Home Blog Page 15

Unlocking the Secrets of Filet Mignon

Few cuts of meat inspire as much reverence as the filet mignon. This iconic steak is celebrated worldwide for its exceptional tenderness, buttery texture, and delicate flavor. But what makes this cut so special, and why does it command such a high price? Unlocking the secrets of filet mignon requires a closer look at its origins, characteristics, preparation, and more. Whether you’re a seasoned steak aficionado or a culinary enthusiast eager to learn, this comprehensive guide will illuminate everything you need to know about this beloved cut.

Filet Mignon

The Origins and Anatomy of Filet Mignon

To appreciate filet mignon, one must first understand its origins. The name “filet mignon” comes from the French words “filet,” meaning a thick slice, and “mignon,” meaning small or dainty. True to its name, this cut is both petite and tender, prized for its refined texture. It is taken from the tenderloin, a narrow strip of muscle that runs along the spine of the cow. This muscle does very little work, which is why the meat is so tender. Unlike other cuts that are full of connective tissues, the tenderloin remains soft even when cooked to higher temperatures.

The tenderloin, from which filet mignon is derived, is part of the short loin and sirloin, positioned just beneath the ribs. This muscle’s location contributes significantly to its tenderness because it doesn’t bear the weight or engage in heavy activity. The minimal exertion means the muscle fibers remain soft, almost velvety, resulting in a texture that’s difficult to replicate with any other cut. This anatomical placement is also why the filet mignon is smaller compared to other popular steak cuts like ribeye or New York strip.

Not only does this tender cut represent luxury, but it also requires careful butchering. Extracting a filet mignon from the tenderloin involves precision to ensure the integrity of the meat. Butchers must skillfully trim away any fat, silverskin, and membranes, leaving only the pure, delicate beef that filet lovers crave. Each step, from butchering to preparation, underscores why filet mignon is often viewed as the jewel of any steakhouse menu.

What Sets Filet Mignon Apart from Other Steaks

The filet mignon’s distinct characteristics set it apart from other popular steaks. First and foremost, it is the tenderness that captures the hearts of steak lovers. While other steaks may boast bold, beefy flavors, none can rival the melt-in-your-mouth experience that the filet offers. This tenderness is a direct result of the low-activity muscle it comes from, which allows the meat fibers to remain loose and free of the tough connective tissues found in other cuts.

Another defining feature of filet mignon is its subtle flavor profile. Unlike cuts that have heavy marbling, such as ribeye, the filet mignon is lean. Some might consider this a drawback, as it doesn’t offer the same rich, fatty flavor. However, this mildness allows the natural, clean taste of the beef to shine through, making it the ideal cut for those who prefer a more delicate, nuanced flavor. This quality is especially appealing when paired with bold sauces or rich side dishes that complement rather than overpower the meat.

Finally, the shape of filet mignon contributes to its allure. Unlike the irregular, wider cuts of steak, a filet is usually round and compact, making it ideal for a refined presentation. Its uniform shape ensures that it cooks evenly, which is a crucial aspect when aiming for the perfect medium-rare finish. These combined factors—tenderness, flavor, and presentation—are why filet mignon remains a staple in fine dining and a top choice for those seeking an unparalleled steak experience.

The Art of Cooking Filet Mignon: Methods and Tips

Cooking filet mignon is an art that requires precision and respect for the cut. Due to its lean nature, this steak can easily become dry if overcooked, making it crucial to master the timing and technique. The most traditional method is pan-searing, where the filet is browned in a hot skillet and then finished in the oven. This technique creates a caramelized crust on the outside while preserving the tender, juicy interior. For those who prefer a smoky flavor, grilling is an excellent option, but it’s important to keep the grill at a moderate temperature to avoid overcooking.

One of the keys to preparing a flawless filet mignon is seasoning. Given the cut’s mild flavor, it benefits from simple, high-quality seasoning—just a touch of salt, pepper, and perhaps a hint of garlic or herbs. These minimal additions enhance the natural taste without overshadowing it. Moreover, letting the meat rest before slicing ensures that the juices redistribute, providing a more succulent bite. This resting period is essential for retaining moisture.

For those seeking the best of the best, sourcing premium beef, like Wagyu filet mignon, can elevate the experience to new heights. Wagyu beef is known for its exceptional marbling and flavor, even in leaner cuts like the filet. Brands like Destination Wagyu offer selections that combine the natural tenderness of filet mignon with the luxurious richness that Wagyu is famous for. Choosing such high-quality meat ensures a dining experience that is as close to perfection as possible.

Pairing Filet Mignon: Wine, Sides, and Sauces

A great filet mignon deserves equally great accompaniments, and choosing the right wine, sides, and sauces can transform a meal. When it comes to wine, many experts recommend pairing filet mignon with a medium-bodied red. Options like Bird in Hand Rosé or Merlot provide just enough acidity and fruitiness to complement the lean, tender meat without overwhelming its delicate flavor. However, those seeking a bolder experience might reach for a Cabernet Sauvignon, which adds depth and richness to each bite.

As for sides, it’s all about balancing flavors and textures. Because filet mignon is tender and mild, pairing it with richer, creamier sides can create a delightful contrast. Mashed potatoes, truffle fries, or a classic gratin are popular choices that add a comforting element to the dish. Vegetables, particularly those with a slight char or roast, like asparagus or Brussels sprouts, add a fresh, crisp note that cuts through the richness of the steak and side dishes. The combination of soft, creamy, and crunchy textures ensures a well-rounded meal.

Lastly, sauces play a pivotal role in enhancing the filet mignon experience. While some prefer their steak unadorned, a well-chosen sauce can elevate the dish. Traditional options include a red wine reduction, béarnaise, or a peppercorn sauce. Each adds a unique flavor profile, whether it’s the tang of wine, the smoothness of butter, or the spice of pepper. These elements complement the filet without detracting from its star quality, making the meal a memorable one.

The Premium Appeal: Why Filet Mignon Commands a Higher Price

Filet mignon’s reputation as a luxury cut matches its price, and several factors contribute to this. First and foremost, it’s a matter of supply and demand. The tenderloin, from which the filet is cut, is a small muscle that accounts for a very limited portion of the cow. This scarcity, combined with its prized texture, drives up the price. In contrast, other cuts, like the ribeye or strip steak, come from larger muscles, resulting in more available portions.

Additionally, the labor-intensive process of butchering the tenderloin adds to the cost. Each filet must be meticulously trimmed and prepared to remove any unwanted fat, sinew, and silverskin. This level of precision requires time, skill, and attention to detail, which reflects its price tag. Restaurants and butchers often treat filet mignon as a showcase item, elevating its presentation to match its cost, further cementing its status as a premium cut.

The appeal of filet mignon extends beyond its flavor and texture; it’s about the experience. Diners willing to pay a premium are seeking more than just a meal—they are indulging in a culinary tradition that celebrates elegance, simplicity, and luxury. From the meticulous care in its preparation to the perfectly cooked, tender bite, every aspect of filet mignon speaks to those with a refined palate and an appreciation for the finer things in life.

The Future of Filet Mignon: Trends and Innovations

As the culinary world continues to evolve, so does the approach to filet mignon. While traditional preparations remain popular, there is a growing interest in experimenting with new cooking techniques and flavor pairings. Sous-vide, for instance, has gained traction as a method that ensures consistent doneness and tenderness without the risk of overcooking. By sealing the filet in a vacuum bag and cooking it at a precise temperature, chefs can achieve a perfect medium-rare finish every time.

Moreover, sustainability and ethical sourcing are becoming increasingly important to consumers. There is a rising demand for filet mignon that not only tastes exceptional but also aligns with environmentally friendly and humane farming practices. Brands that prioritize quality, transparency, and responsible sourcing are leading the charge, offering consumers the chance to enjoy their favorite cut without compromising on values. This shift reflects a broader trend in the food industry towards greater sustainability and accountability.

Finally, as tastes evolve, so do flavor profiles. Experimentation with global influences, from Asian marinades to South American chimichurri, is making its way into filet mignon preparations. Chefs go beyond traditional European sauces and are exploring diverse spices, herbs, and seasonings that introduce new dimensions to this classic cut. The result is a dynamic, exciting future for filet mignon, where innovation meets tradition on the plate.

Backpacking Bites: Foods with Nutrients for the Trail

When embarking on a backpacking adventure, choosing the right foods is crucial not only for nourishment but also for satisfying taste and practical mobility. Selecting options with nutrients can keep your energy levels high and your backpack light. This guide provides you with the best food choices to ensure you’re well-fed, energetic, and ready to explore.

Forest

Essential Snacks with Nutrients for Every Trekker

Fueling your body with the right kind of nutrients is essential, especially when your next meal might be several miles away. A balanced meal that fits easily next to your 330ml water bottle becomes a treasure in the wilderness. Consider these lightweight yet hearty options:

Nuts and Seeds: Almonds, walnuts, and chia seeds are jam-packed with calories and nutrients. They offer a perfect mix of proteins, fats, and fiber that help sustain energy.

Dried Fruits: Compact and sweet, these are quick sugar fixes without the bulk. Think apricots, raisins, or dates; they can be especially revitalising during longer hikes.

Building Your Backpacking Meal Plan

Planning meals for a backpacking trip might seem daunting, but a good rule of thumb is to focus on diversity. 

Instant Heat Meals: Invest in high-quality, freeze-dried meals that only require hot water, which you can easily store in a compact thermos along with your 330ml water bottle.

Whole Grains: Quinoa, oats, and couscous are not only lightweight but also full of essential carbs and proteins. They are perfect for a quick boost of energy.

Hydration Strategies on the Trail

Hydration plays a pivotal role in maintaining your stamina and health during arduous treks. Here’s how you can ensure you stay adequately hydrated:

Electrolyte Supplements: These can be vital for replenishing the salts lost through sweat. Carry sachets that can be mixed with water for an electrolyte-rich drink.

Water Purifying Tablets: These are a must-have to quickly turn any water source into drinkable water. They are small, easy to carry, and a lifesaver in remote areas.

Backpacking with Dietary Restrictions

Adaptability is key when it comes to backpacking with dietary limitations. Here are strategies to make sure you don’t compromise on nutrition:

Gluten-Free Choices: Rice cakes or gluten-free wraps can substitute bread. Combine them with peanut butter or a packet of tuna for a fulfilling meal.

Vegan Options: Lentils, powdered hummus, and oatmeal topped with dried fruits can be hearty options that don’t skimp on nutrition and taste.

For an added edge on energy and wellness, consider natural supplements like Morning Kick. They provide a quick boost while also supporting digestion, so you can keep going without slowing down. These supplements enhance energy and focus, ensuring you’re ready to tackle long days on the trail while supporting overall wellness.

Tools and Gadgets for Food Prep on the Trail

Lightweight and space-saving tools can enhance your food preparation experiences in the wilderness:

Portable Stove: A small, fuel-efficient stove can make cooking a breeze and helps maintain the nutritive value of foods.

Multipurpose Utensils: Invest in a durable spork that combines the functionality of a spoon and fork. It’s a small tool that can make a big difference in how you eat.

Conclusion

Backpacking requires preparation, and that includes meal planning. Using the strategies mentioned here, you can make sure your nutritional needs are met, lightening your load and increasing your enjoyment of the adventure. Remember to vary your food, hydrate sufficiently, and always be ready for a gastronomic adventure on the trail. Trek smart, eat well, and make your backpacking journey unforgettable.

The Essentials of a Well-Organized Kitchen: 7 Tips

Creating a well-organized kitchen is synonymous with creating a more functional and enjoyable cooking space. Whether you’re a seasoned chef or a home cooking enthusiast, the way your kitchen is organized can significantly impact your culinary experiences. Here are essential tips to help you achieve a systematic and appealing kitchen.

Dishes

Optimize Your Storage

The key to a well-organized kitchen lies in optimal use of space. Consider installing deeper drawers for pots and pans, and use dividers for utensils. Stackable shelves and transparent containers can also make a world of difference. This organization not only saves you time during cooking but also keeps everything neat.

Arrange by Frequency of Use

Organize your kitchenware and ingredients based on how frequently you use them. Keep everyday items like plates, glasses, and your favorite plant based cheese at an arm’s reach. Place rarely used items on higher shelves or in back cabinets. This technique ensures a more functional kitchen layout.

Label Everything

Labelling can transform the way you navigate through your kitchen. Label spices, dry goods, and even refrigerated items. It might seem trivial, but it saves time and prevents waste. Plus, it helps anyone else who might be using your kitchen to find things effortlessly.

Maintain a Clear Countertop

Keeping countertops clear not only gives your kitchen a neat appearance but also enhances functional space. Store appliances you rarely use in cabinets and have only the essentials out. This will also help in keeping your workspace clean and ready for the next culinary task.

Utilize Wall and Door Space

Do not ignore wall and door spaces; they are great for storage. Use hooks for mugs and utensils. Install a pegboard for pots, pans, and other hanging items. This not only saves drawer space but also adds a stylish touch to your kitchen decor.

Integrate Pull-Out Cabinets

Pull-out cabinets are a game-changer for lower back cabinets. By pulling out shelves, you can easily access even the items at the back without straining. This is particularly useful for heavier items, making your kitchen friendlier for all age groups.

Regularly Reassess and Reorganize

As your cooking style evolves, so should your kitchen organization. Make it a point to reassess your kitchen setup periodically. Adjust the location of items, donate unused cookware, and rethink your storage solutions. Constant reassessment helps maintain an organizational system that evolves with your needs.

Organizing a kitchen effectively enhances your cooking experience and transforms your kitchen into a space that inspires culinary creativity. Start implementing these tips today and enjoy a kitchen that not only looks good but works efficiently too. Challenge yourself to maintain this organization and tweak it as needed to suit your evolving culinary journey.

Cold Brew Coffee Maker: The Ultimate Choice for Coffee Lovers

Cold brew coffee is quickly becoming the new favorite in the coffee world. Whether in a cafe, office, home, or outdoors, more and more people are choosing cold brew coffee. Its low acidity, smoothness, and natural sweetness make cold brew an ideal choice for coffee lovers who pursue the ultimate taste and health. If you are also looking for a more convenient and efficient way to make cold brew coffee, then a cold brew coffee maker is a tool tailor-made for you.

What is cold brew coffee?

Cold brew coffee is completely different from regular hot brew coffee. Traditional cold brew coffee is a process where coffee beans are soaked in cold water for a long time to extract the coffee flavor. It usually takes 10 to 24 hours.

If you use the ITEHIL Portable Cold Brew Coffee Maker, it uses advanced vacuum extraction and a powerful pump to reduce the brewing time of traditional cold brew coffee from 10 hours to 15 minutes.

Although this slow extraction method is very popular, it requires time and patience. Therefore, cold brew coffee makers came into being to solve the problems of time and complexity in the production process.

Coffee

How a Cold Brew Coffee Maker Works

The core working principle of a cold brew coffee maker is simple: it optimizes the process of steeping and filtering to shorten the extraction time while ensuring the flavor and taste of the coffee. Most cold brew coffee makers allow you to control the strength of the coffee according to your taste preferences through adjustable time and water flow. Some high-end cold brew coffee makers, such as the ITEHIL electric cold brew coffee maker, can even complete the cold brew process in just 15 minutes, greatly reducing waiting time.

These coffee makers not only provide the ultimate convenience but also ensure that the quality of each cup of coffee remains consistent. Whether you like a strong coffee taste or prefer a light flavor, a cold brew coffee maker can easily meet your needs.

Why Cold Brew Coffee Makers Are the Ultimate Choice for Coffee Lovers?

Enjoy cold brew coffee anytime, anywhere

Cold brew coffee makers allow you to easily enjoy high-quality cold brew coffee at home, in the office, or even when traveling. You no longer have to wait in long lines at coffee shops, nor do you have to endure the bitterness of hot coffee in the hot summer. With a cold brew coffee maker, you can enjoy your favorite cold brew coffee anytime, anywhere, without being restricted by location and time.

Save time and energy

Traditional cold brew coffee requires more than 12 hours of soaking time, which is a huge challenge for many people. Cold brew coffee makers can effectively shorten this time. There are even some electric cold brew coffee makers, such as ITEHIL electric cold brew coffee makers, which can complete high-quality cold brew extraction within 15 minutes, greatly reducing the waiting time during the production process. Its automated design makes production simple and convenient, without too much manual operation.

Consistent taste and stable quality

Compared to manual cold brew, one of the advantages of cold brew coffee makers is that they can ensure the stability of the taste and quality of each cup of coffee. Manual cold brew coffee may cause flavor differences due to factors such as water temperature and soaking time, while cold brew coffee makers use a standardized process to ensure that each cup of coffee has consistent high quality performance.

Low-acid healthy choice

Cold brew coffee is much less acidic than traditional hot brewed coffee, making it an excellent choice for those who are sensitive to stomach acid. Studies have shown that cold brew coffee is more than 60% less acidic than hot brewed coffee, making it an ideal coffee drink for people with sensitive stomachs. In addition, low-acid cold brew coffee is less abrasive to teeth, so it can better protect dental health.

How to choose a cold brew coffee maker that suits you?

Choosing the right cold brew coffee maker is a decision based on your personal needs and lifestyle. Here are a few important factors to consider:

Capacity and portability

If you are someone who needs to use a cold brew coffee maker in the office or while traveling, a portable coffee maker is the first choice. For home users, choosing a large-capacity coffee maker can make more cold brew coffee at one time, which is suitable for sharing among multiple people.

Coffee mug

Filtration system

The quality of the filtration system directly affects the flavor and taste of coffee. An efficient filter can ensure the clarity and purity of the coffee and prevent coffee grounds from mixing into the coffee liquid. Some high-end cold brew coffee makers, such as ITEHIL electric cold brew coffee makers, are equipped with a high-quality double-layer filtration system, which can effectively improve the purity of coffee.

The balance between price and function

The price of cold brew coffee makers varies greatly. When choosing, you should balance your budget and needs. If you want to get high-quality cold brew coffee in a short time, the ITEHIL electric cold brew coffee maker is undoubtedly a very cost-effective choice, which has powerful functions and can provide stable high-quality coffee.

Popular cold brew coffee maker recommendation

As the leader among electric cold brew coffee makers, ITEHIL electric cold brew coffee maker uses advanced extraction technology to make high-quality cold brew coffee within 15 minutes. Compared with traditional cold brew coffee makers, ITEHIL not only saves time but also retains the unique flavor of cold brew coffee. Its double-layer filtration system ensures that every cup of coffee is clear and without residue, fully satisfying coffee lovers’ pursuit of quality.

In addition, this cold brew coffee maker also has a portable design, suitable for those who travel frequently or want to enjoy cold brew coffee on different occasions. You only need to put the coffee powder into the machine, press the button, and wait for 15 minutes to enjoy a cup of cold brew coffee with a mellow taste and rich flavor.

Cooking Made Simple: The Benefits and Uses of a Carbon Steel Wok

A carbon steel WOK is a versatile and essential tool in any kitchen, especially for those who enjoy cooking Asian cuisine or want to explore new culinary techniques. It’s one of the most popular pieces of cookware in professional and home kitchens alike, prized for its durability, excellent heat conductivity, and versatility. Whether you’re stir-frying, deep-frying, braising, steaming, or even smoking, a carbon steel WOK can handle it all.

What is a Carbon Steel WOK?

A carbon steel WOK is a large, bowl-shaped pan traditionally used in Chinese cooking. It is typically made from a blend of iron and carbon, which gives it its lightweight and durable properties. Unlike heavier materials like cast iron, carbon steel heats up quickly and evenly, allowing for precise temperature control.

WOK’s come in a variety of sizes, usually ranging from 10 to 14 inches in diameter, and can have flat or rounded bottoms depending on your stove type. The flat-bottomed wok is perfect for modern gas or electric stoves, while the traditional round-bottomed WOK works best with a gas burner or wok ring.

What is it For?

The WOK’s design and material make it a multifunctional piece of cookware. Here are some common cooking techniques it excels at:

  1. Stir-frying: One of the most common uses of a WOK is stir-frying. The high, sloping sides allow for easy tossing of ingredients, ensuring everything cooks evenly and quickly. You can achieve that iconic WOK hei (a slightly charred, smoky flavor) thanks to the high heat retention and conductivity.
  2. Deep-frying: With its deep, sloped sides, a WOK can hold plenty of oil, making it perfect for deep-frying without splattering oil everywhere. Its wide surface also allows for better control when frying larger batches of food.
  3. Steaming: By placing a steaming rack inside the WOK and filling it with a small amount of water, you can easily steam vegetables, dumplings, or fish.
  4. Braising: The large surface area of a WOK is ideal for browning meat before adding liquid to braise it. The curved walls also help evenly distribute heat during the slow cooking process.
  5. Smoking: You can even use a WOK for indoor smoking by placing a small amount of wood chips or tea leaves at the bottom, adding a rack, and covering it.

Cooking with Wok

Advantages of a Carbon Steel WOK

  1. Heat conductivity: Carbon steel heats up quickly and distributes heat evenly. This makes it ideal for high-heat cooking methods like stir-frying, where quick and uniform cooking is essential.
  2. Lightweight: Unlike cast iron, carbon steel WOK’s are relatively lightweight, making them easy to handle, toss, and move around the kitchen.
  3. Durable: Carbon steel is incredibly tough and can withstand high temperatures without warping. It’s less prone to breaking or chipping, making it a long-lasting investment.
  4. Non-stick surface (after seasoning): One of the most appealing aspects of a carbon steel WOK is its ability to develop a natural non-stick surface after proper seasoning. The more you use it, the better it performs, unlike many synthetic non-stick pans that deteriorate over time.
  5. Versatility: As mentioned earlier, a WOK can handle a wide range of cooking techniques, making it a one-pan solution for many kitchen tasks.
  6. Affordability: Compared to other high-end cookware, carbon steel WOK’s are quite affordable, offering excellent value for money.

How to Use

Using a carbon steel WOK is simple, but there are a few tips to get the most out of it:

  1. Preheat the WOK: Always preheat the WOK before adding oil or ingredients. This ensures even cooking and helps prevent food from sticking.
  2. Use high heat: Carbon steel woks are designed for high-heat cooking. Don’t be afraid to crank up the heat when stir-frying or deep-frying.
  3. Toss, don’t stir: The shape of the WOK allows you to toss ingredients easily, so you can move them around quickly without losing heat. This tossing motion is crucial to stir-frying and helps give the food that delicious charred flavor.
  4. Cook in batches: If you’re stir-frying, avoid overcrowding the WOK. Too many ingredients can lower the temperature and result in steaming rather than frying.

How to Care

Proper care is essential to ensure your carbon steel WOK performs well for years. Here’s how to care for it:

  1. Seasoning the WOK: Before using your carbon steel WOK for the first time, you need to season it. This process creates a protective coating that prevents rust and forms a natural non-stick surface. To season a WOK:
    • Wash the WOK with hot water and mild soap to remove any factory coating.
    • Dry it completely.
    • Heat the WOK on high heat until it starts to smoke.
    • Add a thin layer of high smoke-point oil (like vegetable or canola) and spread it around the entire surface using a paper towel.
    • Allow the WOK to cool, then wipe away any excess oil.
    • Repeat this process a few times before using it.
  2. Cleaning the WOK: After each use, wash the WOK with hot water and a soft sponge. Avoid using soap or abrasive scrubbing pads as they can remove the seasoning. Dry it immediately to prevent rusting.
  3. Re-season when necessary: Over time, the non-stick layer might wear down. If you notice food starting to stick or rust spots appearing, it’s time to re-season your WOK.
  4. Store in a dry place: Always make sure your WOK is completely dry before storing it. Some people even apply a light layer of oil before storing it to prevent rusting.

Why You Should Buy a Carbon Steel WOK

A carbon steel WOK is a must-have for anyone serious about cooking, whether you’re a home cook or a professional chef. It’s incredibly versatile, durable, and affordable. Its ability to handle high heat and develop a natural non-stick surface makes it superior to many other types of cookware. Plus, the unique cooking techniques it facilitates, such as stir-frying, steaming, and deep-frying, offer endless culinary possibilities.

By investing in a carbon steel WOK, you’re not just buying a pan—you’re buying a cooking tool that will enhance your kitchen and elevate your dishes for years to come.

Cooking Techniques for Power Outages Due to Flooding

When a flood-induced power outage strikes, it puts a serious dent in your normal cooking techniques. Suddenly, you’re left with no power and a pantry full of perishables. However, there are strategies to navigate this challenge efficiently.

In such circumstances, knowing how to adapt your cooking methods becomes utmost important. Safe food preparation is not only essential for maintaining a balanced diet but also for preventing foodborne illnesses during these testing times.

If the situation becomes overwhelming, you can always get expert help. Their professional intervention will resolve safety threats and sort out your living conditions in an efficient manner during such calamities.

Preparing Your Emergency Kitchen

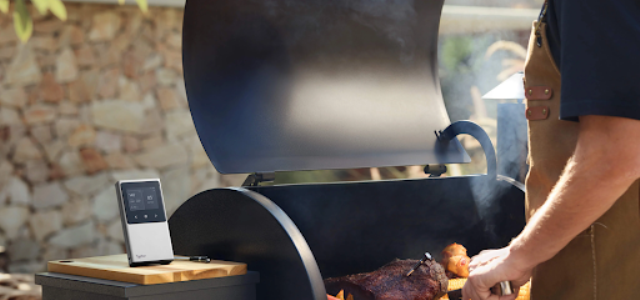
When flooding leaves you powerless, setting up an emergency kitchen becomes vital. A gas-powered stove or tabletop barbecue can serve as the heart.

Safe Storage Practices

Keep perishable food items in insulated coolers filled with ice. Understand that refrigerators can preserve your food only for 4 hours without electricity.

Frozen food stays good for a day if the freezer is half-full and about two days if full. Always note these timelines.

Alternative Cooking Methods

You have plenty of alternatives to traditional cooking methods during power outages. Whether it’s propane stoves, charcoal grills or camp stoves, options are numerous.

grill

Opt for these alternative cooking methods but use them outdoors to ensure safety. Indoor usage can cause smoke buildup or carbon monoxide poisoning.

Boiling Water Safety

Consider water safety during floods. If water sources are compromised, you’ll need to boil water before use. Ensure you have the means to do so.

Maintaining Safe Food Handling

When power outages occur due to flooding, ensuring food safety is crucial. Your stored food can pose health risks if not handled properly during these times.

Your primary focus should be to prevent cross-contamination and maintain the optimum temperature for your food. Take measures to keep all surfaces and utensils clean.

  • Keep raw and cooked food separately: Use different containers to avoid cross-contamination.
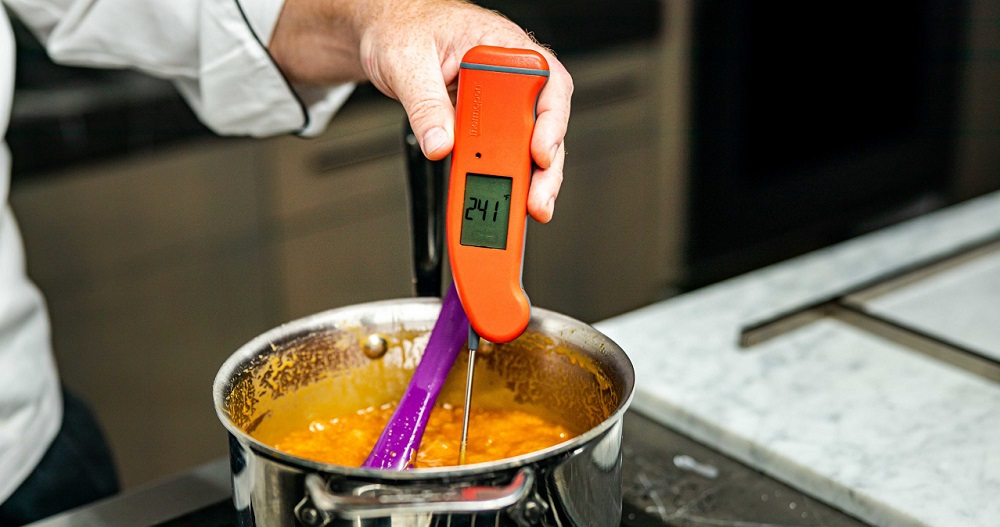
  • Use a food thermometer: It helps maintain the safe temperature for various food items.

food thermometer

  • Secure your food: Store them in sealed containers or zip lock bags.
  • Consume perishable goods first: Foods like milk, meat and vegetables spoil quickly without refrigeration.

To underline the importance of these strategies, you can refer to these four steps to food safety during a power outage.

Avoiding spoiled food and potential health issues will give you one less thing to worry about during a flood-induced power outage. Stay safe, stay healthy!

Cooking Without Power Techniques

When floods cause a power outage, it’s still possible to maintain a hot meal plan. Alternative cooking methods are available that don’t rely on electricity.

Knowing various off-grid cooking techniques can make these challenging times less stressful. Being able to cook your meals helps maintain morale and ensure you remain fed.

  1. Solar Cooking: Solar ovens efficiently utilize sunlight to cook meals. Simple to use, these require clear skies and direct sunlight for optimal results.
  2. The Wonder Oven: This retains heat for long periods, slowly cooking your food. Preparation is easy; bring your dish to boil and place it inside the wonder oven.
  3. Rocket Stoves: Efficiently burning small amounts of wood or charcoal, rocket stoves ensure a hot meal even during power outages.
  4. Charcoal Grills: Ideal for outdoor cooking, providing both heat and flavor. Remember to never use them indoors due to carbon monoxide risks.

Selecting an off-grid cooking method depends on which resources are readily accessible to you. For advice on choosing suitable methods, consider this guide.

Your ability to adapt during power outages due to flooding is crucial. Learning and practicing different off-grid cooking techniques enhances your resilience in such situations.

Sautéing Without Electricity

You might think that sautéing without electricity is an impossible task. But, surprise! Cooking under such limiting circumstances doesn’t mean you have to sacrifice flavor.

Heat Control

Begin by controlling your heat source. This could be a wood-burning stove or camping stove, even coals over a fire can work excellently.

Remember to regulate the heat. With practice, you’ll create consistent, controlled warmth like your beloved electric stove at home.

Choosing The Right Ingredients

Selection of ingredients is crucial too. Vegetables like asparagus, chard, mushrooms and more are fantastic for sautéing even in tricky conditions.

Their hardy nature and robust flavors persevere well when tossed over a low flame. They’ll add that pleasing note to your power-less cooking regime.

Use The Correct Pan

Finally, don’t forget your pan. Opt for a cast iron pan which retains heat evenly.

A thick bottom pan ensures that your food doesn’t burn and gets cooked evenly.

Stir Constantly

In the absence of conventional temperature controls, you must stir constantly to prevent burning. Dedicate time to this and sautéing will be a breeze!

Navigate through these power outages smoothly with effective yet simple techniques, making each meal nutritious and flavorsome even without electricity.

Simmering Meals in a Power Outage

When the power goes out due to flooding, your regular cooking methods might not be feasible. Learning the art of simmering meals can help.

Saving Energy with Simmering

Simmering uses less fuel than boiling. It continues the cooking process while preserving taste. Essentially, it’s an energy-saving technique for long-lasting resources.

Slow Cookers in Operation

You can use a slow cooker, Dutch oven, or any pot with a tight lid. They all work excellent when it comes to simmering meals.

Heat Management is Vital

Effective heat management underpins successful simmering. The necessary heat is to produce little bubbles on the surface, not rolling boils.

Simmering Safety Concerns

Please ensure you don’t leave simmering food unattended. Accidents may occur, particularly with open fires. Safety should always be your priority.

You can explore more about primitive cooking methods here.

Maintaining Balanced Flavor Profiles

Learning how to maintain balanced flavors is key in simmered dishes. Spices, herbs and roots help deepen nuance and complexity.

Survival Baking: Bread and Cakes

Unplanned power outages can impact your meal plans significantly. During flooding, traditional baking techniques may not be possible due to a lack of electricity.

Portable Gas Stove

A portable gas stove can serve as your savior in such situations. It remains a valuable asset for baking bread or cakes during electricity shortages.

Ensure that the pot or pan you’re using sits securely on the stove surface to prevent toppling over and causing accidents.

Alternative Power Sources

Exploring alternative power sources such as solar powered ovens can be beneficial. Solar energy can hear up an oven enough to bake items successfully.

You should consider investing in one; it’s a great way to continue cooking regular meals regardless of circumstances.

Right Ingredients

Possessing staples such as flour, yeast, eggs, milk, and sugar for baking proves crucial in power outage situations. Plan ahead and stockpile these essentials.

Cakes and bread can be made using these basic ingredients, providing precious sustenance when electricity isn’t available for usual cooking methods.

Effective Use of a Chef’s Knife

Your chef’s knife is more than a simple kitchen tool, it can be turned into an instrument of survival during power outages caused by flooding.

Even without electric power, a chef’s knife allows you to prepare a variety of meals. Equally important is knowing how to use it effectively.

  • Maintain knife sharpness: A dull knife can cause injury. Keep your chef’s knife sharp and ready for use with a reliable sharpening tool.
  • Chopping: Understand the difference between chopping and mincing. These techniques allow you to navigate through different recipes even without electricity.
  • Slicing thin strips: Master the technique of julienning in case you need to make stir-fries or salads while dealing with power failures.
  • Fish preparation: If you live near water and are able to catch fish, knowing how to filet is crucial for safe eating habits.

Beyond nourishment, learning these knife skills contributes towards efficiency and safety when operating in challenging circumstances such as a flood-induced power outage.

In such moments, owning these skills represents a critical part of surviving and bouncing back from testing times, thus turning adversities into manageable situations.

Mastering Outdoor Roasting

When power outages occur, outdoor roasting can be a practical choice. You’ll just need the right tools and techniques to keep meals delicious.

With a makeshift grill, you’re set to go. All you require is a metal grate and safe fire source. Use damp wood to prevent overheating.

Flood-Proof Cooking Techniques Equipment Needed Tips
Outdoor Roasting Makeshift grill Use damp wood to control heat intensity.
Open Fire Cooking Cooking pots or pans Cook over glowing embers for even heating.
Solar Cooking Solar Oven Sunny weather is essential for effectiveness.
Canned Heat Cooking Canned heat source, cooking vessel Avoid using inside due to potential lethal gases.

You can also try open fire cooking with proper pots or pans. Just ensure your fire has dropped to glowing embers for stable heat.

Solar cooking is another helpful option. This method requires a solar oven and sunny weather. It’s understandable if you lack these conditions during flood scenarios.

If you’ve gotten stuck in a storm and run out of options, canned heat is your last resort – opt only as a desperate measure.

Efficient Cooking Skills During Floods

During floods, power outages often occur. Learning effective cooking methods to use in these situations is crucial for maintaining a balanced diet despite the challenges.

What Cooking Equipment Is Useful In Flood Conditions?

Portable stoves and grills are excellent tools to have. Ensure they are designed for outdoor use to prevent carbon monoxide poisoning.

What Should Be Prioritized When Cooking During A Flood?

Prioritize preparing and consuming non-perishable foods first. You don’t want your fresh food to go bad during prolonged outages.

Are There Preferred Cooking Techniques During A Flood?

Boiling water and cooking rice or pasta provides a quick, easy meal. Solar ovens can also be handy if there’s enough sunlight.

What Precautions Should Be Taken While Cooking?

Safety is paramount – always cook outside if using portable stoves or grills. Also, ensure your food is thoroughly cooked to avoid foodborne illnesses.

What Should Be Avoided When Cooking During Flooding?

Avoid cooking foods that require lots of water or long cooking times. The aim should be to conserve both fuel and supplies.

Cold Food Preparation: Salads and Vinaigrettes

When power cuts plague, one solution is exploring cold food recipes like salads and vinaigrettes. Fresh vegetables and pantry staples can inspire a variety of mixes.

salad

Your salad staples may involve lettuce, spinach, and other leafy greens. Adding proteins like canned beans or seeds will keep your meal balanced and satisfying.

  • Asian coleslaw: Make a blend of cabbage, carrots, cilantro and green onions. Toss in a mixture of rice vinegar, honey, sesame oil and soy sauce.
  • Tuscan bean salad: Mix canned cannellini beans, cherry tomatoes, diced red onion and oregano. Drizzle with olive oil and lemon juice for a refreshing tang.
  • Sweet corn salad: Combine canned sweet corn, bell peppers, onions, cucumber and a dollop of mayo for a creamy-crunchy contrast.
  • Classic French vinaigrette: Whisk together Dijon mustard, vinegar and olive oil for an easy dressing that pairs with any salad combination you fancy.

You are capable of creating nutritious meals even in adversity. This practice helps you broaden your culinary techniques beyond traditional stove-based and oven-cooking methods.

You have not just survived but thrived during power outage situations. These simple yet flavorful recipes ensure your meals are never bland or boring again.

Self-Sufficient Chef

You’ve amassed valuable skills for cooking during power outages due to flooding. Now, you can prepare and handle food safely, cook effectively under challenging circumstances, and even enjoy a range of meals. If faced with water damage, consult these experts.

Why Sharp Kitchen Knives Make All the Difference in Cooking

In the kitchen, the importance of a sharp knife cannot be emphasized enough. Whether you’re a professional chef or a home cook, having a good kitchen knife at your disposal makes a big difference when cooking. 

From prepping vegetables to meats, a well-sharpened knife offers ease, precision, and safety, making your cooking experience better. 

Many people often settle for dull knives, thinking they are just as effective; but in reality, a sharp knife not only improves your cooking but also makes it more enjoyable.

Among the top choices for kitchen knives, Nacionale Bladework’s kitchen knives stand out for their sharpness and durability. These excellent blades are made for efficiency and provide precision with every slice. 

But why exactly is a sharp knife so important in cooking, and how does it make a difference? Let’s dive into the details!

Why Sharp Knives Are Safer

A common misconception is that sharp knives are more dangerous than dull ones. However, dull knives require more force to cut through food and the additional pressure exerted makes them harder to control, often leading to accidents. On the other hand, sharp knives glide through food effortlessly. This allows for better control and reduces the risk of injury when dealing with tougher ingredients. 

A well-sharpened knife is crucial for every cook, professional or self-taught, in the kitchen. Aside from safety, a sharp knife can drastically cut down on prep time. 

For those with hectic or demanding schedules – such as new parents – a sharp set of kitchen tools is essential. These essential kitchen tools make meal preparation faster and less stressful, allowing you to balance kitchen duties with the responsibilities of a new parent. 

Precision in Cooking

When chopping herbs, slicing fruits, or dicing vegetables, it is important to have uniform pieces for presentation and even cooking. 

Dull knives tend to crush food rather than slicing cleanly, leading to uneven cuts and a less appealing dish. For example, when cutting something delicate like tomatoes or a soft loaf of bread, a dull knife might squish the food rather than slice through it smoothly.

On the other hand, a sharp knife allows for thin, consistent cuts that enhance the overall texture and appearance of your meals. Well-sharpened kitchen knives are perfect for uniform cuts with minimal effort, ensuring your dishes can be prepared quicker and look excellent.

Efficiency in the Kitchen

Cooking can take a lot of time, especially when you are preparing meals for your family or a large number of guests. Using a sharp knife significantly reduces your prep time!

Using dull blades means you will need more effort and time to cook, but you will typically be left with inconsistent chunks regardless.

With a sharpened knife, you will get quick, clean cuts, speeding up your prep work and leaving you with more time to focus on the other aspects of your meals.

When it comes to efficiency, it is not just about speed but also the ease of the entire process. A well-sharpened knife lets you move swiftly through tasks without feeling exhausted.

It is essential to find a knife that has a comfortable grip and an ergonomic design. Since cooking sessions may take longer than expected, efficiency is key. With a high-quality blade, you will find that tasks like fileting a fish or deboning chicken become much easier.

Maintaining Your Knives

Apart from knowing how important it is to use sharp knives in the kitchen, it is also necessary to know how to keep your blades in top shape. There are several ways to sharpen your knives, but your chosen method will depend on the equipment you have and how sharp you want your knives to be.

Here are some common knife-sharpening techniques:

  • Honing Steel – With frequent use, a knife’s edge can become slightly bent, even if it isn’t dull. A honing steel is often mistaken for a sharpening tool, but it’s actually used to realign the blade’s edge. Running your knife along the honing steel at a 20-degree angle helps keep the edge straight, ensuring the blade remains sharp.

honing steel knife sharpener


  • Whetstone – Whetstones come in various grits, with coarse ones used for dull knives and finer grits for finishing and polishing. The friction between the knife and the stone sharpens the blade, making it one of the most effective tools for sharpening your knives. However, remember to soak your whetstones before using them to sharpen any blades. This will ensure your knife will not chip against the stone while being sharpened.
  • Electric Sharpeners – For those looking for a quicker solution, an electric sharpener is designed to sharpen your knives with minimal effort. Just pass the blade through the sharpener, and it will do the work for you! Though they are convenient, remember that overusing the sharpener can also wear down your blade.
  • Professional Sharpening Services – If you are uneasy about sharpening your knives at home, many kitchen supply stores offer professional sharpening services. These are a great way to ensure your knives are sharpened correctly without any risk of damage.

Regular maintenance of your kitchen knives not only improves your cooking experience; it also extends the lifespan of your knives. 

Top-of-the-line kitchen knives are designed to hold their edge longer, but keep in mind even the best knives require regular maintenance.

How to Tell When Your Knives Need Sharpening

If you are not paying close attention to your knife’s performance, it’s not always easy to tell when it needs sharpening. However, there are a few signs that you can look out for.

  • Difficulty Cutting Through Food: If you find yourself applying more pressure or sawing back and forth more often to cut through ingredients, your knife has likely already dulled.
  • Uneven Cuts: If the cuts start to appear jagged and inconsistent or if the knife starts crushing your food, it’s time to sharpen it.
  • Slipping on the Cutting Board: Your knife needs maintenance if it often starts to slip on smooth surfaces such as tomatoes, onions, or bell peppers.

Pay attention to your knife’s performance and regularly test the sharpness to prevent these issues. You may also perform a paper test by slicing through a piece of paper.

If the knife cuts through cleanly without tearing the paper, it’s sharp. Otherwise, it is time to give it some attention.

Conclusion

A sharp kitchen knife is one of the most important tools you can have in your kitchen. Investing in a high-quality knife will significantly enhance your cooking prep time and overall experience. It also requires less force to use, which is generally safer when handling knives.

Remember to keep your blades sharp, for a well-maintained knife is not only sharp, but is also more enjoyable to use.

Salsa and Guacamole: a Delicious Dip Duo Unveiled

If you’ve ever marveled at the distinctive taste duo of salsa and guacamole, this post uncovers the delectable secrets. It’s a light-hearted delve into the world of these time-honored culinary treats adorning dinner tables worldwide.

This post breaks down their creation, revealing time-tested techniques that those in the know use to infuse an unforgettable flavor punch that will absolutely improve your favorite dishes. 

Their versatility caters perfectly to various meals and appetites, making them indispensable companions to some of your most loved food items.

Specifically for dishes like shrimp tacos, where a unique blend of accompaniments can single-handedly determine its success. 

A salsa-guacamole combo might just be that game-changer you’ve been missing. Get more insights on the perfect sides for shrimp tacos right here.

Knowing Salsa and Guacamole

You may find salsa and guacamole in almost every Mexican cuisine. Both contain nutritious elements and provide unique flavors.

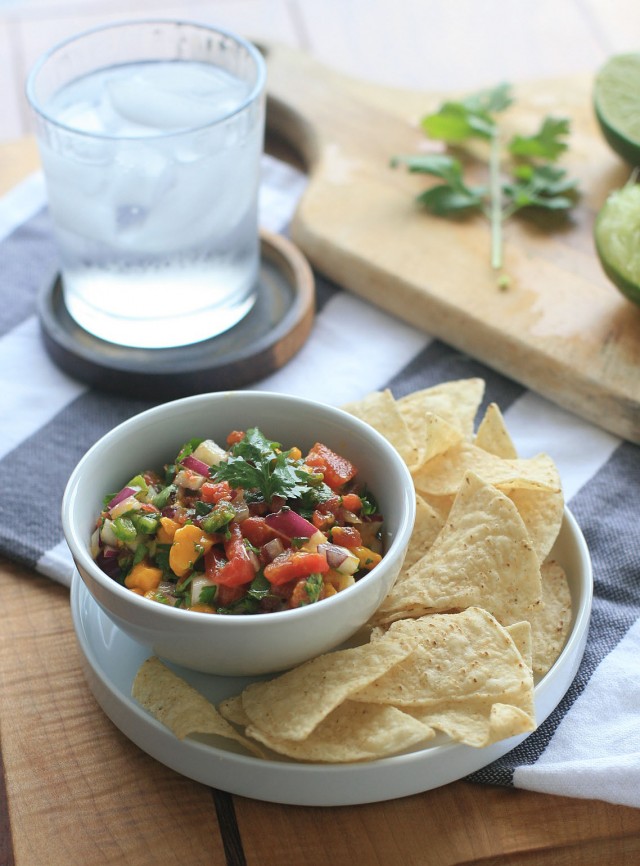
Salsa, a term meaning “sauce” in Spanish, typically consists of tomatoes, onions, and chilis. Variations include fruit salsas, which have an extra sweet element.

On the contrary, guacamole is primarily avocado-based. Mix it with lime juice, jalapenos, and cilantro to create a creamy delicacy that perks up every meal.

  1. Mashing avocados: This is the first step towards creating delicious guacamole. Make sure avocados are ripe to achieve the desired creaminess.
  2. Adding ingredients: Next, add in all other ingredients mentioned above – lime juice, jalapenos, and cilantro.
  3. Mixing components: To make salsa, combine tomatoes, onions, and chilies. A blender gives it a smoother texture if preferred.

Some prefer to go by simplicity whereas others would want to amplify their salsa or guacamole by experimenting with additional ingredients like mangoes or black beans.

Apart from tantalizing your senses with their exceptional flavors and texture, both these dips are also beneficial for your health owing to the wholesome ingredients used in them.

Popular Varieties and Flavors

From fiery chipotle salsa to creamy avocado guacamole, these dips offer a universe of flavors. They can be spicy, tangy, sweet or even smoky.

Salsa Variants

Pico de gallo and roasted tomato salsa are two popular variants. The former, also known as ‘salsa fresca,’ is bright and chunky.

Roasted tomato salsa, on the other hand, has a deeper flavor due to the caramelization of sugars in the tomatoes during roasting.

Guacamole Variations

Classic guacamole is relatively simple: ripe avocados, lime juice, salt, and add-ins like cilantro or diced tomatoes provide most of its beloved flavor.

Avocado

The celery-based recipe variant offers a fresh crunch with its creamy counterpart, a delectable blend attracting many gourmets.

Different Pairing Options

Beyond tortilla chips and tacos, these dips pair well with a variety of foods. Salsa brightens up grilled fish while guacamole complements burgers perfectly.

Veggies like carrots or bell pepper sticks make healthy dipping options too. Your dishes become vibrant canvases with this delicious dip duo!

Essential Ingredients List

Your salsa’s taste hinges on fresh ingredients. Hunt for ripe tomatoes, crunchy onions, green chilies, zesty limes and bunches of fresh cilantro leaves.

Fresh Tomatoes

Tomatoes lend a juicy base to your salsa. Ideally, use semi-ripe tomatoes with a mix of acidity and sweetness for a balanced flavor.

Don’t forget to de-seed them. The seeds often contribute bitter notes while the flesh holds all the delicious tomato flavor.

Crunchy Onions

Add onions for a delightful crunch. Dial the heat down by soaking chopped onions in cold water before blending them into your salsa.

White onions are a common choice due to their slightly milder flavor and can easily be substituted by red or sweet varieties based on personal preference.

Zesty Limes

Limes give a refreshing tanginess. It complements the flavors of tomatoes and onion, bringing out their best. Their juice also keeps the salsa vibrantly colored.

Cilantro Leaves

The last key ingredient is cilantro. This herb imparts an earthiness that ties all flavors together. Chop it finely to distribute flavor evenly throughout your salsa.

Step-by-Step Preparation Guide

Salsa and Guacamole, two dips that have secured their place in everyone’s heart, are surprisingly easy to conjure. Their creation promises an engaging culinary journey.

What ingredients do you need for Salsa?

You’ll need tomatoes, onion, cilantro, jalapenos, lime juice, garlic, salt, and pepper. Get these fresh from your local market.

How to prepare the perfect Salsa?

Simply chop all ingredients finely. Mix together, ensuring the lime juice evenly coats everything. Let it sit to enhance its flavor.

Which ingredients are required for Guacamole?

Your shopping list should include ripe avocados, onion, cilantro, tomato, jalapeno, lime juice, and some salt for optimal taste balance.

What is the method to make Guacamole?

Mash avocados till they’re smooth yet chunky. Mix in diced elements. Drizzle lime juice and add salt as per preference. Enjoy your homemade Guacamole!

How long can you store these dips?

Their freshness lasts around 1-2 days in the refrigerator. Make sure to keep them covered to prevent oxidation and keep them delicious.

Can you freeze Salsa and Guacamole?

Salsa freezes quite well but Guacamole may brown or become watery. It’s advised to consume them fresh for the authentic experience.

Keeping Guacamole Fresh

Guacamole is a versatile and delightful dip. Yet, it can brown quickly, diminishing its eye appeal. The key to keeping guacamole fresh involves a few techniques.

These techniques work as they prevent oxidation from occurring, which is responsible for the unsavory color change. Thus, your guacamole visibly stays green and inviting.

  • Add plenty of lime juice: Lime not only adds flavor, but it also helps curtail oxidation.
  • Cover with plastic wrap: This seals out air, suppressing the browning reaction.
  • Store in an airtight container: This method further limits oxygen exposure.
  • Stir in ripe avocado chunks: Fresh pieces slow down the overall discoloration process.

With these methods, you maintain the lush green color and creamy texture of your freshly made guacamole longer. Doing so makes it more appealing to your guests.

To sum it up, keeping guacamole fresh and green requires deliberate preservation steps. By following these techniques, you ensure a visually appealing dip every time.

Storage and Make-Ahead Tips

You can notably increase the life of your salsa and guacamole. Proper storage techniques are fundamental in preserving their freshness and zesty flavors.

Preserving Guacamole Freshness

Guacamole turns brown due to oxidation. Submerging it in water creates a barrier against oxygen, maintaining its vibrant green color.

Saving Your Salsa

Refrigerate your salsa promptly after use. Keep it in an airtight container to retain its flavor and safeguard against contamination.

Make-Ahead Tips

Your salsa and guacamole can be made two hours before serving. Add lime juice to prevent browning or loss of taste during this time.

If you need more detailed guidance, feel free to check the great resources on Epicurious.

Health Benefits and Nutritional Information

Salsa and Guacamole offer nutritional benefits beyond their tasty appeal. They are rich in fiber, vitamins, minerals, and antioxidants for better health.

Both dips keep your heart in check due to their low sodium and high potassium content. Plus, they also aid digestive health, thanks to their fiber content.

The tomatoes in salsa offer Vitamin C while avocados in guacamole feed your body with monounsaturated good fats aiding weight management.

The versatility of these dips shows not only in taste but also in their contributions to a balanced diet. It’s easy to include them in meals.

Salsa and Guacamole aren’t merely treats for your palate; they also substantially enhance nutrient intake, elevating the quality of your daily nutrition intake.

Creative Serving Suggestions

Dip doesn’t have to be confined to a bowl. Surprise your guests by utilizing salsa and guacamole in fresh, creative ways at your next gathering.

Taco Salad Twist

Reinvent taco salad by adding spoonfuls of salsa and guacamole. The complex flavors would richly complement the mix of crunchy lettuce and savory beef.

Your friends will appreciate this refreshing take on a well-loved dish. It simultaneously offers nutritional goodness and intense taste.

Nacho Upgrade

Nachos are a crowd favorite. Level up this snack by layering with salsa and guacamole, adding more depth and contrast to every bite.

This improves not only flavor but also visual appeal. The vibrant colors of the dips are sure to captivate anyone’s attention and appetite.

Soup Seasoning

To give an ordinary soup a fiery kick, spoon in some salsa. Alternatively, add creamy guacamole for a smoother, unexpected twist.

These dips can surely elevate any soup from basic to special, an equation that equals deliciousness coupled with creativity at its finest.

Culinary Pairings and Substitutions

Transform your culinary experience by exploring the diverse world of salsa and guacamole.

Serving these sensational dips together creates an irresistible flavor combination.

  • For tanginess, try adding fresh lime juice to your salsa.
  • For a creamy texture, consider avocado blended with cilantro in your guacamole.
  • To spice things up, jalapenos or chilies can make both dips irresistibly hot.
  • Love a sweet touch? Mango or tomatoes give salsa its refreshing zest.

Your tweak of ingredients can turn these dips into a customized culinary masterpiece.

Whether they accompany a meal or serve as appetizers, they never fail to impress.

Crowning Your Fiesta

By now, you’re equipped with everything you need to create flavorful Salsa and Guacamole. Remember, freshness is key for both dips. Enjoy exploring the endless culinary possibilities they offer, while reaping their multiple health benefits. It’s time to make your fiesta memorable!

Meal Prep 101: Tips and Tricks for Beginner Cooks

Meal prep can be life-changing if you want to save time, eat better, and cut stress. Above all, you can even create a week’s worth of meals for only $50

For new cooks, it might seem hard, but with the right plan in place, it can be easy and quick. If you’re aiming for balanced meals, less takeout, or more food orders in advance, these tips will help you begin. 

This article will cover the basics of meal prep, from picking fresh, organic food to storing meals right. Let’s jump into the basics and boost your kitchen skills.

Vegetable pan

Start with Fresh, Organic Ingredients

Meal prep begins in the supermarket, by selecting healthy and organic produce. Fresh, organic fruits, veggies, and meat provide more nutrition, taste better, and last longer when stored correctly, compared to nonorganic alternatives, which contain pesticides or harmful nitrates.

When shopping for vegetables, look for those that appear bright and feel firm to the touch. Greens such as spinach or kale should have crisp edges instead of sogginess, while fruit should feel heavy for its size and have smooth skin. Though organic food may be more expensive, its taste and health benefits make it well worth the cost.

Choose organic, grass-fed meats like beef, free-range chicken, and wild fish, as they contain more nutrients and fewer drugs and hormones compared to conventional meats. For example, selecting better-quality meat can make your ground lamb dishes taste and smell better. It’s all because of the meat choice. Not to mention that organic, grass-fed meat types give you more proteins and are generally healthier for you. In essence, starting with fresh, organic food gives you great meals for the week.

Plan Your Meals Ahead of Time

Before cooking, it’s key to plan meals for the week. This saves time and ensures you have all you need while cutting down waste. Pick simple meals you like and use the same ingredients. For example, you can make roasted chicken, and then use leftover chicken in a salad or a wrap the next day.

Make a grocery list based on your plan and stick to it firmly to avoid buying things you don’t need. Beginners often buy too many things, leading to waste. Start small with 3-4 recipes, and add more as you gain skill. Consider incorporating meal replacement shakes Australia into your plan for added convenience and variety.

However, think about portions when you plan. This helps if you have food goals like weight loss or muscle gain. Knowing how much you should eat ensures you have enough food for the week without eating too much.

Invest in Good Storage Containers

A key part of meal prep is having good containers. Quality, airtight boxes keep food fresh all week. Choose BPA-free plastic or even better, glass containers. Get different sizes because not all meals are the same. 

Stackable container sets save fridge space and help keep your fridge organized and appealing. Glass containers are usually heat-resistant and you can quickly pop them in the microwave to warm up your food. 

For fruits or snacks, you can use silicone bags. These can be used over and over, protecting the earth and your wallet. You can also use them to freeze food, so you can avoid spoilage. In addition, make sure to label your boxes with what’s inside and the date the food was made. It helps you eat things before they spoil.

Vegetables

Batch Cooking is Key

Batch cooking is great for easy meal prep. Cook a lot at once and split it into separate containers for the week. If you’re new, begin with simple dishes that can be made in big batches like soups or roasted veggies. You can roast a bunch of veggies like sweet potatoes, carrots, peppers, and broccoli in one pan. 

You can also combine your veggies with grains like quinoa, in salads, or with proteins like chicken or tofu. Cook a lot of protein like chicken or salmon, which you can mix up with sides for different meals. This saves time and ensures you have tasty meals ready.

Don’t Forget Snacks and Breakfast

When meal prepping, include breakfast and snacks too. Prepping them saves time and prevents you from eating sweets and junk food. 

Overnight oats make an easy and nutritious breakfast that you can quickly whip up every week in individual jars. Simply combine oatmeal, milk, yogurt, and fruits or nuts before leaving them to sit in the fridge overnight. By morning, you’ll have a filling and nutritious meal ready to consume.

Prepare fruit, veggie sticks, and energy snacks to take with you on the go. Cutting carrots, cucumbers and peppers allows you to grab healthy snacks quickly when hunger strikes. Nuts or trail mix bags make snacking healthier on the go easier too.

Bottom Line

Meal prepping may seem intimidating at first, but with practice, it becomes easier and simpler. Start with fresh, organic produce to ensure healthy meals. Prepare multiple dishes at the same time; this helps ensure everything stays neat and organized. Cook multiple breakfast and snack items so all meals are ready when necessary and help ensure you stay on track with your plans. As your culinary skills improve and meal prepping becomes an indispensable skill, time saved will become much less of an issue as healthy homecooked meals become a staple part of life.