For many coffee drinkers, flavored coffee can feel like a compromise. Too often it tastes artificial or overly sweet, leaving the impression that flavor was added to cover up average beans.
At Main Street Roasters, that approach never made sense. Instead, the team built their reputation on crafting flavored coffee that actually tastes like the flavor on the label.
Based in Nappanee, Indiana, the family-run brand has grown from a welcoming local café into a destination for coffee lovers across the country. Today, customers who search for authentic single serve coffee K-Cups can find the same artisan roasting and thoughtful flavor development that visitors experience inside the shop.
The idea is simple: A great cup of coffee begins with well-roasted beans and careful attention to flavor. When those two elements work together, the result feels less like a novelty and closer to a genuine coffee experience.
From Family Roots to Flavor Innovation
Marcus Miller, Head Roaster & Flavor Innovator, helped shape the brand’s vision. He grew up in family businesses and wanted to create something similar for his own children.
That goal influenced the culture of Main Street coffee from the very beginning. Together with their team, they focus on creating a welcoming space where people feel comfortable gathering over a cup of coffee.
Flavored Coffee: Why Main Street’s Blends Actually Taste Real
Most companies treat flavored coffee as an afterthought. Main Street Roasters takes a different approach. Flavor development is a central part of the roasting process.
Their team builds each blend on quality beans first. Only after dialing in the roast do they refine the flavor profile. That process allows each cup to deliver both the taste of coffee and the flavor notes people expect.
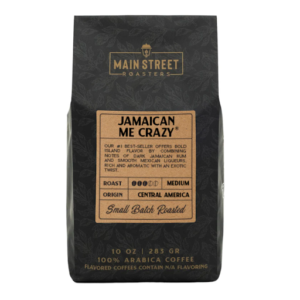
The result is a lineup that has developed a loyal following. One standout is Jamaican Me Crazy Coffee, a smooth and aromatic blend known for its warm, rum-like character. Customers often discover it at the café and later look it up online.
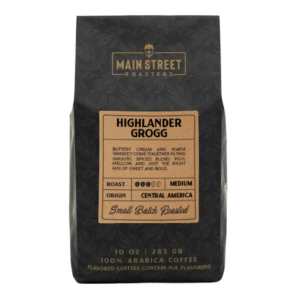
Another favorite is Highlander Grogg, known for its rich butterscotch flavor. For those who prefer less caffeine, the company also offers flavored decaf coffee options, including varieties like decaf hazelnut coffee and other smooth decaf K-Cup coffee selections.
Artisan Coffee Blends in Single Serve Pods for Home
One reason these blends have gained national attention is convenience. Main Street Roasters now offers their signature, small-batch coffee flavors to home brewers in convenient single-serve K-Cups, including decaf K-Cup coffee.
The transition was intentional. Many customers loved the café experience but wanted the same flavors in their daily routine. With fresh roasted pods and even compostable coffee K-Cups, the brand made it possible to enjoy that same taste from a kitchen coffee maker.
That online shop now ships flavored pods, morning blend coffee, and even specialty products like espresso coffee blends, coffee wedding favors, and custom labeled coffee anywhere in the United States.
Coffee That Brings People Together
For Main Street Roasters, coffee has always been about connection. They believe the simple ritual of sharing a cup can bring together people from every background.
Their faith quietly shapes that philosophy. Although it is not advertised, many visitors say they sense a welcoming spirit inside the café. The team tries to carry that same attitude into every interaction, whether someone is visiting one of the coffee shops in Indiana or ordering from home.
Looking ahead, the Millers hope to see their adult children take part in the business and help guide its future. In the meantime, they continue focusing on what made their brand special in the first place: roasting excellent coffee, serving people well, and creating flavors that truly taste like the real thing.