Some traditions just refuse to fade, no matter how quickly our lives move. Gingerbread is one of them. Its scent alone—warm spices tangled with honey, sugar, and a faint edge of citrus—can pull you back decades in a single breath. A tray set down in the center of a holiday table isn’t just dessert; it’s a quiet announcement that the season has truly arrived.
And yet, fewer people are rolling dough in their own kitchens. It’s not because the magic has worn off. It’s because life, as it tends to do, has gotten crowded. Many hosts now turn to bakeries that have perfected the craft, letting someone else handle the labor while they handle the party.
Is one route better than the other? That depends on what you value more—control over every grain of sugar, or a guarantee that you’ll have perfect cookies without a whisk in sight.
Why Buying Gingerbread Often Wins
Let’s be honest—there’s something blissful about knowing dessert is handled before the first guest even rings the doorbell. No last-minute flour spills, no “Did I forget the baking soda?” panic. You open the box, and there they are: identical, golden-brown, each one ready for its close-up.
Consistency You Can Taste
Professional bakers don’t rely on luck. Their recipes are tuned like instruments—spice blends measured to the gram, oven temperatures that never fluctuate.
They source ginger so fresh you can smell it before the lid comes off the tin, sometimes even importing blends from regions where gingerbread is more than a seasonal indulgence—it’s a birthright.
Flavors You’d Never Attempt at Home
Buying opens the door to combinations most home bakers wouldn’t dream of, or wouldn’t risk wasting a Saturday afternoon to try. Imagine a gingerbread heart coated in dark chocolate and hiding a layer of tart plum jam. Or a loaf so dense with almonds it’s closer to cake than cookie.
A few bakery creations worth noting:
- Spiced rounds with bright specks of candied orange peel
- Chocolate-dipped hearts filled with raspberry preserves
- Almond-and-hazelnut loaves finished with a sugar glaze that crackles under your teeth
- Gluten-free or vegan twists that taste indulgent
The Prestige of Nuremberg Gingerbread
Some gingerbread carries a passport. Nuremberg gingerbread—Lebkuchen—isn’t just famous; it’s regulated. Bakers in Nuremberg have been guarding their recipes for centuries, and with good reason. Each piece blends nuts, spices, and honey into something richer and softer than anything you’ll find in a supermarket aisle.
The designation isn’t just a marketing trick—it’s the law. To be called Nuremberg gingerbread, it has to be made in Nuremberg itself, following traditional methods. That means no cutting corners, no substituting cheaper nuts, and no skimping on spices.
Packaging That Feels Like a Gift
The first thing you notice might not even be the cookie. It’s the tin—often painted or embossed, sturdy enough to live a second life as a keepsake box for holiday cards or ribbons. Inside, the gingerbread feels almost ceremonial.
Distance Isn’t an Obstacle Anymore
Thanks to specialty online shops, you can now order genuine Nuremberg gingerbread from halfway across the world and have it arrive fresh enough to make you pause before eating the first bite.
Where to Buy the Best Gingerbread
If buying is your route, it pays to be selective. Local honey, hand-milled flour, spices from a supplier they’ve used for decades. And if you ask nicely, they might even package them in a way that matches your table’s color scheme.
Online specialty stores are a lifeline for hosts who want rare varieties or can’t get to a market. Here’s where you’ll buy authentic Nuremberg gingerbread, or limited editions infused with things like brandy-soaked figs.
Holiday Markets
Half the fun is wandering from stall to stall, tasting samples, and finding that one vendor who bakes something so perfect you buy a dozen without blinking.
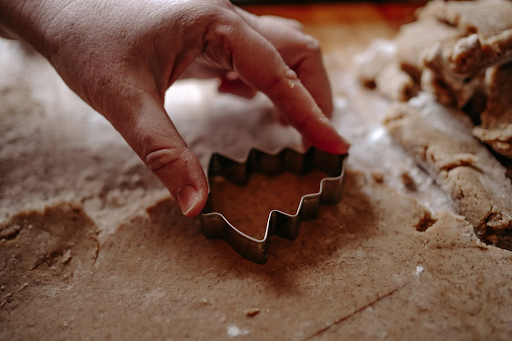
Baking Gingerbread at Home: Charm Meets Challenge
There’s a different kind of satisfaction in flour-dusted counters and trays cooling by the window. When you bake, the cookies are yours in every way—the thickness of the dough, the exact shade of gold on the edges, the crooked smile you pipe onto a snowman’s face.
Full Creative Reign
You can tone down the ginger, dial up the cinnamon, fold in crystallized ginger chunks, or sneak in a splash of espresso.
And because you’re in charge, every cookie can be shaped and decorated to match your party’s mood—sleek and modern, or cheerful and a little chaotic.
A Tradition Worth the Mess
Some families don’t even care how the cookies turn out; they care about the process. Hands in dough, laughter over lopsided reindeer, a kitchen that smells like December should. The memory matters more than the symmetry.
If you go the homemade route, remember:
- Chill the dough so your snowflakes don’t melt into blobs
- Line pans with parchment to keep bottoms from overbrowning
- Have multiple icing bags ready so you can decorate while the inspiration lasts
- Store in airtight containers to hold onto that fresh-baked texture
The Cost in Hours
The downside? Baking can eat up a day—especially if you’re a perfectionist. If you’re already juggling a main course, drinks, music, and decorations, gingerbread might not be the best place to spend your energy.
Finding the Middle Ground
You don’t have to be all-in on one side. Let the bakery handle the bulk—those perfect, uniform rounds—and make a smaller batch at home just for the pleasure of it.
- Use bought cookies to ensure consistency and variety.
- Add your own for a personal, slightly imperfect touch.
- Give Nuremberg gingerbread a starring role—it’s a conversation starter as much as a dessert.
That way, your table has the best of both worlds: polish and personality.
The Final Word
Gingerbread isn’t just a cookie—it’s shorthand for the holidays themselves. Buying it gives you control over time and presentation. Baking gives you connection and creativity. This year, don’t think of them as rivals. Think of them as partners in the same festive mission: to fill your home with warmth, spice, and the kind of joy people remember well past January.