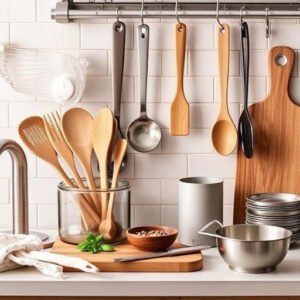
A functional kitchen doesn’t require dozens of gadgets—it requires the right utensils that make cooking smoother, safer, and more enjoyable. Whether you’re a beginner learning basic recipes or a home chef experimenting with flavors, having reliable tools can dramatically improve your results.
This detailed guide walks you through the must-have kitchen utensils, explaining not just what they are—but why they matter, how to use them, and what to look for when buying them.
1. Chef’s Knife – Your All-in-One Cutting Tool
A chef’s knife is the most important utensil in your kitchen. Typically 6–10 inches long, it’s designed for versatility and precision.
What it’s used for:
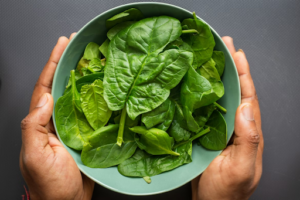
- Chopping vegetables like onions, tomatoes, and spinach
- Slicing meat and fish
- Mincing garlic and herbs
Why it’s essential:
Instead of using multiple knives, a chef’s knife handles nearly every cutting task efficiently. A sharp knife also reduces the risk of injury because it requires less force.
What to look for:
- Comfortable grip
- Balanced weight
- Stainless steel blade for durability
2. Cutting Board – A Safe Prep Surface
A cutting board protects your countertops and provides a stable surface for food preparation.
Types:
- Wooden boards: Durable and gentle on knives
- Plastic boards: Easy to clean and more hygienic for raw meat
Why it matters:
Using a cutting board prevents contamination and keeps your kitchen organized during prep.
Pro tip:
Keep separate boards for vegetables and meat to maintain hygiene.
3. Measuring Cups & Spoons – Precision in Cooking
Cooking is an art, but baking is a science—and both require accurate measurements.
What they’re used for:
- Measuring flour, sugar, spices, and liquids
- Maintaining consistency in recipes
Why essential:
Even small measurement mistakes can change the taste or texture of a dish.
Tip:
Use separate sets for dry and liquid ingredients for best accuracy.
4. Spatula – The Multi-Tasking Tool
A spatula is incredibly versatile and comes in different forms.
Types and uses:
- Flat spatula: Flipping pancakes, eggs, burgers
- Silicone spatula: Scraping bowls, mixing batters
Why it’s important:
It helps handle delicate foods without breaking them and prevents scratching non-stick cookware.
5. Wooden Spoon – A Traditional Favorite
A wooden spoon is a simple yet powerful tool for stirring and mixing. Wooden spoons can be a best for custom gift boxes as they can be a perfect fit along with cutting boards or other olive wood products.
Best for:
- Soups, curries, sauces, and gravies
- Long cooking processes
Why choose wood:
- Doesn’t conduct heat (safe to hold)
- Won’t scratch pots and pans
- Doesn’t react with acidic foods
6. Whisk – For Smooth Mixing
A whisk is designed to blend ingredients and incorporate air.
Common uses:
- Beating eggs
- Mixing cake batter
- Preparing sauces like custard or gravy
Why it matters:
It creates smooth, lump-free mixtures and improves texture.
7. Tongs – Better Control While Cooking
Tongs act like an extension of your hands, giving you better grip and safety.
Ideal for:
- Flipping meat while frying
- Handling hot foods
- Tossing salads
Why essential:
Keeps your hands away from heat and oil splashes.
8. Ladle – Perfect for Liquids
A ladle has a deep bowl and long handle, making it perfect for serving liquids.
Best used for:
- Soups
- Daal and curries
- Sauces
Why it’s useful:
It allows controlled pouring without spills.
9. Peeler – Speed Up Your Prep Work
A peeler makes removing skins from fruits and vegetables quick and easy.
Uses:
- Potatoes, carrots, cucumbers
- Apples and other fruits
Why it’s important:
Saves time and reduces waste compared to using a knife.
10. Colander (Strainer) – Drain with Ease
A colander is used to drain liquids from food.
Common uses:
- Draining pasta
- Washing fruits and vegetables
- Rinsing rice
Why it matters:
It simplifies kitchen tasks and improves efficiency.
11. Kitchen Scissors – The Underrated Tool
Kitchen scissors are more useful than many people realize.
What you can do with them:
- Cut herbs quickly
- Open food packaging
- Trim fat from meat
Why keep them handy:
They’re faster and more precise for certain tasks than knives.
12. Mixing Bowls – Essential for Preparation
Mixing bowls are used for combining ingredients before cooking.
Why they’re important:
- Keep your prep organized
- Prevent mess in the kitchen
Best options:
- Stainless steel (durable)
- Glass (microwave-safe)
13. Grater – For Fresh Flavor and Texture
A grater is a simple tool that delivers big results when it comes to flavor.
Common uses:
- Grating cheese for pasta or pizza
- Shredding vegetables like carrots and cabbage
- Zesting lemons and oranges
Why it’s worth having:
Freshly grated ingredients taste better than pre-packaged ones and can elevate even simple dishes.
14. Rolling Pin – For Dough Preparation
If you enjoy baking or making homemade flatbreads like roti or naan, a rolling pin is essential.
What it does:
- Flattens dough evenly
- Helps control thickness for consistent cooking
Types:
- Wooden rolling pins (traditional and sturdy)
- Marble rolling pins (heavier and smoother)
15. Food Thermometer – Precision Cooking
A food thermometer takes the guesswork out of cooking, especially for meat.
Why it matters:
- Ensures food is cooked safely
- Prevents overcooking or undercooking
Best for:
- Chicken, beef, and baked dishes
Final Wrap-Up
A thoughtfully equipped kitchen doesn’t have to be expensive or complicated. By investing in essential utensils and adding a few smart extras, you create a space that supports your cooking journey.
From chopping and mixing to cooking and serving, each utensil plays a role in making your time in the kitchen more efficient and enjoyable. With these tools at your disposal, you’ll not only cook better meals—you’ll also enjoy the process much more.


")