Home Blog Page 4

What You Need to Know Before You Start Your Homebrewing Journey

Does the idea of homebrewing pique your interest, but you’re worried that making your own beer may be a lot more complicated than you think it is? Well, here’s the good news: getting started is a lot easier than you’d imagine. With some basic equipment, the right ingredients, and a general idea of how brewing works, anyone can start making their own beer at home.

These days, home brew kits for beginners have made the whole process even more accessible. Not only do these kits usually include most of the essentials you need to get going, but they also help take the guesswork out of brewing, letting you focus on learning the ropes and just enjoying the experience. That said, before you go splash out on your first homebrewing kit and start brewing your first batch, there are a few things you really should know.

About the Equipment You’ll Need
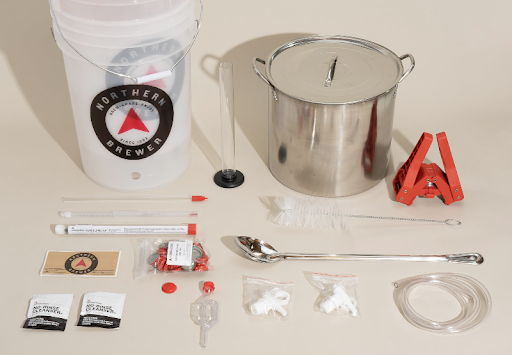
Now, I know that different homebrew kits can have slightly different contents, but most beginner setups will include some or all of the following.

Fermentation Vessel 

This is where your beer ferments after the brewing stage – essentially the container that holds your brew, allowing the yeast to go to work and turn the sugars into alcohol and carbon dioxide, while also giving it enough room to expand. It’s usually a food-grade plastic bucket or similar container with a lid, and its job is to keep everything in one place while the magic happens.

Airlock

An airlock is a bit of kit that fits on top of the fermentation vessel, letting any carbon dioxide produced during fermentation escape while keeping outside air and any unwanted germs or contaminants out of the brew. That’s especially important during fermentation, when the beer needs all the protection it can get.

Hydrometer

One of the really useful tools you’ll get in a beginner’s kit is a hydrometer. This little device lets you measure the density of your brew, which in turn gives you a pretty good idea of how things are progressing. Plus, if you’ve got a read of the original gravity of the brew and the final gravity, you can even estimate how much alcohol the finished beer is going to have.

Thermometer 

Temperature is a big deal when it comes to fermentation, so a thermometer is a really useful bit of kit for keeping an eye on things. It lets you check that the temperature of your wort or fermenting beer is just right for the yeast you’re using, and helps you avoid temperatures that could end up messing up the finished beer.

Syphon 

A syphon is basically a long, curved tube with a plunger on the end, used to transfer your beer from one container to another. The idea is that you use it to move the beer from the fermenter into bottles or another vessel, leaving all the sediment behind in the process. This makes the transfer a heck of a lot cleaner and reduces the amount of stress on the brew.

Steriliser or Sanitiser 

Keeping your equipment squeaky clean is one of the most important bits of the homebrewing process, and that’s where a steriliser or sanitiser comes in – it helps keep the risk of unwanted germs and microorganisms messing up your beer to a minimum. Now, a lot of kits will come with one, but it’s always a good idea to follow the instructions for cleaning and sanitising your equipment – it’s worth taking the time to do it right.

Brewing Or Mixing Spoon

A long-handled spoon is a really simple but really useful tool that you’ll end up using all the time. It’s great for stirring ingredients, helping the sugars dissolve, and mixing up the contents of your brewing vessel – it’s a solid addition to any homebrew kit.

About the Ingredients

Getting to know the ingredients is another important part of starting out on your homebrewing adventure. Each one of them plays a different role and can have a big impact on how your beer turns out – from the flavour and aroma to its colour, body and alcohol content.

Malt

Malted barley is pretty much the main source of fermentable sugars in most beers. When you’re brewing, these sugars get extracted from the malt and then converted into alcohol by the yeast. And malt contributes to the beer’s alcohol, sweetness and body as well. Of course, many beginner kits use malt extract, which makes the brewing process a whole lot simpler, and you don’t have to mess around with whole grains.

Hops

Hops bring bitterness and most of the flavour and aroma in beer. What they bring – citrus, floral, fruity, herbal or pine-like notes, for example – depends on the variety. How much bitterness or how much aroma they contribute also depends on when you add them during the brewing process. 

Yeast

Yeast is the one responsible for doing the fermentation for you. It chomps down the sugars from the malt and then converts them into alcohol and carbon dioxide. But the type of yeast you use matters – different strains can produce flavours that are quite noticeably different. And getting the fermentation at the right temperature is important – you want to get it right so you get a good result. 

Water

The water you use makes up most of the finished beer, so the quality of the water you use is going to have an impact on how your beer turns out. The mineral content and pH level of the water can affect the brewing process and the flavour. Now, for beginners, you might not need to start messing around with water chemistry just yet. Good-quality water and a reliable recipe are a good place to start.

You may also come across additional ingredients such as brewing sugar, fruit, spices or other flavourings, depending on the recipe. But you don’t have to try everything straight away – leave that for when you become more confident in your brewing skills. A beginner’s ingredient kit can be a godsend because it provides the ingredients and quantities needed for a particular beer. When you’re feeling more confident, you can start experimenting with different malts, hops and yeast to create beers that really suit your taste.

About the Brewing Process 

The exact process of brewing can vary depending on the beer style and recipe you’re working with, but most brews follow the same basic steps.

Get Your Gear in Order

Before you even start, make sure all the equipment that’s going to come into contact with your beer is spotless and sanitised. Good hygiene is key to stopping unwanted bugs from screwing with your brew.

Get Your Wort On

The wort is the liquid that eventually becomes beer. Depending on your recipe, you might be steeping malts, mixing in some malt extract, or working with other ingredients to get the fermentable sugars out of them. Hops usually get added at different points in this stage to give the beer some bitterness, flavour and aroma.

Chill the Wort

Once you’ve done the brewing bit, you need to get the wort cooled down to the right temperature for adding yeast. You don’t want to be chucking yeast in there if it’s still too hot, or you’ll just end up killing it.

The Ferment Stage

The cooled wort goes into a fermenting vessel, and the yeast gets added. Now the yeast starts churning out the sugars and producing beer and CO2 – this is the bit where patience really comes in handy, as it can take days or even longer for the fermentation to finish, depending on the beer.

Time to Bottle or Keg

When the fermentation is done, you can transfer the beer into bottles or a keg. If you’re bottling, you might need to chuck a bit of extra fermentable sugar in there to get some fizz going, depending on how you like your beer.

It’s Ready…Eventually

After you’ve bottled or kegged the beer, it needs some time to carbonate and mature. Eventually it’ll get to the point where it’s ready to drink. The key to getting good results is following your recipe and giving each stage the time it needs. As you get more experience, you can start experimenting and trying out different brewing techniques and beer styles.
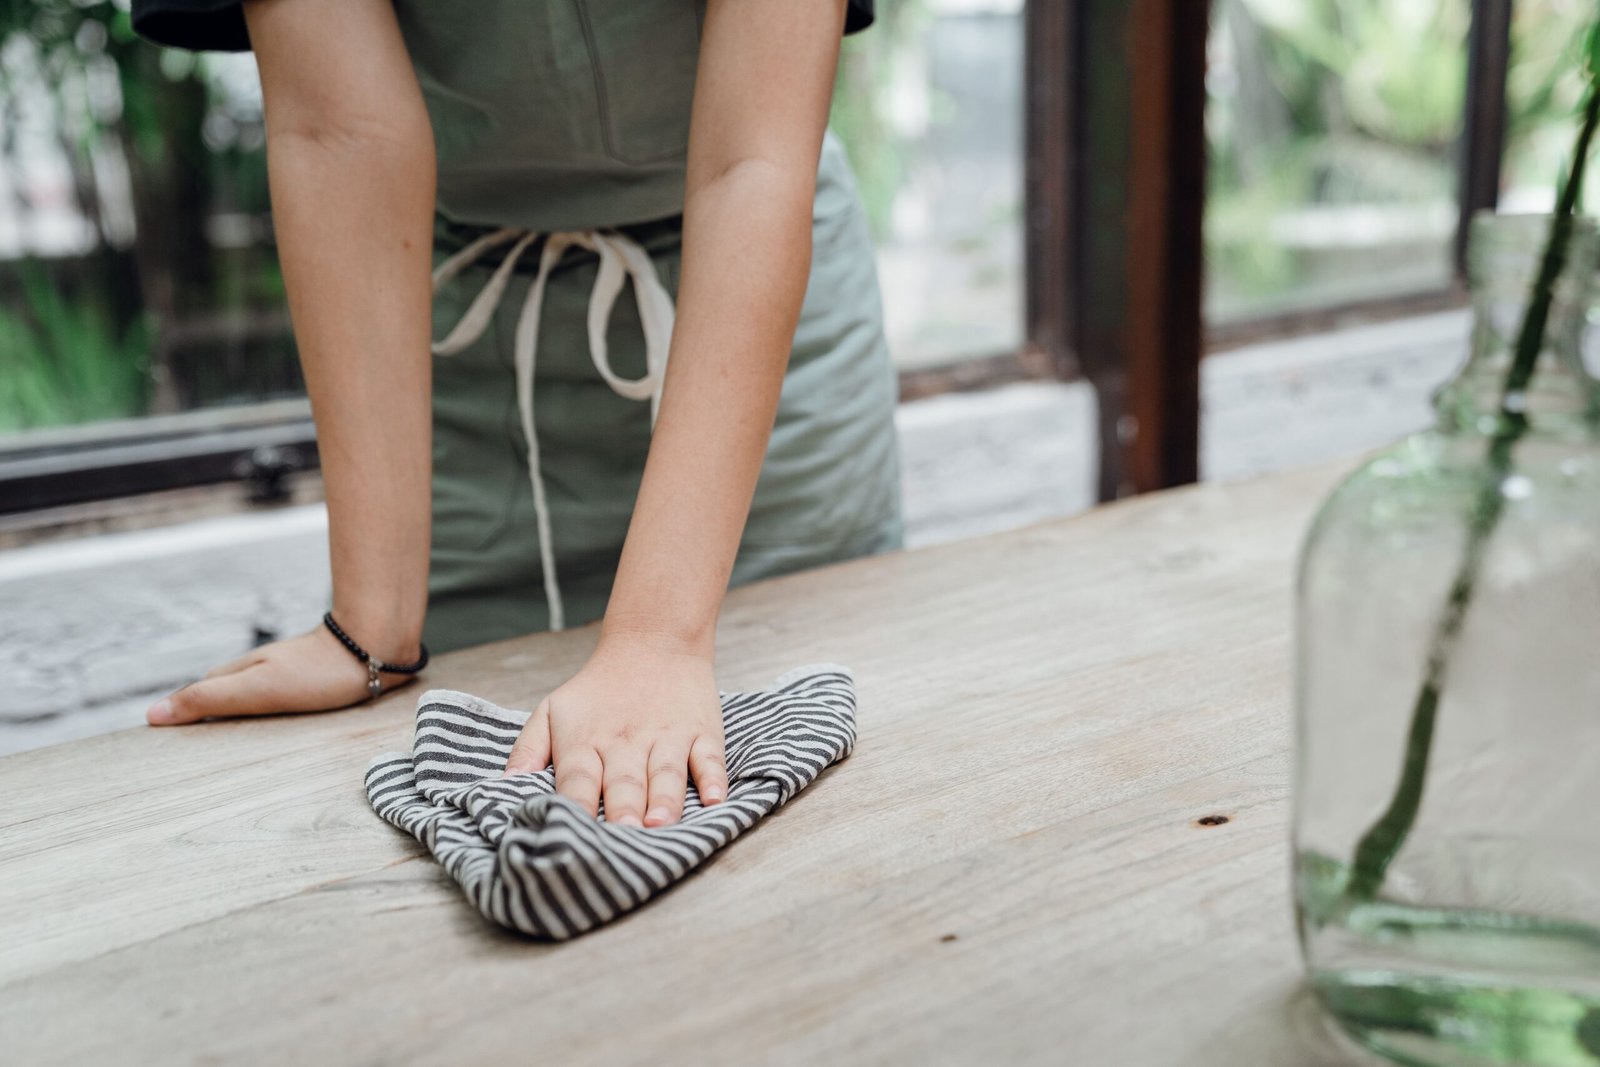
When to Call in the Pest Experts: A Seasonal Guide to Protecting Your Kitchen and Home

Anyone who spends real time in a kitchen knows that a well-stocked pantry, a warm stove, and a few crumbs on the counter are basically an open invitation to unwanted guests. If you love experimenting with global recipes, fermenting your own kimchi, or keeping a pantry full of grains, oils, and spices like the readers of this site do, you already understand how much care goes into protecting that space. Pests do not care whether your shelves are lined with imported sesame sauce or homemade preserves, they just want easy access to food, warmth, and shelter.

That is why timing matters so much when it comes to pest control. Ants, rodents, and termites do not show up randomly, they follow seasonal patterns tied to weather, breeding cycles, and food availability. Knowing when these pests are most active lets you protect your kitchen investment, your pantry staples, and your home structure before a small problem becomes an expensive one. This guide walks through each season so you know exactly when to tighten up your defenses and when it is time to bring in professional help.

For homeowners in central Ohio, seasonal shifts hit especially hard because of the region’s humid summers and cold, damp winters, both of which create ideal breeding conditions for common household pests. Local professionals like Green Shield Pest Pros see this pattern play out year after year, with certain months bringing predictable spikes in ant activity, rodent sightings, and termite swarms. Understanding this rhythm is the first step toward staying ahead of an infestation instead of reacting to one after it has already taken hold in your walls or cabinets.

Spring: The Critical Prevention Window, Why Early Action Stops Summer Infestations

Spring is when dormant pest colonies wake up, and it is arguably the most important season for prevention. As temperatures climb, ants begin scouting for food sources, and a single scout finding a crumb trail in your kitchen can lead to a full colony invasion within days. Termites also swarm in spring, particularly after rain, which makes this the season when structural damage often begins even though it may not become visible for months. Roughly 56 percent of U.S. households report dealing with ant infestations annually, and spring is typically when that cycle starts.

This is also the ideal time to schedule a professional inspection rather than wait for visible signs of trouble. A trained technician can spot early termite activity, seal foundation cracks, and treat entry points before pests establish themselves indoors. Waiting until summer, when populations are already thriving, means playing catch-up instead of staying ahead. Homeowners who treat spring as a prevention window rather than a wait-and-see period consistently report fewer issues later in the year.

Summer Peak: Managing Active Pest Populations in Your Kitchen and Home

By midsummer, pest populations are at their peak, and kitchens become a primary battleground. Warm weather accelerates ant and cockroach reproduction, while open windows and screen doors create easy access points for flying insects. Pantry pests like moths and beetles also thrive in summer heat, often arriving hidden in flour, grains, or pet food before spreading to other stored goods. This is the season when consistent food storage habits, tight-sealing containers, and prompt cleanup matter most.

Summer is also when most homeowners first notice a problem serious enough to call for help, since populations are large and visible. According to NPMA Pest World, the residential pest control segment served over 13.25 million customers in 2024, with recurring service revenue accounting for the vast majority of residential pest control income, underscoring how many households rely on scheduled treatments rather than one-time fixes. If you are already dealing with an active infestation by midsummer, a single treatment is rarely enough, ongoing monitoring is usually necessary to keep numbers down through the hottest months.

Fall: Sealing Entry Points Before Winter Invaders Arrive

As temperatures start to drop, pests shift their focus from foraging to finding shelter, and this is when rodents become the primary concern. Mice and rats begin searching for warm indoor spaces in early fall, often squeezing through gaps as small as a dime around utility lines, vents, or foundation cracks. Approximately 21 million U.S. homes deal with rodent infestations each winter, and most of that activity begins with entry points that went unsealed in autumn. Spiders and stink bugs also tend to move indoors during this transition, seeking refuge from cooling outdoor temperatures.

Fall is the season for a thorough exterior inspection, checking weather-stripping, sealing gaps around pipes, and clearing debris away from the foundation where pests like to nest. It is also worth thinking through your own kitchen habits during this window, since stored dry goods and root vegetables can attract rodents looking for an easy meal indoors. Taking these steps in October rather than December can mean the difference between a pest-free winter and months of dealing with unwanted rodent activity.

Winter and Year-Round: Maintaining Protection and Knowing When to Call Immediately

Winter might seem like a quiet season for pests, but indoor infestations often peak precisely because rodents and insects that got inside during fall are now settled into wall voids, attics, or crawl spaces. This is when homeowners typically notice droppings, gnaw marks, or scratching sounds, all signs that warrant immediate professional attention rather than a wait-and-see approach. Termite damage, meanwhile, continues silently regardless of season, and repair costs average around 3,000 dollars per home once damage is discovered, which is significantly more than the cost of preventive treatment would have been.

The most effective long-term strategy is not seasonal panic but consistent, scheduled care. Pest control professionals generally recommend service at least every three months to maintain year-round protection, since this frequency interrupts breeding cycles before they escalate into visible infestations. It is also worth noting that homeowner preferences have shifted considerably, with 92 percent of homeowners now actively seeking eco-friendly pest control options that protect kitchens and food storage areas without harsh chemical residue. Whatever the season, the moment you notice consistent activity, structural damage, or signs of nesting, that is the signal to call in professional help rather than attempting a delayed DIY fix.

Statistic Figure
Households with annual ant infestations 56%
Homes affected by winter rodent infestations ~21 million U.S. homes
Average termite damage repair cost $3,000 per home
Recommended service frequency Every 3 months (quarterly)
Homeowners seeking eco-friendly solutions 92%

Recipe for Social Success: How Food Bloggers Maximize Instagram Likes and Engagement

Food blogging fits well on Instagram because people want to see photos of recipes, ingredients, cooking, and meals. But just a good-looking food photo will not always make people care or get involved. Food bloggers should mix nice photos with helpful tips. They also need fun captions, to post often, and to make content that makes people stop, read, and get them to talk or like the post.

1. Turn Recipes Into Useful Content

A food post gets more people interested when you give them something useful. Don’t just show the finished meal. Tell people how they can make it on their own and get good results.

Include helpful details like cooking times, what you can swap in, quick ways to get things done, storage tips, or common mistakes. A short note about why an ingredient is important can help readers want to save or share the post.

Creators can also think about using high-quality Instagram likes as one more way to get seen by more people. But outside engagement should not take the place of real, helpful content. The best base is always posts that get followers to get involved in a real way.

2. Make Every Dish Visually Irresistible

The way a food post looks at first is very important. A clear photo or video can make a big change. Good lighting helps the food stand out. Simple backgrounds and nice setup also help. These things can make a basic dish look much better to people who see it.

Food bloggers can experiment with:

  • Overhead shots of the recipe
  • Close shots of how things feel
  • Step-by-step clips to show cooking
  • Before and after views
  • Short Reels that show the recipe
  • Flat lays that show what you need to cook

The goal is not to have expensive gear. You can use natural light, pay attention to how you frame your shots, and look at the little things. These steps help make your content feel better and more friendly.

3. Give Followers a Reason to Comment

Food can bring up thoughts, likes, and memories in people. This makes it simple to start talking with others.

Try ending posts with specific prompts:

“Would you make this spicy or mild?”

“Which ingredient would you replace?”

“What should I cook next?”

“Team homemade sauce or store-bought?”

If you ask people specific questions, you get better replies than when you ask something too general. When people leave a comment, take time to answer in a caring way. This can help turn one talk into a good, long chat.

4. Build Engagement Through Different Formats

Posting the same kind of content again and again can make your page feel the same every time. Food bloggers get better results when they use different types of posts for different reasons. This way, you can make a mix that keeps people interested.

A simple weekly content rhythm

Monday — Recipe Reel: Show the cooking process.

Wednesday — Carousel: Share the ingredients and steps to make it.

Friday — Food Story: You can ask people a question or run a poll.

Weekend — Finished dish: Share a recipe with a story about you.

This mix gives the page a fresh feel. It also lets followers find new ways to connect and take part.

5. Learn From Engagement Patterns

Likes are good, but they are just one way to see how well you do on Instagram. People with blogs should also keep an eye on saves, shares, comments, visits to their page, and follows.

Look for patterns such as:

High saves → Recipe is practically useful.

High shares → Content is relatable or inspiring.

More comments → Topic encourages discussion.

High profile visits → Post creates curiosity.

High follows → Content gives people a reason to stay.

This way helps food bloggers know what recipes and formats need more focus. They do not have to guess what works best.

6. Make Seasonal Content Part of the Strategy

Timely food content can give bloggers one more way to get attention and help people join in. Using seasonal ingredients, special recipes, summer drinks, comfort foods, and popular dishes can make people want to interact. Bloggers can also link their recipes to things going on now, local food habits, or cooking challenges without letting go of their own style.

Another good way is to ask your followers to give their ideas. You can ask them to share different versions, vote for one of two recipes, or name ingredients they like. This lets people feel like they are a part of your content. Over time, these talks can show what your Instagram followers like and help you get new ideas for what to post next.

Conclusion

Good food blogging on Instagram brings together tasty-looking food, useful tips, and real talks with followers. Great photos grab your eye at first. But clear recipes, good questions, new kinds of posts, and talk with others keep people coming back. You can see the same idea in groups that love football on Instagram; fans use it to share ideas, have fun, and talk all the time. Food bloggers should see likes as just one part of a bigger plan. This helps them get people who do more than just look at recipes—they join in and talk too.

The After-Dinner Kitchen Reset: Simple Habits That Make Tomorrow’s Cooking Easier

Dinner is finished, everyone is full, and the last thing most people want is another hour of kitchen work. Still, walking away from half-used ingredients, a crowded sink, and crumbs around the stove usually means tomorrow’s first cooking task is cleaning up yesterday’s meal.

An after-dinner kitchen reset offers a middle ground. It is not deep clean. It is a short routine that takes care of food, restores the main cooking areas, and leaves the kitchen ready for the next meal. There is a food safety reason to start with leftovers, too. According to the USDA Food Safety and Inspection Service, perishable leftovers should be refrigerated within two hours, or within one hour when temperatures are above 90°F. Most cooked leftovers can be refrigerated for three to four days.

Once food is safely stored, the rest of the reset can move quickly.

Put Leftovers Away Before You Start Cleaning

It is tempting to leave dinner on the counter while dealing with dishes, but leftovers should be the first priority. Transfer food into appropriate containers, close them securely, and get them into the refrigerator promptly.

Think about visibility as well as storage. Leftovers pushed behind condiments and produce are easy to forget. Place foods you want to use for tomorrow’s lunch or dinner where they can actually be seen. Adding a simple date label can also save you from trying to remember which night the pasta was made.

This is a good moment to decide whether part of tonight’s meal can become tomorrow’s. Roasted vegetables can go into an omelet. Cooked chicken can become a sandwich or salad. Rice can provide a head start on another dinner.

Deal With Crumbs and Spills While They Are Fresh

Next, look at the areas where food was prepared and served. Flour beside the mixer, sugar near the coffee station, sauce around the stove, and crumbs beneath the toaster are much easier to clean now than after they dry or spread around the kitchen.

Pay particular attention to spaces beside appliances and along cabinet edges. Food debris can collect there without being obvious from standing height. Sticky spills and moisture around sinks deserve the same attention.

Regular cleanup also removes food and water sources that can attract insects and rodents. If ants, cockroaches, rodents, or other pests keep appearing around cabinets, plumbing, or food-storage areas despite consistent sanitation, professional San Francisco pest control may help identify an entry point or another underlying condition that surface cleaning cannot resolve.

Reset the Space Where You Actually Cook

You do not need every surface to sparkle before going to bed. Focus on the areas you will need first tomorrow.

Clear the main prep counter. Wipe the stovetop once it is safe to clean, put away the cutting board, and return frequently used utensils to their normal places. Check spice jars, oil bottles, and other ingredients that may have been left beside the stove.

This small reset changes how the kitchen feels the next time you walk in. Starting breakfast with an open counter is noticeably easier than moving last night’s pans, mail, and ingredient containers before you can make coffee.

Reset Step What to Do Why Tomorrow Is Easier
Leftovers Store, cover, and date food Lunch or dinner already has a head start
Counters Remove crumbs and wipe spills Prep space is ready to use
Sink Wash or load used dishes No pile is waiting in the morning
Pantry Reseal and return ingredients Cooking staples stay organized
Floor Pick up visible food debris Yesterday’s mess does not spread
Trash Remove full or food-heavy bags The kitchen starts fresher

Don’t Let the Sink Become Tomorrow’s First Job

A sink full of dishes can make a clean kitchen feel unfinished. Load the dishwasher if you have one, then hand-wash anything that should not go inside it. Knives, wooden tools, delicate cookware, and specialty cooking equipment may need individual care.

You do not necessarily need to scrub every pan immediately if something needs to soak. The goal is to leave the sink functional rather than completely buried.

Once the dishes are handled, clear food from the drain area and give the sink a quick rinse or wipe. Hang damp towels where they can dry instead of leaving them bunched on the counter.

Return Ingredients to Their Proper Homes

Cooking often leaves a trail of ingredients behind. There may be flour near the mixing bowl, spices around the stove, an open bag of rice on the counter, and vegetables that never made it back to the refrigerator.

Take a minute to return everything to its usual place. Reseal opened packages properly rather than folding the top and hoping for the best. Wipe sticky containers before putting them back in a cabinet.

This tiny bit of pantry organization has another benefit. You see what is running low. If there is barely enough olive oil for another meal or the last onion went into dinner, add it to the shopping list now instead of discovering the shortage halfway through tomorrow’s recipe.

Give the Floor and Trash a Quick Check

Nobody needs to mop the entire kitchen after every dinner. A quick look at the floor is usually enough.

Pick up obvious crumbs and food pieces, especially around the table, prep counter, stove, and pet feeding areas. Sweep or vacuum the busiest section when needed. Save the full floor cleaning for the regular cleaning schedule unless dinner created a larger mess.

Trash deserves similar judgment. A nearly empty bin containing only dry packaging can probably wait. A full bag containing meat packaging, seafood scraps, or other food waste may be better taken out that evening. Rinse recyclable food containers when appropriate so residue is not sitting overnight.

Spend One Minute Thinking About Tomorrow

Before switching off the kitchen lights, look at what tomorrow’s meals require.

Maybe something needs to move from the freezer to the refrigerator. Perhaps tonight’s leftover chicken already solves lunch. A container of herbs might need to be used before the newer vegetables. Breakfast may be easier if the coffee station is ready and the clean skillet is back where it belongs.

This is not formal meal planning. It is simply using information that is already in front of you while the refrigerator, pantry, and evening meal are fresh in your mind.

Keep the Routine Small Enough to Repeat

An after-dinner kitchen reset works because it is short. If the routine turns into scrubbing cabinet doors, reorganizing drawers, and cleaning the oven every evening, it will probably disappear after a busy week.

Prioritize what changes tomorrow morning: store the food, handle the dishes, clear the prep space, put ingredients away, remove obvious crumbs, and check the trash. Deeper jobs can stay on a weekly or occasional cleaning schedule.

Ten focused minutes at night can completely change the way the kitchen greets you the next day. Instead of beginning with yesterday’s mess, you can open the refrigerator, reach for a cutting board, and start cooking.

How to Organize Your Pantry to Keep Ingredients Fresh and Reduce Food Waste

A well-organized pantry does more than make the kitchen look tidy. It helps you see what you have, find ingredients while dinner is already on the stove, and stop buying the third jar of something hiding behind the cereal. For anyone who cooks regularly, those small conveniences add up.

They can also save real money. According to the U.S. Environmental Protection Agency, updated guidance in 2026 estimates that the average American family of four spends almost $3,000 each year on food that ultimately goes uneaten. Pantry organization cannot eliminate every bit of food waste, but it can solve one surprisingly common problem: forgetting what you already bought.

The trick is to organize around how you cook rather than how a pantry looks in a photo.

Start With an Honest Pantry Inventory

Before buying containers or labels, find out what is actually on the shelves. Pull ingredients forward and group similar foods together. You may discover two open bags of rice, several nearly empty pasta boxes, or baking supplies you forgot you had.

Check packages while you work. Damaged bags, spills, webbing, insects, or rodent evidence need more attention than simple rearranging. If pest activity keeps returning after affected food is removed and the pantry is thoroughly cleaned, there could be an entry point or problem elsewhere in the home. Holper’s Pest & Animal Solutions can inspect for pest activity and conditions that may be allowing it to continue.

For everything else, decide what belongs in the pantry and what does not. Move misplaced items, combine duplicates when it is safe and practical, and make a mental note of ingredients that should be used soon.

Organize Around the Meals You Actually Make

Pantry zones are more useful when they reflect your cooking habits. Someone who bakes every weekend needs flour, sugar, baking powder, and vanilla together. A household that relies on quick pasta dinners might want noodles, canned tomatoes, beans, and sauces within easy reach.

A practical setup might look like this:

Pantry Zone Ingredients to Keep Together Why It Helps
Baking Flour, sugar, cocoa, extracts, leaveners Keeps recipe essentials in one place
Grains Rice, pasta, quinoa, oats Makes meal planning faster
Canned foods Beans, tomatoes, vegetables, broth Shows what is available for quick meals
Breakfast Cereal, oats, nut butter Simplifies busy mornings
Flavor Oils, vinegars, sauces, spices Keeps frequently used seasonings accessible
Use soon Open or older ingredients Makes them harder to forget

Do not create ten tiny categories if five broad ones work. Pantry organization should remove decisions from cooking, not create another complicated system to maintain.

Let Older Ingredients Win the Visibility Contest

Grocery stores rotate stock for a reason, and the same basic idea works at home. When you bring home another can of tomatoes or bag of rice, place it behind the one already in the pantry. Older ingredients stay visible and are more likely to get used first.

Opened products deserve even more visibility. Half a bag of walnuts will probably disappear from memory if it sits behind three unopened packages. Keep open ingredients toward the front, and consider creating a small “use soon” section.

That section can also inspire meals. A little coconut milk, half a box of pasta, and an open bag of lentils are no longer random pantry leftovers. They become ingredients to work into this week’s cooking.

Use Containers Where They Solve a Real Problem

Matching containers look nice, but decanting every grocery item is not necessary. A sealed can of beans gains little from moving into another container. Dry ingredients in flimsy or opened packaging are different.

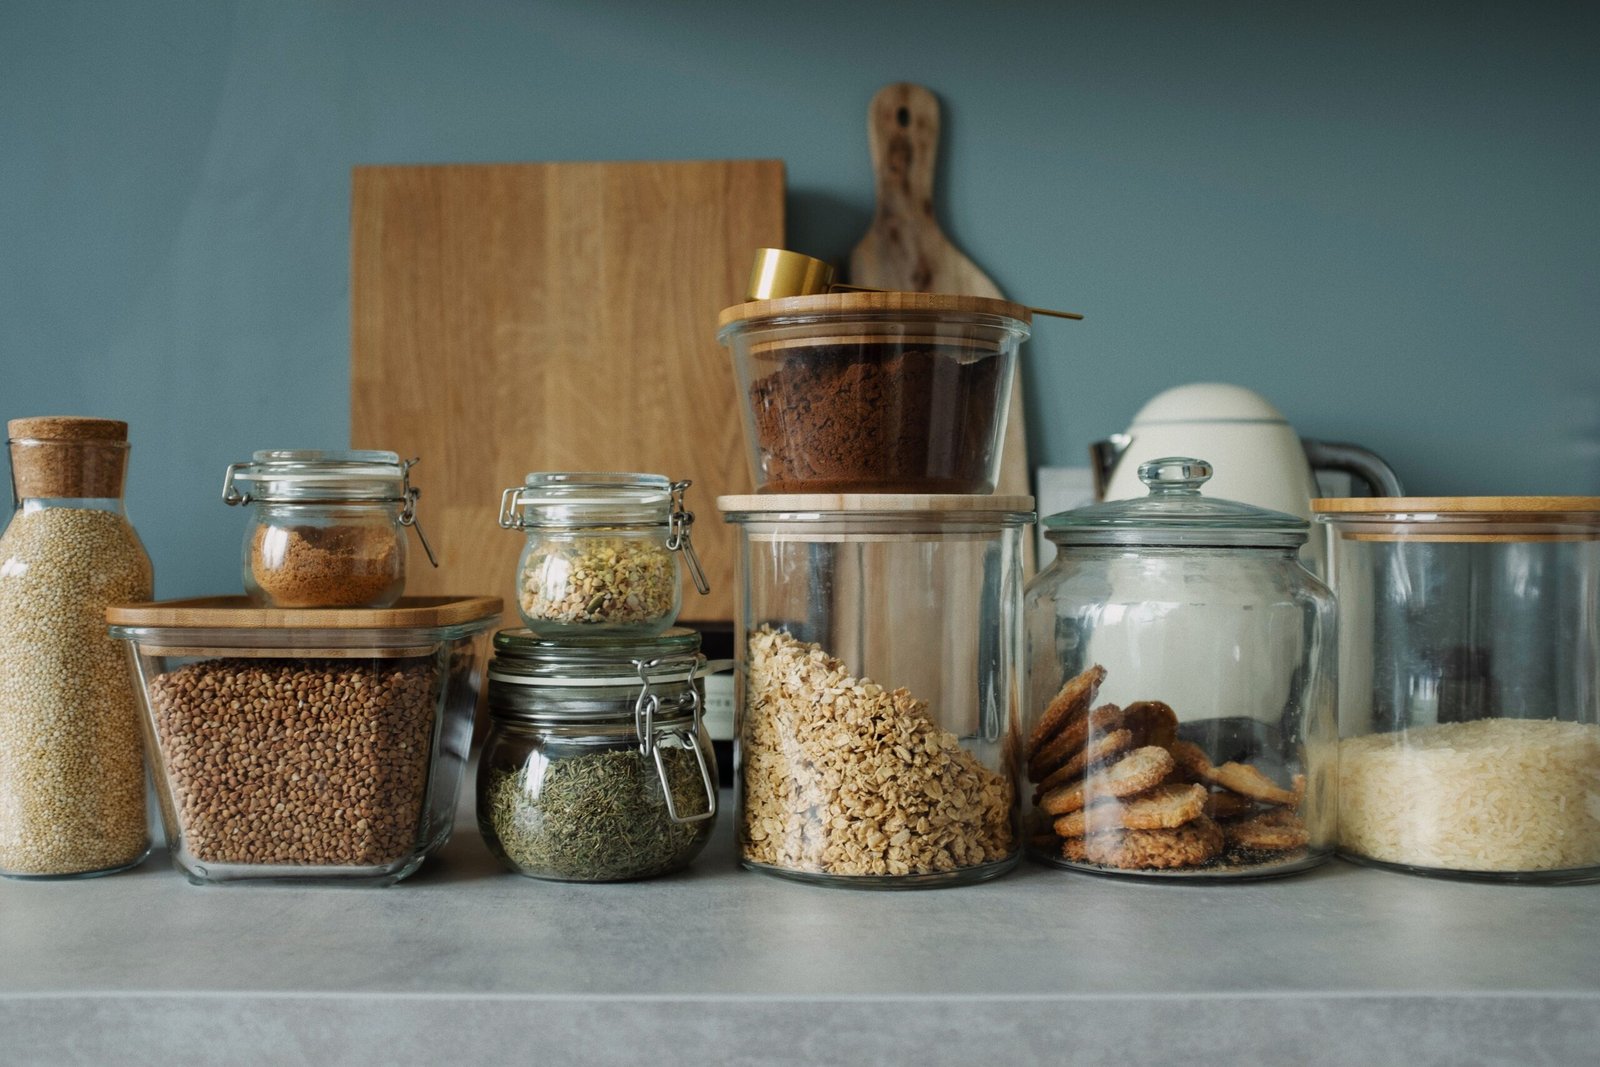
Flour, sugar, rice, cereal, pasta, nuts, and dried fruit can be easier to manage in tightly closed containers. Good containers protect ingredients from spills and make quantities easier to see. They can also keep one torn bag from emptying itself across the shelf.

Labels become important when ingredients look similar. Nobody wants to discover mid-recipe that the container they assumed held all-purpose flour contains bread flour instead. Label the contents clearly, and consider adding the purchase or opening date to foods that tend to sit around for a while.

Turn Pantry Shopping Into Meal Planning

Before writing a grocery list, spend two minutes shopping your own pantry. Look for ingredients that are already open and check the “use soon” section first. Then choose one or two meals that can put those foods to work.

This changes meal planning in a useful way. Instead of deciding on five dishes and purchasing every ingredient from scratch, you begin with food already in the house. An open package of tortillas might suggest tacos. Chickpeas and canned tomatoes can become a curry. Oats, nuts, and dried fruit can turn into breakfast for several days.

Only after that should you write down what is missing. This simple order helps reduce duplicate purchases while making pantry staples part of actual meals rather than long-term shelf decoration.

Clean for Food Protection, Not Perfection

A working pantry will collect a little flour dust, stray rice, and the occasional sticky spot. Clean spills when you notice them rather than waiting for a major pantry overhaul. Crumbs and food residue are much easier to deal with when they are fresh.

Pay particular attention to shelf corners, the floor beneath lower shelves, and areas where pet food is stored. Check rarely used packages from time to time as well. A pantry can look spotless from the doorway while an old bag at the back has been sitting untouched for months.

You do not need to empty every shelf each week. Regular small cleanups are easier and make unusual signs more noticeable.

Give the Pantry Five Minutes a Week

The best organization system is one you can maintain after the enthusiasm of the first cleanup disappears. Once a week, straighten the main zones, move older products forward, wipe up spills, and check which ingredients need to be used next.

That quick reset can happen while making a grocery list or planning meals for the week. It keeps the pantry connected to cooking instead of treating organization as a separate household project.

A useful pantry does not need matching jars or perfectly aligned labels. It needs ingredients you can find, food you remember to use, and a system simple enough to survive a busy week. When pantry organization supports the way you actually cook, less food gets forgotten and deciding what to make for dinner becomes a little easier.

Smart Pantry Storage Habits That Help Keep Kitchen Pests Away

Every home cook knows the satisfaction of opening a well-organized pantry. Flour is easy to find, spices are neatly arranged, and favorite ingredients are ready whenever inspiration strikes. Good pantry organization also has another benefit that often goes unnoticed. It helps protect food from moisture, waste, and unwanted pests.

Pantry pests are not always a sign of a dirty kitchen. Small insects can arrive inside packaged foods from the grocery store and spread to nearby ingredients if they go unnoticed. The good news is that a few smart storage habits can make a real difference. Better organization helps preserve flavor, reduces food waste, and makes it much easier to spot a problem before it affects multiple ingredients.

Start With Every Grocery Trip

Pantry protection begins before food reaches the shelf. While shopping, take a few seconds to look at boxes and bags containing flour, rice, cereal, pasta, grains, dried fruit, baking mixes, and nuts. Avoid packages with tears, holes, loose seals, or visible damage.

Once you arrive home, unpack groceries instead of leaving bags sitting on the floor for hours. Transfer ingredients that will be stored for a long time into quality containers with tight-fitting lids. This simple habit protects food from moisture while making your pantry easier to organize.

If insects continue appearing even after replacing affected products and improving storage habits, the issue may extend beyond a single package of food. In those situations, homeowners can consult professionals such as PCI Pest Control to determine whether pests are coming from another part of the home rather than the pantry itself.

Choose Containers That Keep Ingredients Fresh

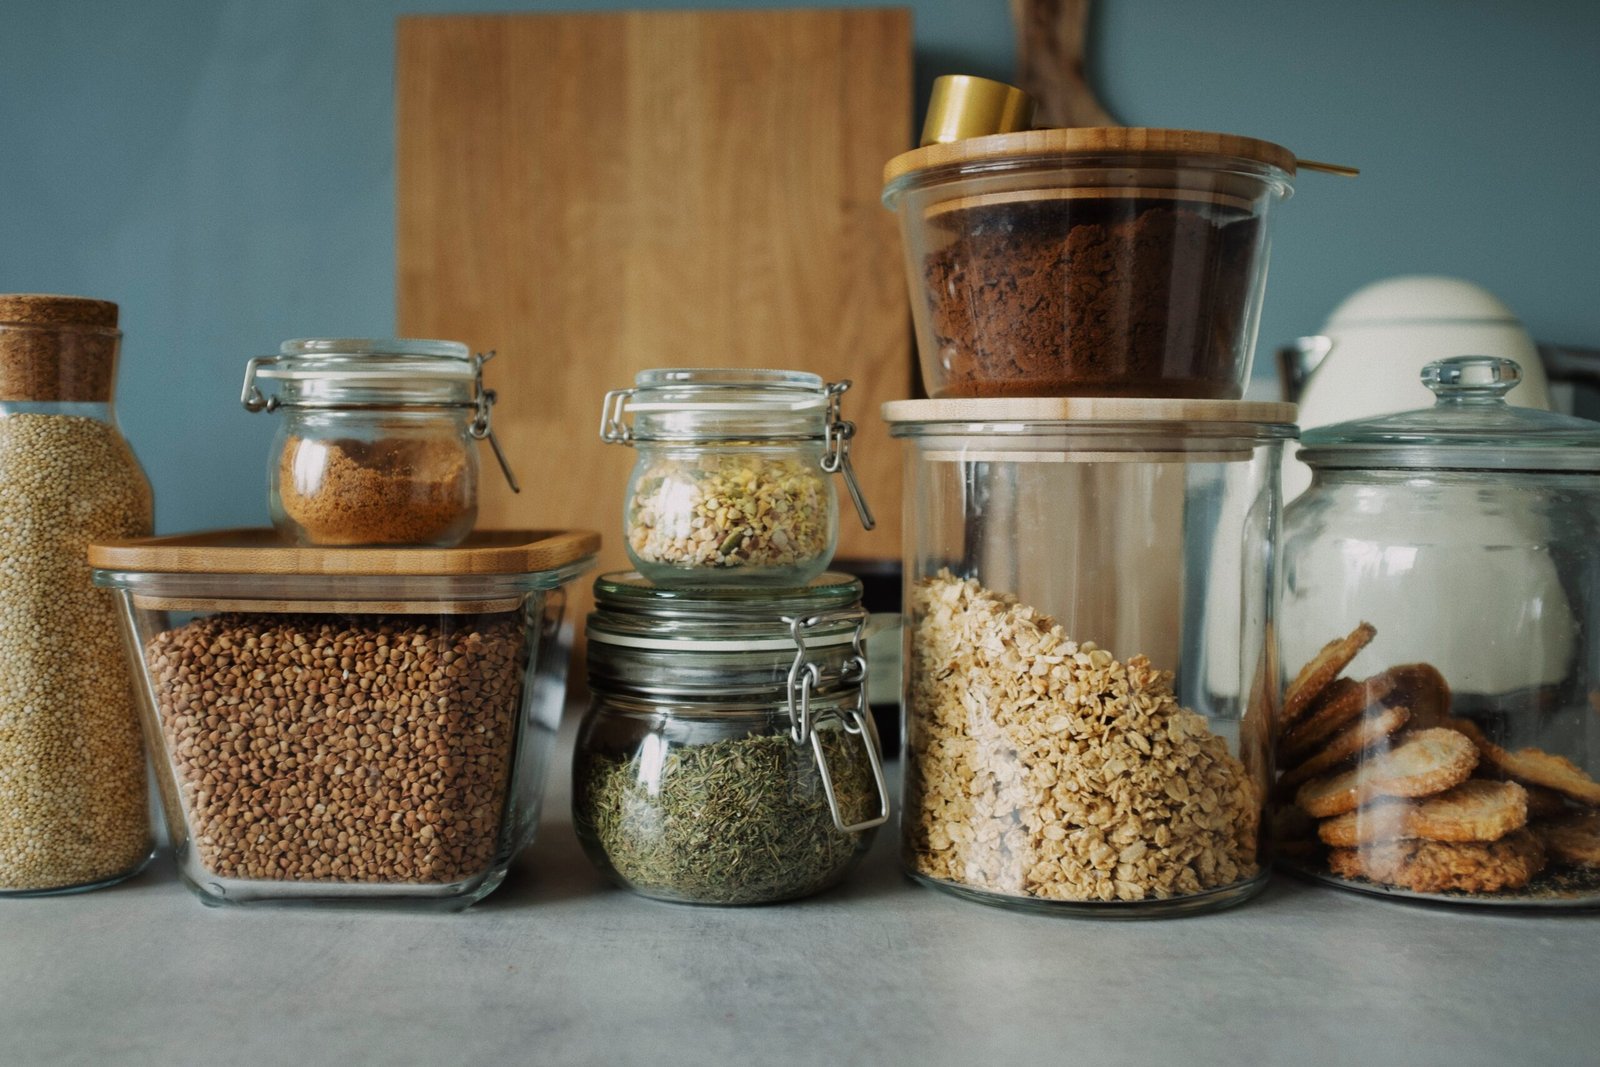
Many dry ingredients remain in their original packaging after opening, but paper bags and thin cardboard boxes are not always the best long-term storage solution. Flour, oats, rice, cereal, sugar, beans, and pasta all benefit from sealed containers that reduce exposure to air and humidity.

Glass containers make it easy to see what is inside, while durable food-safe plastic containers are lightweight and practical for everyday cooking. Clear labels also help prevent duplicate purchases because you always know what you have available.

According to the USDA Food Safety and Inspection Service, checking dry-food packages for damage and transferring products such as rice, cereal, pasta, and baking mixes into glass or plastic containers adds another layer of protection against moisture and insects while helping preserve food quality.

Rotate Ingredients Instead of Forgetting Them

Most home cooks have discovered an old package hiding at the back of a cabinet. Sometimes it is a forgotten bag of flour from holiday baking. Other times it is a specialty grain purchased for one recipe and never used again.

A simple first-in, first-out system solves this problem. Place newly purchased products behind older ones so the oldest ingredients are used first. Small labels with purchase dates can also make pantry rotation easier, especially for frequently used baking supplies.

Buying in bulk often saves money, but only if the ingredients are actually used before quality declines. Purchasing realistic amounts keeps food fresher and reduces unnecessary waste.

Keep the Pantry Clean Between Cooking Sessions

Deep cleaning does not need to become a weekly project. Small habits completed after cooking usually prevent larger problems later.

Sweep or vacuum loose flour, sugar, cereal, and rice from pantry shelves whenever you notice spills. Wipe sticky containers before putting them back into storage. Check corners where crumbs tend to collect, and clean beneath shelves every few months.

Pet food deserves attention as well. If it is stored indoors, keep it in a sealed container rather than leaving open bags sitting on the floor.

These routines take only a few minutes, but they remove food sources that insects can use if they find their way inside.

Give Every Ingredient Its Own Space

Organized storage makes cooking more enjoyable because ingredients are easier to find. It also makes unusual activity much easier to notice.

Keep baking supplies together, breakfast items in one section, snacks in another, and spices close to the cooking area. Dry goods should not be stacked so tightly that packages cannot be inspected.

Leaving a little space between containers also improves airflow and allows you to spot spills, damaged packaging, or unexpected insects before they spread through the pantry.

Watch for Early Warning Signs

Most pantry pests do not appear overnight. Small warning signs usually show up first if you know what to look for.

Tiny moths flying around the pantry, beetles near dry foods, unusual webbing inside packages, or clumped flour deserve closer inspection. It is also worth checking packages that sit nearby because insects often move between products stored on the same shelf.

Finding one affected package does not necessarily mean every ingredient must be discarded. Carefully inspect nearby foods, throw away contaminated items, and thoroughly clean the surrounding shelves before restocking them.

A Simple Pantry Routine Makes a Big Difference

The easiest storage systems are usually the ones people actually follow. Instead of creating complicated rules, focus on a few consistent habits that become part of everyday cooking.

Pantry Habit Why It Helps
Inspect packages before storing Helps avoid bringing damaged products home
Transfer dry goods to sealed containers Protects ingredients from moisture and insects
Label containers Makes pantry rotation easier
Store older products in front Encourages first-in, first-out use
Clean spills quickly Removes food sources and keeps shelves tidy
Check pantry monthly Helps catch small issues before they spread
Keep similar foods together Makes ingredients easier to monitor

These habits support better organization while making meal preparation faster because everything has a predictable place.

Build a Pantry That Supports Better Cooking

A well-maintained pantry is about more than appearance. Fresh ingredients produce better meals, and organized storage saves time during busy weeknights. It also helps reduce food waste because ingredients are easier to see and more likely to be used before they lose quality.

The best pantry is not necessarily the one with the most expensive containers or perfectly matching shelves. It is the one that fits your cooking routine and makes it easy to keep food fresh.

By inspecting groceries before storing them, using sealed containers, rotating ingredients regularly, cleaning small spills promptly, and checking shelves every month, you can protect the foods you enjoy cooking with while making your kitchen a more organized and efficient place to work. Small habits performed consistently often have the biggest impact, allowing you to spend less time dealing with pantry problems and more time creating meals worth sharing.

These Visual Details Will Enhance Your Cooking Environment

Cooking spaces often turn into purely functional work zones where personality gets lost behind plain cabinet doors. Spending time preparing meals becomes far more enjoyable when the surroundings feel personal and thoughtful.

Simple adjustments to colors, textures, and wall displays can transform any routine kitchen into an inviting space. Small design choices make a noticeable difference in how a room feels during daily meal prep.

Softening Hard Surfaces With Curvilinear Accents

Kitchens feature endless straight lines along countertops, modern cabinets, and square appliances that can make the room feel cold. Hanging framed botanical prints with custom framing for artwork brings organic curves that break up those rigid architectural edges. Smooth shapes introduce balance into standard culinary layouts.

Rounded wooden bowls and arched wall shelves offer a gentle contrast to rectangular backsplash tiles. Placing curved ceramic items on exposed shelving creates depth without taking up valuable prep space. Subtle shapes shift the mood of a cooking area quickly.

Incorporating rounded kitchenware on counter corners keeps the room from looking overly structured. Soft outlines guide the eye naturally across work zones. Warm wood tones paired with rounded edges generate a cozy feel.

Creating Emotional Warmth Through Curved Design Elements

Architectural choices in room interiors direct how comfortable people feel while spending extended time in a home setting. A research paper revealed that curved interior shapes correlate with higher visual preference and positive emotional responses. Bringing rounded motifs into kitchen layouts helps create an inviting atmosphere.

Curved cabinet handles and arch-topped wall frames soften heavy overhead cabinetry. Swapping sharp geometric light fixtures for dome pendants instantly changes room dynamics. These small changes relax the visual flow of the workspace.

Displaying rounded cutting boards against backsplashes adds warmth and function simultaneously. Layering circular trays under oil bottles groups daily items neatly. Thoughtful geometry elevates simple kitchen décor effortlessly.

Selecting Statement Lighting To Define Prep Areas

Lighting fixtures serve as focal points above islands and dining nooks. Overhead lamps direct focus to functional zones while adding distinct style. Choosing materials like brushed brass or matte black adds personality.

Key lighting choices that improve visual balance include:

  • Pendant lights placed 30 inches above island counters.
  • Under-cabinet strip lights that illuminate dark prep spots.
  • Dimmable wall sconces that adjust mood during evening meals.

Layering different light sources creates flexibility throughout the day. Task lighting assists during cooking, and softer ambient fixtures help guests relax. Balanced illumination makes prep work easier and safer.

Building Emotional Connection Through Intentional Interior Logic

Decorative decisions go far deeper than simple surface choices when planning a home cooking environment. A recent study noted that design logic hidden beneath superficial features serves as the key to emotional resonance in space. Organizing display pieces intentionally gives a room meaningful purpose.

Selecting items that tell a personal story makes meal preparation feel grounded. Displaying vintage recipe cards in matching wall frames turns family history into daily art. Curated displays build an authentic atmosphere across empty wall spaces.

Arranging cooking tools according to frequency of use improves daily flow. Matching visual style with functional needs yields a balanced room. Smart spatial logic creates a comforting room environment.

Introducing Natural Textures With Wooden Accents

Natural wood brings organic warmth into bright tiled kitchens. Raw timber shelves break up continuous runs of painted cabinetry. Wooden salad bowls and butcher blocks add rich textures on polished granite.

Open shelving offers places to showcase everyday crockery alongside potted herbs. Combining light oak tones with white subway tiles offers contrast. Stacking cutting boards vertically against a tile wall fills empty corners nicely.

Unfinished wood surfaces develop character over years of daily kitchen use. Rustic accents soften modern stainless steel appliances. Natural materials make large prep spaces feel grounded and relaxed.

Displaying Curated Artwork Above Counter Spaces

Art pieces transform kitchen walls into expressive visual displays. Framing colorful food illustrations or nature prints brings creative energy to blank walls. Hanging art away from direct splash zones preserves frames.

Choosing uniform frame finishes creates a clean gallery appearance. Mixing floating frames with traditional matting adds dimension across wall layouts. Smaller art prints fit perfectly on narrow shelf edges.

Rotating prints seasonally keeps the cooking area feeling fresh. Wall art gives family members points of interest during daily meal preparation. Personal displays make functional rooms feel complete.

Using Color Palette Variations To Create Depth

Strategic color choices change how open or cozy a culinary space feels. Muted sage green cabinets pair nicely with warm brass hardware. Deep navy accents anchor bright marble countertops effectively.

Two-tone cabinet layouts divide room height and add visual interest. Lower dark cabinets ground the space, leaving upper units light to maintain openness. Accent paint on an island base creates a central focal point.

Small colorful accessories like ceramic jars bring life without permanent commitment. Repeating key colors across kitchen towels and rug runners unifies the layout. Thoughtful color accents elevate basic room designs.

Refreshing a cooking environment requires simple visual adjustments that reflect personal taste. Small updates to wall art, lighting, and natural textures make daily meal preparation far more rewarding.

Focusing on clean layouts and warm details creates a welcoming hub for family gatherings. Every thoughtful detail contributes to a space that feels comfortable every day of the week.

Comparing Food Cultures Around the World

Food tells you more about a place than almost anything else. The way a country eats, what shows up on an everyday table versus a celebration table, how meals are shared or eaten alone, all of it carries history in a way that is easy to taste and harder to explain. Travelling with an appetite for this kind of detail changes how a trip feels, because suddenly the food is not just fuel between sightseeing stops, it is the story itself.

Germany: Regional, Layered, and Underrated

German food culture gets flattened into sausages and beer in most people’s minds, but the reality is far more regional and varied than that reputation suggests. Bavaria eats differently from Hamburg, and both differ again from what shows up in Berlin, where decades of migration have folded Turkish, Vietnamese, and Middle Eastern influence into the city’s everyday food scene.

Anyone spending real time in the capital notices this mix fast. Wandering through restaurants in Berlin makes the point better than any description could, since a single street can move from a currywurst stand to a Vietnamese pho spot to a Turkish bakery within a few minutes.

Italy: A Meal Built Around Time

Italian food culture treats the meal as an event rather than a task. Lunch can stretch well past an hour, courses arrive slowly, and the table is where the day actually pauses. Regional differences matter enormously here too, a plate of pasta barely resembles what shows up two regions over, and locals take that distinction seriously.

What stands out most is how little rushing there is. Even a simple weekday lunch tends to include more than one course, and skipping bread or wine can feel like skipping a step nobody told you was optional.

Japan: Precision as a Form of Respect

Japanese cuisine treats presentation and technique as inseparable from flavour. A bowl of rice, cut vegetables, or a piece of fish is handled with a level of care that looks almost ceremonial to an outsider, yet for the cook it is simply the standard. Seasonal ingredients drive the menu far more than personal preference does, so what you eat in April looks nothing like what shows up in November.

This attention to detail extends to eating too. Meals are often quieter, more deliberate, and structured around balance rather than abundance, which is a sharp contrast to cuisines built around big, generous portions. Nothing on the plate feels like filler, and even a modest bowl of rice earns its place through the effort behind it.

Mexico: Bold Flavour and Shared Tables

Mexican food culture leans into contrast, heat balanced against sweetness, crunch against something soft, all stacked into a single dish. Corn, beans, and chilies form the backbone of most regional cooking, but the variation between states is significant enough that two versions of the same dish can taste like entirely different meals.

Here, people rarely eat meals alone by choice. Food is a reason to gather, and street food culture in particular turns eating into something social and constant throughout the day rather than confined to three sittings. Even a quick lunch tends to involve more than one person and more than one dish passed around the table.

What Comparing Cuisines Actually Teaches You

Putting these food cultures side by side is less about ranking them and more about noticing what each one prioritises. Germany protects variety within its own borders, Italy protects time, Japan protects precision, Mexico protects connection. None of it is universal, and that is exactly the point.

Eating with this kind of attention turns a trip into something closer to a conversation with a place, rather than a checklist of dishes to photograph and move past. The next best thing to standing in one of these kitchens is trying to recreate a little of it at home.

What I Wish I Knew About Restaurant Management Before Opening My Kitchen

When I first started cooking professionally, all I thought about was the food. The flavors, the plating, the way a dish came together after hours of testing and retesting a recipe. Nobody warned me that running a kitchen, even a small one, would eventually mean spending just as much time managing operations as I spent cooking. It took a few chaotic dinner services before I realized that a good restaurant management system is not a luxury for big chains. It is something every kitchen, no matter how small, eventually needs.

The Moment Everything Clicked

There is a specific memory that sticks with me. It was a Saturday night, the dining room was full, and our old method of scribbled tickets and shouted orders across the kitchen completely fell apart. Two tables received the wrong dishes, one order never made it to the kitchen at all, and by the end of the night I was more exhausted from the chaos of managing service than from the actual cooking.

That night pushed me to look into a proper restaurant management system, and it genuinely changed how I run my kitchen. Instead of relying on memory, handwritten notes, and a lot of hoping for the best, everything from orders to menu updates now flows through one organized system.

Why Passion Alone Is Not Enough

I think a lot of cooks, especially those of us who came into this industry because we love food, resist the idea of “management systems” because it sounds corporate and cold. It sounds like something that takes away from the creativity and heart of cooking. But I have come to see it differently. A good system does not replace passion. It protects it.

When orders are accurate and organized, I spend less time putting out fires and more time actually cooking with intention. When menu changes update instantly across the dining room instead of requiring a scramble to inform every server, I spend less time correcting mistakes and more time perfecting dishes. The system does not compete with my creativity, it gives that creativity room to breathe.

What a Restaurant Management System Actually Solves

For anyone who has not looked into this kind of tool, it can be hard to picture exactly what it does beyond the vague idea of “organizing things.” Here is what it looked like in my own kitchen once we made the switch:

Orders stopped getting lost. Every order placed by a guest, whether through a server or a self ordering QR menu, goes directly into the system and straight to the kitchen. No more relying on someone remembering to relay a ticket during a busy rush.

Menu updates became instant. If we run out of an ingredient mid service, I can mark that item unavailable in seconds, and it disappears from every guest’s menu immediately. No more apologizing at the table because the printed menu still listed something we could not make.

Staff communication improved. Instead of shouting across a loud kitchen or hoping a note taped to the wall gets noticed, updates and order details are visible to everyone who needs them, right when they need them.

Reporting became clearer. I can actually see which dishes are selling well, which ones are being ordered less often, and where guests tend to spend the most time browsing before ordering. This kind of insight used to be a complete guessing game for me.

Learning to Let Go of Old Habits

Honestly, the hardest part of adopting a management system was not the technology itself. It was letting go of habits I had relied on for years, even when those habits were clearly not working well anymore. There is a strange comfort in doing things the way you have always done them, even when it means extra stress and avoidable mistakes.

Once I got past that initial resistance, the transition was surprisingly smooth. The system itself was intuitive enough that my staff picked it up within a single shift of training. Guests adapted just as quickly, especially since many of them were already used to scanning codes for menus at other restaurants they had visited.

The Ripple Effect on the Whole Kitchen

What surprised me most was how much a management system improved things that had nothing to do with technology at all. Staff seemed less frazzled during busy shifts. Guests seemed happier because their orders came out correctly and on time. Even my own mood improved because I was not constantly firefighting avoidable problems every single service.

There is something deeply satisfying about walking into a busy Friday night knowing that the system running in the background is catching details that used to slip through the cracks. It let me focus on what I actually love, which is developing recipes, training my team, and creating an experience guests want to come back for.

Advice for Anyone Starting Out

If you are early in your journey running a kitchen, whether it is a full restaurant or a smaller food business, my honest advice is to not wait as long as I did to get organized. It is easy to assume that management systems are only necessary once a business grows large, but the truth is they help just as much, if not more, when you are small and every mistake feels bigger because resources are tighter.

Cooking will always be the heart of what we do. But the businesses that last, and the cooks who manage to keep their passion alive without burning out, tend to be the ones who build strong systems around that passion early on. It is not about becoming less of a chef and more of a manager. It is about giving yourself the structure to keep doing what you love without the constant chaos threatening to pull it apart.

Looking back, I wish someone had told me this on day one instead of letting me learn it the hard way through a string of stressful Saturday nights. If you are on the fence about whether a management system is worth exploring for your own kitchen, take it from someone who resisted the idea for far too long. It is worth it.