The kitchen has always been the heart of the home. But what if that heart is a bit smaller than usual? Thanks to modern technology, small kitchens can still deliver a big flavor. One of the prime examples is the benchtop convection oven.
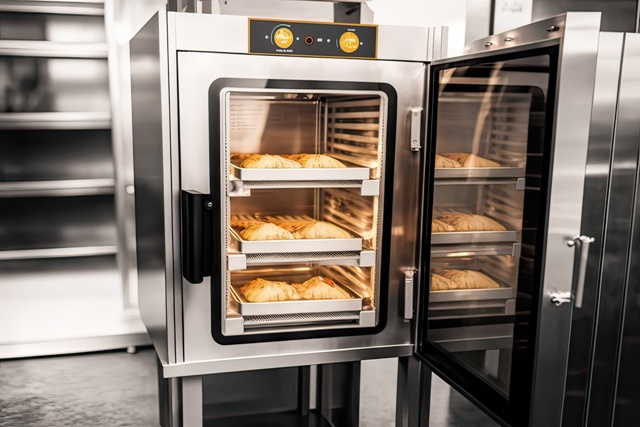
This underdog doesn’t just make do – it dazzles. Picture it: big flavors, minimal space, and no compromise on quality.
With a benchtop convection oven, you don’t need a sprawling kitchen or a fancy range to whip up mouthwatering meals. All you need are the right tools and a few insider tips to turn that compact space into a flavor-packed paradise. Ready to discover how? Dive in.
For those looking to invest in one, order convection ovens from reputable brands to ensure quality and longevity.
Know Your Oven’s Features
Start by exploring those nifty features of your benchtop convection oven. This isn’t just about flipping a switch and hoping for the best. Understanding what your range brings to the table can change your cooking game entirely
Here are the basic features of a benchtop convection oven:
- Pre-Set Cooking Modes: Many ranges come with these built-in helpers. Dive into your manual and get acquainted with these. They’re like having a chef whispering in your ear, ‘Try this setting!’
- Temperature Ranges: Every oven is unique. Some might heat up faster or have higher maximum temperatures. Play around and see how your oven responds. Knowing its temperature quirks will save you from any unexpected meal mishaps.
- Timers And Alerts: Don’t rely on guesswork. Use the built-in timers and alerts. They’ll give you a heads up when your food is just right, helping you avoid the dreaded burn or undercook.
Your oven is more than a box that heats up. It’s a tool with features designed to make your culinary adventures a success. Spend some time, get to know it, and let it work its magic in your kitchen. After all, a chef is only as good as their tools.
Rearrange Your Oven
Everyone’s probably been there—pulling out a dish only to find one side perfectly cooked and the other not so much. In a benchtop convection oven, the size makes every inch crucial. Here’s the deal on how to ensure an evenly cooked meal every time:
- Start At The Right Spot: When placing your dish in the oven, don’t just shove it anywhere. Aim for the center. It’s the sweet spot where heat circulates best.
- Rotate Midway: Got a baking tray full of cookies or a juicy roast? Give it a spin halfway through the cooking time. Think of it as giving each side its time in the spotlight.
- Shift Levels: Some ovens have multiple rack heights. Try moving it up or down a level if you’re cooking more than one dish or if one side is browning too fast.
Your benchtop convection oven is mighty, but giving it a helping hand ensures you get the delicious results you aim for.
Utilize The Convection Feature
So, you’ve got this fancy convection feature on your benchtop oven. It’s not just there to sound high-tech. That feature can change the game for your cooking. Here’s why and how you should make the most of it:
- Even Cooking: The convection setting is all about the fan. This little powerhouse circulates hot air throughout the oven. No more burnt edges with a still-frozen center, cooking your dishes more evenly and consistently.
- Faster Cooking Times: Time’s ticking, and you’re hungry. Good news! With the convection setting, dishes often cook faster. So, next time you’re in a rush, this feature can be your secret weapon to get dinner on the table quicker.
- Perfect For Certain Foods: Some dishes just turn out better with convection. Think crispy-skinned roast chicken, flaky pastries, or those cookies you’ve been craving. The circulating air gives these foods the perfect texture.
But here’s a heads up. Because it cooks faster, you’ll want to keep an eye on your dish the first few times you use the convection setting. Maybe set the timer a few minutes less than the recipe suggests, just to play it safe.
Keep It Clean
A clean oven isn’t just a pretty sight; it’s essential for top-notch performance. The residue from cooking can affect temperature consistency and impart unwanted flavors to your dishes. Here’s how to keep things spick and span:
- Daily Wipe-Downs: After using your oven, wait for it to cool down. Wipe the interior with a damp cloth to catch any spills or splatters.
- Weekly Deep-Cleans: Set aside time each week for a more thorough cleaning. Avoid harsh chemicals, as they might leave residues that can affect the taste of your food.
- Empty The Crumb Tray: If your oven has a crumb tray, make it a habit to empty it regularly. This reduces the risk of smoke or even minor fires.
Remember, a tidy oven isn’t just about appearances. It’s a crucial step to ensure every dish you whip up is cooked to perfection. You’ve got the power to make your kitchen shine, both in cleanliness and culinary delights!
The Takeaway
Benchtop convection ovens might be small, but they pack a punch in flavor delivery. So, embrace that compact cooking wonder, and let it surprise you with its capabilities. Whether you’re whipping up a quick dinner or experimenting with a new recipe, remember these hacks and let your little kitchen leave a big impression.