Home Blog Page 42

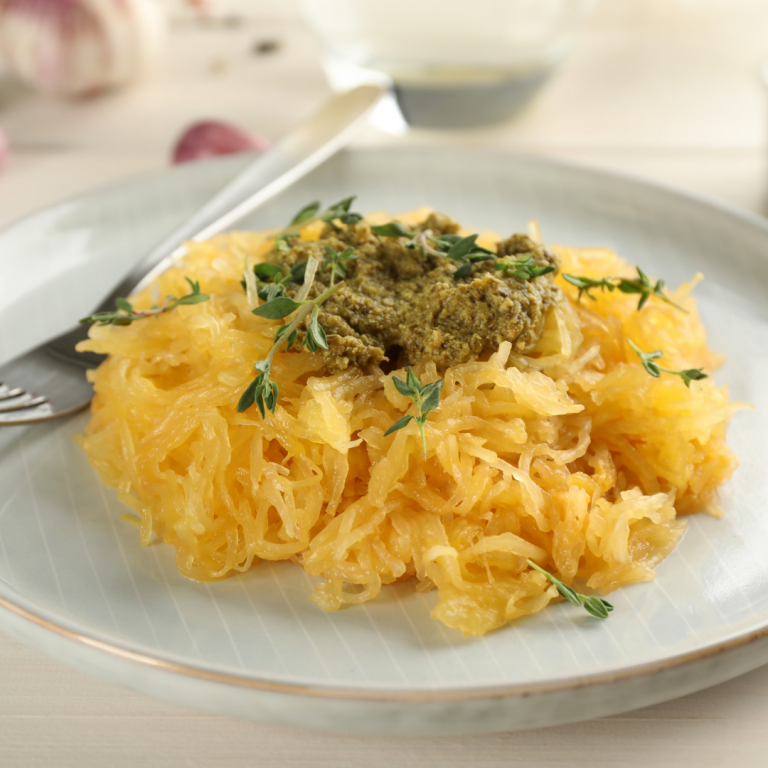
Spaghetti Squash with Avocado Walnut Pesto

0

A healthy way to replace classic pasta with vegetable pasta!

The recipe for squash spaghetti with pesto is delicious, easy, and quick to make. These vegetables have a low-calorie content, have a lot of water in their composition, which leads to a rapid feeling of satiety, are a good source of potassium, and do not contain saturated fats.

Fresh, healthy, refreshing, fast – these are just some reasons I recommend you try this recipe. It’s perfect for a healthy and light dinner! The combination of avocado and nuts makes a great pesto that fits perfectly with spaghetti squash pasta.

Nutrients in this recipe

Spaghetti squash is rich in fiber and, at the same time, provides a nice balance of healthy carbohydrates, vitamin C, vitamin B6, and manganese. It also has a lot of very beneficial carotenoids and other antioxidants that fight free radicals. The name of the vegetable comes from the resemblance to spaghetti. If you pull the pumpkin pulp with a fork, long threads are formed, just like spaghetti.

Many people avoid eating nuts because of their high fat and calorie content, but they are very healthy. Studies show that walnuts contain: healthy fats, antioxidants, many vitamins, and minerals. They have a high omega 3 fatty acids content, plenty of fiber, and healthy fats. The rich content of Omega 3 helps maintain heart and brain health and lowers bad cholesterol, reduces inflammation, improves blood flow, and prevents breast cancer.

Avocado does not contain cholesterol and salt and is low in saturated fat. Instead, the “good” fat content plays several essential roles in the body. When you eat healthy fats, your brain receives a signal to stop your appetite. In addition, constant consumption of good fats, such as those in the composition of avocado, slows down the breakdown of carbohydrates and thus keeps blood sugar levels within normal limits.

Peas have an impressive nutritional profile. This food contains quite a few calories; at 1 cup consumed, you only assimilate 62 calories. About 70% of these calories come from carbohydrates, and the rest are from protein and a small amount of fat. In addition, peas contain many vitamins and minerals but also a significant amount of fiber.

Peas are essential food for the proper functioning of the body, especially since it is an essential source of protein. For example, 1 cup of cooked carrots contains 1 gram of protein, while the same amount of peas contains 4 times more protein.

Like other adaptogenic plants, basil can help regulate the body’s rhythm. It is a plant with a calming effect, but not how lavender works, immediately relaxing. Basil helps the body regulate its response to stressors, bringing stability, peace, and calm. Studies have shown that basil can counteract metabolic stress by stabilizing blood sugar levels.

Garlic is a very popular natural remedy, thanks to its therapeutic properties. It is used to flavor culinary preparations and fights against digestive problems caused by intestinal parasites. In addition, garlic is known for its ability to fight infections and its role in keeping blood pressure under control.

Spaghetti Squash with Avocado Walnut Pesto

Necessary equipment:

  • a spoon to scoop out the seeds
  • an oven-proof baking dish
  • a fork
  • medium pot
  • a food processor

Ingredients:

  • 1 medium spaghetti squash
  • 2 cups of filtered water
  • 1 large avocado
  • 1 1/2 cup of green peas (can be frozen)
  • 6 garlic cloves
  • 1/3 cup of chopped walnuts
  • 1/2 cup of freshly chopped basil
  • 1/2 t. of black pepper

Instructions:

  1. Preheat the oven to 350°F (176°C).
  2. Wash and cut the spaghetti squash in half lengthwise.
  3. Use a spoon to scoop out the seeds and pulp from the inside.
  4. Place the halved squash in a large oven-proof baking dish (cut side down) and fill it with water up to 1/8 inch.
  5. Bake in the oven for about 40 minutes. Check with a fork if the spaghetti squash is soft by slowly poking it.
  6. Take the dish out of the oven, set the squash cut side up. Set aside to cool down for at least 5 minutes.
  7. Use a fork to rake the flesh of the squash, creating spaghetti noodles.
  8. Bring a pot with 1 cup of water to a boil, add the peas and cook them for about 10 minutes.
  9. Meanwhile, peel and remove the avocado’s seed. Roughly cut it.
  10. Peel garlic cloves and dice them finely.
  11. Add the avocado, chopped walnuts, basil, garlic cloves, and black pepper to the bottom of a food processor. Pulse until the texture is smooth (you should still be able to see walnut crumbles).
  12. Serve the spaghetti squash covered with peas and avocado-walnut pesto.

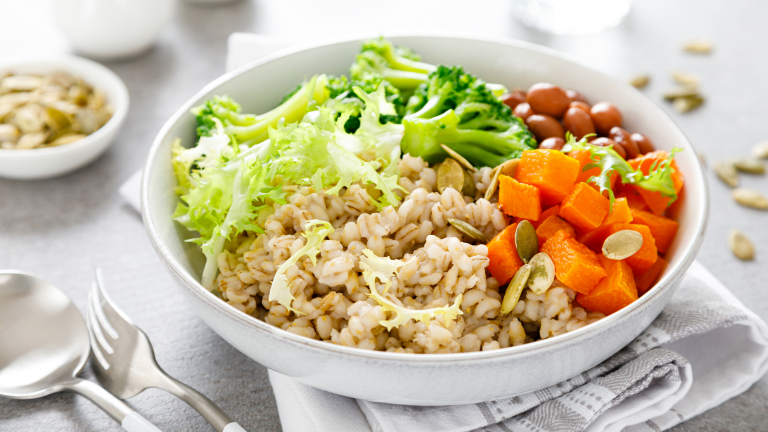
Italian-style Broccoli Bean Salad with Barley

Food waste is a bigger problem than we can imagine. Discarded food rots and produces greenhouse gases. In other words, throwing away food contributes to climate change.

A golden rule to combat food waste is to use all the ingredients and foods, even in leftover dishes from dinner, which can be easily integrated into new food combinations for a delicious lunch at the office.

For this recipe, I did a short check of the refrigerator and pantry, so I chose to bring to life some foods—the outcome? A delicious salad with broccoli, beans, and barley.

Nutrients in this recipe

Barley is an essential source of both soluble and insoluble fiber, to a greater extent than oats or wild rice. Many studies have shown that one of the components of barley – beta-glucan, is a soluble fiber that is thought to have beneficial effects on blood cholesterol levels. Fiber helps prevent intestinal disorders and feeds the so-called “healthy bacteria” inside gout.

Broccoli – if you want to give your body plenty of vitamins, minerals, and antioxidants, then choose to eat broccoli constantly. In addition to being an essential source of nutrients necessary for iron health, experts say that this green vegetable has several proven therapeutic properties.

I know many people who can’t eat broccoli. However, I still think they stopped at a simple bunch boiled with olive oil and salt. For this reason, they will keep their repulsion towards this superfood despite all the possibilities of preparation and the many benefits it offers. Still, I have a whole list of recipes, including this one.

Pinto Beans – you can tell by the tiny spots, usually reddish-brown, all over the grain. After boiling, these spots disappear, the grains acquiring a pinkish hue. It is a bean low in fat and rich in protein and fiber. Originally from Mexico, it has a more pungent taste, being used primarily in spicy food. A cup of boiled beans contains up to 15 grams of fiber, about 60% of the recommended daily dose.

I have used canned Pinto beans for this recipe, but you can also use the regular dry one. If you choose to use the dry beans, soak them overnight. Boil the beans in plenty of water for at least 1 hour. If the water drops, add hot water. Do not add salt while the beans are boiling!

Italian-style Broccoli Bean Salad with Barley

Necessary equipment:

  • a large stockpot
  • a medium stockpot
  • a strainer
  • a medium skillet
  • a slotted spoon

Ingredients:

4 servings

  • 2 cups of barley grains
  • 2 1/2 cups of water
  • 1/2 teaspoon of Kosher salt
  • 2 cups of broccoli florets
  • 2 teaspoons of extra-virgin olive oil
  • 1 teaspoon of red pepper flakes
  • 1 teaspoon of dried oregano
  • 1/2 teaspoon of garlic powder
  • 1/2 teaspoon of cayenne pepper
  • 1 cup canned pinto beans
  • 2 cups Iceberg lettuce
  • 1 medium carrot
  • 2 tablespoons lemon juice
  • 1 teaspoon of raw pumpkin seeds

Instructions:

  1. Rinse barley grains under cold water and drain them well.
  2. Pour 1 1/2 cup of water into a large stockpot and bring to a boil. Add the barley grains and leave to simmer for about 10 minutes. When the barley has cooked, drain and set it aside.
  3. Fill a medium stockpot with water, add a pinch of salt and bring to a boil over high heat. Meanwhile, cut the broccoli florets, then chop them so that they are as small as a sip. Rinse well under running cold water.
  4. Cut the stem in half, then slice them thinly. Then, when water starts to boil, use a slotted spoon to lower the broccoli into the water.
  5. Let it cook for about 3-4 minutes or until it softens – you should be able to easily insert the tip of a knife into the broccoli florets.
  6. Drain over the sink with a strainer, then let the steam out for about a minute.
  7. Add the olive oil to a skillet over medium heat.
  8. Add in the broccoli and all the seasonings. Stir and cook for about 5 minutes.
  9. Drain beans and rinse them well under cold water.
  10. Use a very sharp knife to shred lettuce in long pieces about 0.12 inches.
  11. Finely chop the carrot.
  12. Add the cooked barley and broccoli, beans, shredded lettuce, and chopped carrot in a large bowl.
  13. Drizzle everything with some lemon juice and top with pumpkin seeds.

Peach Cobbler with Buttermilk Biscuit Topping and Cinnamon

You might have seen my classic recipe for peach cobbler already. That peach cobbler is exactly what my mom used to make for family dinners and I love it for its nostalgic taste. Instead of covering the fruit with batter, I do the opposite. I put the batter on the bottom, place the fruit in the middle, and let the batter rise in the oven so that it covers up the peaches. The results taste delicious with a unique twist on the classic cobbler recipe.

A person who has read the recipe suggested making the same peach cobbler but with a buttermilk biscuit layer on top. I thought it was a wonderful idea and immediately decided to try it out since I also have a great recipe for buttermilk biscuits. Curious about the results? Read on to find out how it turned out!

I added cinnamon on top which elevated the taste to another level of deliciousness. If you’re a fan of cinnamon like me, I highly recommend you try it out.

I love planning my meals in such a way that I can use the same ingredients twice. For example, I cook rice for dinner on Tuesday, but I make a larger than usual batch. I then put the leftover rice in the fridge and make fried rice the next day. Less effort, more meals! These buttermilk biscuits are exactly the same. I needed to bake some for dinner anyway so I simply did twice as many at once. We ate half of it on one day and the other half was used to make this variation of a peach cobbler.

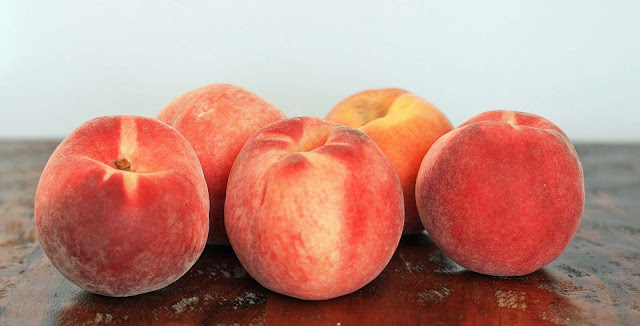
This cobbler had great timing, too! Peaches are in season right now so you can get them for very cheap. I like to buy a lot of peaches at once so that I can can them and enjoy them later when they’re hard to come by at the grocery store.

Items needed:

  • measuring cups
  • large bowl
  • pastry blender
  • wooden spoon
  • kitchen towel
  • large baking dish
  • cooling rack

Ingredients:

peach filling:

4 cups of peaches

1 cup of whole cane sugar

1 T. of lemon juice

1/2 cup of water

1 t. of vanilla extract

1 t. of cinnamon

buttermilk biscuit topping:

2 1/2 cups of freshly ground flour (how to make sprouted flour)

6 T. of butter (around ¾ of a stick) (how to make butter)

1 cup of buttermilk (how to make buttermilk)

1/4 cup of whole cane sugar

2 t. of baking powder

1 t. of sea salt

1/2 t. of baking soda

1 t. of cinnamon

1 t. of vanilla extract

Biscuit dough:

  1. Combine flour and butter in a large bowl. The butter should be cut into small cubes. The easiest way to do it is to use a pastry blender but you can also you forks or fingers.
  2. Once done, pour in the buttermilk and stir everything with a wooden spoon until combined.
  3. Let the mixture sit in a warm place for 12-24 hours. Cover the bowl with a breathable dish towel. If you don’t have a warm space in your house, you can also use the over set to a low temperature (around 80 degrees).
  4. After the necessary time has passed, add the whole cane sugar, baking soda, baking powder, salt, cinnamon, and vanilla extract to the mix. Stir all the ingredients until combined.

Peach filling:

  1. Blanch the peaches in boiling water and rinse with cool water to make them easy to peel. Remove the pit and slice into smaller pieces.
  2. Turn the stove to medium high heat. Simmer the peaches with whole cane sugar, water, lemon juice, vanilla, and cinnamon for about 8 minutes.

How to make buttermilk peach cobbler:

  1. Preheat the oven to 350 degrees.
  2. Cover your baking dish with butter to make sure the cobbler doesn’t stick to its surface.
  3. Pour the peach filling on the bottom in a nice even layer.
  4. Now carefully put the biscuit dough on top of the fruit layer, covering all of it.
  5. Bake the cobbler for around 35-40 minutes. You will know the cobbler is done when you can see the peach filling bubbling and the biscuit dough will start to become brown on the surface.

Enjoy your buttermilk peach cobbler!


How To Wash Produce with Apple Cider Vinegar

It’s very important to wash produce with apple cider vinegar if it’s non-organic. Did you know that apples are the most pesticide-covered fruit out of everything you can normally find at a grocery store? Unfortunately, not many people are aware of that. The full list of these products can be found here. Be careful, it’s really mind-opening!

To avoid ingesting harmful substances with our fruit and vegetables, we should always look out for products marked as ‘organic’. Organic produce was grown and harvested without the use of any pesticides, wax, and other substances that are potentially detrimental to our health. Buying organic is sometimes a little bit more expensive but for the sake of our bodies, we should choose quality over quantity. Fruit and veggies are supposed to be healthy so let’s make sure they really are so.

Personally, I always go shopping with my list of the worst produce when it comes to pesticide use. I check which fruit and vegetables are the most dangerous and then work within my budget to purchase organic versions of these produce.

How can we make Non-organic Produce Healthy Again?

Organic produce is not always available or you simply don’t have the money to afford it. So is there anything you can do to make the non-organic versions healthy again? Yes! That (among many other things) is why we wash produce with apple cider vinegar. It’s not as good as buying fully organic but serves as a good substitute if you are forced to choose non-organic produce. I wash my non-organic items with apple cider vinegar fairly often and I think it really makes a difference! And don’t worry, your fruit won’t smell or taste like vinegar afterward.

Having a bottle of the best apple cider vinegar at home really comes in handy. Other than washing produce, you can use it as a salad dressing, in cooking, as a natural cosmetic & supplement, or to make your own cleaning detergent. Preferably, you should use raw vinegar as it’s the healthiest and the most natural kind.

Needed items:

Directions:

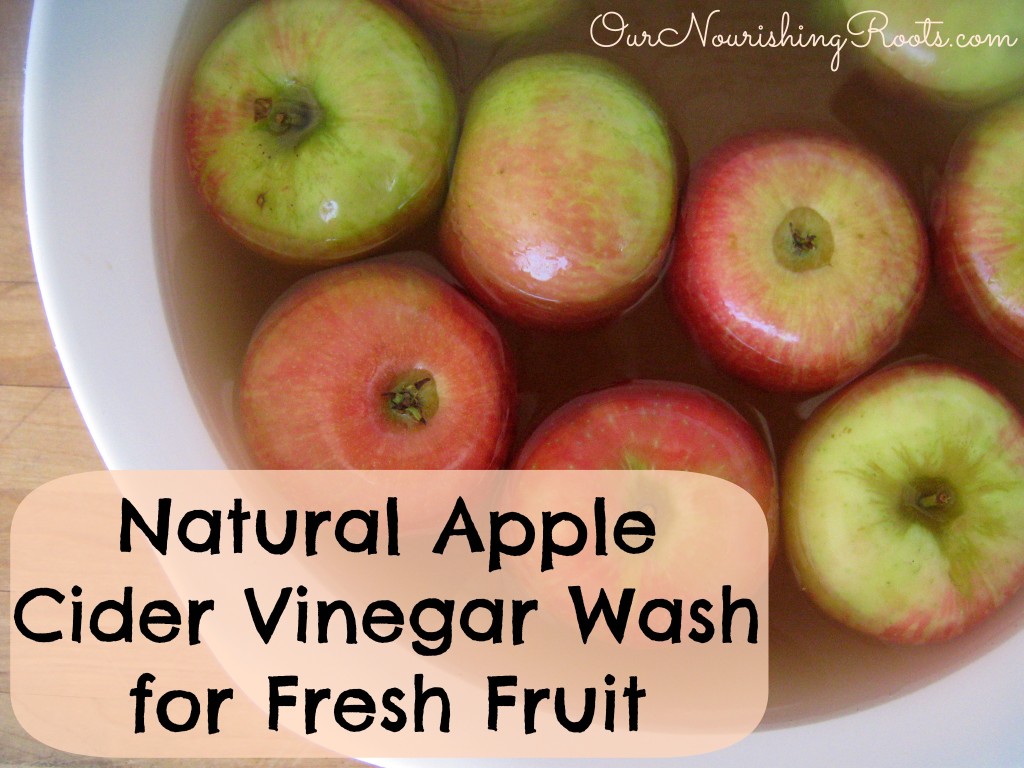
  1. Place the produce you want to cleanse at the bottom of your bowl and fill it with water until the produce is fully covered.
  2. Add apple cider vinegar to the water. Leave the produce immersed in the mix for about 15 minutes. Turn the produce every few minutes to make sure that you get all the sides clean. You can cover the mixing bowl with a plate to further increase the cleansing effect.
  3. After 15 minutes, drain your produce and rinse thoroughly with clean water. Congrats, now you can enjoy the healthiest non-organic produce possible!

The Dangers of “Fat Hatred”

Have you ever heard about “fat hatred”? I suppose many people have, especially people who have struggled with body imaged and their own body fat.

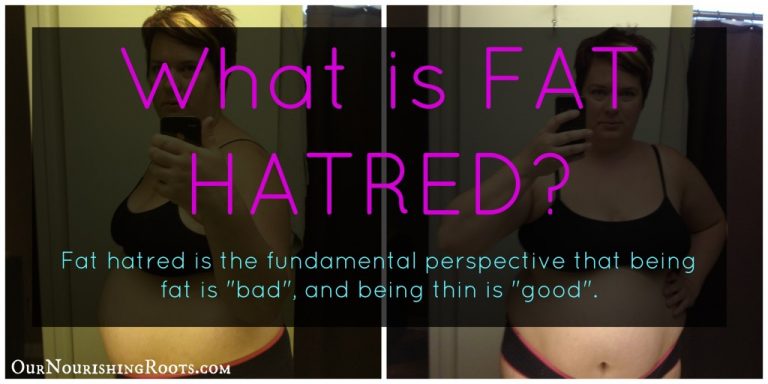
Fat Hatred

People tend to think that if somebody is fat then there is something wrong with that person. That feeling of hating somebody’s fat, even if it’s your own, is irrational. It comes from this ingrained way of thinking that f_at people are people who have let themselves go and who need to be specifically told to eat less and to exercise. F_at people know they’re fat, there is no need to point that out. But we still feel entitled to judge them for how they look, even if we have no idea of that person’s health history or personal struggles.

We hear all the time about different public campaigns that are supposed to make Americans thinner and healthier. Public officials and celebrities like Jamie Oliver try to introduce programs that would reduce the rate of obesity in the United States. However, they are not aware of the fact that these campaigns are the cause of fat hatred.

Society and Fat Hatred

Fat hatred results in a distorted body image. We learn that fat = bad, so we start to hate every bit of it, whether it’s our own fat or someone else’s. We simply cannot possibly associate being fat with being happy or being healthy. Do you remember this photo shoot of “Fat and Attractive” from Abercrombie & Fitch? It’s a good step in the direction of normalizing fat body shapes but judging by the reaction of people who saw the photo shoot, we still have a long way to go.

Is being fat unhealthy? Yes, a person who is morbidly ob_ese is not as healthy as a person with a regular BMI. But the same can be said about skinny people who hate their body fat to the point of becoming anorexic. Still, that kind of body type is not as heavily judged as being fat.

Fat Shaming

We condemn body shaming but we need to start doing the same for fat shaming. Fat shaming is when somebody criticizes another person for their heavier body shape. Have you ever heard someone say directly to a f_at person “You need to eat less”? That’s a classic example of fat shaming and I can swear to you that any f_at person has heard their share of this phrase. Do you think fat shaming is necessary for the f_at person in front of you to start exercising? Well, think again.

Fat shaming is not a good motivator at all. On the contrary, it actually can cause paralyzing fear and severe hatred of a person’s own body. Feeling ashamed of something makes you want to hide it but it doesn’t help you grow. A f_at person is more likely to start wearing loose clothes in order to somehow hide their weight instead of exercising. That’s because exercising would mean showing your vulnerable side in front of other people and most of us try to conceal our fat due to extreme fat hatred.

Some people speak out loudly against fat shaming which is of course a good thing. The not so good thing is that these people are later criticized. They are called lazy because instead of dieting they would rather want people to accept them as they are. They don’t try hard enough, they eat too many sweets and fast foods, they don’t care about their health. That kind of criticism comes from fat hatred.

F_at people are somehow abnormal and they should simply become thin so that they fit in with the rest. We don’t see them as real people with feelings. We feel free to comment on their appearance whether it’s directly in person or in the comment section of a Facebook post. After all, they did it to themselves so they deserve to be called out, right?

A Different Perspective

Melissa McEwan from Shakesville blog talks about exactly the same topic in her blog post. She herself is fat and she doesn’t feel afraid to admit it. She also says that in her case, becoming thin is simply not a possibility. And that’s perfectly fine. We should not shame her for something that she cannot change.

Jamie Oliver states that “Obesity is preventable.” She rejects that statement. In her own words:

“Fat people are not only tasked with finding individual solutions to systemic problems; they are, in many cases, asked to somehow overcome their very physiologies and make their bodies do things that they are simply unable to do.

We are literally asked to be people we are not.

That is eliminationist. Plain and simple.”

Just like Melissa, I am also what most people would call fat. I was always a chubby kid but what really cemented my body type was my pregnancy 5 years ago. Becoming fat is the price I had to pay to give birth to a healthy child. And I would do it all over again because I know there is nothing wrong with my body, even if other people might say otherwise.

Recently, I have started to slowly lose weight again. But it would still take me years to go back to what is considered a healthy body weight. In the meantime, I will be fat shamed again and again by people who think they can change me with their words.

I know I am fortunate. I have access to good and healthy food, I can afford to buy diet books and go to the gym, I have time to exercise. Even with all that, I am still fat.

So what about people who don’t have access to these privileges? They might want to lose weight but don’t have the means to do it. And no amount of fat shaming will change that.

EVERY BODY IS PERFECT

Yes, I am confident in saying that every body type is perfect. If you think you are fat and want to change that to feel healthier, that’s perfectly fine. As long as you are doing it for your own good and not for the good of other people. In the meantime, enjoy the journey and your body, no matter its shape.

That’s what being body positive means – accepting every pound of your body, whether it’s a pound of fat or a pound of muscle. It also means accepting everyone else’s body types. Feeling hatred all the time is exhaustive so get rid of it. Why do you care that person next to you on the bus is fat? Accept it and move on.

Is 3,000 Calories a Day Really a Lot?

I set out on my journey to become healthier and thinner over 60 days ago. I follow an established routine to achieve my goal. Many people have asked me what exactly do I eat during a typical day. They are always surprised at the number of calories I consume. I eat 3,000 calories a day and I am still losing weight. It might seem unbelievable, but I swear that’s what’s happening.

My typical day consists of meals that range from 2,500 to 3,000 calories. It depends on how hungry I am on this particular day. In this post, you will see an overview of what I eat on a day after doing an exhausting training session – this means, I was more on the hungry side. I need more energy to recover after lifting weights so it’s natural that my body craves more food, especially protein. I often eat protein-filled snacks right after the training or the following day.

In this post, you can see what is my menu for today. Take notice that this is the day after weight training. The listed amounts are all approximate as I do not measure every single thing I eat. I used to do so at the beginning but now I am confident that I can estimate these values correctly.

Breakfast filled with carbohydrates:

  • oatmeal (1/2 cup): 150 calories
  • whole milk (1 cup): 150 calories
  • cream (4 T.): 250 calories
  • 1 serving of berries: 50 calories
  • maple syrup (4 T.): 200 calories
  • strawberry milk kefir (1 cup): 170 calories

Breakfast: 970 calories


Large Lunch:

  • panini with turkey, cheddar, mustard, and lettuce (1 sandwich, 2 oz. cheese): 650 calories
  • mashed potatoes and cheese (2 cups): 250 calories
  • milk (1 cup): 150 calories
  • two cookies: 200 calories

Lunch: 1250 calories


Liquid snack: 

chocolate milk

  • milk (2 cups): 300 calories
  • chocolate sauce (6 t.): 100 calories

For more options, check out my snack recommendations.

Snack: 400 calories


Vegetarian dinner: 

  • herb salad with celery and carrots (2 cups, 1 stalk celery, 1 carrot): 50 calories
  • blue cheese (2 oz.): 200 calories
  • homemade dressing (4 t.): 150 calories

Dinner: 400 calories

Day total:  3020 calories

I try to decide my menu based on advice from Matt Stone. His Diet Recovery ebook has helped me immensely to establish my own eating routine. He has some other helpful publications that can be found in the Metabolism Bundle.

Matt Stone also does one-on-one consultations that I recommend to everyone. There is nothing better than having a professional take a look at your life and give individual advice regarding living a healthy life. Reading articles like mine is good but it doesn’t replace a real-life consultation with an expert. There are also other professionals available besides Matt. If you need help with resolving anxiety, stress, or have fertility concerns that need to be addressed, you should try and reach out to one of them.

Getting Rid of Headaches with Essential Oils – The Guide

Headaches

There are numerous types of headaches and it’s sometimes hard to pinpoint exactly which one is troubling us at the moment. The headaches that occur on their own include cluster headaches, tension headaches, migraines, and migraines with aura. These are the most commonly occurring types of headaches. Other less common but still painful headaches include exercise headaches, stress headaches, or even sex headaches! These are caused directly by our actions and lifestyle.

Managing and alleviating these symptoms can be supported by innovative tools like the NeuroWrap Pulse, which combines targeted light therapy and Pulsed Electromagnetic Field (PEMF) therapy to provide relief for various types of headaches. Headaches can also be a symptom of another ailment – like a sinus infection, high blood pressure, or a brain tumor (Mayo Clinic). If your headaches are persistent and chronic, it might be worth it to get a proper check up at the doctor’s to rule out underlying diseases.

gap

But no matter what the cause is, a headache is almost always painful and annoyingly difficult to get rid of.

Most people reach for an over-the-counter painkiller as soon as they feel a headache creeping up. And I’ll be the first to admit that medication is sometimes necessary if you’re experiencing unusually severe pain. But my general rule of thumb is that I try natural remedies first and pop a pill only if that natural remedy didn’t work. I’m not going to suffer needlessly just so that I can brag later about abandoning modern medicine completely! I sincerely believe in utilizing everything I have on hand to find the most efficient solution possible.

For example, I won’t choose to take paracetamol if I have a mild headache that can be treated with some rest, a pinch of salt, or a few drops of the right essential oils. Painkillers can bring temporary relief but that relief comes at the cost of potential side-effects and weakening your body’s response to pain. In fact, overuse of pain medication has been proven to sometimes lead to so-called rebound headaches. The cons simply aren’t worth the pros. However, if my headache is severe and doesn’t go away after trying my trusted natural remedies then I won’t refuse any modern medicine. Everything in moderation!

I want to share some of my knowledge about natural headache remedies so that hopefully, some of you can benefit from them too. In this blog post, I’ll focus specifically on essential oils – what they do and how they can be used to treat headaches.

Essential Oils

Essential Oils

So what even are essential oils? We tend to simply think of them as oils that smell nice.

That aroma actually comes from a natural source – the plant the essential oil is derived from. This means that lavender essential oil is made from a real lavender plant’s essence – that’s why it’s called “essential” oil. They are not an essential product in the sense that we need them to live. However, due to their health properties, they are often heavily utilized by those who value organic ingredients. Essential oils are all natural and there are no artificial fragrances in them. These highly concentrated liquids make it possible to benefit from the nature’s gift in an easy-to-use form.

Essential oils are generally extracted by distillation, often by using steam. Other processes include expression or solvent extraction. They are used in perfumes, cosmetics, soaps and other products, for flavoring food and drink, and for adding scents to incense and household cleaning products. (source)

Essential oils go by some other names as well. Volatile oils, ethereal oils, and aetherolea all carry the same meaning. If you see something called “oil of lavender” that also is the same thing as lavender essential oil. In fact, it’s very much possible that even if you have never consciously used an essential oil, you might have come into contact with some when buying organic food products or natural cosmetics.

It is difficult to list all of the benefits of using essential oils, but for the purpose of this post, I will give an overview of how they work in relation to headache treatment. Before I can start with oils, it is advisable that you seek expert help from ArabiaMD to understand which oil will suit you the best.

Peppermint Oil

The first essential oil I ever used was actually peppermint oil so I might be a little biased when saying that it’s a great natural remedy for headaches. But I can also confidently say that it’s the one that has the most consistently successful results among my friends that have tested it on themselves!

The first time I saw essential oils in action was when I was visiting my then-boyfriend’s family home. I had an awful headache that day, probably due to congestion in my sinuses. I was very apologetic to his parents because I felt like I wouldn’t make a good conversation partner. But his mother had none of it. She immediately brought me a bottle of peppermint oil, told me to lie down in the guest room, and apply two drops to each of my temple. I felt skeptical but did as I was told because I didn’t want to offend her. But I was very wrong to distrust her.

gap

Imagine my surprise when the headache started to subside after only 5 minutes! It didn’t do anything for my sinuses but the peppermint oil clearly helped me think more clearly and I was able to spend a fun afternoon with some of the nicest people.

Peppermint oil has been known for its headache-relief abilities and is even proven to help with tension headaches in some studies (source).

You can use peppermint oil like I did, i.e. by applying some to your temples. Other methods include putting a few drops in the bath or inhaling together with hot steam. Now, whether peppermint oil works for you depends on how your body will react to it and how strong your headache is. I highly recommend you give it a try, though!

Some people find peppermint oil to be too strong. In that case, try using spearmint oil instead. It has similar properties but a less overpowering aroma so it’s better suited for children.

Lavender Oil

Lavender oil is famous for its relaxing effects and is often utilized as a stress relief aid. I sometimes inhale some before bed so that it helps me fall asleep more quickly.

Lavender relaxes not only our minds but also our muscles. That’s why it’s great for treating headaches that are caused by stiff muscles in the neck and back, similar to tension headaches. The soothing oil eases our muscles and relieves tension. Many chronic migraine sufferers have also stated that regular lavender oil use has reduced the frequency of their headaches (but I don’t get a lot of migraines so I can’t vouch for that).

There are two main strains of lavender oil: the Lavandula latifolia (spike lavender) and Lavandula angustifolia (English lavender). The first one has a stronger aroma which is why I prefer it over the other (source).

Lavender oil can be applied on its own or as a part of an essential oils blend. Another popular use is for aromatherapy. Hanging a diffuser with lavender oil in it by your bed is a sure way to have a good night’s sleep.

Eucalyptus Oil

Eucalyptus oil is the perfect remedy for those headaches that are caused by sinus issues. If you have chronic sinus problems then you’ll definitely benefit from familiarizing yourself with this essential oil.

Eucalyptus oil is known for being able to open up nasal passages and help congested sinuses. This in turn helps with pain relief and soothing painful headaches. That’s why eucalyptus oil is an ingredient in many homemade vapor rub recipes. Research has also shown that eucalyptus oil is effective against tension headaches.

I usually apply eucalyptus oil directly to the spot where the headache is located. I also like to use in a homemade essential oil blend, usually together with peppermint oil and/or lavender oil. The aroma combination is just so soothing that it immediately makes all of my tension melt away.

There are several different strains of eucalyptus oil but the one I use most often is called eucalyptus globulus.

Rosemary Oil

Rosemary oil’s health properties include many other aspects besides headache relief. People have used it to treat various pain conditions since medieval times. Now it’s more known as a food seasoning but numerous research is starting to show its other benefits as well.

Rosemary contains analgesic and nervine:

an analgesic and nervine (a substance that strengthens, calms, and soothes the nerves) (source)

Rosemary oil is great at improving blood circulation so if you tend to have cold feet and hands then rubbing rosemary oil in them before bed can help with that. It also has anti-inflammatory properties and helps with stiff joints due to arthritis or lack of exercise. Inhaling rosemary oil vapors has been proven to show soothing effects and reduce stress.

For headache relief, apply rosemary oil to your temples and massage it in with your fingers.

Tea Tree Oil

Tea tree oil, also called melaleuca oil, hasn’t been researched thoroughly yet when it comes to headache relief so don’t put all of your hopes in it. The reports are conflicting and we still aren’t sure why it works for some people and not for others.

Rather than applying directly to the skin, tea tree oil has more uses in inhalation and aromatherapy. Try it the next time you experience a headache and test if you’re one of the lucky ones who benefit from tea tree oil. Be careful, however, because there are some reports (few but still) that tea tree oil can sometimes cause a migraine.

I included this oil in my list because I feel there is no harm in giving it a try. Tea tree oil has numerous other properties (all-purpose cleaner, sanitizer, insect repellent, etc.) so I think a lot of people interested in essential oils already have it in their inventory.

My recommendations:

There are plenty of essential oil brands on the market but they’re not all the same. Unfortunately, some makers try to deceive their customers by offering them dupes that have nothing to do with real essential oils. And if you’re buying them to use internally or on your skin then you really want something that works as it should! Search for the highest quality essential oils you can get to receive full benefits. You can see what my recommendations are here.

I am not affiliated with the brand but I am a long-time fan and customer. I assure you that these essential oils work wonders for me but remember to always test everything on your own body! Something that works for me doesn’t necessarily have to work for everyone.

And just as a side note, I need to mention the Desert Sage Herbs brand from Mesa. If you are a local from Arizona then I highly recommend you give their products a try. The staff there is very knowledgeable and they helped me a lot when I first started using essential oils.

gap

Young Living is one of the most recognizable brands of essential oils and they are known for their authentic products that adhere to stringent purity standards. Their production process is regularly monitored so that each small bottle contains only the highest quality essential oil. They are committed to providing their customers with only the best. You can be sure that their products are not only effective but also safe to use.

There are two ways of purchasing Young Living’s essential oils. You can do it through their website as a regular retail customer. However, you will be paying slightly more.

The way I recommend is joining Young Living as a Wholesale Member. By being a part of Young Living, you automatically get an amazing 24% discount on each item. To keep your discount you need to order a minimum of $50 a year which is really not a lot considering how many wonderful essential oils and other products Young Living has to offer.

The Premium Starter Kit – the best for any beginner essential oil user

Ordering the Premium Starter Kit gives you access to the aforementioned 24% discount for each product. So while the Premium Starter Kit costs over $300 for the retail price, with your Wholesale Member discount you can get it for half the price! It really is the best value kit Young Living offers.

What is inside?

The Premium Starter Kit contains the following:

  • 10 bottles (5 ml) of various essential oils that include lavender, peppermint, lemon, PanAway, Peace & Calming, Frankincense, Purification, Thieves, Valor and Joy, Stress Away
  • Aroma Glide roller fitment that allows you turn any oil into a roll on for easier application. If you suffer from chronic headaches, having a roll on peppermint oil in your purse can be a real life-saver
  • A home diffuser to hang somewhere at home
  • Sample packets you can share with your friends to introduce them to the benefits of essential oils. These include lavender, lemon, peppermint, Peace & Calming, and Thieves
  • Two 2 oz. NingXia Red samples that are great for those days you just have no energy for anything

I look forward to hearing your opinions about this Premium Starter Kit. I know you won’t be disappointed!
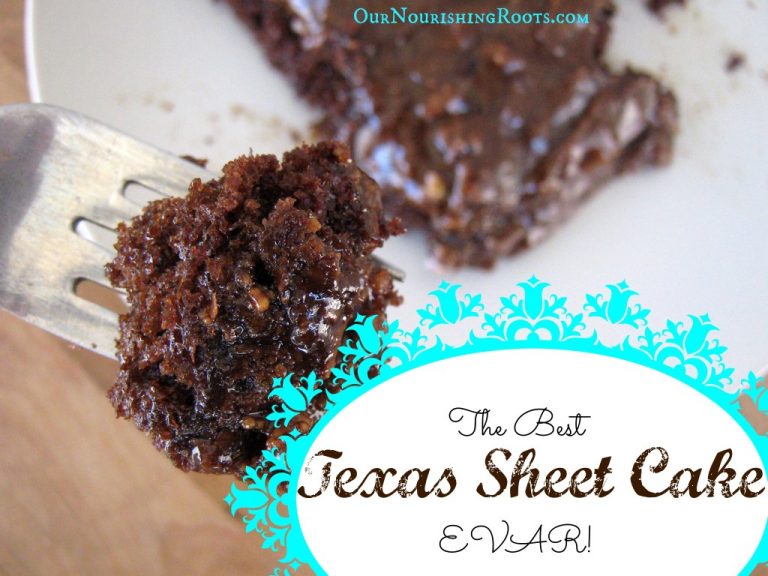
Healthy version of Texas Sheet Cake recipe

Have you ever scoured the online websites for new dessert recipes only to find out that all of the best ones contain either refined sugars, plain flour, or other unhealthy ingredients? Yup, I’m sure you have had this experience because it happens to me all the time but don’t worry since I’ll be sharing with you this delicious Texas sheet cake recipe.

For example, my mom once brought me some lime cooler cookies that were simply too good to be true and I tried to modify her recipe into something healthier and digestion-friendly but to no avail. The key to the deliciousness of these lime cookies is powdered sugar in the lime juice glaze and I could not find a good substitute that would taste just as good.

However, this Texas sheet cake recipe is different. It works perfectly even when made with whole grain flour and unrefined sugar! No one, even my sugar-loving kids, can tell the difference. The original recipe does use powdered sugar but after a few tries and misses, I managed to achieve the same result with different ingredients. The original idea comes from the Pioneer Woman’s recipe that was recommended by a dear friend of mine. I then modified it to suit my dietary needs.

Honestly, I think this is actually my favorite chocolate dessert ever. No cakes or cookies that I have eaten even compare to this one. I hope that after making this Texas sheet cake you will be able to see it too!

Absolutely Unbeatable Texas Sheet Cake

Necessary equipment:

  • measuring cups and spoons
  • a couple of wooden spoons
  • a large mixing bowl
  • a medium mixing bowl
  • a large saucepan
  • a whisk
  • half sheet jelly roll pan
  • parchment paper
  • a medium saucepan
  • a sharp knife

Ingredients:

the sheet cake:

  • 2 cups of whole grain flour (how to make sprouted flour here)
  • 2 cups of whole cane sugar
  • 1 cup of butter (2 sticks)
  • 1 cup of boiling filtered water
  • ½ cup of buttermilk (how to make buttermilk here)
  • 2 eggs
  • 6 T of non-alkalized cocoa powder
  • ½ t. of sea salt
  • 1 t. of baking soda
  • 1 t. of vanilla extract

the icing:

  • 14 T. of butter (1 ¾ stick)
  • ½ cup of chopped pecans (how to soak and dehydrate pecans here)
  • 3 cups of whole cane sugar
  • 6 T. of whole milk
  • 6 T. of non-alkalized cocoa powder
  • 2 T. of strong brewed coffee
  • 2 t. of vanilla extract
  • 1 t. of cinnamon

Instructions:

the cake:

  1. Preheat the oven to 350 degrees.
  2. Put whole grain flour, sugar, and salt in a large mixing bowl and stir until combined.
  3. Melt butter in a large saucepan.
  4. Add cocoa powder and remove from the heat. Stir together until combined.
  5. Add boiling water to the saucepan and stir until the mixture is smooth. Add it to the other ingredients in the mixing bowl.
  6. Combine the buttermilk, eggs, vanilla extract, and baking soda in a medium mixing bowl. Whisk quickly to break up the yolks and add the mixture to the previous mixing bowl.
  7. Mix the ingredients until everything is well combined.
  8. Pour the batter onto a jelly roll pan lined with parchment paper.
  9. Bake for 20 to 25 minutes. Check the center with a toothpick. When there a few still moist crumbs sticking to it, the cake is ready.

the icing:

  1. Powder the whole cane sugar. You can do it by placing the sugar into a dry blender and blend it on high settings until powdered.
  2. Melt the butter in a saucepan.
  3. Add cocoa and stir until combined. Remove from the heat.
  4. Add the milk, coffee, powdered sugar, vanilla extract, and cinnamon. Stir until smooth.
  5. Pour the icing over the cake as soon as it comes out of the oven while it’s still warm.
  6. Let it cool completely and then cut into pieces.

Enjoy this healthy Texas Sheet Cake!

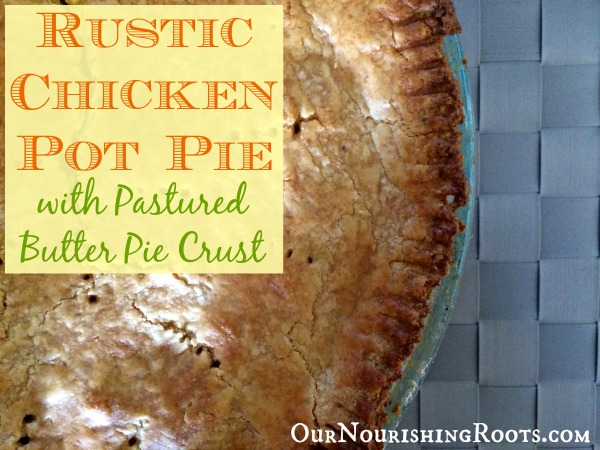
Rustic Chicken Pot Pie with Crust made of Pastured Butter

Have you ever eaten something as filling and comforting as chicken pot pie? Not many dishes can compete with the deliciousness of this ultimate chicken meal.

It’s not only tasty but healthy – which cannot really be said about other typical comfort foods, such as mac’n’cheese. It contains important nutrients you’d want from a proper meal. The butter is a great source of vitamin A, D, E, B12, and K2. And since this dish uses a lot of it, you can be sure to get a nice dose of your needed daily vitamin intake. The stock is made from nutritious vegetables and chicken bones provide plenty of healthy minerals.

Chicken pot pie can be served in two ways. Traditionally we prepare it using a large baking dish, like a casserole. But you can also make it into small individual servings if you have soufflé dishes in your kitchen. That way you will avoid the messy part of portioning the pot pie between all of your family members and you can impress your guests with this modern take on the well-known traditional dish.

Equipment Needed:

  • measuring cups
  • sharp knife
  • wooden spoon
  • rolling pin
  • food processor
  • pastry knife
  • pastry brush
  • plastic wrap
  • large saucepan
  • large baking dish

Chicken Pot Pie with Crust Made of Pastured Butter

Ingredients:

The crust:

The pie:

  • ½ cup of grass-fed butter (1 stick)
  • 1 diced onion
  • 4 finely diced carrots
  • 3 sprigs of fresh thyme
  • 1 bay leaf
  • 2 minced garlic cloves
  • ½ cup of freshly ground/sprouted flour
  • 4 cups of chicken stock (how to make chicken stock)
  • 1 cup of peas
  • 3 cups of shredded cooked chicken
  • a large handful of chopped fresh parsley
  • sea salt
  • freshly ground pepper
  • whole milk

Instructions:

The crust:

  1. First, put the flour and salt in a food processor and mix until combined.
  2. Cut the unsalted butter into small pieces and add to the food processor.
  3. Mix the flour and butter until you can see small pea-sized crumbs.
  4. Gradually add the ice water, preferably by spoonful, and mix until a nice round-shaped dough is formed.
  5. Remove the dough from the food processor and flatten it with your hand.
  6. Using a pastry scraper or a sharp knife cut the dough in half.
  7. Cover the dough in plastic wrap and chill it while you prepare the chicken pot pie filling. You can either put it in a fridge for 1 hour or in the freezer for 15 minutes.

The filling:

  1. Preheat the oven to 375 degrees.
  2. Heat the butter in a large saucepan until it melts.
  3. Sauté onions, carrots, thyme, and bay leaf in the butter for 5 minutes or until the vegetables become soft.
  4. Add garlic to the mix and sauté for 1 more minute.
  5. Add the flour and stir with the wooden spoon until the vegetables are thoroughly covered. Cook together for 2 minutes.
  6. Slowly add the chicken stock and stir steadily. Simmer the sauce until it thickens and coats the back of the spoon.
  7. Add the chicken, peas, and parsley. Season with salt and pepper to taste.

The pie:

  1. Take 1 half of the chilled crust dough and flatten it with a rolling pin until the size is slightly larger than the bottom of your baking dish.
  2. Place the bottom crust and make the edges stick to the sides of the baking dish.
  3. Pour the filling onto the crust.
  4. Flatten the other half of the chilled crust and put it on top of the filling so that it covers all of it.
  5. Use a brush dipped in milk to coat the edges of the crust.
  6. Press the edges of the dough with a knife.
  7. Cut a pattern of your choice in the top of your crust with a fork or a knife. The pattern serves as a decoration and as a vent for the steam to release.
  8. Use the same brush as before to coat the top crust layer with milk
  9. Bake the dish for 45 minutes or until the crust turns a nice golden color and the filling starts bubbling.
  10. Cool for 15 minutes before saving.

Enjoy your delicious chicken pot pie!