")
No matter how hard you try, it can be nearly impossible to effectively clean a grill. Whether you are out by the BBQ or cooking dinner indoors, it is a job that is best made as simple and easy as possible. After enjoying some deliciously grilled food, the cleanup is something we all dread. But there are ways of making light work of this thankless task. It is best to tackle it head-on, without delay, and use a proven method to get that leftover burnt meat or charcoaled corn off the grill. We have detailed some of the most common and effective ways to clean a grill.
Dishwasher
If the grill is detachable from the BBQ or oven and will fit, then the dishwasher is one of the easiest and most convenient cleaning methods. Although this won’t be much use for stubborn, burnt-on grime, it can help to lift a base layer. And at the very least, it will start you off so you can do a little scrubbing to get the rest. If you put it in whilst still warm, this can help. A high temp cycle should do the trick.
Burn It
This works on gas grills, and the method is simple. Get it started and leave the grill in place before pulling the hood over. Leave it for 20 – 30 minutes and it will burn the excess food parts and stuck-on leftovers. Lift the hood then use a wire brush to scrub any excess off. This should be easier when it is hot.
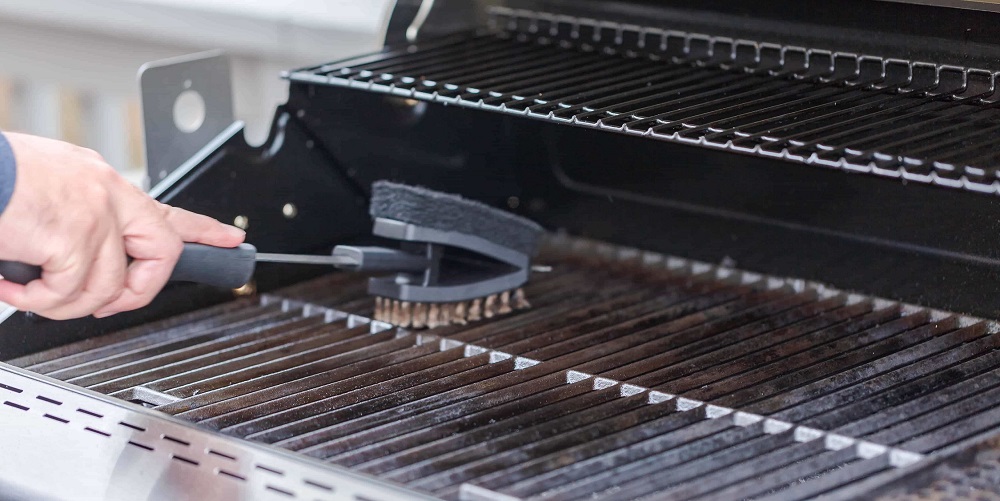
Use a Grill Brush
If you have purchased some cheap grill brushes then expect them to give you a limited clan with less than impressive results. It is always best to spend a little extra and invest in a quality product as it will make life a lot easier. The bigger the brush, the easier it will be so if you can find anything around 18 inches then even better. You will want to find one without bristles as these can fray and detach from the handle easily and although this method involves a bit of manual labor, some soapy water and a bit of scrubbing will yield impressive results.
Maintain your grill by using a grill brush after every use and it will not only last a long time, but it will be much easier to clean next time.
An Onion
Although this method might bring you to tears, it will at least help get the grill clean. Stick a fork in a halved onion and scrub the grill up and down. Do it when hot to replicate steam clean as the water from the onion and heat from the grill make the process easier.
Soak The Grill
When the grill has cooled down, put it in a tub of warm to hot soapy water and leave it to soak. This might not eliminate all the burnt-on food and stains but it will make the job of scrubbing it down a lot easier. After 30 minutes of submersion, it should be ready for a bit of elbow grease.
Baking Soda
The savior of at-home cleaning remedies, baking soda mixed with water can remove stubborn messes on a grill. Use a scouring pad to mix it in. The granules and soda formula will combine to leave the grill looking squeaky clean.
Vinegar
You can turn this into a spray by mixing vinegar with 50% water in a spray bottle and apply liberally to the grill. The acidic content will help to lift tough grease and burnt food when left for ten minutes before being re-applied then scrubbed off. This solution also works when looking to clean the outside of the grill to leave it looking new.
Tips For Keeping A Grill Clean
When you have cleaned a grill, you will want to keep it that way, here are some tips for making sure the next time you have to clean the grill, it isn’t going to take so long.
Clean The Rest of the Grill
By maintaining good habits, you will find that the grill is easier to clean. When the base is clear from debris and you have tipped the old coals away (when cold of course) there is less dirt that can get stuck on the grill. A bit of soapy water and a scrub should usually get rid of the last bits left behind. This includes the taps, plates, burners, you name it. The more technical your BBQ, the more work it will take to maintain but this is to your benefit. More frequent cleaning means it takes less time, so be sure to clean all parts before putting it away again.
Burn Off Food
We mentioned this as a cleaning technique but it good practice after every use. Turn the excess food pieces to ash and they will either fall away or be easy to remove. It must be seriously hot and covered to get the full effect and always wait a while before going anywhere near the grill after.
Proper Disposal of Oils
The same goes for fats but scrape them into a newspaper or the like before putting them in the trash. Combine them with coffee grinds for more responsible disposal or purchase a fat trapper.
Clean Outside
It can be a messy task scrubbing a grill and this can mean a lot of flying debris. Rather than transferring burnt-on grease from your grill onto a window, do the hard work outside so you only have to do it once.
Cover It Up
When you are done cleaning, don’t leave the hood up. Not only does this expose it to the elements which can cause wear and tear, but bugs and other wildlife can cause destruction, making you need to give it a thorough clean before you use it next. Covering the grill helps to ensure it lasts longer. To protect the outside of the BBQ you can also purchase a cover.
Use Fresh Cleaning Equipment
By this, we mean everything from new grill brushes to dishcloths as working with worn tools will make the process a lot harder. When you notice a scouring brush or grill bristle start to look frayed or damaged, grab a new one to notice the difference.


")