Chicken is a very fickle food item. If it’s seasoned properly, it has the potential of exciting the taste buds and turn an ordinary dinner into a magical one. However, if a chicken isn’t seasoned properly, it can be dull and lifeless, and compel everyone at the dinner table to run out for a pizza. That’s why we’ve decided to find out what’s the best seasonings for chicken and put them in a convenient list. We also decided to go ahead and pen a guide that will help everyone make the most beautifully seasoned and tasty chicken possible. Since we’re starting to get hungry, let’s just jump right into the thick of things and get started.
Quick Summary of Best Seasonings for Chicken
Chef Merito Seasoning Powder
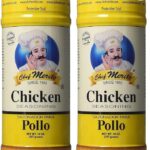
Chef Merito is a company that’s known for making some of the best seasoning products available. This company was started in 1985 when Mister Garcia perfected his top-secret recipe for sale to the public. Since that time, this company has released several different recipes that are sure to please just about anyone. And one of our favorite seasonings that they’ve released is this chicken seasoning. Although it’s a little expensive compared to other seasonings on this list, we feel that this product is the best seasoning for chicken available. It’s flavor profile and taste just works so well with chicken, the cook is going to want to use it every time they throw a bird in the oven.
One of the most frequently asked questions about this seasoning for chicken is what spices can be found in it. Although we can’t fully answer that question because it is a top-secret recipe, we can identify some of the spices that are used in this recipe. Some of the spices that we’ve discovered include garlic and onions, black pepper and annatto, among other spices as well. It’s a great seasoning blend that’s perfect for not only making roasted chicken but is also good for other chicken recipes such as chicken fajitas, chicken quesadillas, and chicken enchiladas. It’s also great for turkey and other types of poultry, too. Overall, it’s just a great product that seasons chicken and other types of poultry well.
PROS:
- Improves the flavor of chicken drastically.
CONS:
- Costs more than some other chicken seasonings.
Weber Kick ‘N Chicken Seasoning
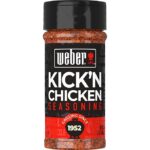
As we were researching chicken seasonings, and trying out a large variety of different seasonings, we consistently found that a lot of our favorite seasoning for chicken seemed to come from one company and that company was Weber. This company just seems to do a great job of weaving together some brilliant chicken seasoning blends. And this one was one of our favorites of all of the seasonings they made. It’s our favorite because it had a unique flavor profile that seemed to be perfect for grilling–one of our favorite ways of making chicken. So we’d like to spend a few moments and talk a little bit more about this product.
The first thing that we’d like to mention about this seasoning product is to do a rundown of some of the ingredients that can be found in it. Although some spices aren’t going to be disclosed by this company, other ingredients can be found right on the ingredient label. The following ingredients can be found in this product: onion, garlic, red pepper, paprika extracts, orange peel, and sea salt. This product also contains sugar, which might be a turn off for some people, but it’s a small amount—accounting for less than 1-gram for a 1/4-teaspoon serving. That’s not enough for people to worry about, but it is worth mentioning that it contains that amount of sugar in the first place.
PROS:
- Doesn’t contain MSG.
- It’s an all-natural & gluten-free product.
CONS:
- It does contain a slight amount of sugar.
McCormick Perfect Pinch Rotisserie Seasoning
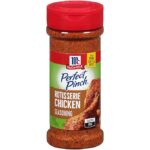
McCormick is a company that was found in 1889, and ever since then it has been making some great seasoning products, and this one is one of the better blends. This chicken seasoning is certified Kosher by the Orthodox Union and is made without MSG. It’s also a product that’s without any sugar whatsoever, so some consumers might like this seasoning blend better than ones that are packed with sugar. It’s also a blend that contains a pretty robust flavoring profile and is packed with ingredients such as onion, garlic, paprika, and salt. Those combinations of ingredients work together well to make a tasty and exciting product.
This product isn’t just tasty for seasoning rotisserie chicken, however. It can also be used for roasted chicken, fried chicken or any other chicken iteration a person can think about seasoning. And we also think that it would be good for seasoning other types of poultry as well including turkey, goose, and duck. But what’s really fascinating about this seasoning blend is that it can even transcend poultry. We’ve tried this product on rice, pasta, beef and even pork and all of it worked out very well. And if it’s mixed with sour cream and mayonnaise, along with some roasted chicken, the home cook can even make a great chicken salad. A really good chicken salad.
PROS:
- Has a great flavor profile.
- Is good for not only chicken, but other foods as well.
CONS:
- Shelf life isn’t very long with these bottles.
McCormick Grill Mates Montreal Seasoning for Chicken
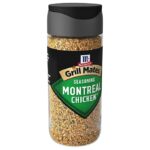
Since McCormick has been making quality seasonings for chicken, beef, and pork for over 131+ years, it should be no surprise to anyone that they’ve made several high-quality seasonings in that time–including this one. And this one is not only an inexpensive blend, but it’s also one that goes great with chicken or with any other protein that it’s used on. All the cook has to do is to sprinkle 1-tablespoon of this seasoning for each pound of chicken to create a dinner that no one will soon forget. Although this seasoning blend doesn’t have the kick of other McCormick Grill Mates products, we found that its mild flavor worked quite well with chicken and other types of poultry.
So what flavors can the cook expect out of this blend? Well, this seasoning profile’s main ingredient is garlic and that’s supported by a host of other ingredients that include onion, black pepper, parsley, red pepper, orange peel, paprika, and green bell peppers. All of those ingredients blend to create a seasoning that’s great for everything from rotisserie chicken to chicken salad. It also works exceptionally well on seafood and we’ve used it successfully on salmon, trout, and shrimp. All things considered, this is a great seasoning that many people are going to enjoy having in their cupboard. It’s also a product that the consumer isn’t going to want to do without.
PROS:
- Has a mild but delightful flavor profile.
- It’s an inexpensive seasoning blend.
CONS:
- Might not have the kick that some cooks are looking for.
A Guide to Seasoning Chicken
Yes, it’s true that we could’ve stopped this guide by listing the best seasonings for chicken, but we decided that we wanted to explore the subject a little bit deeper. We wanted to not only give our readers the ability to find great chicken seasonings, but we also wanted to show them some of the wonderful ways they can use those seasonings to create a chicken dish that friends and family will come back to again and again. Let’s see how we can make it happen by exploring some of the ways that chicken seasonings can be used to instill flavor into a bird.
The Different Ways of Using Chicken Seasonings
Of course, consumers can just buy one of the above seasonings and sprinkle it directly on their chicken either before or after cooking, but there are also a wide variety of other ways that these seasonings can be used to create some much-needed flavor to chicken, turkey or other poultry products. Let’s take a look at some of the more popular seasoning methods below.
Make A Chicken Marinade
One way that a cook can turn an ordinary chicken sprinkle-on chicken seasoning into something more powerful is to turn it into a marinade and then allowing the chicken to sit in this marinade for approximately 24-hours. And it’s pretty easy to turn one of these chicken seasoning products into a marinade. All that has to be done is to take your favorite seasoning for chicken and then use it in the following recipe:
Chicken Marinade Recipe
Ingredients Needed:
- 1/2-cup of olive oil
- 3 tablespoons of lime juice
- 3 tablespoons of soy sauce
- 2 tablespoons of red wine vinegar
- ¼-cup brown sugar
- 1 tablespoon Worcester sauce
- 6-teaspoons of favorite seasoning for chicken.
- 2-pounds of chicken
Directions:
Mix all of the ingredients into a bowl and mix well. Now pierce the chicken breast with a fork all over and then place them in a 1-gallon Ziploc bag. Now add the marinade to the bag. Allow the chicken to sit for a minimum of 4 to 6-hours. Once that amount of time has elapsed, grill the chicken over medium heat for 5 to 6-minutes per side. When the internal temperature of the chicken has reached 165-degrees, remove the chicken from the grill. Now allow the chicken to rest for approximately 5- minutes and then serve.
Make A Great Fried Chicken Coating
Another way to turn ordinary chicken seasoning into something fantastic is to use it underneath the flour when the chicken is breaded. Season the chicken liberally with it and then coat it in your favorite flour or fried chicken breading. That makes a great chicken that no one will forget. Our favorite recipe for making a great fried chicken using a seasoning for chicken is listed below.
Best Seasoned Fried Chicken
Ingredients Needed:
- Vegetable oil for frying
- 6-cups of all-purpose flour
- 12-tablespoons of favorite chicken seasoning
- 2-cups of buttermilk
- 2 whole chickens
Directions:
Dissect the chickens into breasts, thighs, legs, and wings. Set those pieces aside. Using a heavy cast-iron frying pan, bring your favorite oil up to proper deep-frying temperature, which is about 325-degrees.
While the oil is heating, mix the flour, and the chicken seasoning and then set the bowl aside. In another large bowl, place the chicken pieces in and pour buttermilk over them. Be sure that all of the chicken is fully immersed before proceeding.
The next step is to set up a dredging station. To your left, have the chicken in the bowl then the flour mixture. Lift each piece of chicken out of the buttermilk milk, allow the excess to drip off and then place them in the flour mixture. Once all of the chicken is thoroughly coated, proceed to the next step.
Once the chicken is in the hot oil, set a timer for 12-minutes. When that time has elapsed, turn the chicken over and then fry for another 12-minutes. When the temperature of the chicken has reached 175 to 180-degrees, remove the chicken and allow it to drain for 5-minutes. Allow it to cool for another 5-minutes before serving.
Other Uses for Chicken Seasonings
Before we go, we’d like to list just a few other ways that chicken seasoning can be used to make a great meal. Let’s take a look at them before we allow this guide to come to its logical conclusion.
- Mix sour cream, mayonnaise, and chicken seasoning to make chicken salad.
- Add chicken season to steaks or pork chops for an added flavor boost.
- Use chicken seasoning for pasta, baked potatoes or mashed potatoes.


 Great Northern Popcorn Premium 8 Ounce Packs, Case of 24
 Snappy White Popcorn, 4 Pounds
 Franklin’s Gourmet Movie Theater Popcorn
 Orville Redenbacher’s Gourmet Popcorn Kernels
 Amish Country Popcorn – Baby White – Small & Tender Popcorn
 Arrowhead Mills Organic White Popcorn, 24 oz. Bag (Pack of 6)