Even though some people consider granite to be nearly indestructible, the truth is that a lot of things can damage the surface and leave granite looking less than its best. Watermarks, stains, and even discoloration from acids can easily occur—especially if the counter isn’t properly maintained. To avoid these situations, it’s best to clean granite thoroughly and to use the best granite sealer available. Since we consider it to be critically important to use a quality sealant on granite, we decided to list some of our picks below. Any one of the following products will help to keep your granite counters looking as good as new.
Quick Summary of Best Granite Sealers
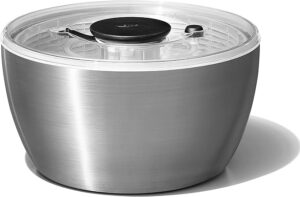
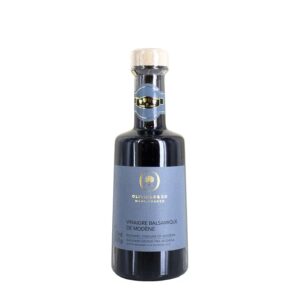
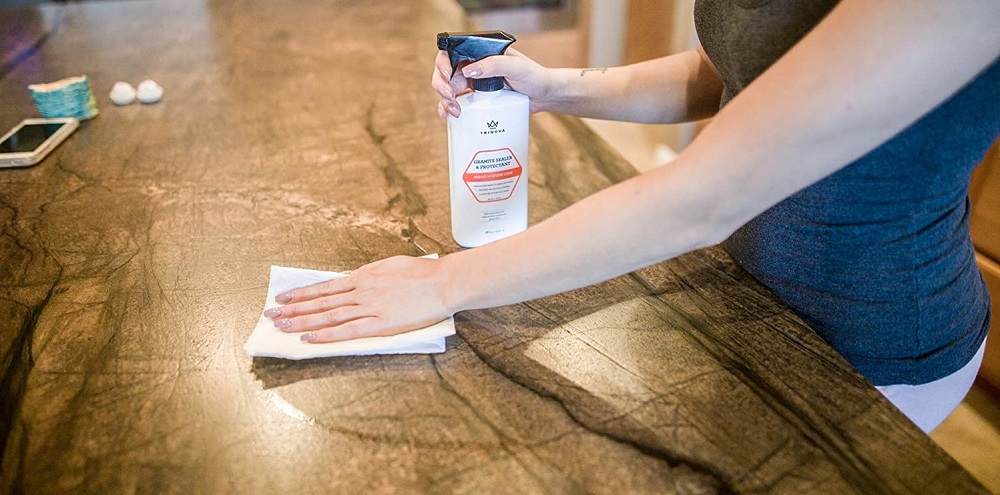
TriNova Granite Protector & Sealer
 Best Overall
Installing that natural stone counter was worth it, but it wasn’t cheap. That’s why you should make sure to keep that counter looking good as long as possible. And there are two ways to keeping granite counters in good condition. We all know that they have to be regularly cleaned, but they also have to be properly sealed. A good sealant will ensure that the expensive countertop is good for many years to come and will prevent it from succumbing to hard water damage, watermarks, corrosion from acids or the hundred other things that can happen to counters.
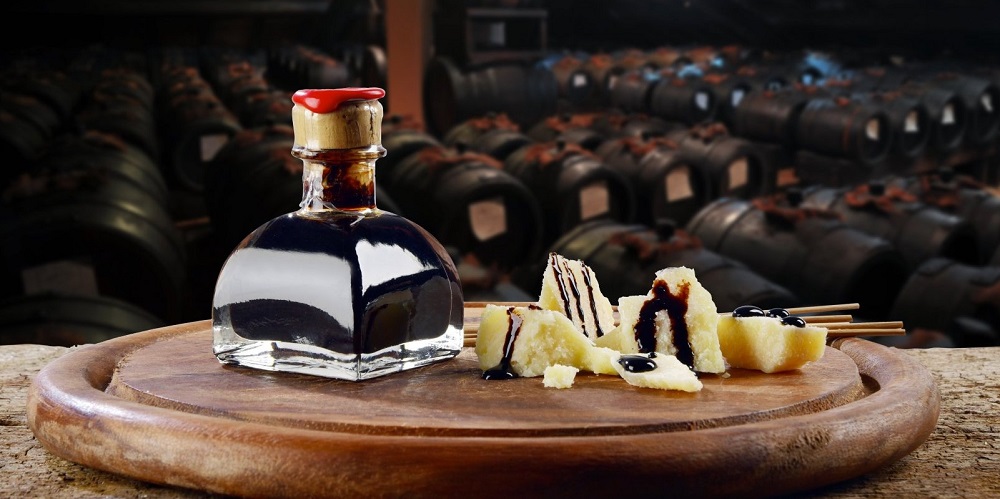
Fortunately, this sealant is one of the best granite sealers available. You can use it not only on quality granite surfaces but also for sealing quartz, marble, soapstone, or Quartzite. Its unique blend of polymers work themselves down into the stone’s porous surface to help prevent dirt, grime, and stains from embedding themselves into the stone and ruining it forever. When you apply this product to a clean granite counter, it will protect it without clouding over or being sticky. It’s so simple, just about anyone can use this product.
The most notable thing about this product, however, is that it not only provides advanced protection from stains, but it also gives the stone’s surface a glossy and shiny look that everyone is going to love. So, in essence, this product just doesn’t protect but also enhances the surface of the stone. This makes it one of the best choices for sealing stone counters, backsplashes or other surfaces. Although it’s not the most inexpensive product on the market, it’s one of the most effective sealants available and certainly one that you should consider.
PROS:
- It does a good job of protecting surfaces against stains.
- It makes the surface glossy and shiny.
CONS:
- It isn’t the most inexpensive product available.
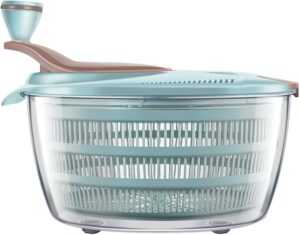
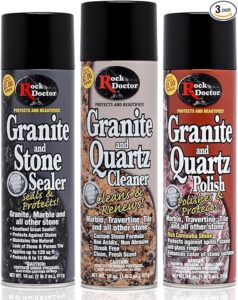
Rock Doctor 3-Piece Granite Care Kit
 Best Care Kit
When we first decided to review this product, we knew that it wouldn’t appeal to everyone. That’s because most people are looking for a sealant and not an all-in-one kit. However, we felt that this product did such a good job of maintaining granite and other natural stone surfaces, we just couldn’t resist including it on our list. We feel that it will not only replace your current granite sealer, but it will replace your current granite cleaner and polish as well. Let’s examine this product closer, so we can see what it can do.
Firstly, this kit comes with 3 separate 18-ounce cans. There’s a granite sealer, of course, but there’s also a granite cleaner and a granite polish included as well. Each of these cans is made out of 100% recyclable steel, so they’re more eco-friendly than many of the products contained in plastic bottles. And if it does end up in a landfill, steel will break down in 50-years or less, while plastic hangs around for centuries before it fully breaks down. That’s important to consider since the planet currently has an ongoing plastic disposal problem.
The thing that’s more important than the eco-friendly packaging of this kit is the product itself. This kit features a cleaner that’s pH-balanced and is non-abrasive, so it won’t harm any sealer on the stone. The granite sealer is a water-based formula that can be used as both stone and grout sealer and is designed to lock dirt, grimes, and moisture out of the stone. And finally, the granite polish is a product that keeps the stone’s surface nice and shiny. Its glossy appearance and shine is sure to impress everyone who sees it and helps to keep the stone looking as good as new.
PROS:
- Cleans, seals and polishes granite.
- Works on other natural stone surfaces.
CONS:
- Some people might not need all the products in this kit.
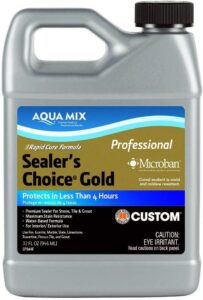
Aqua Mix Sealer’s Choice Gold
 Best Professional Sealant
When you need a professional granite sealer that provides the maximum amount of stain protection and is long-lasting, then you’re probably going to want to look at this product. That’s because this granite sealer can hold up to just about anything, and it lasts approximately 15 years. It’s a sealer that was specifically designed to seal the stone and tile surfaces used in food preparation and food service areas. It locks out not only dirt, grime, grease, and stains, but also moisture as well.
You can use this product as both a granite sealer and a pre-grouting sealer. And you can use it not only on for granite surfaces, but also for terra cotta, masonry, marble, cement, porcelain, limestone, slate, and travertine. It’s a product that dries within approximately 4-hours and provides a no-sheen natural look to the surface. Because of its large 32-ounce size, there’s plenty of product for most uses. Although this granite sealer might be a little expensive, it’s still one of the best professional sealers available. Besides, for a product that seals the surface for up to 15-years, it’s really not all that expensive.
PROS:
- Seals natural stone, grout and tile.
- It’s a mold and mildew-resistant sealer.
CONS:
- Is more expensive than many other granite sealers.
A Guide to Granite Sealers
We’ve been talking a lot about granite sealers, but we haven’t done an in-depth examination of these products or how to use them, so we decided that we would do that now. In the following guide, consumers will find everything they ever wanted to know about these sealers but were afraid to ask. Now let’s get started doing an in-depth examination of this type of product.
How Does Granite Sealer Work?
One of the first questions that we would like to answer is just how granite sealers work in the first place. These product work by introducing resins or epoxies down into the pores of the stone to prevent dirt and grime from penetrating the stone’s surface and ultimately staining it. To accomplish this goal, the sealer uses some form of solvent to distribute these agents. Usually, the solvent used in granite sealers is water, but other types of solvents may be used as well.
Determining Whether the Granite Needs Sealing
The first thing that you should do before attempting to seal your granite surface is to make sure it’s appropriate to seal the granite in the first place. Although many marketers will have you believe that every single piece of granite needs to be sealed, some granite counters don’t. To find out whether your counter requires sealing, spray a few drops of water on a small portion of the counter or leave a wet paper towel on it. Allow the water or the paper towel to sit on the counter for approximately 15-minutes. If after that time, the granite counter has begun drinking up the water and the surface has darkened, then the granite needs to be sealed.
If the granite counter is going to be exposed to petroleum-based products, then you may want to perform an additional test to see if it’s properly sealed. Place a few drops of mineral oil on the surface of the counter and then wait for 15-minutes. If the surface darkens, then the surface will need to be sealed. If it doesn’t, then it doesn’t need to be sealed.
The last test to determine whether a particular granite counter should be sealed or not is called the Lemon Juice Test. Apply a few drops of lemon juice to an inconspicuous portion of the counter and wait. If the granite counter begins to develop dark spots immediately, then DO NOT use a sealer on the counter. Instead, contact and professional and find out what options might be available to use. If the counter only begins to darken after 4 or 5-minutes have elapsed, however, then the counter is most likely a candidate for being sealed. On the other hand, if the counter never darkens after more than a half-hour, then you’re not going to want to seal the granite because it’s apparently already stain-proof.
Choosing The Best Granite Sealer
Once you’ve determined that your granite counter is the ideal candidate for sealing, it’s time to buy the best sealant available. Although we’ve provided some of the brands that we feel are the best, you might have something else in mind, so we provided some general guidelines for choosing a granite sealer below. Keep the following suggestions in mind before purchasing your next granite sealer and you’ll be better off.
- Water-Based Sealers Are Easier To Apply And Better
- Avoid Sealers That Are Linseed Or Silicone based.
- Solvent-Based Sealers Provide Professional Results But Are Expensive.
How To Seal Granite Counters
Now we’ve come to the part of the article where we talk about how the granite should be sealed. Once you know that your counter needs to be sealed and have selected the best granite sealer, it’s now time to put it to work. Below are some tips that will help you get the job done with professional results.
Step One: Read The Instructions
This might seem like common sense advice, but we’ve seen a lot of people fail to do this very thing. Since there are so many different types of granite and natural stone sealing products available, and some of them dramatically differ in how they’re used and applied, the consumer needs to follow the directions on their product’s label. The rule is to always follow the manufacturer’s instructions, even when they differ with our advice. That will ensure that the product is the most effective for the application at hand.
Step Two: Clean The Granite First
The next thing to do is to clean the granite. Although some people suggest that granite can be cleaned with merely soap and water, we like to use a specialized granite cleaner for the job. That’s because granite cleaners power away dirt and grime and they do it without marring the granite’s surface. Once the counter has been cleaned with a granite cleaner and a microfiber towel, allow then counter to dry for approximately 24-hours. When it has returned to its natural color, the sealing process can then begin.
Step Three: Test A Small Corner
As is the case with any product you use on your granite countertop, you should be sure to test a small portion of it to make sure the sealant is going to stain it or leave a residue. Apply a small amount of the product on this inconspicuous spot, following the manufacturer’s instructions, and see if that particular product is compatible with the granite counter. If the granite becomes hazy or discolored, then do not use that product. Instead, buy a different type of granite sealer. If it doesn’t cause an adverse effect, it’s then safe to continue.
Step Four: Apply The Product Evenly
Wearing gloves, be sure to apply the granite sealer evenly over the entire surface of the counter. Once the entire surface is damp, then it’s time to move on to the next step. Be sure to not overapply the sealer. The counter should be damp, but it shouldn’t be soaking wet.
Step Five: Wait The Appropriate Amount of Time
Now is the part of the process where you allow time for the granite to absorb the sealer. Although the amount of time required for this to happen varies from one product to the next, it usually takes about 20 to 40-minutes. Just be sure to follow your product’s directions for guidance on how long to wait if you’re unsure.
Step Six: Finish It Up
If the product’s label says to apply a second coat, then go ahead and apply a second coat using the same method of application. As was the case with the first coat, make sure to evenly spread the product over the entire counter. Allow the second coat to dry for the appropriate amount of time. It’s now time to clean up any excess granite sealer that may be on the surface. Remember, too much granite sealer will leave a haze, so be sure to be diligent about removing the excess. After that, do not use or touch the counter for approximately 48-hours.