Popcorn is a food that’s been enjoyed for thousands of years and is currently one of the best-selling snack foods in the world. It’s a snack that’s tasty, salty and crunchy, so it’s quite understandable that so many people choose this product when they’re in the mood for a snack. Unfortunately, its rise in popularity has also resulted in the rise of sub-par popcorn products being released on the market. This is why we’ve decided to cut through all of the marketing hype often associated with snack foods so that we can help our readers choose the best popcorn products currently available.
Quick Summary of Best Popcorn
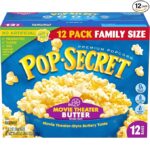
Pop Secret Movie Theater Butter Microwave Popcorn

Anyone who has spent any amount of time sitting in a darkened theater enjoying their tasty, buttery popcorn has probably wondered how they could replicate that popcorn in their own home. Movie theater popcorn is just so salty and buttery, that consumers can’t seem to get enough of it, especially when it’s washed down with a tasty beverage. Unfortunately, too may popcorn brands claim to deliver that great movie theater taste, but fail to do so. However, this Pop Secret popcorn is a little bit different. They claimed to be able to bring movie theater goodness to microwave popcorn and we believe that they’ve succeeded in their goal.
This popcorn has a taste that’s not exactly like movie theater popcorn but comes pretty close. It’s light, airy and salty, and has that rich buttery flavor that we all want out of our popcorn. It’s also a product that’s is quite easy to make as well. Remove the plastic, lay the bag in the right position in the microwave and in a couple of minutes popcorn is done. And since it produces less unpopped kernels than traditional microwave popcorn varieties, consumers don’t get that twinge of disappointment when they open the bag. In other words, this is the best microwave popcorn that can be purchased. It’s a big step up from the sub-par microwave popcorn varieties that can be found in grocery stores all over North America.
PROS:
- This popcorn pops up extremely well.
- This product has a great movie theater butter flavor.
CONS:
- It’s not a low-calorie popcorn.
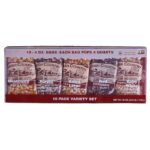
Amish Country Variety Gift Set Popcorn

Even though the popcorn kernels in this variety pack aren’t as easy to make as microwave popcorn, they still pop up extremely well. Besides, the whole purpose of this variety pack isn’t just to get some good popcorn, but it’s also to give the consumer a wide range of different popcorn varieties. In this set, consumers will find a delectable assortment of kernels. You will find 10 4-ounce bags of some of the best popcorn varieties available including mushroom, purple, extra-large, baby white, and baby red. Although the packaging wasn’t as durable as we would’ve liked, it was nice to have an assortment of kernels in one set to give away as gifts.
We also liked that this popcorn gift set comes from Amish country and is homegrown in Indiana. The corn is not only high-quality but has been raised and harvested according to strict standards. This product is gluten-free, GMO-free, and free of added flavoring, preservatives, or oil. It’s even free of tree nut particles, so consumers with tree nut allergies can enjoy it with confidence. It’s also dairy-free as well. All of which makes it a wonderful addition to any pantry.
PROS:
- Popcorn kernels pop up extremely well.
- Variety set makes a great gift.
CONS:
- Packaging is a bit flimsier than what we would’ve liked.
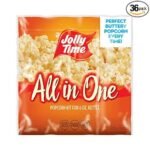
Jolly Time All-In-One Popcorn Machine Kit

Regardless of whether the consumer needs popcorn kernels that can be used in a popcorn machine or for cooking on the stovetop, they are going to want to try out this popcorn kit. Each kit weighs approximately 8-ounces and contains enough kernels to make 7-servings of popped corn. Popcorn that’s salty, buttery and delicious. Each pouch contains three pre-measured compartments that have sections for the oil, for the salt and of course, for the popcorn. This product uses nothing but non-GMO yellow corn kernels, seasoning salt and coconut oil to deliver a great flavor any lover of popcorn can enjoy.
Because this product is made by Jiffy in the United States, the consumer can expect them to be high-quality and to have a decent shelf-life. After all, Jolly Time is a company that’s been making quality popcorn products since 1914 and it’s a family company that’s operated for over four generations. Each pack contains 36 kits, so consumers have plenty of popcorn for their air popper or their movie theater popcorn machine. That means that for under twenty cents an ounce, just about anyone can enjoy delicious and tasty popcorn any time of the day or night.
PROS:
- Is easy to use in popcorn machines.
- Has a nice flavor to it.
CONS:
- Popcorn is very salty.
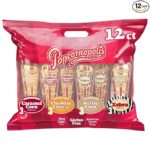
Popcornopolis 12-Cone Popcorn Snack Pack

Popcornopolis is a company that’s been making quality popcorn products for quite some time now, so it should be no surprise to anyone that one of their products has made it on our list. This product contains 12 cones of popcorn in four exciting flavors. Included in this set is Zebra popcorn, popcorn that’s caramel corn that’s been drizzled with white and dark chocolate, kettle corn, caramel corn, and cheddar cheese popcorn. This snack cone set has an average shelf life of 9-months, so it’s great to keep around for the holiday gift-giving season, or for keeping in the pantry to be used for snacks.
Although this product is a little bit more expensive than comparable brands of popcorn, we do love the quality, freshness, and flavor of this popcorn. Each of the popcorn varieties in this set is gluten-free, GMO-free, free of high-fructose corn syrup, and are made using quality coconut oil. This is a product that contains 0-grams of trans fats, and when eaten responsibly can be part of a healthy diet. Keeping all of this in mind, we do have to say that we recommend this product for anyone who loves flavored popcorn or who wants to add a little bit of excitement into their snack time.
PROS:
- A great assortment of flavors.
- Great to give away as a gift.
CONS:
- This popcorn is a bit expensive.
A Nifty Guide to Popcorn
Without a doubt, popcorn is the newly appreciated snack food of the Millenium. It’s healthier than either chips or crackers with a wonderful smell and flavor many people enjoy snacking on. So many people enjoyed this food as children, it’s also a snack that will stir up feelings of nostalgia. Having said that, we wanted to give our readers more information on this subject so they can buy the best popcorn.
The History & Meaning of Corn
Although no one knows just how far people have been cultivating corn for popping, we do know that it goes back at least 4,000-years in the Americas. That’s because ears of popcorn that were that old were found in the Bat Cave of New Mexico between 1948 and 1950.
Yes, we know that many people claim that they have proof that popcorn was even older than that because there are biblical accounts of Egyptians storing corn in the pyramids. However, what these people fail to account for is that the word “corn” that was used from that time up through the middle ages was a term for whatever grain was the most common at a particular place and time. The word means “small seeds,” so it was often used to refer to barley, wheat, rye, and other bread grains. That means that the corn that was stored in the pyramids was most likely barley.
So, if the word corn was used to refer to other types of grains, then why was American maize eventually known as corn? That’s because it was the most common type of grain in the Americas, so it was given the name corn. However, in this instance, the name just stuck for some reason, while other grains reverted to their original names.
The Different Types of Popcorn
Even as we began writing this section of this guide, we knew it was futile to try to list all of the popcorn varieties available. There simply isn’t enough space to do that. However, we knew that we wanted to give our readers a sampling of some of the different popcorn varieties. So, that’s what we did. The following list is just some of the popcorn varieties that exist out there.
Mushroom Popcorn
People often see the term mushroom popcorn but really have no idea what it is. That’s understandable because we didn’t realize that this type of popcorn even existed until we began researching and reviewing popcorn. It’s called mushroom popcorn because when it pops up it looks like the top of a mushroom. These popcorns are used for caramel popcorn because they hold up so well and they don’t crumble easily.
Yellow Popcorn
Yellow popcorn is the most popular variety and the one that’s most commonly used by movie theaters. That’s probably because it has a yellow tint to it that looks buttery before butter is added to it. This popcorn comes in a variety of sizes, and usually have smaller hulls than other popcorn varieties. It’s not good for caramel or candy coatings, however, because the kernels are a bit on the fragile side.
White Popcorn
This popcorn stays a nice shade of white and has a flavor that’s kind of flat. As such, that makes it a great base for adding seasonings or cheese flavoring to. Because of its mild neutral flavor, this type of popcorn is usually used for making white cheddar popcorn. All in all, it’s a great product but it doesn’t have much pizzazz to it. However, it’s mild flavor is why so many people choose it as a snack food. After all, there’s nothing to get in the way of the real stars of the show: salt and butter!
Other Types of Popcorn Varieties
Before we go, we’d like to list a few of the other popcorn varieties that exist. So, let’s just jump into this list of the most common popcorn varieties currently available. We hope that you’ve enjoyed this article and wish all of our readers a very happy popping!
If you want to know how to make the best homemade popcorn, then check out this article.
- Butterfly Popcorn
- Ladyfinger Popcorn
- Red Popcorn
- Purple Popcorn
- Blue Popcorn