Home Blog Page 65

Healthy Onion Soup Mix “Packet”

I remember those onion soup mix packets that my mom used to make onion soup for us. I still get kind of nostalgic when I see them in my supermarket (although I don’t go there very often). They’re even on social media in those fast-forwarded recipe videos. They are used as an ingredient for many “quick” dinners, as a nice and convenient way of adding some flavor to your meal. But as with many other convenient products, we should be suspicious and “take them with a grain of salt”.

Onion Soup Mix

This is the ingredient list for the most popular brand of onion soup mix:

Onions (deyhydrated), salt, cornstarch, onion powder, sugar, corn syrup, hydrolyzed soy protein, caramel color, partially hydrogenated soybean oil, monosodium glutamate, yeast extract, natural flavors, disodium inosinate, disodium guanylate.

There’s a lot to unpack here.

Ingredients in Store-bought Onion Soup Mix

First, the monosodium glutamate. It’s also commonly referred to as MSG and known as the ingredient supposedly responsible for the umami flavor. It’s also a known excitotoxin, meaning it’s bad for your body and overall well-being. Other ingredients from the list, the hydrolyzed soy protein and the yeast extract, also contain MSG (source).

The disodium inosinate and the disodium guanylate behave similarly to MSG. Their chemical components are largely the same and they are often used together (source). I think of them as one and the same thing: MSG. And I avoid MSG whenever I can.

Not so Natural Flavors

But what I don’t like the most about this ingredient list is the so-called “natural flavors”. At least with MSG, they tell you exactly what it is. But the term “natural flavors” can mean anything which is why it’s so problematic. It’s the same deal with “fragrance” in cosmetics. We simply don’t know what “natural flavors” contain.

The Code of Federal Regulations defines “natural flavors” in the following way:

the essential oil, oleoresin, essence or extractive, protein hydrolysate, distillate, or any product of roasting, heating or enzymolysis, which contains the flavoring constituents derived from a spice, fruit or fruit juice, vegetable or vegetable juice, edible yeast, herb, bark, bud, root, leaf or similar plant material, meat, seafood, poultry, eggs, dairy products, or fermentation products thereof, whose significant function in food is flavoring rather than nutritional. (source)

So, what this means that we don’t know whether the maker is referring to the oil that came from a natural substance or a derivate of some chemical that is supposed to mimic the taste of real food. There’s simply no way to know what we are putting in our mouth.

And I don’t know about you, but I don’t really trust big corporations to put healthy stuff in there (otherwise, they would brag about it on the packaging!). The sad truth is that they usually use the cheapest ingredients possible while still fulfilling the vague guidelines from the government to trick us into thinking their product is safe.

GMO Ingredients

What about the other ingredients? The cornstarch is most probably full of pesticides and comes from a GMO crop. Most non-organic corn crops nowadays are genetically modified, so I generally avoid corn that comes from an unknown source.

Same deal with soybeans. The hydrogenated soybean oil is most probably derived from a GMO. The hydrogenation process is also considered to be contributing to the increased likelihood of heart disease in our population (source). I really don’t understand how it can still be legal.

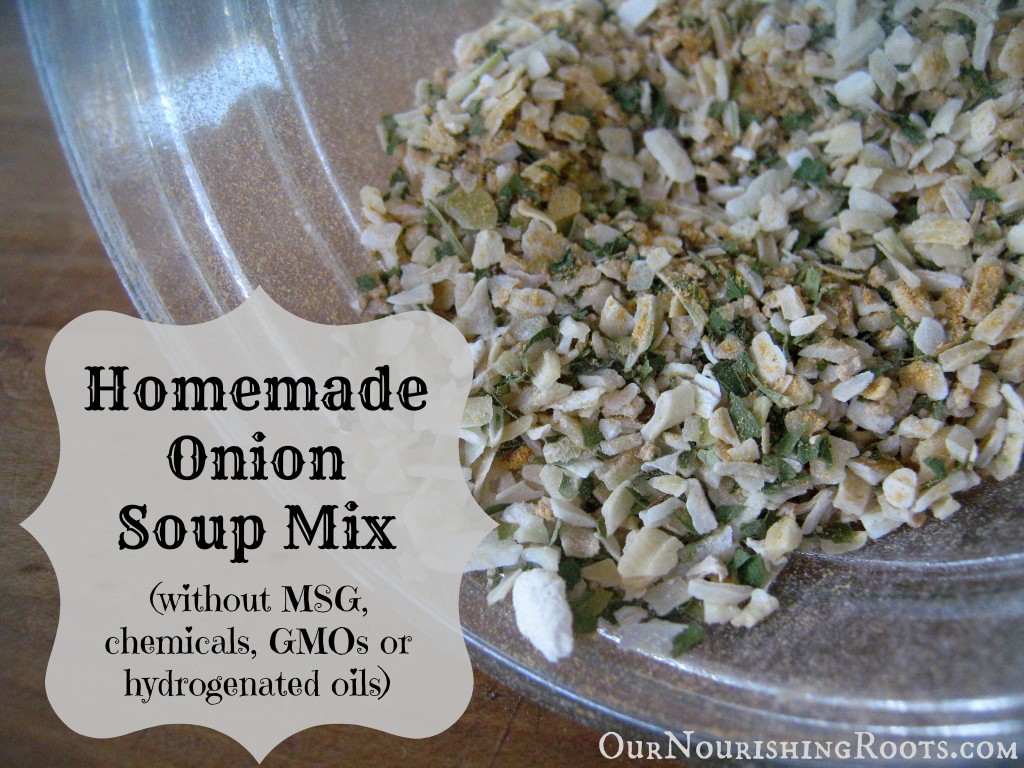
Ok, rant over. What I want to show you in this post is that you don’t need to use artificial flavor packets to whip up a bowl of onion soup with no effort. All you need to do is prepare such a mix yourself and have it on hand in your kitchen when you feel like having onion soup.

Necessary equipment:

  • a measuring cup
  • a pint glass jar with a lid

Ingredients:

  • 2/3 cup of dried minced onion
  • 1 T. of whole cane sugar
  • 1 T. of dried parsley
  • 2 t. of onion powder
  • 2 t. of turmeric
  • 1 t. of celery salt OR 2/3 t. of sea salt + 1/3 t. of celery seed powder
  • 1 t. of sea salt
  • 1/2 t. of ground pepper

Instructions:

  1. Add all the ingredients together in a mason jar.
  2. Screw the lid on and shake well to combine.
  3. Use two tablespoons of this mix like you would use one packet of a store-bought mix.

Enjoy your onion soup without worrying about shady ingredients! Also, don’t forget to try my taco seasoning alternative.

Orange Brownies with Honey Glaze

Who doesn’t love brownies? No one, that’s who! I admit I get a hankering for a nice creamy piece of brownie every once in a while. But to keep things interesting, I like to experiment a bit with my classic brownie recipe.

I love most citruses but oranges take the crown. They are a wonderful fruit, so refreshing and delicious! And I love the color they give to my orange desserts.

I first saw this recipe for orange brownies on Pinterest and I immediately decided I need to try something like this. I based my recipe on the one I found here, I just changed it up a little bit to be a bit more whole food.

These “orangies” are perfect as a light refreshing dessert that won’t weigh you down like regular heavy chocolate brownies do. I feel like fruit, especially organic fruit, has all the sweetness I need to satisfy my cravings.

The orange brownies taste great when still warm but interestingly, they seem to get better the longer they sit. I think it’s because by then, the honey syrup has completely absorbed into the cake. So don’t eat it all at once on the first day! Save a few pieces for later and tell me which tasted better.

Necessary equipment:

  • a large mixing bowl
  • a hand mixer
  • a rubber scraper
  • a large baking dish
  • a medium mixing bowl
  • a wooden spoon
  • a cooling rack
  • a skewer OR a fork

Ingredients:

the batter:

the glaze:

  • 3/4 cup of raw honey
  • 2 T. of freshly squeezed orange juice
  • 1 T. of orange zest

Instructions:

  1. Preheat the oven to 350 degrees. Prepare your baking dish by buttering it and set aside for now.
  2. In a large mixing bowl, whisk the flour and sea salt together.
  3. Add in the butter, eggs, honey, orange juice, and orange zest.
  4. Use a hand mixer to combine all the ingredients until you get a smooth batter.
  5. Pour the batter into your buttered baking dish.
  6. Bake for 30 minutes or until the middle is set but still slightly wet.
  7. In the meantime, prepare the honey glaze. Combine the honey with orange juice and orange zest in a medium mixing bowl using a wooden spoon.
  8. Once ready, remove the brownies from the oven and place on a cooling rack.
  9. Poke holes in the top of the cake using a skewer or a fork.
  10. Immediately pour the glaze on top of the cake. It will fill the holes you just created and give the brownie surface a nice glossy finish.
  11. Leave to cool for at least 30 minutes.
  12. Cut into squares and enjoy!

How to Make Vinaigrette – 2 versions: Traditional + Garlic and Herbs

If there’s one sauce recipe everybody should learn how to do perfectly, it’s the vinaigrette. This French sauce is brilliant in its simplicity and works perfectly with many kinds of foods. I most often use it as a salad dressing for literally any type of salad but it also tastes great when drizzled over hot steamed or baked vegetables. Most meals can be immensely enhanced just with a few dashes of a rich vinaigrette.

The basic ingredients of any vinaigrette sauce is high quality olive oil combined with vinegar. It’s both rich and slightly acidic at the same time, providing a nice contrast to the flavors of your meal. And it also serves as a basis for many other French sauces and dressings. You can make a green vinaigrette that gets its unusual color from fresh herbs and is served with steaks and poultry. Or mint and cream vinaigrette that beautifully accompanies thinly sliced ham. The sky’s the limit!

And while you can buy vinaigrette at supermarkets now, I prefer to do my own homemade version (as you might have suspected). It gives you full control over what kind of ingredients you put inside and you can arrange it to your own liking! I have made different versions of homemade vinaigrette and in this post, I am going to share with you two recipes. One if for basic traditional vinaigrette and the other is my favorite customized version: vinaigrette with herbs and garlic. I based it on the recipe here.

The herbs and garlic vinaigrette is my absolute winner. People rave about it at my parties and ask me for the recipe each time! It’s especially perfect over pieces of fancy raw blue cheese.

Necessary equipment:

  • measuring cups
  • a large mixing bowl
  • a whisk
  • a glass jar with a lid for storage

Traditional Vinaigrette

Ingredients:

  • 1 cup of high quality olive oil from late harvest
  • 1/2 cup of apple cider vinegar
  • 1 t. of Dijon mustard OR whole grain mustard (whole grain will give the vinaigrette more texture and a slight crunchiness)
  • 1 t. of garlic powder

Instructions:

  1. In a large mixing bowl, combine the olive oil, apple cider vinegar, mustard, and garlic powder.
  2. Keep whisking until the mixture emulsifies.
  3. Transfer to a glass jar and store in the fridge.

Herbs and Garlic Vinaigrette

Ingredients:

  • 1 cup of high quality olive oil from late harvest
  • 1/2 cup of apple cider vinegar
  • 2 T. of Dijon mustard OR whole grain mustard
  • 1 t. of onion powder
  • 1 t. of sea salt
  • 5 cloves of garlic
  • 1/2 t. of dried basil
  • 1/2 t. of dried thyme

Instructions:

  1. Chop the garlic very finely.
  2. In a large mixing bowl, combine the olive oil, apple cider vinegar, mustard, onion powder, sea salt, chopped garlic, basil, and thyme.
  3. Keep whisking until the mixture emulsifies.
  4. Transfer to a glass jar and store in the fridge.

It’s very simple to make a great vinaigrette that will amaze your guests! If you don’t serve it immediately and plan on storing a jar in the fridge, be aware that the olive oil will naturally harden slightly. So before using your vinaigrette, pull it out of the fridge at least 15 minutes beforehand. Let it sit at room temperature and then shake the jar slightly so that the ingredients can combine once more.

Traditional Irish Cream

I am not a big alcohol drinker but there are a few alcoholic beverages that I could enjoy without ever getting tired of them. One of these beverages is Irish cream. I especially love it in the summer, served with a scoop of vanilla ice cream!

It’s the perfect dairy-based cocktail with rich flavors coming from the grass-fed cream and a smoky Irish whiskey. It can be drunk as it is or used as a base for another cocktail so your mixologist side can get creative! Like I said, it tastes wonderfully when served with ice cream but I also enjoy using it as a creamer for my coffee.

I also use some of my homemade sweetened condensed milk to enhance the flavors even more. As you might have noticed, I use that milk in a lot of different recipes. It’s super versatile and works for more than just desserts – you will see that for yourself in just a moment!

Traditional Irish Cream

Necessary equipment:

  • measuring cups
  • a glass mixing bowl
  • a whisk
  • a glass container, preferably dark colored, to store the Irish cream in (can be either a jar or a bottle)

Ingredients:

Instructions:

  1. Whisk the egg yolks thoroughly in a large mixing bowl.
  2. Add in the sweetened condensed milk, heavy cream, chocolate syrup, coffee, and the vanilla (and optionally almond) extract. Keep whisking until combined.
  3. Pour in the whiskey and combine again.
  4. Your Irish cream is ready! Transfer it to your glass container(s). Screw the lid on tightly.

Refrigerate and use within a few weeks.

How to Make Dashi Stock

I make plenty of different stocks at home and dashi is by far the easiest one. It takes just 30 minutes to make which is vastly different from the 24 hours you usually simmer other stocks for (like bone stocks or chicken stocks). No, this one is so simple that there really is no excuse for not trying it.Dashi Stock

Well, maybe there is one excuse. It’s the ingredients that can be hard to find in a regular supermarket. You need kombu and katsuobushi to make proper dashi at home.

Dashi stock dried kelp

Kombu is dried kelp. Kelp, just like most other seaweeds, contains plenty of umami that will give your meals that wonderful deep flavor. Katsuobushi is shaved bonito flakes. It is also packed full of umami. Asian stores should carry both of these ingredients so if you have one nearby then consider yourself lucky. If not, then ordering them online is also a perfectly valid option. After all, both kombu and katsuobushi are dry so it’s not like you need them to be fresh.

Dashi dried skipjack tuna

Dashi is the base of many Japanese foods, like miso soup. Homemade dashi ensures that there are no shady MSG ingredients. The umami particles in kombu and katsuobushi are what provides the rich flavor, so you don’t need any artificial enhancers!

Necessary equipment:

  • a large stockpot OR a French oven
  • a large glass bowl
  • a large stainer
  • tongs
  • a large glass jar with a lid for storage

Ingredients:

Instructions:

  1. Put about 5 cups of filtered water in a large stockpot or a French oven and soak the kombu in it for at least 15 minutes. The dry kombu should become soft by then.
  2. Turn on the heat and bring the water almost to a boil.
  3. Add in the 1/2 cup of katsuobushi flakes.
  4. Remove from heat and leave the katsuobushi to steep for about 5 minutes. The flakes should sink to the bottom of your stockpot.
  5. Pull out the seaweed using tongs and discard.
  6. Use a strainer to remove the katsuobushi flakes.
  7. Transfer the liquid-only dashi to a glass jar and store in the fridge. Use within three days.

Enjoy! And if you want to make chicken stock, check out my recipe here.

Apple Potato Cake Irish-style

apple potato cake

I have some Irish ancestry in me so lately, I have been going over various Irish cookbooks in search of inspiration and new recipes. The one I am going to introduce you to today is this wonderful cake made from potatoes, sweet apples, sugar, and warm spices, such as cinnamon and nutmeg.

This cake is similar to our American Apple Pie in a way but it uses potatoes instead of butter so it’s more low-fat. The mashed apples and potatoes are covered by a fragrant crust made of sprouted flour, whole cane sugar, butter, and cinnamon. The overall result is a very soft and flavorful pie with an unusual texture that will make you want to bake another one right away!

I would have never thought to use potatoes in a dessert, especially a pie like this, but I must say that this is simply genius. The potatoes give the pie that moisture that is usually created from large amounts of butter. And it doesn’t really taste like potatoes so don’t worry about that. I do, however, think it’s more filling because you get some nice organic carbohydrates instead of just the usual butter fat. This means that the pie will keep your stomach full for longer and you probably won’t be able to eat more than two pieces at once. That’s a win-win for me!

Necessary equipment:

Ingredients:

crumbly topping

Instructions:

  1. Preheat the oven to 350 degrees.
  2. Line the cake pan with parchment paper and set aside for now.
  3. Combine the melted butter with pureed apples and potatoes in a large mixing bowl.
  4. Add in the whole cane sugar, eggs, raw milk, and lemon extract. Stir with a wooden spoon to combine.
  5. In another large mixing bowl, combine the flour with baking powder, salt, and nutmeg. Add this to the apple and potato batter and carefully stir in using a wooden spoon.
  6. Pour the batter into the cake pan.
  7. Make the crumbly topping in another mixing bowl. Roughly combine all the ingredients using a fork.
  8. Cover the cake with the crumble in an even layer.
  9. Bake for 45 to 50 minutes. Check if the cake is ready by using the toothpick method.
  10. Take out of the oven and leave to cool on a cooling rack.

I like to serve this cake with a drizzle of fresh cream or homemade sweetened whipped cream. In the summer, vanilla ice cream would probably work wonderfully!

Community GAPS Challange: The Results

Last month, we started doing the GAPS Challenge together. The GAPS challenge is all about getting through the introductory chapter to the GAPS journey. That chapter lasts for 30 days and can be completed using the Intro Diet ebook.

The first 30 days are the hardest because you are suddenly giving up foods that you were used to eating on regular basis. That’s why I feel like having a community that supports one another is so important. But the good thing is that if you decide to continue with GAPS for the next months, it will be so much easier!

Many of you wrote in the comments about how the challenge was going throughout this month. You shared your progress, asked questions, and asked for encouragement when things got hard. Other commentators would always be supportive, even if I wasn’t there to reply to all the comments myself. I never dreamt that I could be capable of building such a loving and supportive online community. Thank you everyone. This month has been a truly moving experience.

I want to remind you all once again that even if you don’t feel particularly better after doing the challenge, it’s perfectly normal. Some people will need more than 30 days to see results. For others, the GAPS might not work at all. That’s what makes us unique! It wouldn’t be fun if we were all the same person, right?

In today’s post, I want to sum up the challenge and see how we all did. Hopefully, we can all have a meaningful conversation and learn something new from one another. Here are the questions that I would like you to answer to begin that conversation:

  1. Did you manage to complete the Intro to GAPS? Why or why not?
  2. Did you feel any negative symptoms when you first started eating only GAPS-friendly foods? How long it took for them to disappear (if they did)?
  3. Did you cheat during the challenge? (It’s ok if you did!). Did you feel better or worse after?
  4. Did you sleep better?
  5. Did you feel more energy? How did your energy level fluctuate throughout the day?
  6. Has your perspective on cooking changed? Do you find making stock to be easier now?
  7. Has the GAPS challenge opened your eyes to any new dietary concepts?
  8. Are you going to continue with the GAPS diet? If not, are you going to keep some elements of it in your daily diet?
  9. Would you recommend doing the GAPS to friends and family? Why or why not?
  10. Did you make any new discoveries about how your body reacts to certain foods and how it digests them?

And of course, if you have anything else to add, please do so! Share your experience in the comments below so that we can all congratulate one another!

Is Relaxing the new Weight Loss Wonder Drug?

In this post, I want to talk a bit more in-depth about the negative effects of stress. We all know that being constantly stressed out is not good for you, but we are rarely aware of what exactly that entails.

PTSD and Stress

Stress And Its Effects on Your Body

Did you know that stress can actually make you fat? People like to assume that if someone is fat then they must be stuffing themselves with carbs and fats. But that’s not always the case and I am a good example of that.

I have struggled with fat hatred for a long time. For me, even eating clean and cutting out all of these supposedly harmful foods didn’t do the trick, and I still had trouble losing weight. Now I have decided to embrace that and just accept that I need to work first on other aspects of my health. I do not feel self-conscious about my weight anymore but I feel sorry for anyone who does. Skinny privilege is a real thing. Nobody assumes you are unhealthy as long as you are skinny. But you can eat only the right foods, work out regularly, and still be fat. And people will think that it must be your own fault. But I digress, let’s go back to the main topic.

Gaining weight is natural response to stress. That’s because when you are stressed out, your sympathetic nervous system is in overdrive and the body can’t handle that much of the “fight or flight” response. To protect itself from damage, the body begins storing excess fat for protection.

Seek Help and Change Your Habits

I was always easily stressed out. Growing up in abusive household and suffering from PTSD will do that to you. I have healed a lot since then, I worked on myself and my mental health by going to therapy, but still, I think I more prone to stress than most people. Other factors might be important as well. Studying stressed me out and I didn’t get enough sleep when in high school. I was eating a regular American diet for all those years and I was inadvertently exposing myself to all kinds of chemical substances like PUFA. All of that has an effect on how we handle stress.

Stress is not only making your mind stressed, it’s making your whole body stressed. All of your organs are working in stress mode which disables their proper functioning. Some people find that taking a magnesium supplement before bed helps support relaxation and improve sleep quality during particularly stressful periods. Similarly, when you relax after a stressful day at work, your body relaxes too. Having a tasty snack, getting a good night’s sleep, or even orgasming are all good ways to help you relax because these actions lower your stress levels.

Your Parasympathetic Nervous System

By relaxing, we are indicating to our parasympathetic nervous system that we are feeling good and that there are no worrying situations going on. In turn, we don’t get cold feet and hands because blood circulation is working as intended, our gut is properly digesting food, and we have more energy because our metabolism is improved.

Do you remember my other post about stress and the sympathetic nervous system? Both the parasympathetic nervous system and the sympathetic nervous system regulate our body’s functioning. But while the sympathetic nervous system deals more with handling stressful situations (the fight or flight response), the parasympathetic nervous system is all about relaxation. They work together to help you survive.

The parasympathetic nervous system is triggered whenever you feel relaxed. It’s best described by the term SLUDD which stands for Salivation, Lacrimation (crying), Urination, Digestion, Defecation.

So, what does it have to do with body weight? Everything.

Diet Recovery

I feel like we are still heavily ignoring the role metabolism plays in our health. It is most commonly associated with fast digestion and being skinny but it’s more important than that. It affects all of our bodily functions. Here is what Matt Stone has to say on the topic in Diet Recovery:

“Yeah, I know.  Eating pretty much any overly restricted diet will do these things to you.  Throw some “healthy” exercise in there with it and you’ve got a recipe for shutting down your entire system.  It’s all caused by a drop in metabolic rate, which, in today’s day and age, is more significant than ever because metabolic rate, collectively, is already at an all-time low.

The Role of Metabolism

This of course sucks because your metabolism controls, well, everything.  No seriously.  EVERYTHING.  Metabolic rate controls the rate at which every single cell in your body produces energy.  In turn this controls how much testosterone you produce as a male, or how much progesterone – the primary fertility, sex drive, and youth hormone you produce if you are a woman.  It controls the speed at which food travels through your digestive tract (the lower the metabolism, the more you have excess gas, bloating, constipation, or even irritation and resultant IBS-like symptoms).

Metabolism controls how many of those happy neurotransmitters you produce too.  When metabolism is low you sort of live, perpetually, in that state that people get in when they haven’t eaten in several hours – somewhere between depressed, spaced-out, and angry at the world.”

Having a good metabolism is the key to not only losing weight, but also to being healthy overall. And one of the ways we can improve our metabolism is to utilize the parasympathetic nervous system. So yes, relaxation and getting our stress levels under control is how we can lose weight.

The Ultimate Guide to Fat and Why You Should Not be Avoiding it

Today I want to talk about fat. Specifically, about different kinds of fat.

Fat is often what takes the most blame for high obesity rates in our country. It’s up there on the top of the list together with carbs, grains, and sugar. But we rarely stop to think what is the term “fat” entails exactly. Is a stick of grass-fed butter just as bad as the trans fats we find in fast foods? Logically thinking, that doesn’t seem likely, right? So why do we still cling to the idea that fat = bad?

Types of fat

Just like sugars, proteins, and other nutrients, fats can be of worse or better quality. They are not all equal. Let’s take butter for example.

If you go to a grocery store, you will see sticks of pale butter lining the refrigerated shelves. But if you go to a locally-supplied health store and search for grass-fed butter, that grass-fed butter will have a much more yellow coloring than the regular commercial butter. Although technically, they are both butters.

The yellow color is indicative of vitamin K2 content. When cows eat grass and use that grass to produce milk, it creates vitamin K. Vitamin K from the grass converts to vitamin K2 in the milk. And vitamin K2 is particularly important for our health because it’s one of the vitamins responsible for proper nutrient absorption. It also plays a big role in keeping our bones and teeth healthy.

We are severely lacking vitamin K2 in our diets compared to our ancestors. Drinking grass-fed milk and eating dairy products made from that milk is how we can supply our bodies with vitamin K2 again. Grass-fed dairy tends to be more expensive but I don’t think it’s worth it to save money on our health. Besides, you will spend less in the long run because your bones will be stronger and your teeth won’t deteriorate. Make your own butter and buttermilk to ensure you’re getting vitamin K2.

But grass-fed butter is only one of the many other traditional types of fat that can make our bodies healthier. Here are some of them:

  • coconut oil (both virgin and expeller-pressed)
  • pastured lard and bacon fat
  • pastured chicken and goose fat
  • duck fat
  • beef and lamb tallow
  • ghee
  • raw cream and raw cheese
  • organic palm oil and palm shortening
  • unrefined extra virgin olive oil
  • fermented cod liver oil
  • high vitamin butter oil
  • cocoa butter
  • pastured egg yolks
  • grass-fed meats
  • flaxseed and flaxseed oil
  • macadamia nuts

What about cholesterol and heart disease?

Many of the fats I listed are saturated fats. They generally stay solid at room temperature and have high smoke points, making them a good choice for cooking at high heat (but there are exceptions! For example, butter burns easily because it has leftover milk solids inside).

We may have heard that saturated fats are bad for us because they cause cardiovascular diseases. The same myth has been perpetuated by most leading health organizations and not many dare to put that statement under scrutiny. But as hard as it might be to believe, saturated fats do not give people heart disease.

Cholesterol and saturated fats have a very close association because they often appear in the same types of foods. And just like saturated fats, cholesterol has been villainized to an extreme point. Just like fats, there is both good and bad cholesterol. But that’s not the point of this post.

Matt Stone, an expert on nutrition and the author of Diet Recovery and Eat For Heat, says this about cholesterol and heart disease:

“Cholesterol levels are a pitiful indicator of heart disease risk to the point where they are really no indication at all. Mean serum cholesterol levels in France for example are almost identical to that of Americans, yet their heart disease risk is but a fifth of what America endures. This is just one of literally dozens of striking contradictions.”

The key takeaway

Our ancestors have lived their whole lives eating plenty of traditional saturated animal fats. Their foods were full of cholesterol. And their bodies were often much stronger than ours are right now because we have been weakened with years of eating processed foods that wreck our immune systems. Our ancestors kept eating saturated fats and didn’t all die from cardiovascular diseases. What does that tell us?

It tells us that we should embrace the traditional way of living and all the foods it contains. Yes, even saturated fats. Eating processed foods is what is going to kill us, not eating butter or coconut oil. So let’s stop clinging to the idea that fat is bad and unhealthy. Let’s choose what we eat in a mindful and responsible way, stopping to think on our own and not just accept whatever the media decides to feed us this time without questioning. I will stuff myself with grass-fed butter over drinking a spoonful of canola oil any day and I hope you can see why.