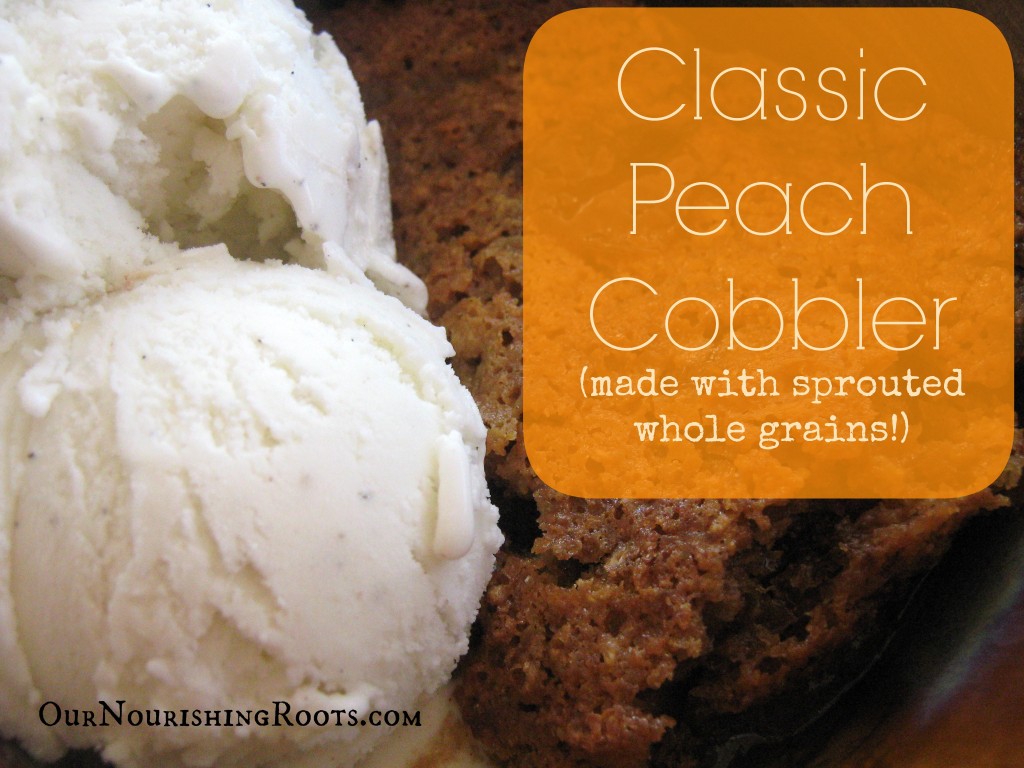
Home Blog Page 64

Coconut Cake frosted with Cocoa Buttercream

This yellow coconut cake is perfect for any large parties like birthday celebrations or baby showers. The best thing about it is that there is nothing in there to make you feel guilty of eating it!

Slice of coconut cake with cocoa buttercream


The soft yellow cake is sweetened with honey, a natural sweetener. Between the layers you will find rich and fluffy cocoa buttercream frosting that is simply addictive. By using coconut flour instead of regular white flour, your cake will be denser and have more depth. The coconut flour also means that this cake is much richer in fiber than a regular cake. It will fill you up quickly so don’t cut the pieces too big!

Cakes from boxes don’t even compare to this one! I feel sorry for my younger self for having to grow up eating store-bought cake mixes. But I am more than glad to make up for this now, as I enjoy every little piece of this delicious coconut cake. And I’m even more glad that my kids get to taste how real food tastes like before they are old enough to get addicted to unhealthy commercial sweeteners found in supermarket foods.

I based my recipe on Jenna’s coconut cake which you can find here. I tweaked a few ingredients to my liking and I’m very pleased with the results; I heard only rave reviews about this one and my kids even prefer it over double chocolate cake! If that’s not a good endorsement then I don’t know what is.

Necessary equipment:

Cocoa Buttercream Frosting

Ingredients:

Instructions:

  1. Whisk the butter and honey with a mixer on a high speed setting. You should get a light-colored soft mixture in three to five minutes.
  2. Add in the cocoa powder, coffee, and vanilla extract.
  3. Continue whisking. First at low speed and then again on high speed for another three minutes.
  4. Your frosting is now almost done. Scrape the sides of the bowl if you need to and chill the frosting (in the mixing bowl) in the fridge for at least 30 minutes.
  5. Take out of the fridge and whisk one last time for three minutes. Frost the cake immediately.

*I like to use a small amount of coffee in recipes which use chocolate or cocoa. It’s completely optional but it makes the chocolate flavor ‘pop’ by giving it more depth. Weak coffee is okay even on GAPS. If you can’t or don’t want to drink coffee for some reason then you can also use a coffee substitute, like Teeccino or Dandy Blend. Just remember that they both contain grains which you should ingest when on GAPS.

Coconut flour cake

Ingredients:

  • 2 1/4 cup of milk (can be substituted with coconut milk if you are on GAPS)
  • 2 cups of flour
  • one dozen eggs
  • 3/4 cup of honey
  • 1 1/2 T. of vanilla extract
  • 1/2 t. of baking soda
  • 1/4 t. of sea salt

Instructions:

  1. Preheat the oven to 350 degrees.
  2. Butter your round cake pans and line the bottom with parchment paper cut to fit into the circle. Spread some butter on the cake pan to help the paper stick. Set aside for now.
  3. Mix all the eggs, milk, honey, and vanilla extract together in a large mixing bowl.
  4. In a separate bowl, whisk the coconut flour with baking soda and salt. Make the mixture as smooth as possible with no lumps.
  5. Add the dry ingredients to the wet ingredients. Use a mixer to fully combine them together.
  6. Pour the batter into your cake pans and bake in the oven for about 40 minutes OR until the edges turn slightly brown. You don’t want to over bake them because the cakes will then rise and be uneven.
  7. Cool the cake pans on a cooling rack. Once cooled, use a knife to carefully separate the cake from the sides of the pan.
  8. Put one of the cakes on top of another one with a layer of cocoa buttercream frosting between. Frost the entire cake with the remaining frosting.

Sour Cream Ice Cream with Dulce De Leche Topping

0

I’m the girl at the frozen yogurt shop who bypasses the special flavors and toppings and fills up on the plain.  I love the tartness and the fact that it’s not overly sweet.

One of my favorite Brazilian cookbooks has a recipe for molton dulce de leche cake. The author recommends serving it with sour cream ice cream.  Although the cake recipe was a bit too fussy and precise for my temperamental oven, I loved the idea of pairing sour cream and dulce de leche.

Enter this simplified combo: a tangy sour cream ice cream recipe that’s surprisingly smooth and creamy for being eggless and a simple one ingredient recipe for dulce de leche that doesn’t involve potentially exploding cans.  Do the dulce de leche recipes involving boiling a can of scare the bejezus out of anybody else?  For my fellow plain frozen yogurt fans, the ice cream is great by itself as well.

Sour Cream Ice Cream

Ingredients:

1 pint sour cream
1/2 cup water
1 cup sugar
1/4 cup Lime Juice
Zest from a lime

Directions:

Make simple syrup:

In a medium saucepan combine 1 cup of sugar and 1/2 cup water over medium heat. Once sugar is dissolved, remove from heat and let cool to room temperature.

Whisk sour cream in a bowl and gradually add in the syrup, the lime juice and the zest until smooth. Mix until smooth.

Refrigerate mixture until thoroughly chilled. Add the mixture to your ice cream maker and follow your machine’s instructions. Place into freezer to harden.

Dulce De Leche:

1 or 2 cans sweetened condensed milk (or make your own with this recipe!)

Preheat oven to 425.

Pour the condensed milk into a glass pie plate or small baking dish. Place within a larger baking or roasting pan and add hot water halfway up the pie plate or baking dish.

Cover with aluminum foil and bake 1 1/2 to 2 hours until browned. Stir and serve immediately or let cool, whisk and refrigerate in a covered jar or container.

Spicy Cashew and Coconut Snack Mix

What do my favorite snacks, i.e. kettle corn, chocolate-covered potato chips, and Costco’s cashew, almond and pumpkin seed clusters have in common?  The irresistible combination of salty and sweet.

And while spiced, candied nuts are certainly nothing new (my previous go-to combined almonds, candied sugar, cumin and cayenne), this Thai snack mix ups the ante by combining cashews, dried coconut, honey and fresh red jalapeno chile pepper into an addicting and slightly spicy treat.

Spicy Thai Cashews

Unlike many of the spiced nut recipes out there, this cashew mix is made on the stove-top.  And why, exactly, is that important or noteworthy?  Well, you could already be enjoying the fruits of your labor in just about the same amount of time it would take you to preheat your oven.  In my book, that’s a good thing.  Dangerous, but good.

And for my fellow foodies who are similarly without access to Trader Joe’s (I feel your pain!), your best bet for tracking down raw, unsalted cashews would probably be your local Asian market or health food store.

Spicy Thai Cashews

Spicy Cashew and Coconut Snack Mix

PREP TIME: 5 minutes

COOK TIME: 10 minutes

TOTAL TIME: 15 minutes

Ingredients:

1 Tablespoon coconut or canola oil
2 Tablespoons honey
2 cups raw, unsalted cashews
1 cup shredded unsweetened, dried coconut
1 red Jalapeno chile, seeded and minced
1/2 teaspoon salt
pinch freshly ground pepper

Directions:

Heat the oil and the honey in a large pan over medium-high heat. Add the cashews, stir to coat and cook, stirring constantly, for about 2 minutes. Next, add the coconut and continue to cook. Stir constantly until both the cashews and the coconut are beginning to turn golden.

Add the chile pepper, salt and ground pepper and continue to cook. Stir constantly until the cashews and the coconut are both golden brown and the chile has toasted a bit. Remove from heat immediately and transfer to a serving bowl. Taste and add additional salt, if necessary.

Chicken with Chinese Broccoli, Thai Basil and Cashews

Thai Tamarind Chicken

What to do when you can’t decide between Thai basil chicken, chicken with cashews, and chicken with broccoli?  Make this Thai-inspired dish that combines elements from the three Asian favorites!

This was the first time I’ve cooked with Chinese broccoli (also called kai lan, gai lan, and Chinese kale) and guys, I’m in love.  I’m not entirely sure whether it’s a completely new to me Asian green, or whether I’ve been oblivious to what’s in the food I’ve been eating.  Regardless, I’m smitten.

Thai Tamarind ChickenThe stems may remind you a bit of regular old broccoli, but Chinese broccoli has sturdy leaves and small, yellow flowers in lieu of florets.  The leaves have a slightly bitter flavor, which pair really well with this Thai chicken’s tangy, salty, and sweet sauce.

Things only get more delicious with the addition of crunchy, toasted cashews and spicy, peppery Thai basil.  Don’t get discouraged by the seemingly long list of ingredients.  Everything should be available at an Asian grocery store.  Once you’ve got your ingredients purchased and prepped, you’re just a quick stir-fry away from this Thai-inspired dish. Need a drink to go with it? Try this Ginger, Lemongrass and Thai Basil Sparkler.

Thai Tamarind Chicken

Chicken with Chinese Broccoli, Thai Basil and Cashews

YIELD: 4 servings

PREP TIME: 45 minutes

COOK TIME: 15 minutes

TOTAL TIME: 1 hour

Ingredients:

* 3/4 pound boneless chicken, cubed or cut into strips
* 1 Tablespoon gluten-free oyster sauce
* 1 Tablespoon palm sugar (can also substitute regular or brown sugar)
* 3 cloves garlic, minced
* 1 Tablespoon minced ginger
* 3 Thai chiles, minced
* 3 Tablespoons vegetable oil, divided
* 1 small to medium red onion, thinly sliced
* 2 cups roughly chopped baby Chinese broccoli, both stems and leaves
* 1 Tablespoon tamarind pulp
* 1 Tablespoon fish sauce
* 1 cup roughly chopped Thai basil leaves
* 1/2 cup toasted, unsalted cashews

Directions:

Combine the first 6 ingredients and 1 Tablespoon of the oil in a large bowl. Set aside to marinate for 30 minutes.

Heat the remaining oil in a large skillet or wok, add the onions, and cook, stirring frequently, until the onion begins to soften. Add the chicken and all of the marinade and cook, stirring frequently, until the outside of the chicken is no longer pink (it shouldn’t be cooked through at this point). Add the Chinese broccoli, tamarind pulp and fish sauce and continue to cook until the chicken is cooked through and the Chinese broccoli leaves have wilted and the stems are tender crisp. Next, add the Thai basil and the toasted cashews. Continue to cook for another minute or so, until the Thai basil has just begun to wilt. Serve immediately.

Melon and Chia Seed Faux Tapioca Pudding

Melon Chia Pudding

Sure it’s kind of old-fashioned and I can certainly understand that its texture isn’t for everybody, but I love me a good tapioca pudding.  And not just the classic American variety, but the cold, soupy Asian versions as well.

Unfortunately it’s exactly the times when cold tapioca soup sounds most appealing (weather = hot, humid, unbearable) that the last thing you want to do is stand over a hot flame for an extended period of time waiting for pudding to thicken.  And that’s where chia, everybody’s favorite wonder seed, steps in to save the day.

Melon Chia Pudding

When combined with unsweetened coconut milk and pureed melon, it creates a lightly-sweetened, refreshing pudding.  It’s easy to adjust the texture by varying the amount of chia seeds you use.  Want it more soupy?  Decrease the amount of chia seeds.   Like your pudding nice and thick?  Add some more chia seeds.  It’s pretty much impossible to mess up.

This no-fuss, no-cook, vegan pudding not only makes a great dessert, but it’s quickly become one of my favorite breakfasts as well.  Getting my Omega-3s has never been so easy.

Melon Chia Pudding

Melon and Chia Seed Faux Tapioca Pudding

Yield: 4 servings

Prep time: 10 minutes

Total time: 30 minutes

Ingredients:

2-3 Tablespoons chia seeds, depending on how thick you’d like your pudding
1-1/3 cups melon (honeydew or cantaloupe) puree**
2/3 cup coconut milk
chopped melon for topping (optional)

Directions:

Combine the chia seeds, melon puree and coconut milk in a medium bowl and stir to combine. Let sit for at least 20 minutes for the pudding to thicken. Spoon into individual bowls and top with chopped melon, if desired.

** Process cubed melon chunks in a blender or food processor to create the puree.

Fresh Mango Salsa

Mango Salsa

Every summer I get a little bit of produce envy when I read about the overabundance of zucchini and/or tomatoes in everybody’s garden.  Every time I attempted to grow either, the plants would invariably succumb to some sort of rot or pest.  Sigh.

But I suppose I shouldn’t get too jealous of you mainland folks.  After all, every summer I am happy to help out friends, neighbors, and/or co-workers looking to pawn off mangoes from their over-productive trees.

Although I live in a condo these days, it wasn’t too long ago that I was the one who had to deal with dozens of newly ripened mangoes on a daily basis (oh how I miss those Pirie mangoes!).  Weekly batches of mango curry chicken and daily smoothies barely put a dent in the supply.

Rather than give the plain fruit away, I often made and gifted batches of fresh mango salsa.

Over the years I’ve had ample opportunity to perfect the recipe.  I’m a bit biased, sure, but I swear it’s the best mango salsa recipe I’ve ever tasted- sweet and salty with a bit of kick to it.  Although I can happily eat excessive amounts of the stuff as a snack with tortilla chips, it’s also great as a topping for grilled chicken, fish tacos, or these Curried Jerk Pork Chops.

Mango Salsa

Fresh Mango Salsa

YIELD: 4 cups

PREP TIME: 10 minutes

TOTAL TIME: 10 minutes

Ingredients:

* 1 cup diced tomatoes (canned tomatoes that have been drained work great)
* 1 cup finely chopped mango
* 1 cup finely chopped red onion
* 1 cup roughly chopped cilantro leaves
* 1 Tablespoon fresh lime juice
* 1 small Jalapeno chile pepper, minced (seeded or partially seeded, depending on heat preference)
* 1/2 teaspoon salt

Directions:

Combine all ingredients in a large bowl and stir well to combine. Taste and adjust lime juice and salt, if necessary.

Cherry-Infused Vodka

Since operation fridge and pantry clean-out is still in effect, I thought I’d drop in with a post that’s more public service announcement than recipe.  Cherry season is drawing to a close, so if you’re a fan of cherry mixed drinks (like this very cherry lime mojito!), you may want to think about infusing some vodka with fresh cherries while you can still find them at the market.

Cherry Infused Vodka 1

I’ve only used Bing cherries, since I love their vibrant hue and bold flavor, but you’re welcome to try Rainier as well.  The resulting product will likely just have a more delicate flavor, like the cherries themselves, as well as a lighter tone.

There’s really no right or wrong way to make this… the following “recipe” is just a guide that you can adjust as you wish.

Cherry Infused Vodka 2

Cherry-Infused Vodka

PREP TIME: 10 minutes

TOTAL TIME: several weeks

Ingredients:

1 cup Bing cherries, washed, stems removed, and pitted
2 cups vodka

Directions:

Combine the cherries and the vodka in a jar or bottle and cover with a tight-fitting lid. Set aside for at least a week or two (ideally about a month) while the cherries to infuse the liquor. Strain the liquid into another bottle.

South Indian Pineapple with Chile and Mustard Seeds

Indian Spiced PineappleSoon after I’d made the rash decision to move to Hawaii, I was looking through the Oahu job classifieds online.  Sandwiched somewhere between the ads for fire knife dancers and coconut tree climbers was an ad for a field worker at a pineapple plantation.  Clearly the job market in Honolulu was going to be a little bit different than on the mainland.

Since my fire knife dancing and tree climbing skills were rusty at best, I figured if I couldn’t get a job that utilized my college education, I could always work on a farm picking pineapples for the summer.  Never mind the fact that at that point I thought pineapples were grown underground, with only their spiky tops reaching above the surface.  It  seriously blew my mind when I first visited Dole Plantation and saw pineapples growing on top of the plant, almost like somebody had just walked by and rested them on the foliage.

Pineapple

DOG

Thankfully I found a more suitable job within a couple weeks of arrival, because I’m pretty sure I would have only lasted a day or two doing manual labor.  It’s a toss-up as to whether it would have been heatstroke or lower back pain that would have done me in.

In any case, I’m lucky to have access to local pineapples that are grown just a few miles away.  But for too long I’ve been guilty of using pineapples exclusively for smoothies or mixed drinks- it never occurred to me to include them in a savory meal (no, Hawaiian pizza and Hawaiian chicken aren’t popular out here).  So I have India to thank for making me finally recognize pineapple’s versatility.

Fresh chunks of pineapple are combined with mustard seeds, cumin, turmeric and hot chilies in this sweet and slightly spicy side dish.  A bit of coconut milk simmers down to create a sweet, thick sauce that coats each and every piece.

And before you pooh pooh the idea of a pineapple Indian side dish, just think about how great a couple dollops of mango chutney are on the side of some hearty curries.  I rest my case.

South Indian Pineapple with Chile and Mustard Seeds

Although curry leaves add a subtle flavor to the pineapple as well as a pop of color, feel free to omit them if you have trouble finding them in your area.

Yield: 4-6 servings

Prep Time: 10 minutes

Cook Time: 15 minutes

Total Time: 25 minutes

Ingredients:

1 medium to large pineapple, peeled, cored and cut into medium chunks
1/4 cup water
2/3 cup coconut milk
1/2 teaspoon turmeric
1 teaspoon salt
1/2 teaspoon crushed red pepper flakes
1 teaspoon sugar
1 Tablespoon oil
1/2 teaspoon mustard seeds
1/2 teaspoon cumin seeds
1 medium onion, finely chopped
2 dried red chilies, cut in half lengthwise and seeds removed
6-8 fresh curry leaves

Directions:

Place the pineapple chunks, water, coconut milk, turmeric and crushed red pepper in a wok or large skillet over medium-high heat. Bring to a boil, then reduce heat to low, cover and simmer for approximately ten minutes. Add the salt and sugar, stir to mix, and simmer uncovered until the sauce has thickened.

While the pineapple is simmering, place the oil in a small saucepan or skillet over high heat. When the oil begins to smoke, add the mustard seeds and cumin seeds and immediately cover with a lid or splatter screen. When the seeds stop popping, add the onion and reduce heat to medium-high. Cook, stirring occasionally, until the onion has begun to turn golden. Add the dried red chilies and curry leaves, stir, and cook for another minute or two.

Pour the onion mixture into the pineapple mixture. Mix everything together and let cook for 2-3 minutes. Serve hot or at room temperature.

Indian-Spiced Creamed Greens

Indian Creamed Chard and KaleCreamed spinach.  It’s pretty good stuff, right?  I mean, even folks who hate greens and vegetables in general would probably be happy to eat it on the side of a char-grilled steak.

But what about those of us on the other end of the spectrum, i.e.  those of us who would happily eat spinach, kale or just about any other green every day of the week?  Those of us who don’t need excessive amounts of butter and cream to make those greens palatable and would be happier without the extra fat and calories?

Well, I think I’ve got something that will appeal to both factions.

Chard and KaleLarge bunches of Swiss Chard and kale are combined with a lightly-spiced onion mixture and rich and creamy coconut milk in this Indian-spiced creamed greens dish.  Even though it’s much, much healthier than your average creamed spinach recipe, it tastes no less indulgent.  Coconut milk for the win yet again.

I have a spinach salad on an almost daily basis, so I like to switch things up and use Swiss Chard and kale for this creamed greens recipe.  But, if you’re looking for a shortcut, I imagine adding a box or two of frozen spinach in lieu of the Swiss Chard and kale would work great and save you a bunch of time.

Indian Creamed Chard and Kale 1

Indian-Spiced Creamed Greens

Yield: 4-6 servings

Prep Time: 5 minutes

Cook Time: 40 minutes

Total Time: 45 minutes

Ingredients:

* 1 medium-to-large bunch Swiss Chard
* 1 medium-to-large bunch kale
* 1-1/2 cups water, divided
* 2 Tablespoons oil
* 3/4 teaspoon cumin seeds
* 1 medium onion, chopped
* 1-1/2 teaspoons grated or minced fresh ginger
* salt
* 1/2 cup coconut milk

Directions:

Thoroughly wash the Swiss Chard and kale and remove any tough stalks on the kale (no need to remove the Swiss Chard stalks). Roughly chop the leaves and stems and place in a large stockpot with 1 cup of the water over medium-high heat. Cover and cook until the leaves and stems are tender, about 15 minutes. Drain.

While the greens are cooking, prepare the tadka. Heat the oil in a large saucepan over high heat. When the oil begins to smoke, add the cumin seeds and cover immediately with a lid or a splatter screen. When the cumin seeds have begun to stop popping and/or sputtering, add the onion and reduce heat to medium-high. Cook, stirring occasionally, until the onion begins to turn golden. Add the ginger and cook a minute or two, until very fragrant.

Add the steamed greens, the remaining half cup of water and a sprinkle of salt to the saucepan. Reduce heat to low and cook, covered, for another 10-15 minutes. Use an immersion blender to process the mixture smooth and then add the coconut milk. Cook just until heated through.

Taste and add salt, if necessary. Serve warm.