
I had made peanut butter cups before but when I first tried the recipe, I’m about to share with you, my mind was blown! The rich taste is very satisfying, and all of the flavors melt in your mouth as you eat it. I really want to savor these butter cups, so I usually eat them very slowly. All my previous recipes were missing something, but this one tasted exactly how I wanted my peanut butter cups to taste. That missing ingredient was fat.
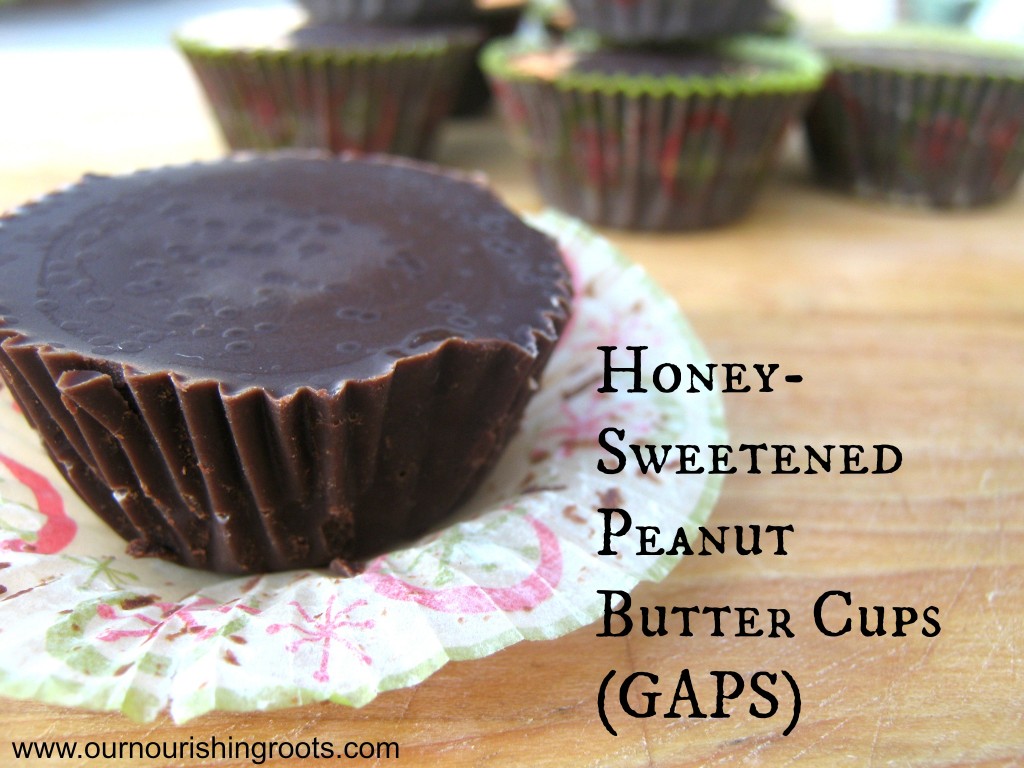
Not that I wasn’t using any fat before, that would be impossible to bake. But my previous versions of peanut butter cups were all made with coconut oil (in both the chocolate batter and the peanut butter mixture) which meant that they needed to be stored in a freezer. That definitely wasn’t beneficial for their flavor.
Coco Butter as a Baking Ingredient
In this recipe, I use cocoa butter instead. It’s not very well-known as a baking ingredient. You most often hear about cocoa butter when it’s used in lotions and creams. I only started thinking it might be good for baking goods after I tried this recipe for Cocoa-Butter Cupcakes. This particular recipe didn’t turn out so well, probably because I messed up in the measurements somewhere. But that gave me the nudge to try using cocoa butter in other recipes as well. It can be used as a substitute for regular butter in most cases.
Cocoa butter has a higher melting point compared to coconut oil (100 degrees instead of 76 degrees) so it’s much easier when you are making chocolate or candies that need to be set up and harden at room temperature. But its most valuable quality is that it has this rich and smooth chocolate flavor that simply cannot be achieved with regular butter. You will be able to taste it for yourself if you buy raw and organic cocoa butter from a certified manufacturer.
These peanut butter cups are going to be part of our Christmas gift bags this year, together with some other pastries. I cannot wait for my friends and family to try them out, I think they will find them really delicious!
Peanut Butter Cups and GAPS Diet
And as a side note about eating cocoa on the GAPS diet, remember that not everyone is able to digest cocoa without any problems. If you want to test your stomach, try drinking a small amount of cocoa liqueur or adding a spoonful of cocoa powder into your pancakes or waffles to see if you see any negative symptoms. I am a very lucky person because I don’t have these issues but I am aware that not everyone is. My recipe uses both cocoa powder and cocoa butter. Cocoa butter is generally easier on the stomach so it shouldn’t cause you too many problems (but again, listen to what your body is telling you). But if you have problems with digesting cocoa powder then you can simply skip it in this recipe.
Technically, cocoa powder is not allowed when you are first starting GAPS and during the first few months. But after your gut has healed substantially then you can start reintroducing it to your diet. Here is what the GAPS FAQ has to say about that:
Cocoa is SCD illegal. However, I find that many people can start having it occasionally on the Full GAPS Diet, once the digestive symptoms are gone. Find pure organic cocoa powder. Mixing the powder with some honey and sour cream makes a delicious dessert, and you can add it to your homemade ice cream or cakes. After trying it for the first time, observe your patient for any reactions. Cocoa is very rich in magnesium and some essential amino acids and, unless your digestive system is not ready for it, there is no need to avoid it.
Honey-sweetened Peanut Butter Cups
As you might know already, I always use coffee in my chocolate recipes. I use only a small amount so that you cannot taste any coffee when eating but I feel like it always gives my baking goods some additional flavor depth. It simply tastes better when you put some brewed coffee in it and I don’t really know how to explain! But I have seen professional chefs do the same thing and I’m convinced there is some baking magic involved there. And if you don’t like coffee or simply don’t want to use it, it’s okay to skip it in this recipe.
And if it’s your first time making chocolate on your own then you need to remember one rule: never let your chocolate mixture come into contact with any liquid, not even a drop of water. Steam from the saucepan or any amount of condensation can cause your chocolate to turn from a smooth glossy mixture into a lumpy mess (imagine how flour becomes a paste when you add water to it – that’s how chocolate behaves and it’s not easy to fix).
Necessary equipment:
- a mini muffin baking pan
- mini muffin paper liners for the pan
- a large glass mixing bowl (needs to be heatproof)
- a medium mixing bowl
- a medium saucepan
- a whisk
- a towel
- a ladle
- a small ice cream scoop
Ingredients:
chocolate:
- 8 ounces of cocoa butter
- 1 cup of cocoa powder
- ½ cup of raw honey
- 2 T. of brewed strong coffee
- 2 t. of vanilla extract
peanut butter filling:
- ¼ cup of peanut butter
- 2 T. of raw honey
- 2 T. of palm shortening
- 1 t. of vanilla extract
- ¼ t. of sea salt
Instructions:
- Line your mini muffin baking pan with paper liners and set aside.
- Pour some water into your saucepan and bring to a simmer.
- Set your heatproof bowl over the saucepan. Remember to fully dry it to avoid the chocolate mixture seizing. You also need to keep the stove at low enough settings so that there isn’t any steam but the water is still simmering.
- Transfer cocoa butter to the bowl and stir gently until it melts.
- Add in the cocoa butter and honey. Whisk to combine.
- Add the brewed coffee and vanilla extract. Keep whisking until the mixture is smooth.
- Remove from heat and set the bowl on a towel to help the bottom of it dry completely.
- Wipe all the sides of the bowl dry and set it aside to cool a bit.
- In another mixing bowl combine peanut butter, honey, palm shortening, vanilla extract, and sea salt. Stir until smooth and set aside.
- Ladle the slightly cooled chocolate into the muffin paper lines. Make it a little less than half full.
- Now use an ice cream scoop to make a small ball of peanut butter dough. Use your hands to flatten the dough ball to make a small disc. Place the disc on top of your chocolate base in each muffin liner.
- Ladle more chocolate over the top until the liners are filled to the top.
- Let your peanut butter cups solidify at room temperature for a few hours. Once hardened, take them out of the baking pan and enjoy!


")