

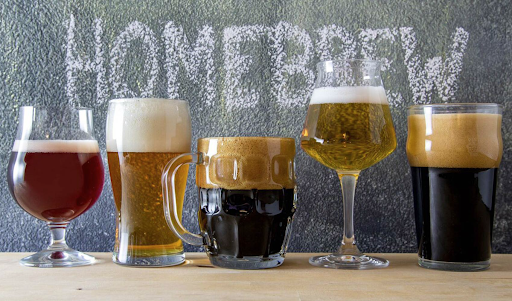
Does the idea of homebrewing pique your interest, but you’re worried that making your own beer may be a lot more complicated than you think it is? Well, here’s the good news: getting started is a lot easier than you’d imagine. With some basic equipment, the right ingredients, and a general idea of how brewing works, anyone can start making their own beer at home.
These days, home brew kits for beginners have made the whole process even more accessible. Not only do these kits usually include most of the essentials you need to get going, but they also help take the guesswork out of brewing, letting you focus on learning the ropes and just enjoying the experience. That said, before you go splash out on your first homebrewing kit and start brewing your first batch, there are a few things you really should know.
About the Equipment You’ll Need
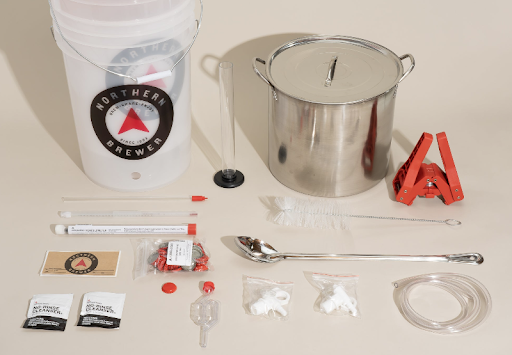
Now, I know that different homebrew kits can have slightly different contents, but most beginner setups will include some or all of the following.
Fermentation Vessel
This is where your beer ferments after the brewing stage – essentially the container that holds your brew, allowing the yeast to go to work and turn the sugars into alcohol and carbon dioxide, while also giving it enough room to expand. It’s usually a food-grade plastic bucket or similar container with a lid, and its job is to keep everything in one place while the magic happens.
Airlock
An airlock is a bit of kit that fits on top of the fermentation vessel, letting any carbon dioxide produced during fermentation escape while keeping outside air and any unwanted germs or contaminants out of the brew. That’s especially important during fermentation, when the beer needs all the protection it can get.
Hydrometer
One of the really useful tools you’ll get in a beginner’s kit is a hydrometer. This little device lets you measure the density of your brew, which in turn gives you a pretty good idea of how things are progressing. Plus, if you’ve got a read of the original gravity of the brew and the final gravity, you can even estimate how much alcohol the finished beer is going to have.
Thermometer
Temperature is a big deal when it comes to fermentation, so a thermometer is a really useful bit of kit for keeping an eye on things. It lets you check that the temperature of your wort or fermenting beer is just right for the yeast you’re using, and helps you avoid temperatures that could end up messing up the finished beer.
Syphon
A syphon is basically a long, curved tube with a plunger on the end, used to transfer your beer from one container to another. The idea is that you use it to move the beer from the fermenter into bottles or another vessel, leaving all the sediment behind in the process. This makes the transfer a heck of a lot cleaner and reduces the amount of stress on the brew.
Steriliser or Sanitiser
Keeping your equipment squeaky clean is one of the most important bits of the homebrewing process, and that’s where a steriliser or sanitiser comes in – it helps keep the risk of unwanted germs and microorganisms messing up your beer to a minimum. Now, a lot of kits will come with one, but it’s always a good idea to follow the instructions for cleaning and sanitising your equipment – it’s worth taking the time to do it right.
Brewing Or Mixing Spoon
A long-handled spoon is a really simple but really useful tool that you’ll end up using all the time. It’s great for stirring ingredients, helping the sugars dissolve, and mixing up the contents of your brewing vessel – it’s a solid addition to any homebrew kit.
About the Ingredients
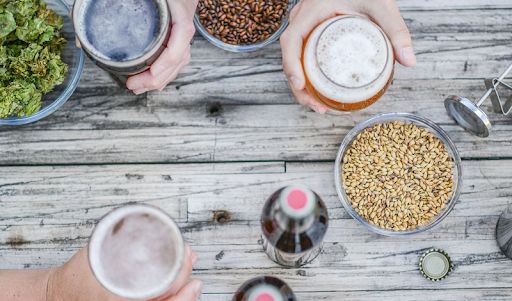
Getting to know the ingredients is another important part of starting out on your homebrewing adventure. Each one of them plays a different role and can have a big impact on how your beer turns out – from the flavour and aroma to its colour, body and alcohol content.
Malt
Malted barley is pretty much the main source of fermentable sugars in most beers. When you’re brewing, these sugars get extracted from the malt and then converted into alcohol by the yeast. And malt contributes to the beer’s alcohol, sweetness and body as well. Of course, many beginner kits use malt extract, which makes the brewing process a whole lot simpler, and you don’t have to mess around with whole grains.
Hops
Hops bring bitterness and most of the flavour and aroma in beer. What they bring – citrus, floral, fruity, herbal or pine-like notes, for example – depends on the variety. How much bitterness or how much aroma they contribute also depends on when you add them during the brewing process.
Yeast
Yeast is the one responsible for doing the fermentation for you. It chomps down the sugars from the malt and then converts them into alcohol and carbon dioxide. But the type of yeast you use matters – different strains can produce flavours that are quite noticeably different. And getting the fermentation at the right temperature is important – you want to get it right so you get a good result.
Water
The water you use makes up most of the finished beer, so the quality of the water you use is going to have an impact on how your beer turns out. The mineral content and pH level of the water can affect the brewing process and the flavour. Now, for beginners, you might not need to start messing around with water chemistry just yet. Good-quality water and a reliable recipe are a good place to start.
You may also come across additional ingredients such as brewing sugar, fruit, spices or other flavourings, depending on the recipe. But you don’t have to try everything straight away – leave that for when you become more confident in your brewing skills. A beginner’s ingredient kit can be a godsend because it provides the ingredients and quantities needed for a particular beer. When you’re feeling more confident, you can start experimenting with different malts, hops and yeast to create beers that really suit your taste.
About the Brewing Process
The exact process of brewing can vary depending on the beer style and recipe you’re working with, but most brews follow the same basic steps.
Get Your Gear in Order
Before you even start, make sure all the equipment that’s going to come into contact with your beer is spotless and sanitised. Good hygiene is key to stopping unwanted bugs from screwing with your brew.
Get Your Wort On
The wort is the liquid that eventually becomes beer. Depending on your recipe, you might be steeping malts, mixing in some malt extract, or working with other ingredients to get the fermentable sugars out of them. Hops usually get added at different points in this stage to give the beer some bitterness, flavour and aroma.
Chill the Wort
Once you’ve done the brewing bit, you need to get the wort cooled down to the right temperature for adding yeast. You don’t want to be chucking yeast in there if it’s still too hot, or you’ll just end up killing it.
The Ferment Stage
The cooled wort goes into a fermenting vessel, and the yeast gets added. Now the yeast starts churning out the sugars and producing beer and CO2 – this is the bit where patience really comes in handy, as it can take days or even longer for the fermentation to finish, depending on the beer.
Time to Bottle or Keg
When the fermentation is done, you can transfer the beer into bottles or a keg. If you’re bottling, you might need to chuck a bit of extra fermentable sugar in there to get some fizz going, depending on how you like your beer.
It’s Ready…Eventually
After you’ve bottled or kegged the beer, it needs some time to carbonate and mature. Eventually it’ll get to the point where it’s ready to drink. The key to getting good results is following your recipe and giving each stage the time it needs. As you get more experience, you can start experimenting and trying out different brewing techniques and beer styles.