Home Blog Page 30

Making The Best Tasting Coffee Possible

Without the caffeine that coffee provides, we’re sure that the world would come to a stop. Coffee is the fuel for many of us and most days would be difficult to face without at least one cup in the morning. Fortunately, most people don’t have to go to a fancy coffee shop and spend a small fortune on a cup of coffee. They can simply fire up their coffee machine and have hot coffee at their fingertips in a matter of moments.

Of course, caffeine isn’t the only reason we all enjoy coffee, now is it? We also like the taste and aroma of coffee. There’s just something special about that first cup of coffee and it can really signal the start of a good day. Unfortunately, the whole experience can be quickly ruined if you get a bad cup of coffee from a dirty coffee maker. That can ruin the whole experience and you can end up drinking a cup of bitter, nasty tasting coffee.

We don’t think anyone should have to deal with funky coffee, so we’ve decided to address the issue head-on. We’ve decided to talk about how you can keep your coffee maker clean and in tip-top condition. That’s why we’re going to talk about cleaning and maintaining your coffee pot so that you can enjoy a great cup of coffee not only this morning but every morning from this point on.

Before we continue dwelling on what it takes to make a great coffee every morning, if you are the adventurous type, consider joining a coffee club. They offer coffee subscriptions, delivering a variety of specialty beans and roasts from around the world to your doorstep. You can also go all out and sign up for a barista course in Melbourne that will give you hands-on practical training.

Cleaning Drip Coffee Makers

It doesn’t matter if you have the best 4-cup coffee maker or the best 12-cup coffee maker, this section applies to you. This section deals with cleaning drip coffee makers, so if you have a single cup coffee maker, you’re going to want to move down to the next section. For everyone with drip coffee makers, let’s talk about how these machines can be kept clean.

[wc_fa icon=”star-o” margin_left=”” margin_right=”10″ class=””][/wc_fa]Step One: Empty The Coffee Pot Completely

The first thing that you should do is to empty out the coffee pot. This should be done when the coffee maker is cool. Make sure to pour out any remaining coffee in the carafe and then remove the filter and the grounds from the machine.

[wc_fa icon=”star-o” margin_left=”” margin_right=”10″ class=””][/wc_fa]Step Two: Clean With White Vinegar Regularly

Although this step doesn’t need to be performed every day or even every week, it does to be done at least once a month. To clean your 12-cup coffee machine, add 3-cups of white vinegar to the machine and 6-cups of water to it. To clean a 4-cup coffee machine, add 1-cup of white vinegar and 2-cups of water to the machine. That will give you the best ratio of vinegar to water for cleaning the coffee maker.

Now, turn on the coffee pot. Allow it to continue through its entire cycle, and then when it’s done brewing, turn off the coffee maker. Allow the water/vinegar mixture to remain in the coffee carafe for at least 15-minutes, but 30-minutes is better. When that time has elapsed, then pour out the water.

When the carafe is cool, it’s time to brew a cycle of water. Fill up the machine with all of the water it can hold and then run it through a cycle. Dump out the water from the carafe and then when it’s safe to do so, brew another pot of plain water. Make sure that there are at least 15-minutes between each brewing cycle for the best results. This will remove any residual vinegar taste that still exists in the machine.

Cleaning Single-Cup Coffee Makers

Now let’s talk about single cup coffee makers. You know, the ones that use a pod. These are pretty easy to clean if you take a few moments to do so properly. To begin, empty the machine and make sure that there isn’t a pod in the chamber. Now, as is done with drip coffee makers, it’s time to clean the machine with vinegar.

Using 1/2-cup of white vinegar and 1/2-cup of cold water. Pour this vinegar mixture into the coffee maker’s reservoir and then turn on the machine. When the brewing cycle is done, turn the machine off and allow it to sit for at least 15-minutes. After 15-minutes, dump out the vinegar/water mixture.

Now, it’s time to brew two consecutive cups of plain water. This will help to remove the vinegar taste. Make sure to wait for at least 15-minutes between each brewing cycle for the best results.

Use Soap & Water On The Carafe

The above steps aren’t designed to be performed every day, but only every 2-weeks to a month. What you can do on a daily basis to ensure that your coffee machine brews a better taste of coffee is to wash the carafe using soap and water on a daily basis. This will help to keep the oil build-up from the coffee grounds from building up too much.

Other Things To Consider For Better Tasting Coffee

Okay, that’s all we have on cleaning and maintaining the coffee maker, and just following those steps will ensure that the coffee maker makes better tasting cups of coffee. However, keeping a clean coffee machine isn’t the only thing that will improve coffee flavor. There are a few other things that you can do to make sure that your coffee is the best it can be and we’ve listed some of them below.

  • Tip #1: Use Freshly Ground Coffee When Possible.
  • Tip #2: Use Filtered Water For Making Coffee.
  • Tip #3: Use The Highest Ground Coffee Available.

The above three tips, along with a clean machine, will ensure that you will brew a fantastic cup (or pot) of coffee every single time. And who doesn’t enjoy a fine cup of coffee? Like we’ve said earlier, coffee is one of the simplest joys in the world.

Some Of The Best Uses For Ketchup

Ketchup is a food product that can be found just about everywhere. It’s in most people’s homes, it can be found on most restaurant tables, and stores stock dozens upon dozens of different varieties of it. Most of what we can find is tomato ketchup, but there are certainly other types of ketchup. There’s mushroom ketchup, walnut ketchup, and even mango and banana ketchup.

Despite ketchup being ubiquitous, we have to say that most people only use it to put on a couple of different foods. We’ve seen people put it on hot dogs and hamburgers, on French Fries and tater tots. We’ve also seen people put ketchup on their scrambled eggs. That limited use of this product is unfortunate because it has a bigger potential than what most people believe.

We wanted to explore some of the other ways that ketchup can be used. We knew that there had to be more than just a couple of uses for ketchup. After all, it was a product that was historically very widely used. So, after a little bit of research, we’ve found some creative uses for ketchup, so that everyone can put their best ketchup brands to good use. Before we do that, however, we’d like to make a pit stop and talk about the history of ketchup first. If you don’t mind, of course.

A Brief History Of Ketchup

Ketchup can trace its lineage back to 300 B.C. To a product that was made from fermented fish entrails, meat byproducts, and soybeans. This fish sauce was known as “Koe-Cheup” in the Southern Min dialect, and it was created because it was easy to store on long oceanic voyages.

This paste was extremely popular and was carried by trade routes through the Philippines and Indonesia. This is where the British developed a taste for this fishy and salty condiment during the early 18th century. However, even though they liked it, they couldn’t help but change it to more fit their tastes.

The British would go on to make ketchup products from everything from oysters and mussels to plums and peaches. There were walnut ketchup, lemon ketchup, and celery ketchup. They would boil down ingredients into a salty syrup-like consistency. It was highly concentrated and could last for a very long time without spoiling.

It wouldn’t be until 1812 until tomato-based ketchup products were introduced. This is when a Philadelphia scientist names James Mease developed one of the first recipes. Unfortunately, early tomato-based ketchup products didn’t use vinegar, so they tended to go bad quickly. It wouldn’t be until 1876 until more modern ketchup was introduced.

Modern Day Ketchup

In 1876, Heinz created a ketchup formulation that contained tomatoes, brown sugar, salt, various spices, and yes, vinegar. It also bottled this in glass bottles so that everyone could see its quality. This was innovative at the time since many of their competitors produced adulterated ketchup products that contained harmful ingredients such as lead.

Today, tomato ketchup has been the standard product that most Americans use. In fact, it’s estimated to be used in approximately 97% of all American homes. Although it’s mainly used for putting on French fries or hamburgers, it’s also got a few other great uses as well. Let’s take a look at some of them, shall we?

Some Of The Best Uses For Ketchup

Okay, as promised, this is the section where you can find out what other things that ketchup can be used for. So without further ado, let’s jump right into it.

[wc_fa icon=”star-o” margin_left=”” margin_right=”10″ class=””][/wc_fa]Shining Silverware & Copper

The one thing that ketchup can be used for that doesn’t involve it being directly placed on food is using it as a metal polish. Placing a little bit of ketchup on copper pans or silverware can turn the metal from tarnished to new looking. All it takes is the ketchup, a polishing cloth, and a little bit of elbow grease.

[wc_fa icon=”star-o” margin_left=”” margin_right=”10″ class=””][/wc_fa]Making Fake Blood For Halloween

Another way to use ketchup is to make fake blood for Halloween. There are some great fake blood recipes on the Internet and many of them use ketchup as their core ingredient. Just be careful using fake blood made from ketchup because it will stain clothing.

[wc_fa icon=”star-o” margin_left=”” margin_right=”10″ class=””][/wc_fa]Using Ketchup Packs As Improvised Ice Packs

If you have a collection of Ketchup packs from your favorite fast-food restaurant, then you can put them to use really quickly by converting them into mini ice packs. Ketchup packets freeze quickly in the freezer, and they are just the right size for dealing with pot burns or paper cuts.

[wc_fa icon=”star-o” margin_left=”” margin_right=”10″ class=””][/wc_fa]Using Ketchup As A Face Scrub

Although we understand that not everyone is going to like this use, it is worth mentioning. If you mix a tablespoon of ketchup with three packets of artificial sugar and one pack of salt, you can use the mixture to exfoliate your skin.

[wc_fa icon=”star-o” margin_left=”” margin_right=”10″ class=””][/wc_fa]Using Ketchup To Sooth Insect Bites

Ketchup can also be used to soothe mosquito, bee, and spider bites. Although it won’t do much for the swelling of these bites, it will control the sting level and itchiness of the bit. It’s the salt in the ketchup that helps to control itching, and also happens to have antiseptic qualities as well.

[wc_fa icon=”star-o” margin_left=”” margin_right=”10″ class=””][/wc_fa]Using Ketchup To Remove Rust On Cast Iron Cookware

Have you ever found a great cast iron skillet and felt that it was too rusted to be used? Well, if you have, then you’re not alone because we have to. However, thanks to our research, we now have a way to deal with it and that way is to coat it in ketchup!

Yes, if you coat the cast iron skillet in ketchup and allow it to sit for half an hour, it will be a lot easier to remove the rust using a wire brush. That’s because there are acids in ketchup that help dissolve the rust and salt that act as an abrasive to help the wire brush remove the rust. Just remember that the pan is going to need to be seasoned before it’s used again.

Maintenance Tips For Taking Care Of Your Oven

The oven that is in your kitchen is more than likely a wonderful piece of engineering that does a great job of baking, broiling or cooking the food that you cook with it. The first “modern” stove was invented in 1740 by Benjamin Franklin and was known as the Pennsylvania fireplace. Since then, the stove has undergone a dramatic evolution that has led these appliances to become the great stoves that exist today. Unfortunately, far too many fail to see their oven as an advanced piece of machinery, and as such, they don’t take care of it as they should.

We believe that the oven is the centerpiece of the kitchen and you should properly maintain it to ensure that it functions as well as it should. We’re not only talking about cleaning the oven on a regular basis, but we’re also talking about taking other steps such as performing routine oven inspections. Let’s begin with some of the more general tips and then work our way from there to more advanced tips.

Tip One: Clean The Oven Regularly

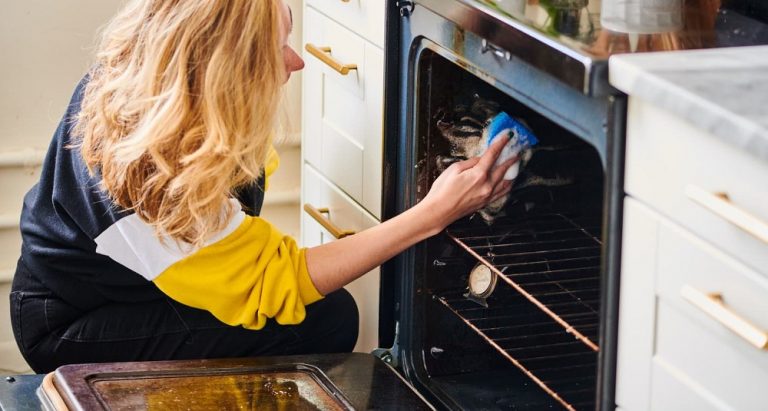
One of the first things that we’d like to recommend to all of our readers is to thoroughly clean their oven regularly. And we’re not just talking about wiping up messes but doing a thorough cleaning. How often should you clean your oven? Well, how often you use the oven will determine how often you will need to clean it. The more you use it, the more often you will need to clean it.

To clean the interior of the oven, you’re going to want to make sure that you purchase the best oven cleaner that you can find. A cleaner that will cut through grease and grime effectively is best. Other tools to clean the oven include the following:

  • Rubber Cleaning Gloves
  • Protective Safety Glasses
  • Paper Towels Or Old Newspapers
  • Microfiber Sponge
  • Damp Cloths Or Sponges
  • Large Plastic Garbage Bag

Tip Two: Some Ovens Can’t Have Their Knobs Removed

We know that it’s common for a lot of people to remove their oven knobs so that they can clean them, and with some oven models, that’s perfectly acceptable. However, with some of the modern oven models, the knobs are connected directly to the oven’s main control system. If that’s the case, then the consumer can be inadvertently subjecting themselves to a risk of electrocution. That’s why it’s always important for the consumer to read their oven’s manual thoroughly and find out what’s acceptable and what’s not acceptable as far as oven cleaning goes.

Tip Three: Regularly Inspect The Oven’s Gas Line Or Electrical Cord

The next thing that the consumer should do regularly, is to inspect the gas line and connection to the oven, or electrical cord if it’s an electric model. Gas lines and electrical cords can degrade over time, so about once a year the consumer should inspect them thoroughly. If they’re worn, replace them immediately.

Tip Four: Unplug An Electric Oven While Cleaning The Inside Of It

It’s not necessary to unplug your electric oven while you’re wiping down the outside of it. However, you should unplug the oven if you are planning to deep clean the inside using oven cleaner.

Tip Five: Inspect The Oven’s Door Gaskets

It’s also a good idea to take a good look at the oven door gaskets and make sure that they’re in good condition. Although these door gaskets are generally long-lasting, they will begin to deteriorate over time, and the consumer is never going to know when that’s going to happen, so the door gaskets should be regularly inspected.

Tip Six: Inspect Element Burners On Electric Stoves

While you’re cleaning your electric oven, it’s a good idea to take a look at the elements. Check both the inside of the oven and on the stove portion. Make sure that there’s no debris clinging to the elements and that they’re in good condition. If they’re dirty, clean them and if they’re compromised, then replace them immediately.

Tip Seven: Racks Need To Be Cleaned As Well

We’ve seen quite a few people spend a considerable amount of time cleaning their oven, only to neglect their racks. And this is a huge problem because it’s the racks that often become the dirtiest and require the most attention. Therefore, whenever you’re cleaning your oven, it’s a good idea to also give the rack a good cleaning as well.

Tip Eight: Clean Under, Behind, And Around The Oven

While you’re spending time cleaning your oven, it’s a good idea to clean underneath it, alongside it, and behind it. Yes, we understand that requires pulling out the oven, but it’s better to be safe than sorry. When the oven was installed, its vents were clear and it was these vents that allowed for proper airflow. Unfortunately, these vents can become blocked over time with grease and gunk, which not only restricts airflow but may also create a fire hazard.

Tip Nine: Avoid Doing These Things To Your Oven

Not everything is designed to be used in the oven. There are things that people do with their ovens that are dramatically shortening the oven’s lifespan. Below are some things that you should avoid when using your oven.

Using Empty And / Or Untempered Glassware

You should never place glassware that isn’t oven-safe in the oven. That’s an important rule. However, it also should be said that even when using tempered glassware made for the oven, you need to be careful. Thermal shock from putting cold glassware in the oven can shatter it, as well as heating up glassware that’s empty.

Using Aluminum Foil On Oven Racks

Although putting aluminum foil on oven racks keeps them clean while cooking, it’s an extremely bad idea. Foil can block airflow in the oven and may reflect heat improperly in the oven. This can result in improper cooking and it might even cause severe damage to the oven or its elements.

How To Properly Care For Kitchen Shears

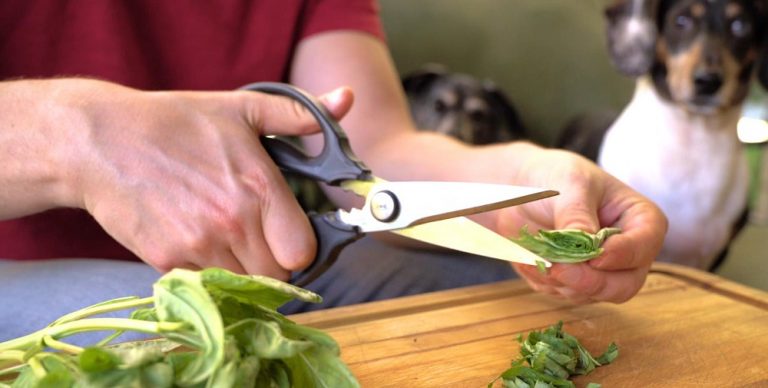
Kitchen shears are handy tools, aren’t they? They can be used for cutting meat, cutting through packages, or for cutting herbs. Some of them are even equipped with nutcrackers so that people can enjoy their favorite nuts. As much as they do for us, however, we don’t seem capable of returning the favor. Many of us fail to take care of our shears, merely tossing them into a drawer. And in our opinion, that’s a shame.

One thing that we know is the fact that even the best kitchen shears won’t last very long if they aren’t properly cared for. When we say properly cared for, we mean keeping them sharp, clean, and safely stored. We’re going to bring respect back to kitchen shears so everyone can get good use out of them.

Keep Your Kitchen Shears Sharp

Although most people are good at keeping their chef knives sharpened, few people bother to sharpen their kitchen shears. It’s so easy to sharpen kitchen scissors, we just don’t understand why everyone isn’t doing it. Want to know how to sharpen kitchen shears? Well, let’s get into it, shall we?

Make sure you use a sharpening stone that has one coarse 400-grit surface and one fine 1,000-grit surface. Begin with the coarse side of the stone and then use the fine side of the stone to refine the edge.

To sharpen the scissors, wet the surface of the stone with honing oil or water. Then lay the inside surface of the scissor blade flat on the stone. Using slight downward pressure, draw the blade across the entire length of the stone. Do this moving from the base to the tip. This usually takes 10-20 strokes, depending on the dullness of the blades. Then check the blade for burrs that might exist around the inner edge.

Keep Your Kitchen Shears Nice & Clean

The next thing we want to talk about is keeping the kitchen shears nice and clean. And that is easily enough done using dish soap and hot water, just like you would with any other kitchen utensil. When washing them, make sure to clean the area where the blade and handle come into contact to remove any food particles—particles where dangerous bacteria can grow. This can be difficult to do with some shears, but with the ones that you can take apart, it’s not that difficult.

It’s important to not let your kitchen shears “soak” in your sink. You should never submerge them in water for longer than a couple of seconds. Rather, you should wash and dry them immediately. Although most are now made from stainless steel and aren’t subject to rust, oxidation can still take place on the surface of the stainless steel and that can potentially weaken it.

Keep Those Kitchen Shears Oiled

It’s also important for you to keep your kitchen shears oiled, especially around the hinge and where the screw is located. To do this, all you have to do is to use a small amount of food-grade mineral oil to these areas—wiping any excess off of them before storing them.

Keep Those Shears Properly Stored

Storing the kitchen shears properly is just as important as sharpening them, cleaning them, and oiling them. Never toss these shears into a drawer with other junk. Instead, store them in some kind of protective case. This can be a box, a sheath, or a pouch.

Another way that some people store them is by using a magnetic strip. That keeps their blades safe and keeps them handy. No matter how you store them, it’s important to keep them away from metal, glass, or ceramic kitchenware.

Some Tips On How To Use Your Kitchen Shears

Since we’re done talking about how you should maintain kitchen shears, let’s talk about some of the things you can use them for. We understand that we might have scared some people away from kitchen shears and make them seem like they’re a lot of work, and that wasn’t our intention. We don’t think shears are difficult to maintain, but we do think that they are good for a variety of projects. Projects such as the ones that we’ve listed below.

  • Slicing Through Peppers
  • Trimming Dough
  • Cut Broccoli Florets
  • Peel Shrimp
  • Cube Bread For Stuffing
  • Cut Bacon

Keeping Your Granite Looking Good For Years

Once people install granite counters into their kitchen they’re often blown away by them. There is no other counter surface that’s as beautiful, as stylish, or as enduring as granite. Although granite counters aren’t inexpensive, they are extremely durable and will last the homeowner a lifetime—if the homeowner takes the time and puts in the work to keep it looking good.

And that’s the fact about granite, it does require a bit of maintenance to keep it in good condition for a long time. Far too many people think that granite is some kind of miracle material that they can neglect and abuse as they see fit. That’s simply not the case. If you don’t take care of your granite, then it’s not going to hold up for you and that’s a fact.

Of course, we do understand that no one purposefully neglects or abuses their granite counters. Most of the time homeowners simply don’t have all of the facts that they need to properly take care of their counter. We wanted to rectify this situation and have decided to give all of our readers the information they need to keep their granite counters looking good for a lifetime.

Tip #1: Clean The Granite Daily

One of the first things that homeowners are going to want to do is to make sure that they clean their granite counters on a daily basis. And we don’t mean merely wiping them down with a wet sponge every once in a while. We’re talking about using the best granite cleaner and using that cleaner properly.

To clean granite using a granite cleaner, you’re going to need a few supplies to do the job properly. You’re not only going to need a granite cleaner, but you’re also going to need a microfiber cloth, some paper towels, and a cleaning cloth. When using a granite cleaner, be sure to read the directions fully and follow them to the letter to achieve the best results.

Tip #2: Avoid Abrasive Cleaning Products

While we’re on the subject of cleaning products, we should mention the fact that you should avoid using certain abrasive materials on granite. As strong and durable as granite is, it is prone to scratching, so anyone cleaning it should keep that in mind. Below is a list of cleaning supplies that should be avoided.

Don’t Use These On Granite:

  • Ammonia
  • Bleach
  • Vinegar
  • Lemon Juice
  • Stainless Steel Brushes

Tip #3: Clean Up Spills Immediately

The next thing that homeowners should think about when they have granite counters is to make sure they clean up any spills immediately. Even something as simple as water can ruin a granite’s appearance if you leave it on the surface. And some liquids can do even more serious damage. Liquids such as tea, coffee, wine, and vinegar are acidic and will damage the granite’s surface. So make sure that you wipe up spills IMMEDIATELY to keep your granite looking good.

Tip #4: Use A Quality Granite Sealer

It’s also a good idea for the homeowner to seal their granite to protect it from liquids. Most granite installers will seal the granite once they’ve installed it, but you should double-check to make sure they actually did. And it should be mentioned that sealing granite isn’t a one and done deal. You’ll want to regularly reseal the granite to keep it protected.

Tip #5: Don’t Use Granite As A Cutting Board

We believe that most people already know that they shouldn’t use granite as a cutting board, but we’ll go ahead and reiterate the fact right now. Sharp blades can do damage to granite, so when cutting meat, chicken, or veggies, make sure that you use a cutting board. The granite counter isn’t a cutting board and never should be used as such.

Tip #6: Use Coasters & Trivets

It also should be mentioned that the coasters and trivets should be used on the granite counter to prevent hot pots and pans from being set on it. Heat is as big of an enemy to granite as liquids, and a hot pan can quickly ruin an otherwise beautiful granite surface.

Tip #7: Don’t Place Heavy Objects On Your Countertop

We want to reiterate that you should not place heavy objects on granite. After all, you don’t want to end up cracking the surface and costing yourself a very expensive repair. Unfortunately, we’ve seen quite a few people ignore this sound advice by placing heavy moving boxes on their granite counters, or even worse, standing on it to screw in a light bulb. We implore all of our readers to avoid standing or placing anything heavy on their granite counters.

Tip #8: Don’t Forget A Quality Granite Polish

And finally, we would like to tell all of our readers the importance of using a quality granite polish on their granite countertop. Although some multipurpose cleaners have a granite polish already in them, many of them do not, so you’ll want to invest in a good granite polish to keep your counters on point.

Kitchen Rugs Are A Safe & Decorative Home Decor Choice

We have to admit that kitchen rugs have gotten somewhat of a bad rap over the years. People have expressed their concern about these room adornments for quite some time now, but they’re mostly misplaced. If the consumer purchases the best area kitchen rug for their room, they’re not going to have a problem with adding one. The only problem that they’re likely to have is if they’re a messy cook. In that case, the homeowner will likely have to launder their rug regularly to keep it looking good.

To show all of our readers that rugs are not only a functional but also a decorative choice for a kitchen, we’ve decided to write this article on it. We’re going to go over some of the pros of using a rug in your kitchen and we’re also going to cover some of the basics that consumers should think about before purchasing a new rug for their kitchen.

The Pros Of Kitchen Rugs

When we first started using kitchen rugs we were quite skeptical about them at first—like many people tend to be. We’ve heard all of the stories about them begin an unsafe choice, so we did have a bit of trepidation. However, once we began to actually do some research and find out how kitchen rugs could be safely used, we immediately began using them. And do you know what? We don’t regret our decision at all. Below are some of the pros of using rugs in your kitchen.

  • Kitchen Rugs Dampen Noises.
  • They Keep Bare Feet From Touching Cold Stone Or Tile Floors.
  • They Add A Bit Of Color To The Room.
  • They Can Be Used To Cover “Ugly” Kitchen Floors.

How To Use A Kitchen Rug Safely

Although we feel that kitchen rugs are safe, they’re only as safe as the person using them. What we mean is that the consumer is going to have to purchase the best kitchen rug for their kitchen, and they’re going to have to deploy that rug properly. Before we talk about purchasing the best rug for your kitchen, it’s important to go over some basic kitchen rug safety tips so that you can use these rugs properly.

[wc_fa icon=”star-o” margin_left=”” margin_right=”10″ class=””][/wc_fa]Tip One: Use A Rug Pad

One of the first things that you can do to make sure that they’re using a kitchen rug safely is to place a rug pad underneath it. A rug pad will add a bit of friction to the rug and prevent it from slipping around on the floor.

[wc_fa icon=”star-o” margin_left=”” margin_right=”10″ class=””][/wc_fa]Tip Two: Use Rug Tape

Another thing that you should do to make the kitchen rug safer to use is to use rug tape. Rug tape will keep the rug from moving, especially when used in conjunction with a quality rug pad. This will prevent the rug from becoming a hazard that someone trips over.

[wc_fa icon=”star-o” margin_left=”” margin_right=”10″ class=””][/wc_fa]Tip Three: Avoid “Cheap” Rugs

The last tip that we would like to offer is to tell you to avoid cheap rugs. Cheaply made rugs tend to fray along the edges and that can present a tripping hazard. Cheap rugs also don’t have the same thickness as quality ones, and this can lead them to move more easily than they should.

What To Consider When Buying A New Kitchen Rug

Now that we’ve gone over some of the ways that kitchen rugs can be used safely, now we’re going to cover some of the other things that you should think about before purchasing a new kitchen rug. Although we’ve covered some of the basics elsewhere on our site, we wanted to go over some key points in this article. So with that said, below are some things for you to think about when shopping for a new area rug for your kitchen.

[wc_fa icon=”star-o” margin_left=”” margin_right=”10″ class=””][/wc_fa]Tip One: Think About The Size Of The Kitchen Rug

One of the first things that you should think about when choosing an area rug for a kitchen is to choose one that fits the floor. After all, this is an area rug, so it should cover the area where it’s used. If the rug is too big for the area, then it will leave curled edges that are unsafe, and if the rug is too small, it just won’t look right in the area. That’s why it’s important to measure the floor and then purchase a rug that adequately fits the area.

[wc_fa icon=”star-o” margin_left=”” margin_right=”10″ class=””][/wc_fa]Tip Two: Think About The Design Of The Rug

It’s easy to get lost in the details when purchasing a kitchen rug, but that shouldn’t mean that you should gloss over one of the most important aspects to consider when buying a kitchen rug—the design. The rug should have a design that ties the room together, not one that’s so busy it pulls a person’s eyes towards it. In other words, it should be subtle, not overpowering.

[wc_fa icon=”star-o” margin_left=”” margin_right=”10″ class=””][/wc_fa]Tip Three: Choose A Stain-Resistant Rug

Take our advice and do yourself a favor by choosing a stain-resistant rug. You might be the cleanest cook on the planet, but spills are still going to happen. By choosing a stain-resistant rug you can assure that those stains don’t ruin the rug that you spent hard-earned money on.

[wc_fa icon=”star-o” margin_left=”” margin_right=”10″ class=””][/wc_fa]Tip Four: Choose A Slip-Resistant Rug

It’s also a good idea to choose a rug that’s slip-resistant. Although you should still pair a slip-resistant rug with a rug pad and rug tape, it being slip-resistant in the first place will add just another layer of safety to the rug. However, you should also keep in mind that some rugs already have rug pads and they recommend that consumers not use an additional rug pad. If that’s the case, then make sure to follow the rug’s instructions before any advice given here.

[wc_fa icon=”star-o” margin_left=”” margin_right=”10″ class=””][/wc_fa]Tip Five: Have Fun With The Process

The last recommendation we have for you is to just have fun buying a new area rug for your kitchen. There are rugs in a wide assortment of colors, shapes, and sizes, so go ahead and browse through some of them before making your purchase. Find a rug that suits you and you’ll be more than happy with your new kitchen area rug.

How & Why To Use Candy Thermometers

Before a person gets a new candy thermometer, they might not think that they need one. After all, how many of us actually make candy on a regular basis? However, believe me when I tell you that once you buy a candy thermometer, you will find about 1,001 uses for it. These thermometers are some of the most versatile kitchen tools to have in the home, and it’s our firm belief that everyone should have one in their kitchen.

To show our readers just how invaluable having the best candy thermometer can be, we’ve decided to go ahead and write this article. In this article, we’re going to talk about not only the intended uses for a candy thermometer but also all of the other things that can be done with them. We’ll also explore how these thermometers should be used.

What’s A Candy Thermometer?

Before we kick things off, it’s probably a good idea for us to define our terms. One of the things that we’re frequently asked is just what a candy thermometer is, followed by the second most common question we receive: how does a candy thermometer differ from a meat thermometer. So, let’s define what a candy thermometer and what actually makes it different from other types of thermometers.

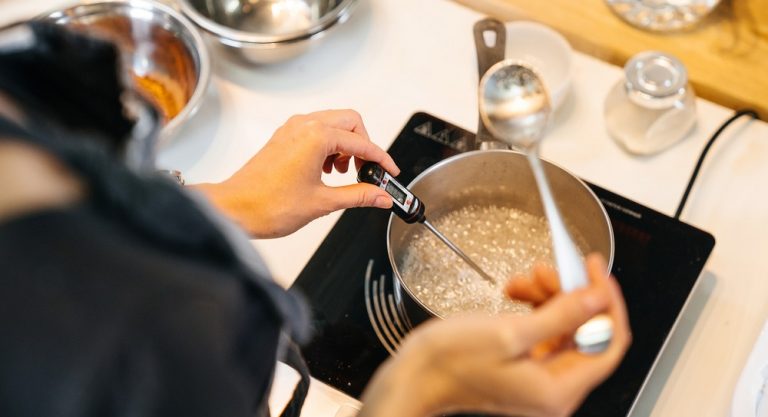
The first thing we’d like to say about candy thermometers is that they’re longer than meat thermometers. That’s so they can be used in boiling oil or sugar without the cook worrying about burning themselves. Candy thermometers also have a higher temperature range than meat thermometers. That’s because they have to measure significantly higher temperatures. Most meat thermometers only go up to 200-250 degrees Fahrenheit, while most candy thermometers will go up to 400 degrees Fahrenheit.

The last difference between meat thermometers and candy thermometers is that meat thermometers have a pointed end, while most candy thermometers have a rounded end. This is obviously because meat thermometers have to be stuck into the meat, while candy thermometers have to usually be placed into boiling liquids.

How To Read A Candy Thermometer

The next thing that we like to talk about is how the consumer can use the candy thermometer. When consumers read candy making recipes, they will often have to know a few terms that outline how they should use their candy thermometer. Below are some of the stages that consumers should know when they’re using a candy thermometer to make candy.

[wc_fa icon=”star-o” margin_left=”” margin_right=”10″ class=””][/wc_fa]Thread Stage

The first stage of the candy-making process is the Thread Stage. This stage is approximately 230 to 234 degrees Fahrenheit. This is the stage that is often used for making simple syrups.

[wc_fa icon=”star-o” margin_left=”” margin_right=”10″ class=””][/wc_fa]Soft Ball Stage

This stage is approximately 234 to 241 degrees Fahrenheit and it’s at this stage that the sugar begins to form a sticky ball. This is the stage where fondants and fudges are started.

[wc_fa icon=”star-o” margin_left=”” margin_right=”10″ class=””][/wc_fa]Firm Stage

This stage is between 242 to 248 degrees Fahrenheit. This is the stage when sugar begins to become flexible yet firm. This is the stage where nougats and caramels are made.

[wc_fa icon=”star-o” margin_left=”” margin_right=”10″ class=””][/wc_fa]HardBall Stage

This stage is between 250 to 266 degrees Fahrenheit. This is when sugar begins to hold its shape and can be worked into a hardball. This stage is ideal for making marshmallows or gummies—and it can also be used for making rock candy.

[wc_fa icon=”star-o” margin_left=”” margin_right=”10″ class=””][/wc_fa]Soft-Crack Stage

The soft crack stage is approximately 270 to 289 degrees Fahrenheit and this is the stage where sugar forms flexible yet firm threads. This stage is good for making saltwater taffy and for making butterscotch candies.

[wc_fa icon=”star-o” margin_left=”” margin_right=”10″ class=””][/wc_fa]Hard Crack Stage

This stage is between 295 to 309 degrees Fahrenheit and is a stage where cooked sugar begins to form brittle threads. It’s good for spinning sugar, and for making brittle candies.

Tips On Using A Candy Thermometer Properly

Now that we’ve covered the differences between meat and candy thermometers, and have gone through some of the candy making stages, now it’s time to turn our attention to keeping the candy thermometer in good condition.

[wc_fa icon=”star-o” margin_left=”” margin_right=”10″ class=””][/wc_fa]Hand-Wash Your Candy Thermometer

The one thing that you should think about when using a candy thermometer is how you wash it. As a general rule, you want to make sure that you don’t wash it in a dishwasher. Although modern candy thermometers are more durable than ones made in the past, they are still pretty easy to break. That’s why you should always hand wash your thermometer with mild dish soap.

[wc_fa icon=”star-o” margin_left=”” margin_right=”10″ class=””][/wc_fa]Properly Store Your Candy Thermometer

It’s also extremely important for you to properly store your candy thermometers. This means not just throwing it in a drawer with a bunch of other kitchen accessories. It also means not throwing it in the junk drawer of your desk (and yes, we’ve seen that happen). Candy thermometers should be stored standing straight up and away from other kitchen utensils.

[wc_fa icon=”star-o” margin_left=”” margin_right=”10″ class=””][/wc_fa]Buy A Spare Candy Thermometer

No matter how well you care for your candy thermometer, however, it’s going to end up breaking at some point. It’s almost inevitable. It might not be tomorrow or even 5-years from now, but at some point, it’s going to happen, and that’s why everyone should keep a spare candy thermometer on hand. This will ensure that you have a candy thermometer available to you when one breaks.

Tips For Reading A Candy Thermometer

When using your candy thermometer, you’re going to want to make sure that you read it properly. Making candy is very precise, so even being off a degree can result in some bad results. That’s why everyone using a candy thermometer should keep the following in mind.

  • Pick A Thermometer That Works Well For You.
  • Make Sure It’s Accurate Before Using It. (Test It Using Boiling Water).
  • Don’t Let The Bulb Touch The Bottom.
  • Read The Temperature At Eye Level.
  • Don’t Take The Thermometer From One Temperature Extreme To Another.

A Guide To Buying & Using Spice Grinders

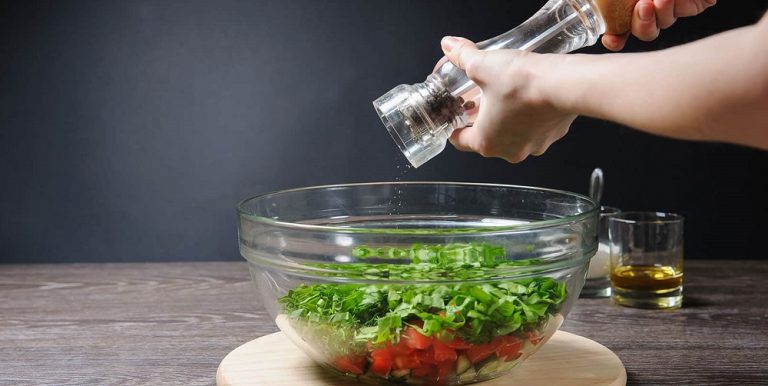
We have to admit that spice grinders are pretty basic in their design and execution, but that doesn’t mean that they are basic devices. These grinders can be used for more than just grinding spices and can be used for a variety of different projects. That’s why we’ve decided to write this article. We wanted to not only help our readers find the best spice grinders for their needs but also tell them the other uses for these grinders as well. With all of that said, let’s jump right into this article and start with what our readers should think about when choosing the best spice grinder for their household.

Choosing The Best Spice Grinder

Let’s kick off our discussion on spice grinders with a look at what consumers should look for when choosing a new spice grinder. Let’s go through a few tips before looking at what other things grinders can be used for—other than grinding spices.

[wc_fa icon=”star-o” margin_left=”” margin_right=”10″ class=””][/wc_fa]Tip One: Choose Between Manual Or Electric Models

One of the first things that consumers should do is choose between manual or electric spice grinders. Both of these grinders work well, but there are some significant differences between them. For example, electric grinders are easier to use, but manual grinders tend to provide the best spice grinding. Of course, how well the grinder works also depends a lot on the type of blades that are equipped on the grinder. We’ll take a look at the blades found on spice grinders, next.

[wc_fa icon=”star-o” margin_left=”” margin_right=”10″ class=””][/wc_fa]Tip Two: Consider The Spice Grinder Blades

The next thing the consumer is going to want to do is to consider the blades on the spice grinder. When it comes to these types of grinders, the consumer generally has two choices when it comes to grinder blades: conical burr blades and flat blades. As a general rule, conical burr blades do the best job of grinding spices, and flat blades are usually found on cheaper spice grinders.

[wc_fa icon=”star-o” margin_left=”” margin_right=”10″ class=””][/wc_fa]Tip Three: Consider Capacity

If the consumer is going to use the grinder for grinding spices, then they will probably only need a smaller model. However, if the consumer decides that they’re going to use the grinder to grind coffee or other things, then the consumer is going to want to think about perhaps purchasing a larger grinder.

[wc_fa icon=”star-o” margin_left=”” margin_right=”10″ class=””][/wc_fa]Tip Four: Consider Other Features

Before concluding this section on choosing spice grinders, we’d like to talk about a few other features that the consumer might want to consider before buying a new one. We don’t have the space to go into each point in detail, but we would like our readers to keep the features at the forefront of their minds when they purchase their next grinder.

  • Transparent Lid
  • One-Button Grind Feature
  • Built-In Power Cord Storage
  • The Price Of The Grinder

What Other Things Can Spice Grinders Be Used For?

One of the most frequently asked questions about spice grinders that we receive is what other things they can be used for. Fortunately, we have the answer to that question and can give it to all of our readers. The following uses prove that spice grinders are a kitchen tool that everyone should have—regardless of whether they grind their own spices or bought pre-ground store-bought spices.

[wc_fa icon=”star-o” margin_left=”” margin_right=”10″ class=””][/wc_fa]Grinding Sea Salt

One trend that’s been on the uptick the last few years is people buying course sea or pink salt in bulk and then mixing it in their spice grinder with herbs and/or spices. This is a great way to create a seasoning salt that can be used for adding flavor to the meat.

[wc_fa icon=”star-o” margin_left=”” margin_right=”10″ class=””][/wc_fa]Grinding Flaxseeds

More and more people are adding flax seeds to their diet. And why not? These seeds are filled with a ton of nutrients. They’re high in fiber, Omega 3 fatty acids, magnesium, phosphorous, and potassium. The problem with adding them to oatmeal or cereal, however, is that they can be tough to chew. Fortunately, they can be ground up in a spice grinder and then added to food.

[wc_fa icon=”star-o” margin_left=”” margin_right=”10″ class=””][/wc_fa]Grinding Rice

Another use for spice grinders is to use it to grind rice. Why grind rice? Well, rice is ground so that it can be turned into rice flour. Rice flour is a gluten-free alternative to wheat flour that more and more people are enjoying. Of course, you can always purchase a grain mill to grind rice, but those tend to be a lot more expensive.

[wc_fa icon=”star-o” margin_left=”” margin_right=”10″ class=””][/wc_fa]Grinding Poppy Seeds

A lot of people are beginning to grind up poppy seeds to add a little bit of that nutty flavor to dishes. Although poppy seeds can be a little tricky to grind thanks to their small size, a quality spice grinder should accomplish the job pretty easily.

[wc_fa icon=”star-o” margin_left=”” margin_right=”10″ class=””][/wc_fa]Grinding Dried Insects

While dried insects might not be on everyone’s menu, quite a few people are finding that adding ground insects to their dishes adds protein without increasing the dish’s calorie count. Sure, it’s not for everyone, but for people who want to try it out, a good spice grinder works quite well for this purpose.

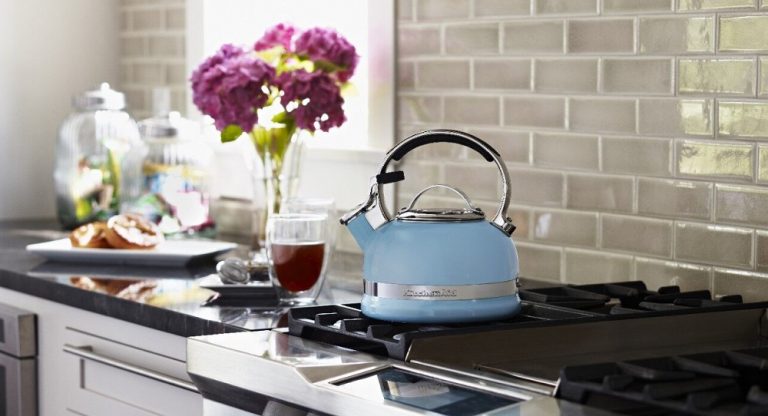
Using And Taking Care Of Your Tea Kettle

Tea kettles are great tools that come in a variety of different styles and are made from a variety of different materials. There are stovetop and electric tea kettles, and they’re made in everything from copper to cast iron. They’re great tools for heating water either for cooking or making tea, and every household should probably have one in their kitchen.

Unfortunately, a lot of people are using and/or taking care of these tea kettles in the wrong way. Many people confuse them with teapots—pots in which the tea is brewed inside. Tea kettles are different, however, and need to be used in a certain way to avoid ruining them. It also needs to be properly maintained so that it lasts a long time—otherwise, even the best tea kettle won’t last very long. That’s why we’ve decided to talk a little bit about using and taking care of tea kettles.

How To Use A Tea Kettle

We’re going to start things off by talking about how to properly use a tea kettle. For our purposes, we’re going to talk about using a stovetop tea kettle, so if you need information on using an electric one, then you’re going to have to rely on your electric tea kettle’s instructions. Now, let’s go through the steps of making the perfect pot of tea using a tea kettle.

[wc_fa icon=”star-o” margin_left=”” margin_right=”10″ class=””][/wc_fa]Step One: Fill Up The Tea Kettle & Put It On The Stove

One of the biggest misconceptions about tea kettles is that tea is brewed in them. That’s false. They’re only used to heat tea. That’s why the first step is to place water into a tea kettle and then place that tea kettle on the stove.

Although this seems like a very basic step, it’s worth mentioning that the quality of the water is very important. We recommend using filtered water in the tea kettle. Remember, the higher quality the water, the better tasting the tea is going to be when it’s all said and done.

[wc_fa icon=”star-o” margin_left=”” margin_right=”10″ class=””][/wc_fa]Step Two: Heat The Water To The Proper Temperature

Once the tea kettle has been filled, heat it until it reaches boiling temperature. On some models, that will be indicated by a whistling sound, but not all tea kettles are whistling kettles, so the consumer might have to keep an eye on it. Once the water has reached boiling, allow the water to sit for approximately 20-seconds. That will bring it to the perfect temperature for making tea.

[wc_fa icon=”star-o” margin_left=”” margin_right=”10″ class=””][/wc_fa]Step Three: Prepare The Tea To Accept The Water

While the water is being boiled, you should take the time to get your tea ready. For some people, that means placing tea bags into a cup, and for other people that means placing tea leaves into a strainer of some sort.

[wc_fa icon=”star-o” margin_left=”” margin_right=”10″ class=””][/wc_fa]Step Four: Pour The Water Over The Tea & Steep

Carefully pour the water through the strainer or into the cup and allow the tea to steep. For tea bags, that can be anywhere from 3-5 minutes. For loose tea, that can be anywhere from 5-7 minutes. If you’re using loose tea leaves without a strainer or tea bags, be sure to remove them before enjoying your nice hot cup of tea. You deserve it.

How To Keep Your Tea Kettle In Good Condition

Okay, now that we’ve cleared up any confusion surrounding how to use a tea kettle properly, we want to shift our attention to how the tea kettle should be properly cleaned. That’s because we’ve found that there are quite a few people who improperly care for their tea kettle, so we thought that we’d give some helpful advice.

[wc_fa icon=”star-o” margin_left=”” margin_right=”10″ class=””][/wc_fa]Cleaning Supplies Needed:

  • Salt
  • White Vinegar
  • Lemon Juice And/Or Lemon
  • Baking Soda
  • Mild Dish Soap

[wc_fa icon=”star-o” margin_left=”” margin_right=”10″ class=””][/wc_fa]Step One: Everyday Cleaning

The tea kettle should be cleaned daily, or at least every other day, to keep it in good condition. To accomplish this goal, you should use a soft sponge and mild dish soap with hot water. Don’t use steel wool on most tea kettles because it can scratch stainless steel or enamel.

[wc_fa icon=”star-o” margin_left=”” margin_right=”10″ class=””][/wc_fa]Step Two: Regular Descaling

The tea kettle should be descaled every once in a while—particularly if you live in an area with hard water. How often should it be descaled? Well, that depends on the hardness of the water. Some people can get away with it every 6-months, and some people will have to descale once a month.

To descale the tea kettle, add 1/4-cup of white vinegar and two cups of purified water to it. Then it should be allowed to simmer for approximately 15-20 minutes. When that’s done, pour out the descaling solution and then rinse the tea kettle.

[wc_fa icon=”star-o” margin_left=”” margin_right=”10″ class=””][/wc_fa]Step Three: Heavy-Duty Cleaning

To deal with a tea kettle that’s been neglected and has both rust and mineral deposits in it, you should do a heavy-duty cleaning. Place two tablespoons of baking soda, purified water, and two tablespoons of lemon juice in the kettle.

Bring the kettle to a boil and allow it to boil for half an hour. Do not boil away the water during this process. If the water level falls low, add some more, but boil for the whole 30-minutes. After 30-minutes, dump out the kettle and allow it to cool. When it’s cool, rinse it out and make sure it’s dry.

[wc_fa icon=”star-o” margin_left=”” margin_right=”10″ class=””][/wc_fa]Step Four: Clean The Kettle’s Exterior

Most of the time, and with most tea kettles, the exterior should be cleaned with mild dish soap and a soft sponge. However, what happens since the tea kettle is often left on the stove, it tends to get grease on its exterior. In these instances, you’re going to want to de-grease the kettle’s exterior.

To degrease a stainless steel or enamel tea kettle, make a paste of baking soda and white vinegar and apply it to the exterior of the kettle. Then use a soft sponge to scrub away grease. If using a copper tea kettle, cut a lemon in half and dip it in salt. You then should use the lemon half to scrub the exterior of the pot. Make sure to thoroughly dry the kettle once it’s been de-greased.