Are you considering off-grid living? Reliable water storage is an absolute must and water tanks are your solution. They are a crucial component to make this sustainable lifestyle feasible.

Water scarcity can become a real issue living off-grid. With the right water tank, this problem is completely mitigated. They provide a consistent supply of clean, potable water for all your needs.
Remember, not all tanks are created equal. Choose one that suits your specific needs. Durability, capacity, and material should all factor into your decision making. Take control of your water supply today.
Off-Grid Water Supply Sources
An essential part of off-grid living is having reliable water sources. These can range from water heaters, pipes and filled bathtubs, to rivers and rain collection spots.
Most people don’t realize how much water their home appliances can store. The average water heater, for instance, can store anywhere between 30 to 80 gallons of potable water.
You can also utilize the water available in the pipeline system of your home although access might require some tactical adjustments in rare occurrences.
If enough notice is given, filling up a bathtub could grant you an extra 40 gallons of stored water.
| Source |
Water Amount |
Requires treatment |
| Water heaters |
30-80 gallons |
No |
| Pipes |
Varies |
No |
| Bathtub |
About 40 gallons |
No |
| Rain collection |
Depends on rainfall |
Yes |
| Note: The amount of water depends on size and state of the source. |
In addition to these direct sources, indirect sources like garden hoses and sprinkler systems can be used; however, precautions must be taken to avoid drinking contaminated water.
When considering natural and public resources like rivers or park fountains, it’s important to consider potential contamination factors that could affect the water quality.
Rivers might seem like an abundant source, but water safety is a must. Filtering the water might not eliminate all harmful chemicals; distilling could be a better option.
Distillation might be time-consuming, but it’s worth it for your health and safety when relying on these types of water sources.
For rain collectors, places like flat rooftops can collect undisturbed water after rainfall or snowfall. Tapping into this resource requires finding paths the water travels to intercept it before it enters sewers.
Additional sources can be found in businesses and public buildings, such as vending machines or refrigerators. Remember to stay safe and respectful when procuring these supplies.
Toilet tanks can carry between 1.6 and 6 gallons of water, depending on their age. However, precautions must be taken to avoid potential contamination from previous use.
Places with ponds, fountains or swimming pools are also great sources of water in emergency situations. Don’t overlook these places that might be just around the corner from you.
In all cases, the key is always ensuring that the water has been adequately treated before consumption thus to ensure a healthier living experience should an emergency occur.
Extracting and Utilizing Well Water
When working with well water, accurate measurements are vital, which necessitate collecting a reasonable volume of water samples. The sediment concentration can vary depending on where the sample is collected.
In case of high flow volume, a centrifugal sand sampler is recommended for accurate sediment representation. The acceptable sediment concentration depends on the purpose of the water.
“The National Ground Water Association recommends different sediment concentrations, such as 1 ppm for water to be used in food and beverage processing.”
These guidelines also apply to municipal water treatment, home use, irrigation systems, and industrial cooling systems, with varying ranges of acceptable sediment count.
Conducting a successful development program includes conscious planning during the design phase. This strategy includes deciding the types of drilling methods, selection of drilling fluids, and breaking methods.
Optimal development tools and methods should align with your specific project goals. Successful well development ensures sand-free water production at the expected rate.
A comprehensive development approach entails breaking down drilling fluids, rearranging filter packs and aquifer grains, followed by pumping to remove fine sediment and establish rapid water flow.
Using combined methods such as simultaneous airlift pumping assists in more efficient sediment removal.
Rainwater Catchment and Storage
The gold standard of water sources, rainwater, has zero hardness unlike well water.
Why spend on extra soap for clothes, dishes, and body when rainwater requires less because of its softness?
Plus, nasty calcium buildup on faucets, tiles, glassware, and hair is a thing of the past!
Why Should I Collect Rainwater?
With proper sizing, a rainwater collection system proves more reliable than traditional wells. Moreover, you can render your collected rainwater potable sans chemicals.
How Much Rainwater Can I Gather?
Per inch of rainfall, 1000 square feet of collection surface yields roughly 550 gallons of water. To calculate the yearly yield, multiply this number by your area’s average annual rainfall.
How Much Collected Rainwater Do I Need?
A thrifty individual uses between 25 to 50 gallons each day. However, a family of four annual consumption ranges from 40,000 to 80,000 gallons.
The key lies in collecting enough rainwater to last till the next rain. Therefore, it is prudent for a four-member household to have a reservoir capacity of 7,500 to 15,000 gallons.
What’s The Cost Involved?
A typical setup for a family of two to four would include a 10,000 gallon fiberglass tank and basic filtration apparatus. Costs may vary but could be $10,000-$12,000. Cutting costs by DIY-ing it is always an option!
What Is the Best Collection Surface?
Metal roofs are ideal surfaces for water collection. However, you can also utilize asphalt shingles, clay tiles, and cedar shingles. Prevent large debris from entering your collection system by positioning screens at gutters.
What Is a Roof Washer?
A roof washer screens undesirable gunk before it enters your tank. This essential component ensures small particles are filtered out and contributes significantly to water cleanliness and potability. The cost of a roof washer starts from $500.
Why Choose a Fiberglass Tank?
Fiberglass tanks may not be attractive, but they’re undoubtedly versatile, resilient, and economical. These tanks can be painted to either blend or contrast with your surroundings.
What Sort Of Pump Do I Need?
This depends on your needs! For DIYers, an economical pump works fine while others may prefer a more powerful unit with increased flow rate. The price starts at $500 for a pump with a pressure tank.
What About Filtration and Sanitation?
The process involves three steps: sediment filter, activated carbon filter and UV light sanitation. Critical here is the proper maintenance schedule to replace each component on time to ensure ongoing water safety.
Off-Grid Water Pumps and Pressure Systems
Installing a new off-grid water pump, like the USA Adventure Gear ProGear 5300, can enhance your self-sufficient practices. This highly efficient 12-volt pump delivers impressive capacity.
Selecting an Off-Grid Pump
The ProGear 5300 stands out with its robust operational capabilities. The 3-gallon-per-minute flow rate outmatches many similar pumps.
With a maximum current rating of 12 amps, this pump offers a significant power boost compared to older models, ensuring reliable performance for routine usage.
Pump Installation Process
To power the device appropriately, the installation process involves setting up a high-amperage relay for wiring. This ensures stable and secure connectivity.
Experts recommend using a six-gauge wire for installation. This minimizes resistance and ensures optimal energy flow to your pump.
About USA Adventure Gear
USA Adventure Gear, based in Colorado, specializes in creating high-quality water pumps for various applications. They cater to diverse needs – from RV to farm uses.
Their product range includes highly effective water pumps, wastewater transfer systems, and inline filters, popular among regular boondocking enthusiasts.
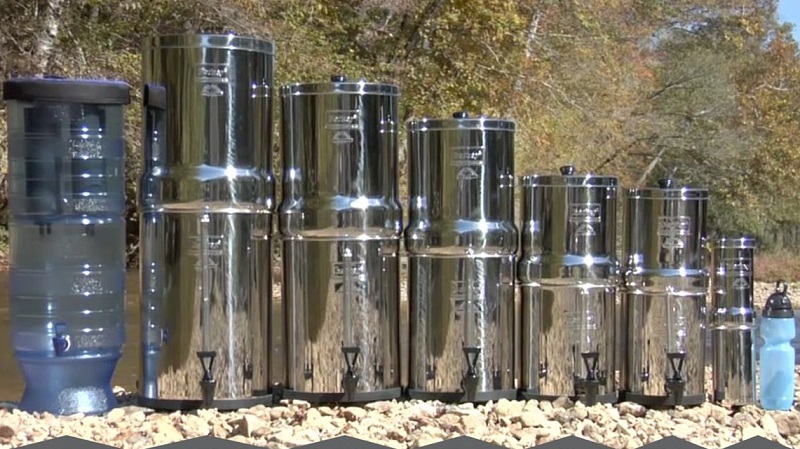
Types of Off-Grid Water Tanks
Off-grid water tanks come in various types, shapes, and sizes. A common choice is the voluminous 1,500- to 3,000-gallon tank.
- Plastic Water Tanks: These are lightweight, durable, and easy to install. They’re also food-grade safe.
- Concrete Water Tanks: Concrete provides excellent insulation, keeping your water cooler. However, they can be costly and hard to transport.
- Steel Water Tanks: They’re robust and resistant to punctures and leaks but may rust over time.
- Fiberglass Water Tanks: Fiberglass tanks are highly durable and are resistant to rust, algae growth, and UV radiation.
Consider factors like budget, installation complexity, lifespan, and maintenance when choosing your off-grid water tank.
Your chosen tank will be a vital part of your self-reliance journey towards living off the grid efficiently.
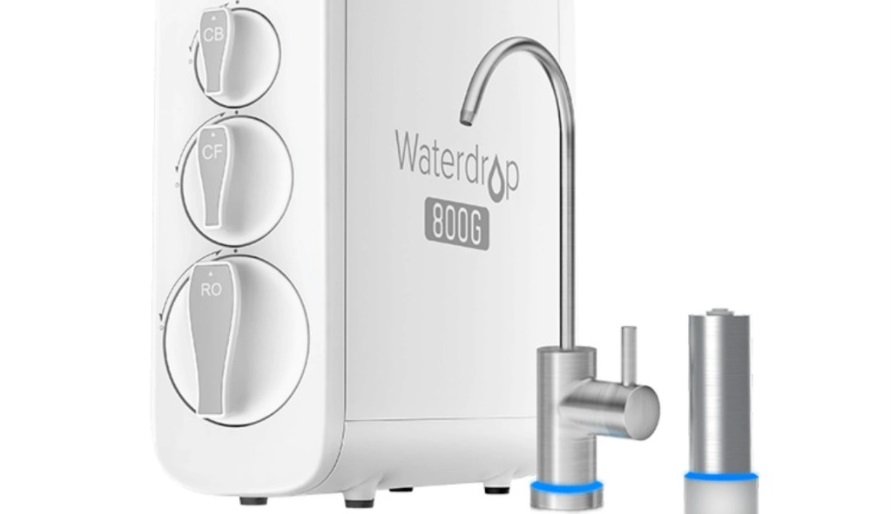
Off-Grid Water Heating and Filtration
Equipping your off-grid lifestyle with an efficient water heating and filtration system is vital for health and comfort.
Showcasing Quality Products
A myriad of wholesaler outlets offer low-priced, diverse water filtration systems.
By taking advantage of these products, you can ensure safe and clean water in your off-grid home.
Choosing the Right System
Selecting a water filtration system requires attention to its characteristics.
An ideal system aligns with your specific needs – efficiency, cost-effectiveness and reliability should be considered.
Heating Your Water Off-Grid
Besides filtration, heating your water is just as crucial in an off-grid environment.
While choices abound, do thorough research before adopting one that assures safety, sustainability as well as affordability.
Maintaining Your System
An effective maintenance routine extends the service life of your filtration and heating systems.
Besides routine check-ups, small-scale repairs are beneficial practices leading to improved system performance.+
Off-Grid Waste Water Disposal
Initiating a waste management revolution, off-grid water tanks enhance eco-friendly sewage treatment methodologies.
- Eco-Cycle Zero Waste models have been pioneering in transforming our waste-driven society into a more sustainable one.
- Revolutionary composting techniques reduce consumption emissions and promote sustainability efforts.
- Innovative soakaway systems are efficient and eco-friendly methods for off-grid waste water disposal.
- Waterless toilets, an integral part of this approach, enormously decrease water consumption and make waste management simpler.
Serving as a beacon for sustainability, these innovative disposal systems represent an essential step towards an environmentally responsible future.
Environmental and Economic Benefits
Installing off-grid water tanks has both environmental and economic advantages. This system can significantly offset potential declines in ecosystem benefits.
- Water Conservation: These tanks harvest rain, promoting responsible use of a vital natural resource.
- Lower Utility Bills: By sourcing water naturally, you save on monthly water expenses.
- Reduced Dependence on Public Systems: Off-grid water tanks lessen the reliance on potentially fragile municipal supplies.
- Biodiversity Protection: Harvesting rainwater decreases strain on local ecosystems, supporting biodiversity preservation.
The future projections show potential decreases in ecosystem benefits, up to 9% by 2100. Using an off-grid water tank system actively combats this trend.
Moreover, such tanks also address global inequality issues. Providing a reliable water source can have substantial impacts on marginalized communities lacking access to clean, readily available water.
With these benefits, more people might be encouraged to shift their focus towards sustainable off-grid systems.
Conclusion For You
In your quest for off-grid living, water tanks are indispensable. They ensure you have a consistent and reliable water supply, making your life much easier. You’ve learned about their importance in the blog post.
If you’re considering off-grid living or already doing it, investing in a quality water tank is crucial. It’s not just about surviving, but thriving off-grid. Your water tank is your lifeline, don’t underestimate its value.