Honey—a delicious natural sweetener enjoyed for centuries. But did you know that choosing local honey offers a bounty of benefits beyond just taste? Local honey not only supports your health, but also your community’s beekeepers and the environment. In this article, we’ll explore the creative ways you can incorporate local honey into your life—from delightful culinary creations to soothing beauty treatments and natural wellness solutions. So, get ready to unlock the full potential of this golden goodness.
Cooking with Local Honey
Local honey isn’t just a delicious topping—it’s a versatile ingredient that can elevate your cooking in surprising ways. Here’s how to unleash its potential in your kitchen:
-
Sweetening Beverages
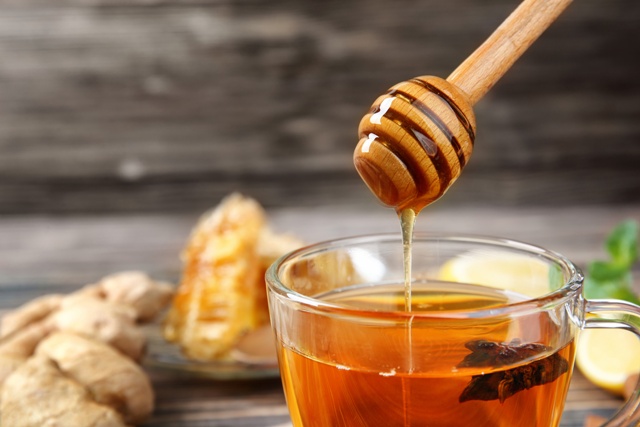
Ditch the refined sugar and stir in a spoonful of local honey to your morning cup of tea. For a refreshing twist, add a drizzle to homemade lemonade or iced coffee. With honey’s own natural sweetness, it perfectly combines and complements the flavors of fruits, making it a seemly destined fruit addition to smoothies.
Try a tropical blend of mango, pineapple, and coconut milk, sweetened with a touch of honey. For a delightful evening treat, create a honey-ginger cocktail. Muddle fresh ginger with a squeeze of lemon juice, top with a splash of sparkling water, and add a generous dollop of local Ohio honey for a touch of sweetness and a warm kick.
-
Baking
Looking for healthier ways to sweeten your baked goods? Honey can be a fantastic substitute for refined sugar in many recipes. As a general rule, you can use about ¾ cup of honey for every 1 cup of sugar. However, keep in mind that honey is slightly sweeter and can also affect browning.
It’s better to try to make a dish that you know well and experiment with the amount of honey and the time in the oven. Honey pairs beautifully with warm spices like cinnamon and nutmeg, making it ideal for fall favorites like pumpkin bread or carrot cake.
-
Sauces and Dressings
Honey’s versatility extends beyond sweetening. The hint of sweetness in it, along with its flavor, makes it perfect for various savory dishes. Whip up a tangy honey mustard dressing for your next salad, or create a sweet and spicy marinade for grilled chicken by combining local honey with soy sauce, sriracha, and a touch of lime juice. Honey also adds a lovely caramelized depth to pan sauces, especially when paired with balsamic vinegar or Dijon mustard.
Honey has unique properties compared to sugar. It absorbs moisture and can brown more quickly. To keep your baked goods from becoming dry, try adding a little extra liquid to your recipe when using honey as a sweetener. Honey’s browning tendency can be an advantage when creating a golden brown crust on roasted vegetables or salmon. A little goes a long way—start with a smaller amount of honey and add more to taste.
Beauty Applications of Local Honey
Nature’s answer to a radiant glow? Look no further than your local honey. Honey’s natural antibacterial and humectant (moisture-attracting) properties make it a fantastic addition to your beauty routine. Here are some ways to unlock its potential for healthy, beautiful skin and hair:
-
Skin Care
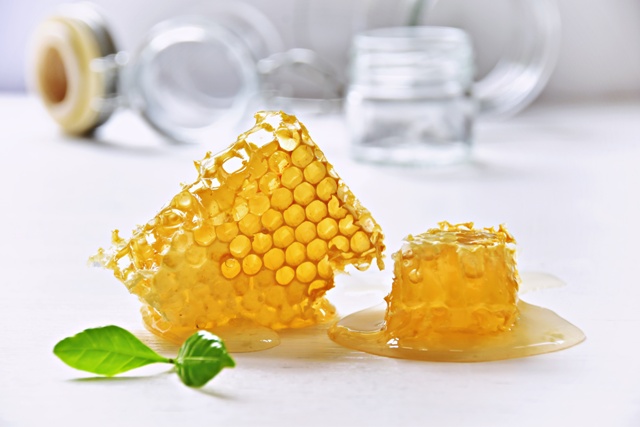
Honey is a gentle hydrating and antibacterial treatment. Simply apply a thin layer of honey to clean, damp skin and leave it on for 15-20 minutes. Rinse thoroughly with warm water and pat your face dry. Honey can also be combined with other nourishing ingredients like yogurt or avocado for a customized mask. For an extra boost, consider using Manuka honey, a specific type known for its potent antibacterial properties.
-
Hair Treatments
Honey makes a fantastic hair conditioner. Mix equal parts raw honey with warm olive oil and massage it into your damp hair, focusing on the ends. Let it sit for 20 minutes before rinsing thoroughly with warm water. This simple treatment will leave your hair feeling soft, manageable, and full of shine.
-
Natural Remedies
Honey’s antibacterial and anti-inflammatory properties can be helpful in addressing various skin concerns. For occasional blemishes, dab a small amount of raw honey directly on the spot. Leave it on for 10-15 minutes before rinsing. Honey can also be used to minimize the appearance of scars. Mix raw honey with a touch of olive oil and massage it gently onto the scar tissue for a few minutes. Rinse thoroughly and repeat daily.
 Wellness Benefits of Honey
Honey isn’t just a delicious treat—it’s a natural remedy with a long history of use in promoting overall well-being. Here’s how incorporating local honey into your routine can benefit your health:
-
Immune System Boost
Honey contains antioxidants and prebiotics, which may play a role in supporting a healthy immune system. Prebiotics are a type of dietary fiber that nourish the good bacteria in your gut, which is crucial for overall immune function. Although additional research is to be conducted, a daily spoon of honey according to the existing studies on the subject can potentially cut down on the amount of coughs and colds.
-
Digestive Health
Honey’s prebiotics can also contribute to digestive health. It provides good bacteria for your gut to maintain a balanced digestive system as this is also where occasional discomfort may occur.
-
Soothing Properties
Honey also serves as a well-known household solution for coughs and sore throats. Its natural antimicrobial properties may help soothe irritation in the throat, while its thick consistency can provide a comforting coating. To ease a cough or sore throat, try mixing a spoonful of honey with warm water or a soothing herbal tea.
Conclusion
The benefits of local honey are a bit of a goldmine, far beyond its phenomenal palate. From revitalizing your best cooking dishes to uplifting your mood with good vibes, bringing local honey into your life creates many open doors to more holistic living. Next time you’re at the farmer’s market or grocery store, consider reaching for a jar of local honey. You might be surprised at the range of possibilities this golden liquid unlocks.