Home Blog Page 53

How to prevent cavities (+ Homemade DIY Toothpaste)

The most obvious benefit of eating real whole foods is the improved overall well-being of your body. Your immune system gets stronger, you have more energy, and you start enjoying each bite of the food you eat more, savoring it and appreciating all the nutrients it contains. One of the less obvious benefits of a healthy diet is… improved oral health!

There are some heavily rooted misconceptions about what causes tooth decay. What gets the most blame is the S. mutans bacteria that reside naturally in human oral cavity. When you have cavities, you also have an abnormally large number of these bacteria in your mouth. But as it turns out, it’s not like they are the ones causing your tooth decay. They are actually useful because they prevent yeast overgrowth!

Now, if your teeth are in a bad condition then yes, the S. mutans can be dangerous to you. Weak teeth are in general more susceptible to decay. So instead of focusing on the bacteria, we should be focusing on strengthening our teeth so that we don’t need to fear any potentially harmful microorganisms.

So how can we do that?

Eating clean is certainly the first step to improving your body’s health, including your teeth. Some say that increased calcium intake is what prevents tooth decay. And while I don’t disagree, I don’t think it’s quite that simple. In my opinion, there are three main aspects to keeping your teeth strong and healthy:

  • Vitamin K2

Vitamin K2 plays a major role in tooth remineralization. Together with vitamins A and D, vitamin K2 is also responsible for the absorption of nutrients found in food. So the bottom line is that if you are not getting enough vitamin K2, your body won’t be able to absorb all that calcium you’re eating to keep your teeth healthy. It’s critical to keeping your body well-supplied with all the necessary vitamins and minerals.

Vitamin K2 is commonly found in dairy products, especially butter and hard cheeses. Natto is also a good source of vitamin K2. Whenever I feel the need to supplement myself with some additional K2, I take care to eat more homemade broths, raw milk, and supplements like fermented cod liver oil.

  • Metabolism

A healthy metabolism is needed in order to absorb vitamins and minerals from food. Perhaps your metabolism is already working as it should – in that case, you can skip this step. But if you often find yourself constipated, bloated, feel tired all day, experience chronic stress, then it’s probably a good idea to work on improving your metabolism first.

Eating whole foods, exercising, and leading a fit lifestyle in general is the key to having a well-functioning metabolism. What I recommend to people struggling with getting their metabolism up and running first is eating large and full of carbs breakfasts. This is a proven way of raising your body temperature and in turn, speeding up your metabolism. Take your basal temperature each day in the morning as you wake up to see if this method is working for you!

  • The right toothpaste

Most commercial toothpastes contain plenty of potentially irritating ingredients that in the long run can cause people to suffer from serious health problems. These include:

  • fluoride – a neurotoxin that has been linked with weakening of the bones, tooth discoloration, and kidney damage
  • SLS (sodium laureth sulfate) – a well-known skin irritant
  • vegetable glycerin – an irritating substance that coats your teeth as you brush them and lowers mineral absorption
  • artificial flavors and colors – all kinds of chemical substances that are only there to make the toothbrushing process more enjoyable but often come from unspecified sources

So which toothpaste should you use? Search for toothpastes that are made from natural ingredients only as those are less likely to cause you any tooth irritation. Or even better, make your own toothpaste at home!

It’s really not that difficult and will give you that much needed peace of mind that you are not poisoning yourself and/or your family with commercial products. You know exactly what goes in it and you can even control the flavor by adjusting the amount of spearmint essential oil.

I’ll share with you a recipe for the homemade toothpaste we use at our house below. There aren’t any fancy ingredients in it and you can easily get everything online.

Here are the ingredients I use and what they each do:

  • coconut oil – a saturated fat that has antibacterial and antiviral properties
  • sea salt – a mineral source that will gently scrub away the teeth debris
  • mineral powder – a great source of calcium that your body will absorb as you brush your teeth
  • mineral drops – another mineral source
  • spearmint essential oil – gives gentle mint flavoring and has anti-inflammatory properties

See, nothing suspicious, right? That’s why I think it’s worth taking the time to make a batch of homemade toothpaste now and then. Because you know that the natural ingredients won’t cause you any harm.

Necessary equipment:

  • measuring spoons
  • a small bowl
  • a spoon for mixing
  • a small glass jar with a lid for storage

Ingredients:

  • 2 T. of expeller-pressed coconut oil
  • 2 T. of green stevia powder
  • 2 T. of baking soda
  • 1 T. of mineral powder
  • 1 t. of sea salt
  • 10 mineral drops
  • 40 drops of spearmint essential oil

Instructions:

  1. Use a small bowl to combine the coconut oil, green stevia powder, baking soda, mineral powder, and sea salt. Use a spoon to mix them well.
  2. Add in the mineral drops and spearmint essential oil. Mix to combine again.
  3. Your toothpaste is now ready! Transfer to a glass jar or an empty tube of regular toothpaste if you want.

My bathroom is relatively cool so I keep the jar of toothpaste there but if your bathroom is warm and not well-ventilated then you might need to keep your homemade toothpaste in the fridge or the ingredients will separate over time.

Vegetable Chowder with Cheddar Cheese

Soups are a life savior during the cold winter. Even more so if they have a creamy consistency, like this cheese vegetable chowder. They warm me right up and make me feel all cozy. Perfect for a meal before bed!

This chowder contains plenty of different vegetables but I especially love the turnip. I never ate much of it as a child and didn’t even really know how it tasted. But ever since discovering it in my local health store, I use turnips to give my meals that nice earthy flavor. The cheese binds all the ingredients together to create a perfect harmony of different nutrients. And the butter is the main ingredient behind the creamy consistency of this chowder. I like to savor each bite of this chowder as I eat while it melts in my mouth and fills me up with delicious warmth.

The vegetables in this recipe can be mostly substituted by others if you don’t have everything in your pantry at the moment. I only recommend that you use good quality cheddar cheese, it really makes all the difference!

If you are on GAPS, then you can also modify this recipe so that it’s compliant with the guidelines. Replace the potato with broccoli or cauliflower (or both!) and use coconut flour instead of sprouted flour. The cream can be substituted with sour cream or 24-hour GAPS yogurt.

Necessary equipment:

  • a large stockpot OR a slow cooker OR a French oven
  • a sharp knife OR a food processor
  • a wooden spoon
  • a ladle
  • glass jars with lids for storage

Ingredients:

  • 5 cups of homemade chicken stock (how to make chicken stock)
  • 4 to 6 T. of grass-fed butter
  • 6 T. of sprouted whole grain flour (how to make sprouted flour)
  • 1 1/2 cup of raw cream
  • 1 large leek
  • 1 large onion
  • 3 carrots
  • 2 stalks of celery
  • 1 turnip
  • 1 large potato
  • 4 garlic cloves
  • 1 bay leaf
  • 4 sprigs of fresh thyme OR 1/8 t. of dried thyme
  • fresh parsley to sprinkle on top
  • salt and pepper to taste
  • 11 oz. of mature cheddar cheese

Instructions:

  1. Prepare all the ingredients. Grate the cheddar cheese. Chop the onion and crush the garlic cloves. Cut the carrots, celery, turnip, and potato into dice-sized pieces. Cut the leek lengthwise and slice into small pieces. Chop the fresh parsley.
  2. Melt the butter in a stockpot over medium heat.
  3. Add the onion and the leek. Cook for about 5 minutes under a cover. Stir from time to time to prevent the vegetables from burning.
  4. Add the garlic and cook for a few more minutes.
  5. Stir in the flour and stir with a wooden spoon until the flour covers the vegetables evenly.
  6. Pour in about 1/3 of the chicken stock. Keep stirring. Take care to scrape the bottom of the stockpot so that no flour sticks to it.
  7. Bring to a boil and gradually add the rest of the chicken stock.
  8. Add the celery, carrots, turnip, and potato. Add thyme and bay leaf.
  9. Lower the heat and put a lid on the stockpot. Keep simmering for about 30 to 40 minutes while occasionally stirring.
  10. The vegetables should be tender by now. Remove the bay leaf and fresh thyme branches.
  11. Taste the soup and add salt and pepper if desired.
  12. Add grated cheddar cheese gradually. Stir constantly after each added batch. Do not add more cheese until the cheese inside the soup has melted.
  13. Remove from heat.
  14. Add the cream and keep stirring until it becomes warm.
  15. The chowder is now ready! Serve with fresh chopped parsley sprinkled on top.

How To Make Whey at Home

In many of my natural food recipes, like the one for beet kvass or mayonnaise, I use homemade whey. It’s not such a commonly heard of ingredient but ever since I learned about it, I can’t stop using it! And it’s really simple to make too.

Why is Whey Good?

You know how when you open a store-bought natural yogurt and you can see a thin layer of liquid forming on top? That’s what whey is! Of course, that way, you only get a small amount of it so it’s better to use my recipe if you want to get a large batch of homemade whey.

Whey is a natural dairy byproduct that can be utilized to enhance many other recipes due to the presence of healthy probiotics. It’s fully natural so it won’t harm your body, it can only help heal it!

Wikipedia states the following about whey:

“Liquid whey contains lactose, vitamins, protein, and minerals, along with traces of fat.

In 2005 researchers at Lund University in Sweden found that whey can help regulate and reduce spikes in blood sugar levels in people with type 2 diabetes by increasing insulin secretion.”

So if you have blood sugar issues, definitely give whey a try! It might just be the thing that helps your body regulate sugar levels on its own, without the use of modern medicine.

How to Make Whey at Home?

You can make whey out of several dairy products. The most popular are raw milk, homemade yogurt, and homemade milk kefir.

If you leave raw milk on the counter for a few days, it will eventually separate into curdles and liquid. That liquid is whey. If you try to do the same thing with commercial pasteurized milk, it will only spoil. That’s the easiest way of proving that organic is better than commercial. Raw milk won’t spoil, it will only turn into something else. And that ‘something else’ can still be utilized and eaten.

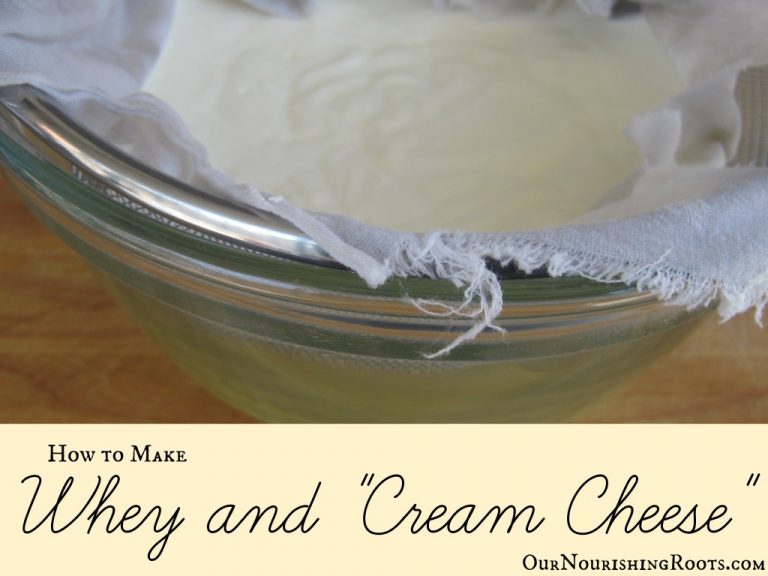
So to make whey out of raw milk, you need to leave it at room temperature for a few days and once the curdles are formed, strain the liquid using a sieve and a cheesecloth. That’s the basic method. I personally prefer to use homemade yogurt or homemade milk kefir. I just find it easier to do because the whey seems to separate much more cleanly than in the case of raw milk.

And I just love the leftover curds from yogurt! I call them “cream cheese” although they are not genuine cream cheese, it’s just my own nickname for it.

Necessary Equipment:

Ingredients:

Instructions:

  1. Place a large metal strainer over a large mixing bowl. Line it with a cheesecloth.
  2. Carefully transfer all of the yogurt to the strainer.
  3. Cover with a dish towel and leave overnight at room temperature. The whey will gradually drip through the strainer into the bowl below.
  4. On the following day, gently grab the edges of the cheesecloth and transfer it to another large mixing bowl.
  5. Remove the cheesecloth and let all of your yogurt curdles fall inside. You can now use them in another recipe (eg. my recipe for sweet or savory ‘cream cheese’ spread below).
  6. Now go back to the first bowl. Remove the strainer see how much whey dripped down below!
  7. Transfer the whey to mason jars and store in the fridge. It should be used within the next six months.

Cream Cheese Spread

Sweet version:

Ingredients:

  • 1 quart of ‘cream cheese’ (about 4 cups)
  • 1 cup of fruit jam OR 1/2 cup of raw honey OR 1/2 cup of maple syrup
  • optional: cinnamon

Instructions:

  1. Mix the ‘cream cheese’ with your chosen sweetener.
  2. Store in a glass jar in the fridge.

Savory version:

Ingredients:

  • 1 quart of ‘cream cheese’ (about 4 cups)
  • 1/4 cup of chopped chives
  • 1 T. of onion powder
  • salt and pepper to taste

OR

  • 1/4 cup of chopped basil
  • 1/4 cup of chopped dried tomatoes
  • 1 t. of garlic powder
  • salt and pepper to taste

Instructions:

  1. Mix the ‘cream cheese’ with your chosen ingredients.
  2. Store in a glass jar in the fridge.

Serve your homemade cream cheese spread on bagels, toasts, on crackers. Enjoy!

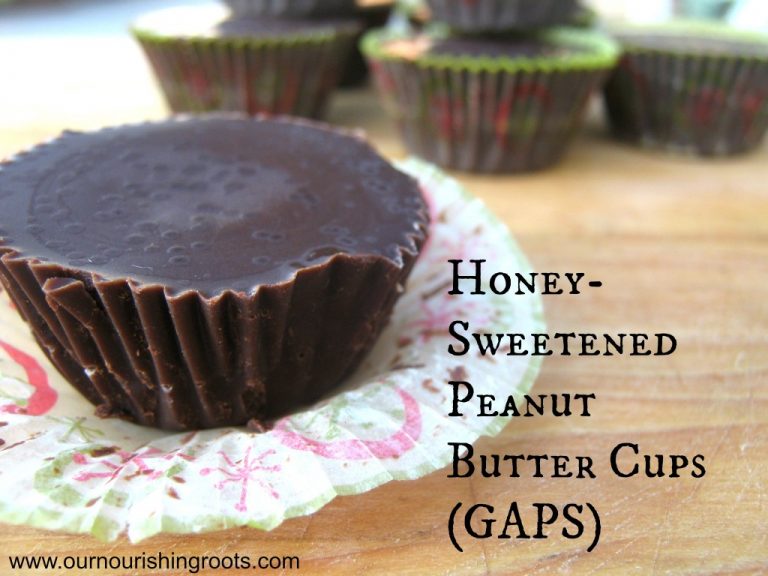
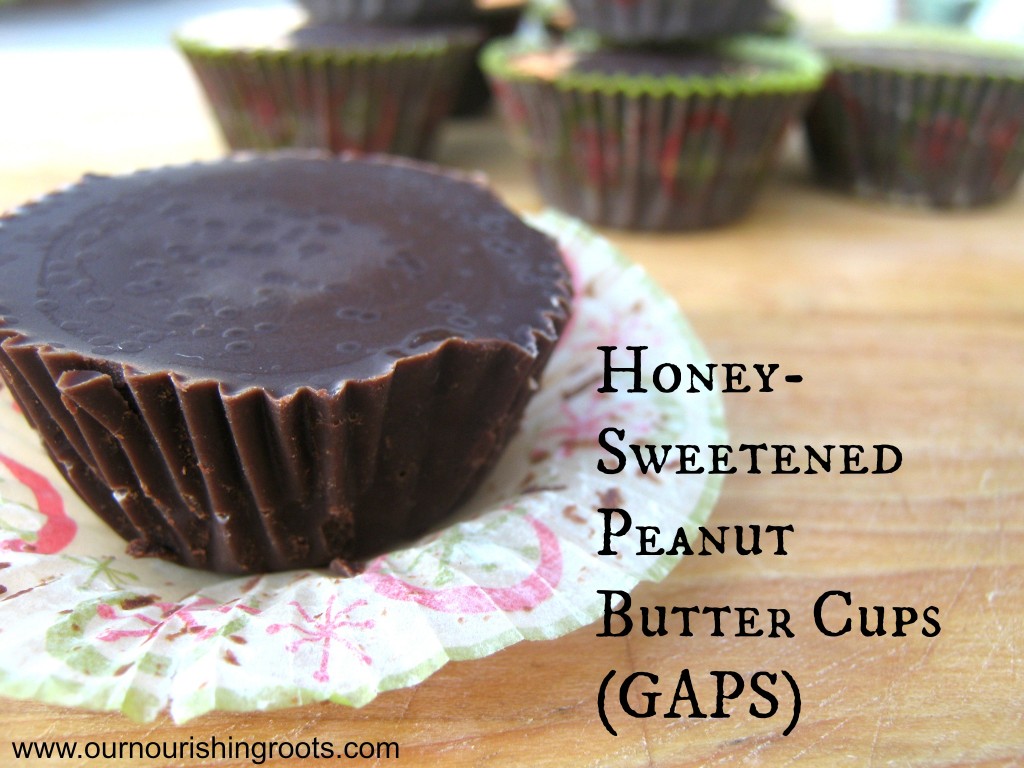
GAPS-friendly Peanut Butter Cups

I had made peanut butter cups before but when I first tried the recipe, I’m about to share with you, my mind was blown! The rich taste is very satisfying, and all of the flavors melt in your mouth as you eat it. I really want to savor these butter cups, so I usually eat them very slowly. All my previous recipes were missing something, but this one tasted exactly how I wanted my peanut butter cups to taste. That missing ingredient was fat.

Peanut butter cups

Not that I wasn’t using any fat before, that would be impossible to bake. But my previous versions of peanut butter cups were all made with coconut oil (in both the chocolate batter and the peanut butter mixture) which meant that they needed to be stored in a freezer. That definitely wasn’t beneficial for their flavor.

Coco Butter as a Baking Ingredient 

In this recipe, I use cocoa butter instead. It’s not very well-known as a baking ingredient. You most often hear about cocoa butter when it’s used in lotions and creams. I only started thinking it might be good for baking goods after I tried this recipe for Cocoa-Butter Cupcakes. This particular recipe didn’t turn out so well, probably because I messed up in the measurements somewhere. But that gave me the nudge to try using cocoa butter in other recipes as well. It can be used as a substitute for regular butter in most cases.

Cocoa butter has a higher melting point compared to coconut oil (100 degrees instead of 76 degrees) so it’s much easier when you are making chocolate or candies that need to be set up and harden at room temperature. But its most valuable quality is that it has this rich and smooth chocolate flavor that simply cannot be achieved with regular butter. You will be able to taste it for yourself if you buy raw and organic cocoa butter from a certified manufacturer.

These peanut butter cups are going to be part of our Christmas gift bags this year, together with some other pastries. I cannot wait for my friends and family to try them out, I think they will find them really delicious!

Peanut Butter Cups and GAPS Diet

And as a side note about eating cocoa on the GAPS diet, remember that not everyone is able to digest cocoa without any problems. If you want to test your stomach, try drinking a small amount of cocoa liqueur or adding a spoonful of cocoa powder into your pancakes or waffles to see if you see any negative symptoms. I am a very lucky person because I don’t have these issues but I am aware that not everyone is. My recipe uses both cocoa powder and cocoa butter. Cocoa butter is generally easier on the stomach so it shouldn’t cause you too many problems (but again, listen to what your body is telling you). But if you have problems with digesting cocoa powder then you can simply skip it in this recipe.

Technically, cocoa powder is not allowed when you are first starting GAPS and during the first few months. But after your gut has healed substantially then you can start reintroducing it to your diet. Here is what the GAPS FAQ has to say about that:

Cocoa is SCD illegal. However, I find that many people can start having it occasionally on the Full GAPS Diet, once the digestive symptoms are gone. Find pure organic cocoa powder. Mixing the powder with some honey and sour cream makes a delicious dessert, and you can add it to your homemade ice cream or cakes. After trying it for the first time, observe your patient for any reactions. Cocoa is very rich in magnesium and some essential amino acids and, unless your digestive system is not ready for it, there is no need to avoid it.

Honey-sweetened Peanut Butter Cups

As you might know already, I always use coffee in my chocolate recipes. I use only a small amount so that you cannot taste any coffee when eating but I feel like it always gives my baking goods some additional flavor depth. It simply tastes better when you put some brewed coffee in it and I don’t really know how to explain! But I have seen professional chefs do the same thing and I’m convinced there is some baking magic involved there. And if you don’t like coffee or simply don’t want to use it, it’s okay to skip it in this recipe.

And if it’s your first time making chocolate on your own then you need to remember one rule: never let your chocolate mixture come into contact with any liquid, not even a drop of water. Steam from the saucepan or any amount of condensation can cause your chocolate to turn from a smooth glossy mixture into a lumpy mess (imagine how flour becomes a paste when you add water to it – that’s how chocolate behaves and it’s not easy to fix).

Necessary equipment:

  • a mini muffin baking pan
  • mini muffin paper liners for the pan
  • a large glass mixing bowl (needs to be heatproof)
  • a medium mixing bowl
  • a medium saucepan
  • a whisk
  • a towel
  • a ladle
  • a small ice cream scoop

Ingredients:

chocolate:

  • 8 ounces of cocoa butter
  • 1 cup of cocoa powder
  • ½ cup of raw honey
  • 2 T. of brewed strong coffee
  • 2 t. of vanilla extract

peanut butter filling:

  • ¼ cup of peanut butter
  • 2 T. of raw honey
  • 2 T. of palm shortening
  • 1 t. of vanilla extract
  • ¼ t. of sea salt

Instructions:

  1. Line your mini muffin baking pan with paper liners and set aside.
  2. Pour some water into your saucepan and bring to a simmer.
  3. Set your heatproof bowl over the saucepan. Remember to fully dry it to avoid the chocolate mixture seizing. You also need to keep the stove at low enough settings so that there isn’t any steam but the water is still simmering.
  4. Transfer cocoa butter to the bowl and stir gently until it melts.
  5. Add in the cocoa butter and honey. Whisk to combine.
  6. Add the brewed coffee and vanilla extract. Keep whisking until the mixture is smooth.
  7. Remove from heat and set the bowl on a towel to help the bottom of it dry completely.
  8. Wipe all the sides of the bowl dry and set it aside to cool a bit.
  9. In another mixing bowl combine peanut butter, honey, palm shortening, vanilla extract, and sea salt. Stir until smooth and set aside.
  10. Ladle the slightly cooled chocolate into the muffin paper lines. Make it a little less than half full.
  11. Now use an ice cream scoop to make a small ball of peanut butter dough. Use your hands to flatten the dough ball to make a small disc. Place the disc on top of your chocolate base in each muffin liner.
  12. Ladle more chocolate over the top until the liners are filled to the top.
  13. Let your peanut butter cups solidify at room temperature for a few hours. Once hardened, take them out of the baking pan and enjoy!

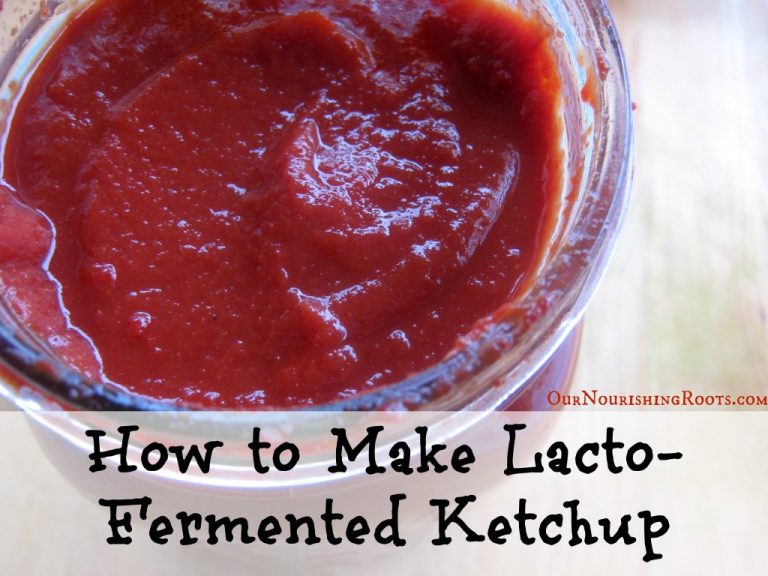
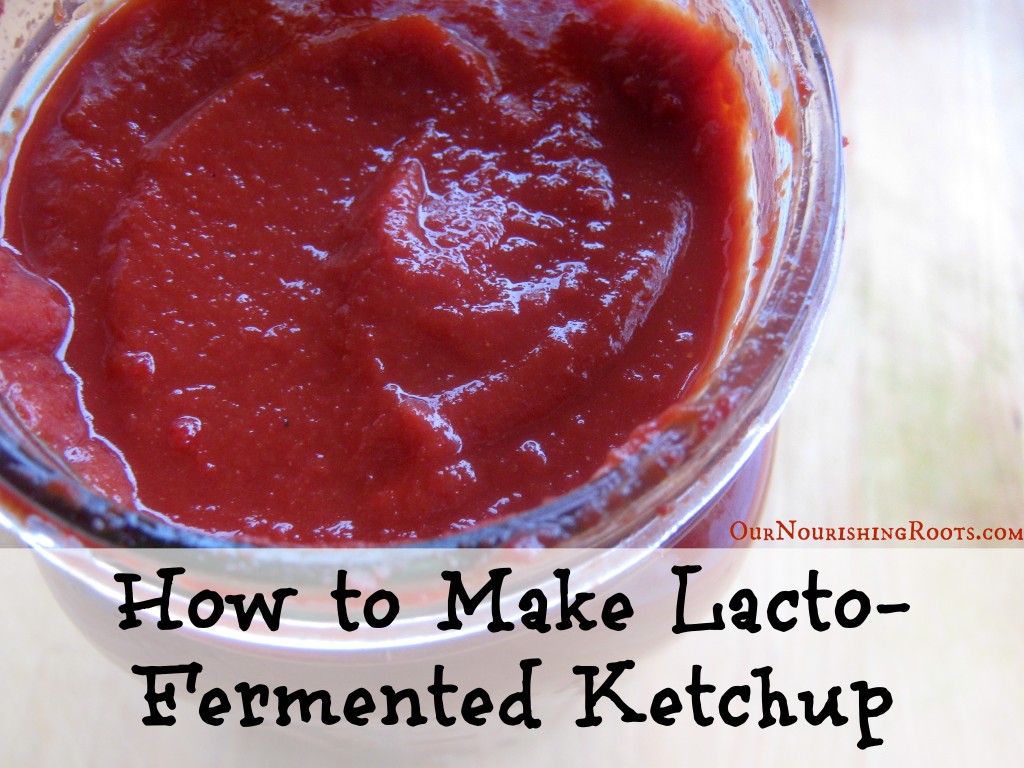
How to Make Homemade Ketchup Full of Probiotics

I have been making my own condiments at home for quite some time now. It never ceases to amaze me how much simpler life can be when you are not relying on store-bought commercial products for every single thing. Homemade mayonnaise and homemade ketchup are always present in my kitchen and today, I am going to share with you the recipe for the latter.

Ketchup

One of the reasons commercial ketchup is so addictive and taste good to us is the amount of sugar makers put inside. And of course, it’s the cheapest kind of sugar possible – the dreaded chemically processed and bleached white sugar. It’s unbelievable how high the sugar content in your typical ketchup bottle is! This is the best reason to start making your own condiments from scratch. You control all the ingredients it contains, and you decide how sweet you want it to be.

Homemade Ketchup

At my home, we always use up all of that homemade ketchup very quickly, so I recommend making a large batch from the beginning. It goes very well with everything, but we especially eat a lot of it during barbeque season. Homemade ketchup with potato fries and inside a burger? Count me in! Hash browns, roasted potatoes, you name it. Everything tastes better with a spoonful of some homemade ketchup made with your own hands.

And this recipe is not your ordinary homemade ketchup, it’s something even better. Thanks to the addition of whey, it becomes a lacto-fermented ketchup, full of probiotics that not only taste good but also work actively to aid your digestive system. It’s a very simple addition and it does so much good!

What I also love about this ketchup is that it can be very easily turned into another sauce:

For fry sauce, mix the ketchup with mayonnaise (preferably homemade!). This will be great for dipping chicken pieces, broccoli bites, and even fried shrimp.

Add some horse radish, lemon juice, chili sauce, hot sauce, and cayenne pepper and you will get a wonderful cocktail sauce!

This homemade ketchup combined together with mustard, molasses, honey, apple cider vinegar, lemon juice, pickle juice, paprika, and chili powder creates the ultimate barbeque sauce.

Necessary equipment:

  • a large mixing bowl
  • a whisk
  • a glass jar with a lid for storage

Ingredients:

  • 16 ounces of plain tomato sauce
  • 12 ounces of tomato paste
  • 1/4 cup of whey
  • 1/4 cup of raw honey
  • 1 1/2 t. of onion powder
  • 1 1/2 t. of garlic powder
  • 1/2 t. of dried mustard
  • 1/2 t. of cayenne pepper
  • salt and pepper to taste

Instructions:

  1. Use a whisk to combine the tomato sauce, tomato paste, and honey in a large mixing bowl.
  2. Add in the spices (onion powder, garlic powder, mustard, cayenne pepper, salt and pepper) and stir them in well. Taste your mixture and if needed, add more spices.
  3. Add in the whey and carefully mix it in until your ketchup texture becomes smooth.
  4. Transfer the ketchup to a glass jar and put the lid on loosely.
  5. Leave the ketchup jar to ferment at room temperature for 2 days. If you have other foods fermenting in the same room, make sure that they are at least a few feet apart from one another.
  6. Once the two days have passed, screw the lid on tightly and put the ketchup jar in the fridge to stop the lacto-fermentation process.

Enjoy! Now that you can make your own ketchup, check out my article about some of the best uses for ketchup.

How to Make Homemade Sweetened Condensed Milk

Sweetened condensed milk is one of those foods that first came to be out of necessity but are still being used now thanks to its taste and versatility.

sweetened condensed milk

Condensed milk was mainly used by those who didn’t have access to fresh milk from a cow but needed milk with a long shelf-life for cooking and drinking. The sugar came later, probably in order to make it last even longer. And the result is simply mind-blowingly delicious. I love it for its smoothness and silkiness.

I use plenty of condensed milk around the holidays because it’s a common ingredient in many pies, candies, and cookies. Typically, I make a large jar of condensed milk sometime in early winter. It’s so helpful to have it on hand and ready to use when I have so many other things on my mind!

Why even make your own sweetened condensed milk?

Surely you could buy a can of condensed milk from the supermarket. I prefer not to do that and here’s why.

When I make homemade foods, I know exactly what kind of ingredients I’m using. I care about my health and well-being so I use a healthy sweetener, like whole cane sugar, and raw milk from a grass-fed cow. But with store-bought food, you never have that certainty. Commercial brands often choose the cheapest ingredients to make their products. So you will probably end up with some highly processed bleached white sugar and preserved milk that hasn’t been fresh for a long time.

But the worst aspect of canned condensed sugar is… the can itself. Cans are usually lined with something called BPA (Bisphenol-A), often found in plastic. And I try to avoid BPAs as much as I can because it has been proven to be detrimental to human health.

Not all cans use BPA but it’s time-consuming to research all of the brands and even if they claim to be BPA-free, you can never fully trust a big corporation. That’s why I simply choose to avoid cans at all. Sweetened condensed milk is so delicious that I believe it’s worth taking the time to cook up a batch on your own.

Necessary equipment:

Ingredients:

Instructions:

  1. Pour cold milk into a saucepan and heat it over low heat. Do not try to speed up the process by turning up the heat, it needs to be at the lowest setting or the milk will separate and form curdles.
  2. Gradually stir in the whole cane sugar or honey. Keep stirring until fully combined.
  3. Warm the mixture until you can see steam forming. Keep it at the same heat level for about 4 hours or until half of the mixture is reduced. You might see some skin forming at the top of the milk. It can be removed as it appears all just taken out all at once when the condensed milk is ready.
  4. Once your mixture has reached the condensed milk consistency, transfer it to a clean glass jar.
  5. At this point, you can add butter and vanilla extract to your milk to enhance its flavor. Stir so that it fully combines.
  6. Screw on the lid tightly and put the condensed milk in the fridge. It will thicken a bit more.
  7. Use within a few weeks.

What the GAPS is all about

In this post, I want to talk a bit more about the GAPS diet. You might have seen me mention it a few times in other places but I have yet to write a post dedicated solely to the wonder that is GAPS.

So let’s begin with the basics.

What is GAPS?

GAPS stands for Gut and Psychology Syndrome and it’s a temporary(!) recovery diet that is supposed to heal your gut and give it more strength to digest food properly.

I would recommend trying out GAPS to anyone who has digestive issues, either caused by temporary health problems or food allergies and/or sensitivity. I am not claiming that GAPS will heal your allergy but I truly believe it might just be the thing that will get your symptoms under control. GAPS is also helpful to those who generally don’t feel properly nourished, have less energy than usual, or have problems with focusing.

The GAPS diet is different from a regular diet. It’s a diet you follow only until your gut has healed. By temporarily cutting out certain foods, you give your digestive system time to heal so that eventually, it will become able to digest those foods with no issues. It’s a modified version of the Specific Carbohydrate Diet (SCD). The GAPS is not about losing weight but about making YOU feel better overall by focusing on what really matters: the food you put in your body.

The premise of GAPS is that the gut is the most important organ in our body responsible for protecting us from diseases. It keeps the immune system in check and makes sure that it works properly. Without a functioning immune system, we are more susceptible to becoming sick. As such, keeping your gut healthy is what keeps your body healthy. By healing your gut with GAPS, you will improve your whole body’s condition. The duration it takes to heal is different for everyone and depends on how damaged your gut is. Some completely recover in just six months but others need to follow GAPS for three years or even more to fully heal.

How do you know GAPS is good for you?

You don’t. At least not until you try it out. But instead of committing to following GAPS guidelines for a whole year, it is recommended you start with 30 days first. Those 30 days should give you a good idea of whether you can see your condition improving and the GAPS is worth continuing. Once you get through the first 30 days, the rest will be a breeze.

There is an excellent book that explains exactly what to eat during those first 30 days. It’s the What Can I Eat Now? 30 Days on the GAPS Introduction Diet” and was written by Cara Comini. It has been immensely helpful to me and I highly recommend you check it out! It gives you guidelines for each day of your introduction to GAPS and contains plenty of recipes to try out.

What does the GAPS diet look like?

The GAPS diet is relatively simple. You can eat anything if it’s easy to digest. You will need to know which foods are easy on the stomach and which aren’t but once you have that memorized, following GAPS is easy. There is a list of GAPS-friendly foods you can check out.

I don’t eat grains, even if they are soaked. The only sugar I allow myself is raw honey. Starchy vegetables like potatoes have been shelved for now. I also avoid fresh dairy, even raw milk. But I eat plenty of other foods: eggs, yogurt, vegetables and fruit, meat, coconut flour, and healthy fats like butter and coconut oil. And I don’t feel like I’m missing out. Especially since I know that if I follow the GAPS properly then I will be able to eat all the grains I want without any health problems afterward!

What else do I do during the day?

  • Take a detox bath in the evening with an addition of either sea salt, Epsom salt, baking soda, or apple cider vinegar.
  • Take a probiotic twice a day.
  • Drink fresh veggie juice in the morning to wake me up.
  • Drink a cup of bone broth three times a day.

I have just one word of caution for you if you decide to start GAPS: it’s easy to go too low carb, especially at the beginning. You probably won’t be able to see it at the start but being too low carb long term, for a few months, is going to do you more bad than good. You might start feeling lethargic and unable to sleep at night, your energy levels will be low. That’s not because GAPS isn’t working but because you’re restricting your carbs too much.

And I really can’t praise Cara’s GAPS resources enough. Not only has she written an amazing book that serves as a thorough introduction to the GAPS diet, but she also has prepared plenty of GAPS-friendly meal plans. Those are the meal plans that she and her family uses herself to help with her child’s autism. Switching to a GAPS diet can be hard, especially in the beginning, but having tested meal plans at hand really relieves you of some of the planning stress!

If you want to feel better then do give GAPS a try for those first 30 days. Even if you decide it’s not for you, after a full month of an amazing healing diet, your body will surely thank you for it! If you are on GAPS or are just planning to begin your healing journey, leave a comment so that we can all feel like a real community!

Butternut Squash Casserole with Pecan Crust

Casseroles are on the menu each week during fall and winter. There is nothing better than a big batch of baked goodness to warm up you and your family when it’s cold outside. This ultimate comfort food can take many forms and the number of casserole recipes is only limited by human creativity.

It’s fall now so I do what I can to use vegetables that are currently in season. This means potatoes, pumpkins, cauliflower, and many more. For this recipe, I will be using squash.

Squash has that natural sweetness that is warm and not overpowering. Combined with some delicious butter and organic vanilla, it becomes this creamy and smooth consistency that simply melts in your mouth as you eat it. I also usually serve it with a small swirl of sour cream that gives it that extra edge. It can be eaten on its own for dinner or as a side dish for larger gatherings. In our case, the butter squash casserole always has its place on the Thanksgiving table. It tastes amazingly well with turkey!

Sweet potato casseroles seem to be more popular but I want to give squash some of the spotlight. It’s not as starchy so you won’t be suffering from indigestion later and the seasonal veggies provide plenty of much needed nutrients and vitamins that prevent us from catching a cold when it’s chilly outside. This is a perfect recipe for those people who try to avoid starches or are on the GAPS diet. The GAPS is a temporary healing diet that helps your gut recover by limiting foods that often lead to digestion problems. This includes grains and starchy vegetables, like potatoes and sweet potatoes. So if you are craving a sweet potato casserole but don’t want to upset your stomach, this squash casserole is the perfect substitute! I think it’s so good that you will be eating it even after you finish GAPS!

And I just want to say one more thing about casseroles in general. Specifically, the casserole dishes. I take care to dishes that are lead-free so that I won’t risk my family’s health when cooking. But the thing about manufacturers is that they often play loose with the term “lead-free”. They might use that term when what they really mean is “We didn’t cross the allowed lead amount”. But I want my pans to be 100% lead-free so I carefully check everything before making a purchase. For example, I found Emily Henry casseroles to be safe to use and completely lead-free.

Necessary equipment:

  • a large casserole dish
  • a large mixing bowl
  • an immersion blender
  • a wooden spoon
  • a medium mixing bowl

Ingredients:

  • 4 cups of butternut squash puree
  • 1/2 cup (1 stick) of melted grass-fed butter
  • 4 eggs
  • 1/3 cup of raw honey
  • 1 t. of powdered cinnamon
  • 1 t. of vanilla extract
  • 1/4 cup of sour cream

Pecan crust:

  • 2 cups of chopped pecans (how to soak and dehydrate nuts)
  • 1 cup of almond flour
  • 1/2 cup (1 stick) of grass-fed butter
  • 1/2 cup of raw honey

Instructions:

  1. Preheat the oven to 325 degrees.
  2. Prepare your casserole dish by buttering it up thoroughly. Set aside for now.
  3. Put the butternut squash, butter, eggs, honey, cinnamon, and vanilla extract in a large mixing bowl.
  4. Use an immersion blender to create a smooth puree.
  5. Add in the sour cream and carefully stir it in using a wooden spoon.
  6. Pour the mixture into your prepared casserole dish.
  7. In another mixing bowl, combine almond flour, butter, and honey using a blender or a fork.
  8. Add in the chopped pecans and stir them in so that they are well coated.
  9. Cover the top of your casserole with the chopped pecan crust.
  10. Bake for 60 minutes. You will know the casserole is ready when the top crust has turned slightly brown and a fragrant aroma fills your kitchen.
  11. Take out of the oven and leave to cool for at least 10 minutes before serving.

How to Soak/Sprout and Dehydrate Nuts, Seeds, and Beans

What is the point of soaking and dehydrating nuts? Can’t they just be eaten on their own?

Those are the questions that I used to ask myself when I took my first steps on the journey to cleaner eating. It seemed so cumbersome to go through the trouble of preparing nuts before using them in my cooking and I really wanted to avoid doing it. But I changed my mind after I soaked and dehydrated my first batch of nuts and had absolutely no trouble digesting them.

This is not only about nuts but also seeds, beans, and grains. Although to properly soak and dehydrate grains you need to do some extra steps and follow a slightly different procedure so I won’t be talking about that here. But nuts, seeds, and beans can be done fairly easily, you just will need to sacrifice some time beforehand. The pros and cons of dehydrated food are worth considering when deciding whether this method fits your lifestyle and nutritional goals. Understanding the benefits and limitations can help you make more informed choices when preparing and storing your food.

Nuts, seeds, and beans contain so many different beneficial minerals, vitamins, and fats that we should be eating them daily. But that’s not really an option for many people. I am sure you have had your share of embarrassing toilet visits after eating too many beans or seeds. Sometimes these foods seem to pass through our bodies without any nutrients getting properly absorbed. Which is a real shame.

The point of soaking and then dehydrating nuts is to neutralize phytic acid, lectins, and enzyme inhibitors. These substances make them harder to digest by our bodies. But the soaking (and sprouting) process “unlocks” the enzyme inhibitors. This makes them easier on your gut and allows for better absorption of the nutrients. The Nourishing Traditions ebook explains it best:

The process of germination not only produces vitamin C but also changes the composition of grains and seeds in numerous beneficial ways.  Sprouting increases vitamin B content, especially B2, B5, and B6.  Carotene increases dramatically–sometimes eightfold.  Even more important, sprouting neutralizes phytic acid, a substance present in the bran of all grains [and in nuts, beans, and seeds] that inhibits absorption of calcium, magnesium, iron, copper and zinc; sprouting also neutralizes enzyme inhibitors present in all seeds.  These inhibitors can neutralize our own precious enzymes in the digestive tract…Finally, numerous enzymes that help digestion are produced during the germination process.

Soaking and sprouting are two separate but similar processes. They both serve the same purpose – to make the nuts, seeds, and beans more digestible. So what’s the difference? The key lies in the duration of the process.

Soaking is simple. You just put your nuts, seeds, or beans in water salted with a spoonful of sea salt and leave them to soak overnight. The next day you put those nuts, seeds, or beans in a dehydrator or in an oven to dry them out until they turn crispy again. For most people, this is enough to make them ready for digestion.

However, if even with soaking you still struggle with digesting those foods, sprouting might be necessary. Sprouting is essentially similar: again, you leave the nuts, seeds, or beans in salt water for a few more days until they start sprouting. You will be able to see the sprouts coming out. But remember that only truly raw nuts, seeds, and beans will sprout properly. Typical store-bought pasteurized foods won’t be able to sprout. The time needed to sprout is different for each product. For example, lentils will usually sprout in around 12 hours but sunflower seeds might need three days of soaking to finally release some sprouts. The size also matters. Larger beans and seeds will take longer to sprout.

The dehydration process is fairly simple. You can lay out all of your soaked or sprouted foods on a tray and put them in the oven set to the lowest temperature. Full dehydration might take just a few hours or even a whole day, depending on what you are dehydrating.

If you start doing this process regularly, I highly recommend you get a dehydrator to make your life easier. You can control the temperature exactly which comes in handy not only when dehydrating seeds and nuts. Dehydrators are able to operate at lower temperatures than most ovens. I also use my dehydrator to make homemade beef jerky, raise bread dough, or even make yogurt! They use much less electricity than ovens so I don’t feel guilty about leaving them on for the whole night. And in the winter, it’s an excellent source of additional heat to warm up our house.

Soaking and dehydrating nuts, seeds, and beans – the basic process

Necessary equipment:

  • a half gallon glass jar
  • a kitchen towel OR a sprouting lid
  • an oven OR a dehydrator

Ingredients:

  • 4 cups of nuts, seeds, or beans
  • filtered water
  • 1 T. of sea salt

Instructions:

  1. Put the filtered water in the glass jar you will use for the soaking process and add in the sea salt. Stir to help the salt dissolve.
  2. Add in the nuts, seeds, or beans you want to soak and stir them in gently.
  3. Cover the jar with a kitchen towel or a special sprouting lid. The jar needs to be covered to keep the dirt out but it also needs to be able to breathe.
  4. Soak overnight or longer, depending on what you are soaking.
  5. The next morning, drain the water out of the jar using a sieve or the sprouting lid.
  6. Rinse the nuts, seeds, or beans by running them under filtered water a few times.
  7. Spread the nuts, seeds, or beans on a baking tray lined with parchment paper or a dehydrator tray.
  8. Oven: set the lowest possible temperature (usually 170 or 150 degrees) and dehydrate until the nuts, seeds, or beans turn crispy.
  9. Dehydrator: set the dehydrator at 120 degrees and dehydrate until the nuts, seeds, or beans turn crispy.

Sprouting and dehydrating nuts, seeds, and beans – the basic process

Necessary equipment:

  • a half gallon glass jar
  • a kitchen towel OR a sprouting lid
  • an oven OR a dehydrator

Ingredients:

  • 4 cups of nuts, seeds, or beans
  • filtered water
  • 1 T. of sea salt

Instructions:

  1. Put the filtered water in the glass jar you will use for the soaking process and add in the sea salt. Stir to help the salt dissolve.
  2. Add in the nuts, seeds, or beans you want to soak and stir them in gently.
  3. Cover the jar with a kitchen towel or a special sprouting lid. The jar needs to be covered to keep the dirt out but it also needs to be able to breathe.
  4. Soak overnight or longer, depending on what you are soaking.
  5. The next morning, drain the water out of the jar using a sieve or the sprouting lid.
  6. Rinse the nuts, seeds, or beans by running them under filtered water a few times.
  7. Fill the jar with water again, screw the sprouting lid on, and drain the water again.
  8. Shake the jar slightly to keep the air circulating properly.
  9. Keep rinsing and shaking the nuts, seeds, or beans inside the jar two or three times a day until you will see the sprouts forming.
  10. Use fresh sprouts as they are or, if you prefer, dehydrate them for later:
  11. Spread the nuts, seeds, or beans on a baking tray lined with parchment paper or a dehydrator tray.
  12. Oven: set the lowest possible temperature (usually 170 or 150 degrees) and dehydrate until the nuts, seeds, or beans turn crispy.
  13. Dehydrator: set the dehydrator at 120 degrees and dehydrate until the nuts, seeds, or beans turn crispy.