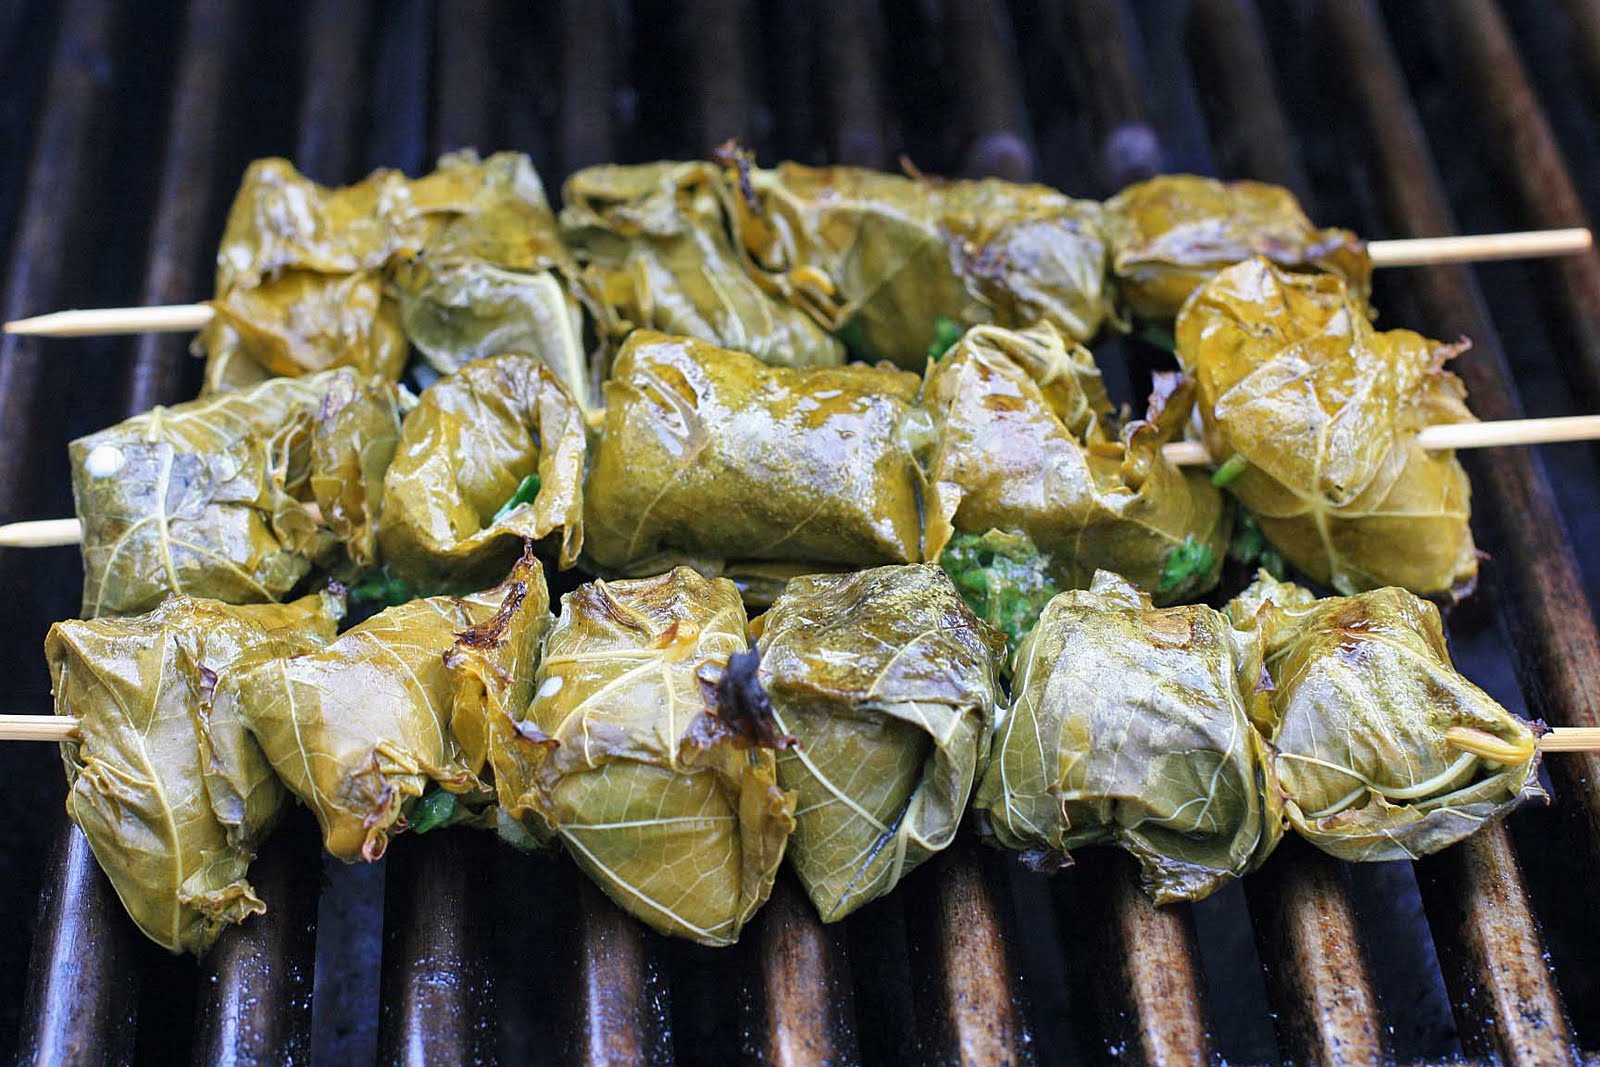
 Here’s another food on a stick recipe for you guys, although this one is a little more fancy-pants than the kind I usually post around here. But don’t worry, there’s nothing too difficult going on here. Firm chunks of fish get a quick soak in chermoula, a marinade common in Northern Africa, before getting wrapped in grape leaves and cooked quickly on the grill.
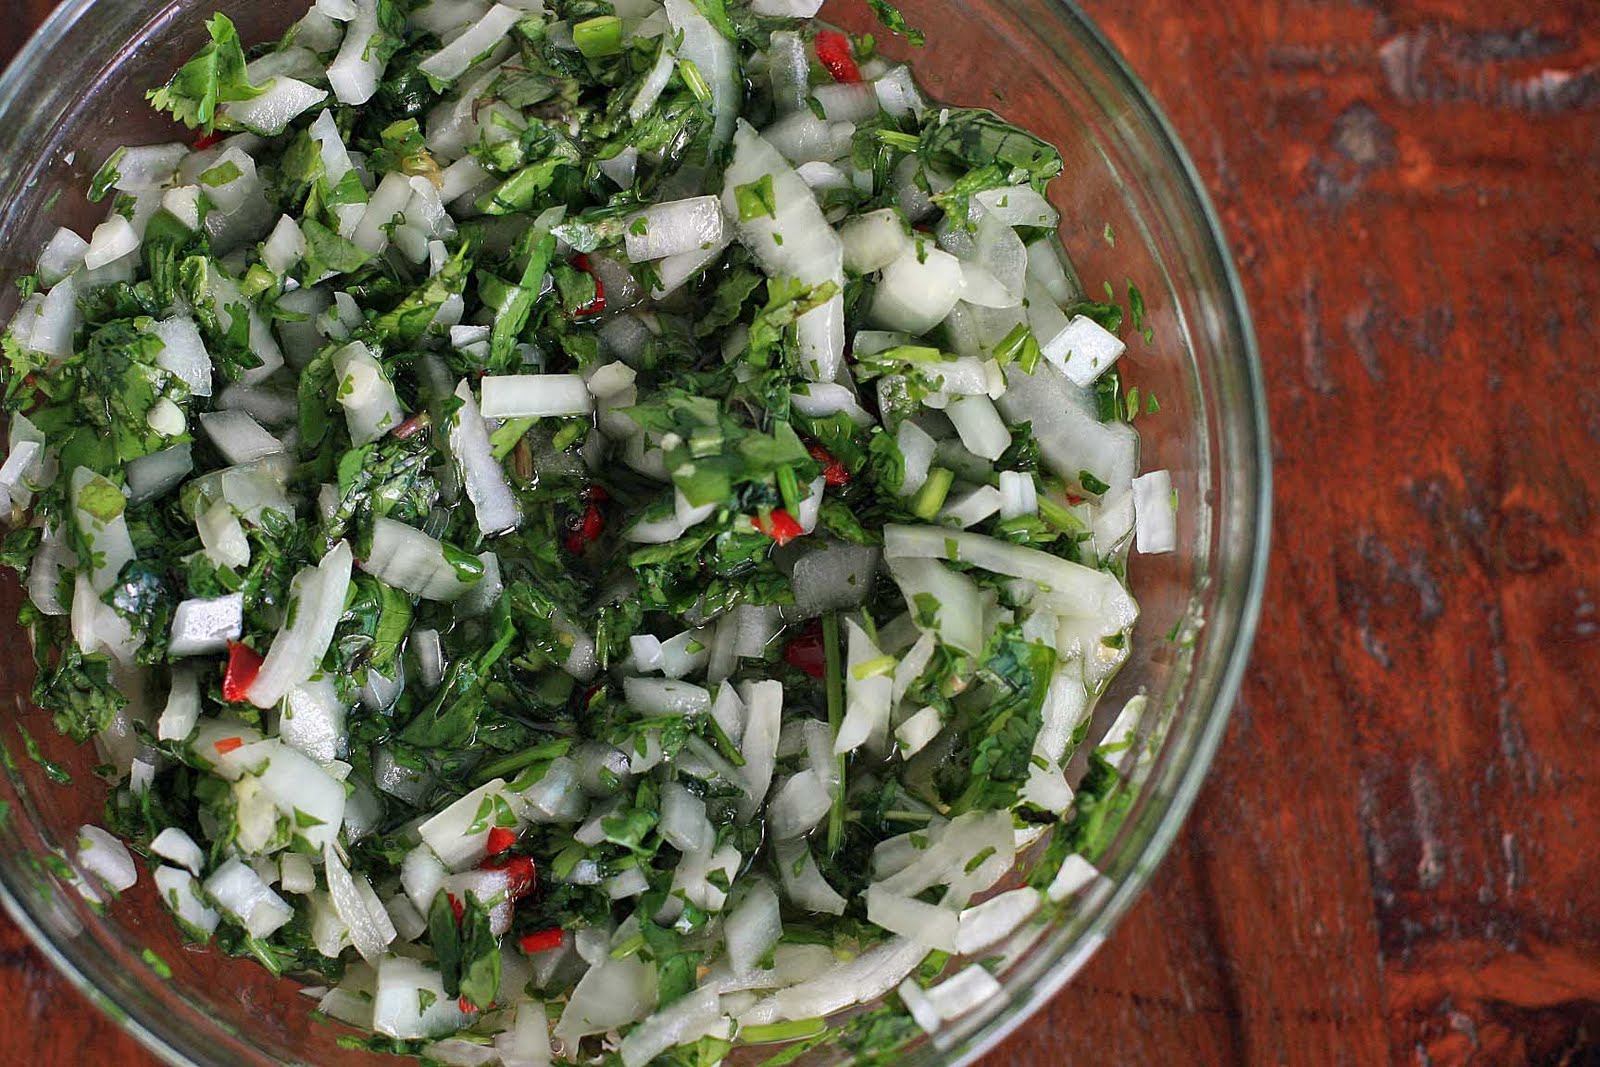
 Although they’re pretty tasty just like that, these little packets of fish goodness become extra special when paired with the sweet and sour dipping sauce. Even if you don’t want to go through the trouble of hunting down grape leaves, definitely try the marinated fish with the sweet and sour sauce. It’s bright, flavorful and easy to adapt to your desired level of heat.I ended up using shutome (swordfish) and nairagi (striped marlin), but I’m sure any firm white or pale fish would work well here.
Grilled Fish Wrapped in Vine Leaves with Sweet and Sour Dipping Sauce
Yield: 4 servings
Ingredients:
* about 15-25 preserved grape leaves
* 1 1/2 pounds firm white fish fillets, skinned and boned
* 6-8 wooden skewers, soaked
Chermoula Marinade:
* Small bunch cilantro, finely chopped
* 3 cloves garlic, minced
* 1 teaspoon ground cumin
* 1/4 cup olive oil
* 3 Tablespoons lemon juice
* 1/2 teaspoon salt
Dipping Sauce:
* 1/4 cup lemon juice
* 1/3 cup sugar
* Pinch saffron threads
* 1 onion, very finely chopped
* 2 cloves garlic, minced
* 1/2” piece fresh ginger, grated
* 2 hot chili peppers, minced (seed the peppers if you’d like a more mild sauce)
* Small bunch cilantro, minced
* Small bunch mint, minced
Directions:
Blend the chermoula ingredients in a blender or food processor and set aside.
Rinse the vine leaves and let them soak in cold water.
Cut the fish into small chunks, place in a large bowl and coat with the chermoula marinade. Place in the refrigerator and let marinate for an hour.
Prepare the dipping sauce by heating the lemon juice and the sugar in a small saucepan over high heat and stir until dissolved. Bring to a boil and let boil for about a minute. Remove from heat, let cool and then add the remaining ingredients and stir to combine.
Drain the vine leaves and place one flat on a kitchen work surface. Place a piece of fish in the center and wrap up the fish into a small packet (note: if the vine leaves are very big, cut into smaller pieces or in half…you want the leaves just large enough to wrap once around the fish with a little overlap to seal. You don’t want multiple layers of grape leaves around the fish as it changes the taste and texture of the dish… things get a little too chewy and the flavor of the grape leaves start to dominate).
Thread the fish packets onto the wooden skewers and repeat with the remaining fish and grape leaves.
Heat the grill to high heat and cook the kebobs for 2-3 minutes on each side. Serve immediately with the sweet and sour dipping sauce.