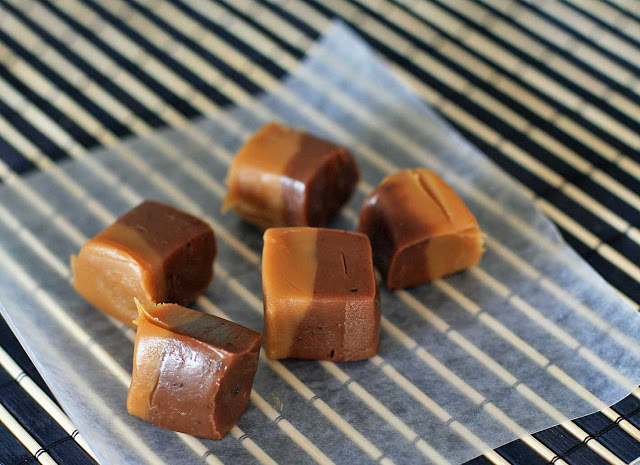
 I know I’m late to the party on this one, but Fany Gerson’s cookbook My Sweet Mexico is a total gem. I’m usually stumped as to how to end Mexican meals (I mean, a girl can only eat so much flan or Mexican chocolate ice cream). Well, that certainly won’t be a problem anymore- this cookbook is chock full of interesting and diverse recipes for sweet breads, candies, cookies, and frozen treats. Seriously, this book has it all. I currently have about a dozen recipes bookmarked with little page flags.
 These creamy mocha coffee caramels actually morphed from Gerson’s milk fudge recipe. I swapped out some evaporated milk for coffee and ended up with these soft, creamy and chewy coffee caramels. I used café de olla, because I had some on hand, but feel free to use any kind of coffee.
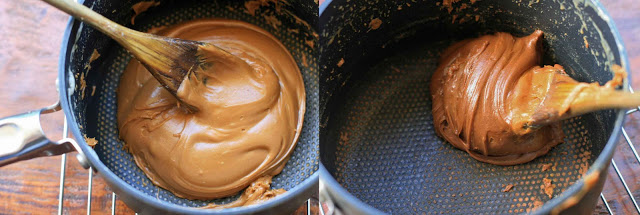
11/7/11 Update: I went back to make these again just to make sure they worked with regular coffee (they did) and to add some extra photos to illustrate the consistency you’re looking for when to pull them off of the heat. The photos above will result in caramels that actually don’t need any refrigeration.. they set up perfectly at Hawaii room temperature. If you stop just short of this, the caramels will require refrigeration, but I actually liked the texture of my earlier batch of refrigerated caramels better. In any case, you have some flexibility here.
When you’re stirring you should be able to coax the mixture into a mound; when you stop stirring it’ll creep back towards the edges. The photo on the right is after cocoa powder was added- at this point the mixture could be coaxed into a little ball. And while you don’t need a candy thermometer, you do need patience… a half batch simmered away for about an hour to get to the finished stage.
 Creamy Mocha Coffee Caramels
2 (14-ounce) cans of sweetened condensed milk
1 cup evaporated milk
3/4 cup café de olla, or other kind of coffee
6 Tablespoons butter
2 teaspoons vanilla
pinch salt
3 Tablespoons cocoa powder
parchment paper or aluminum foil and waxed paper
Lightly grease a loaf pan (approximately 9-inch by 5-inch) and line with parchment paper or aluminum foil, leaving a little overhang on each side.
Combine the condensed milk, evaporated milk, café de olla or coffee, butter, vanilla, and salt in a medium saucepan over medium heat. Cook, stirring continuously with a wooden spoon, until the mixture is very thick and pulls away from the sides of the pan.
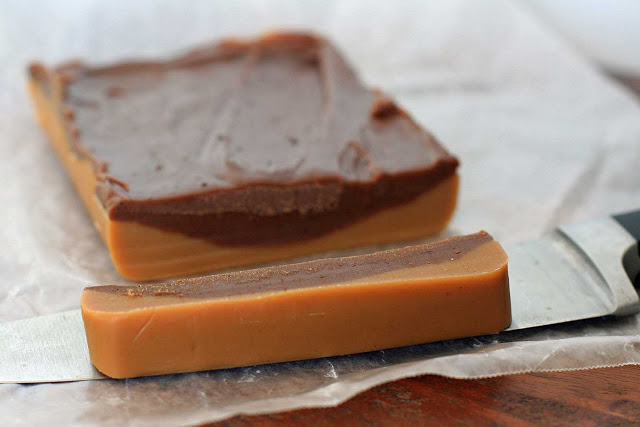
Pour half of the mixture into the prepared loaf pan and spread evenly. Add the cocoa powder to the remaining mixture and stir to combine. Pour the mocha caramel over the coffee caramel and allow to come to room temperature. Place in the refrigerator until chilled. Remove and cut into bite-sized pieces. Wrap pieces in small squares of waxed paper.
Store in the refrigerator.