Home Blog Page 32

Percolator Vs Drip Coffee Maker

With so many ways to brew the perfect cup, it can be hard to tell which is best for you. Two of the easiest methods and certainly good for entertaining are coffee percolators and drip coffee makers. Out of the two, they make a different brew, but which is the best? Some of the criteria are going to be objective as what one person considers good won’t always be the same as someone else but there are some things that no one can argue against such as a burnt cup of joe. To settle this debate, we’re going to take a closer look at both options.

What Is A Percolator?

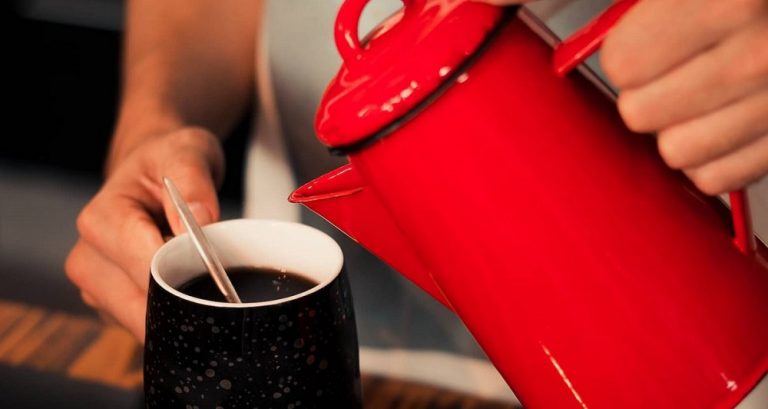
Let’s start by considering the device that has roots that trace back to the 1800s. Still going strong, they use a metal basket filter that holds the ground coffee. Heated on a campfire or stovetop, the water travels up through a tube, and the heat causes condensation. This gathers at the top, before dripping into the basket holding the coffee. When fully saturated, the coffee-infused water drips into the pot.

The cycle is repeated when it is left on the heat, so the user can tailor the strength of their brew accordingly.

What Is A Drip Coffee Maker?

Although its history doesn’t stretch as far back, drip coffee machines still have plenty of history to call upon since its creation in 1908. Using a similar method in that it is placed on a stovetop or campfire, heated below, and creating condensation, only the brewing process differs at this point. Because after brewing the coffee it stores it, the cycle is not repeated so what you get is the same strength. There is a metal basket or place to insert a paper filter that can allow the user to tailor their strength.

[wc_fa icon=”cutlery” margin_left=”” margin_right=”10″ class=””][/wc_fa]Taste

The first and most important consideration is also the most difficult to define, but there is a difference between the two. For a strong coffee, there is only on the winner and that’s the percolator. It makes dark coffee based on its constant recycling but it can be made lighter with the right timing so it does have versatility on its side. There is also more caffeine when using a percolator thanks to the added brewing.

For a lighter coffee that can be made medium depending on the type of filter and grind of beans, a drip coffee maker is a good option. Filters help to remove some of the oils for a clean taste but without some of the smoothness.

[wc_fa icon=”cutlery” margin_left=”” margin_right=”10″ class=””][/wc_fa]Price

Both types of coffee makers are available in a variety of prices so they suit every budget. Of course, quality tends to increase with the price but a compact percolator that is ideal for camping can cost under $20. These may have a smaller capacity but can be perfect for someone living alone. Electric percolators can cost anywhere between $40 – $200 with anything around the mid waypoint being a reliable product with a large capacity that can give you around 10 cups and above.

A drip coffee maker is equally as different when it comes to price and can be found for as little as $15 for a basic product. Pod brewers are more expensive, but not by a lot so don’t expect to have to part with more than $200 for a decent product. Although they can cost more if you have the budget to spend they shouldn’t cost more than for example the best espresso machine under $500.

[wc_fa icon=”cutlery” margin_left=”” margin_right=”10″ class=””][/wc_fa]Capacity

This is where a percolator is the better choice as they are often found in multiple cup sizes, going well over ten cups at a time. These are great for entertaining, especially since they are easy to reheat (although this will increase the strength). Still, both products can be found in more convenient sizes so if you live alone or as a couple, you won’t be short on options.

[wc_fa icon=”cutlery” margin_left=”” margin_right=”10″ class=””][/wc_fa]Convenience

The drip coffee maker might have the edge on this purely based on its brewing options. Because they regulate heat differently and you aren’t going to have to keep as close an eye on the brew time, they can be easier to get on with. On the other hand, there are no paper filters with a percolator so they are good to go and cleanup is easier as a result. Either way, if your budget is restrictive and then the cheaper options for both are similar so it won’t make a massive difference.

[wc_fa icon=”cutlery” margin_left=”” margin_right=”10″ class=””][/wc_fa]Brew Time

Both products have a brewing time of around 5 minutes but this is a maximum for a drip coffee maker. A percolator can take longer but this is if you like your coffee particularly strong. It doesn’t take long for either to make a drinkable cup in the morning.

[wc_fa icon=”cutlery” margin_left=”” margin_right=”10″ class=””][/wc_fa]Portability

For a camping trip or even just taking from place to place, a percolator is a better option. Because it only needs a stove to brew, they are not reliant on power and tend to be hard-wearing because they are mostly made from metal parts, ideal for taking traveling. A drip coffee maker tends to be heavier and bulkier so it is not. as convenient if you are looking for a coffee maker that can b used on a camping trip.

Conclusion

The decision should be down to the user’s preference of brew as anyone who likes it stronger should opt for a percolator and otherwise, a drip coffee maker is a good idea. If you are torn then a percolator has the edge on the above criteria. The portability is not likely to be as important for many people but they are convenient, allow you to make a stronger cap, and tend to have a larger capacity.

Since there isn’t a lot between them when it comes to price, the ease of cleanup might sway you. You can’t go far wrong with either and will be able to produce great-tasting coffee every day. If you do not want to use a stovetop percolator then remember that there are plenty of electric options available, although this will push the price up.
Different Ways To Clean A Grill (And How To Keep It That Way)

No matter how hard you try, it can be nearly impossible to effectively clean a grill. Whether you are out by the BBQ or cooking dinner indoors, it is a job that is best made as simple and easy as possible. After enjoying some deliciously grilled food, the cleanup is something we all dread. But there are ways of making light work of this thankless task. It is best to tackle it head-on, without delay, and use a proven method to get that leftover burnt meat or charcoaled corn off the grill. We have detailed some of the most common and effective ways to clean a grill.

How to clean a grill

Dishwasher

If the grill is detachable from the BBQ or oven and will fit, then the dishwasher is one of the easiest and most convenient cleaning methods. Although this won’t be much use for stubborn, burnt-on grime, it can help to lift a base layer. And at the very least, it will start you off so you can do a little scrubbing to get the rest. If you put it in whilst still warm, this can help. A high temp cycle should do the trick.

Burn It

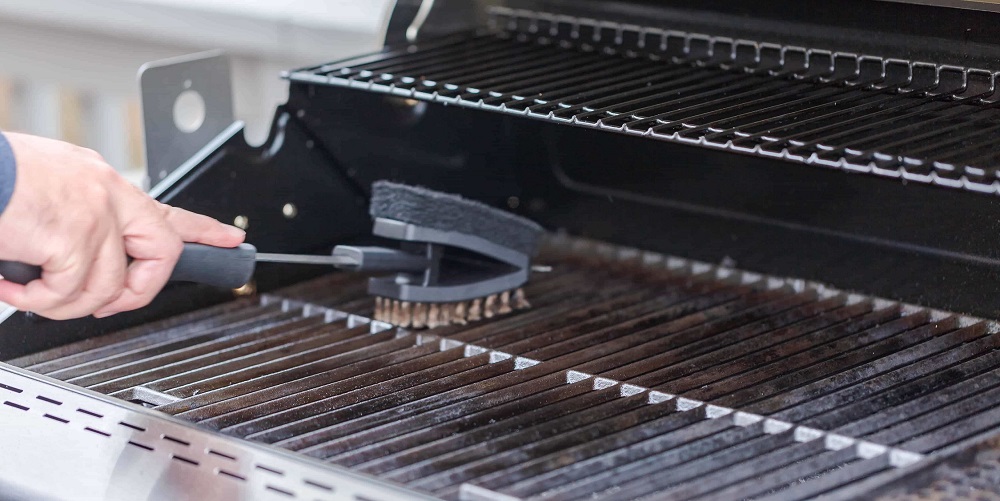
This works on gas grills, and the method is simple. Get it started and leave the grill in place before pulling the hood over. Leave it for 20 – 30 minutes and it will burn the excess food parts and stuck-on leftovers. Lift the hood then use a wire brush to scrub any excess off. This should be easier when it is hot.

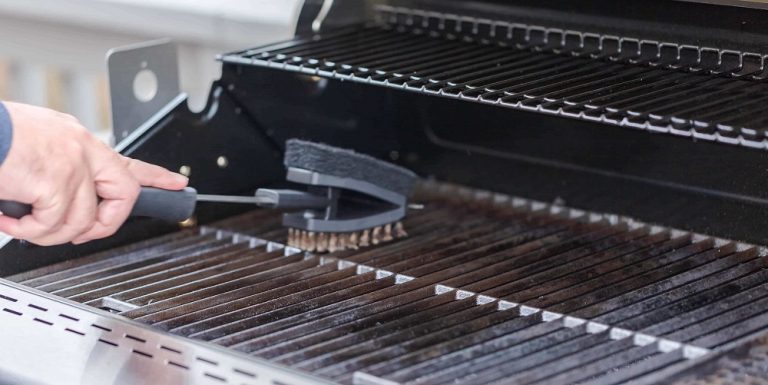
Use a Grill Brush

If you have purchased some cheap grill brushes then expect them to give you a limited clan with less than impressive results. It is always best to spend a little extra and invest in a quality product as it will make life a lot easier. The bigger the brush, the easier it will be so if you can find anything around 18 inches then even better. You will want to find one without bristles as these can fray and detach from the handle easily and although this method involves a bit of manual labor, some soapy water and a bit of scrubbing will yield impressive results.

Maintain your grill by using a grill brush after every use and it will not only last a long time, but it will be much easier to clean next time.

An Onion

Although this method might bring you to tears, it will at least help get the grill clean. Stick a fork in a halved onion and scrub the grill up and down. Do it when hot to replicate steam clean as the water from the onion and heat from the grill make the process easier.

Soak The Grill

When the grill has cooled down, put it in a tub of warm to hot soapy water and leave it to soak. This might not eliminate all the burnt-on food and stains but it will make the job of scrubbing it down a lot easier. After 30 minutes of submersion, it should be ready for a bit of elbow grease.

Baking Soda

The savior of at-home cleaning remedies, baking soda mixed with water can remove stubborn messes on a grill. Use a scouring pad to mix it in. The granules and soda formula will combine to leave the grill looking squeaky clean.

Vinegar

You can turn this into a spray by mixing vinegar with 50% water in a spray bottle and apply liberally to the grill. The acidic content will help to lift tough grease and burnt food when left for ten minutes before being re-applied then scrubbed off. This solution also works when looking to clean the outside of the grill to leave it looking new.

Tips For Keeping A Grill Clean

When you have cleaned a grill, you will want to keep it that way, here are some tips for making sure the next time you have to clean the grill, it isn’t going to take so long.

Clean The Rest of the Grill

By maintaining good habits, you will find that the grill is easier to clean. When the base is clear from debris and you have tipped the old coals away (when cold of course) there is less dirt that can get stuck on the grill. A bit of soapy water and a scrub should usually get rid of the last bits left behind. This includes the taps, plates, burners, you name it. The more technical your BBQ, the more work it will take to maintain but this is to your benefit. More frequent cleaning means it takes less time, so be sure to clean all parts before putting it away again.

Burn Off Food

We mentioned this as a cleaning technique but it good practice after every use. Turn the excess food pieces to ash and they will either fall away or be easy to remove. It must be seriously hot and covered to get the full effect and always wait a while before going anywhere near the grill after.

Proper Disposal of Oils

The same goes for fats but scrape them into a newspaper or the like before putting them in the trash. Combine them with coffee grinds for more responsible disposal or purchase a fat trapper.

Clean Outside

It can be a messy task scrubbing a grill and this can mean a lot of flying debris. Rather than transferring burnt-on grease from your grill onto a window, do the hard work outside so you only have to do it once.

Cover It Up

When you are done cleaning, don’t leave the hood up. Not only does this expose it to the elements which can cause wear and tear, but bugs and other wildlife can cause destruction, making you need to give it a thorough clean before you use it next. Covering the grill helps to ensure it lasts longer. To protect the outside of the BBQ you can also purchase a cover.

Use Fresh Cleaning Equipment

By this, we mean everything from new grill brushes to dishcloths as working with worn tools will make the process a lot harder. When you notice a scouring brush or grill bristle start to look frayed or damaged, grab a new one to notice the difference.

Health Benefits of Different Types of Tea

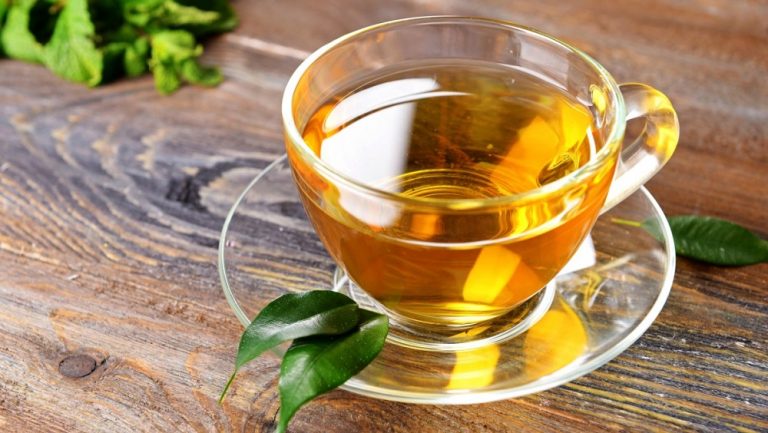
Your traditional English breakfast might be a welcomed sight at the end of a challenging day of work. However, there are so many tea options to choose from with key health benefits. Drinking different teas is an easy way of getting antioxidants and weight loss benefits that others cannot offer. To make sense of the long list of options, we have included some of the best tea types for your health and the common benefits from each one.

Different Types of Tea

Most tea can be put into four main groups. Traditional tea will be in one of the following:

Oxidizing will influence how each tea is produced. Those that are not so fermented are lighter and greener in appearance while tea leaves that are significantly oxidized are redder and darker. Most of the time, these contain caffeine although it can be extracted which is why you will find a lot of them being suitable for use later in the day.

Let’s take a look at some of the health benefits of different teas.

Oolong

Oolong has around 30 mg of caffeine per cup. It’s available in a variety of different forms, with the milky type being popular for its smoky aroma and taste. One of the major health benefits often associated with oolong is its weight loss properties. Other benefits include links to skin health, energy, cardiovascular health, and metabolism.

Look for products picked at high altitude, so they mature slower. This will produce a concentrated flavor.

Black Tea

Black tea covers some of the easily recognizable types including English breakfast, Darjeeling, and earl gray among others. The catechins and polyphenols provide plenty of health benefits. Some of the black teas expand the air passage making it easier for asthmatics to breathe. Other benefits include reducing levels of bad cholesterol, preventing breast cancer, and preventing the formation of kidney stones among many others.

Best enjoyed loose to get the maximum benefit, there are plenty of high-quality black tea brands to choose from.

Chamomile

The first herbal tea on our list is chamomile. This tea is well touted for its relaxing properties which is why it is often favored as a drink before bed. The lack of caffeine helps but it is used to alleviate anxiety and insomnia. Its links to reducing muscle spasms aren’t as widely proven. There are also antibacterial and anti-inflammatory properties to gain from a cup of chamomile.

Turmeric

Having a golden moment that looks like it is going to last, Turmeric is becoming a superfood for many, and the benefits extend to its tea form. A blend of spices that makes up a tea rather than deriving from leaves has been touted as being able to provide Turmeric Anti-inflammatory Benefits, anti-cancer benefits, weight loss, reduced risk of Alzheimer’s, as well as relief from joint pain.

Hibiscus

Effective for fighting flu, hibiscus with its red-tinted color can also help to reduce high blood pressure. This isn’t going to immediately fix such problems and a healthy diet and lifestyle are still required. It has also been found to reduce oxidative stress which makes it a good option for anyone who takes regular exercise.

Rooibos

Derived from the red bush plant in South Africa, rooibos is often linked to being able to reduce the likelihood of kidney stones as well as provide some allergy relief. However, these are not the most concrete available although it does show promise in preventing heart disease. As with many of the teas on the list, there is more evidence needed to fully support their claims, but the signs are encouraging.

Matcha

It’s unsurprising given its vibrant green appearance that this is a form of green tea. Matcha is often touted as being one of the best teas in terms of health benefits. High in polyphenols, there is strong support for its use as protecting against heart disease and cancer but the benefits don’t stop there. It also strengthens the immune system and has a relaxing effect not too dissimilar to chamomile.

The best matcha teas are a ceremonial blend made from the first harvest. It is always best to look for an organic product of this East Asian favorite.

Echinacea

Studies have seen this popular tea become known as an immunity-boosting brew and is often drunk at the early signs of a cold or flu to lessen the impact of the symptoms and shorten the recovery time. Although the evidence on this is not concrete it is a relaxing drink and a pleasant one when consumed hot, something that will soothe some of the symptoms by itself.

Fruit Tea

These products aren’t going to offer much in the way of health benefits unless they are

blended with the likes of green or black tea. The fruit itself can sweeten the brew which makes you less inclined. to add sugar – a health benefit on its own! Sometimes the company will add a lot of sugar to pre-made fruit teas which makes them less than ideal if you are looking for health benefits from tea.

What Tea Is Not Good For Your Health?

Although in reasonable quantities, most teas are better than they are detrimental to health if you drink a lot of tea, be careful. There are links between drinking seven or more cups a day to a higher risk of prostate cancer. Too much of any food is going to tip the balance to where it is not a good idea. When it comes to traditional tea, you should also consider the caffeine content.

Are There Side Effects From Drinking Too Much Tea?

When considering tea, it is fine for most people to tolerate 4 cups a day with ease. If you drink more then that, look out for signs of digestive issues, anxiety, and poor sleep, especially in teas with higher caffeine content.

How To Save Space In A Small Kitchen

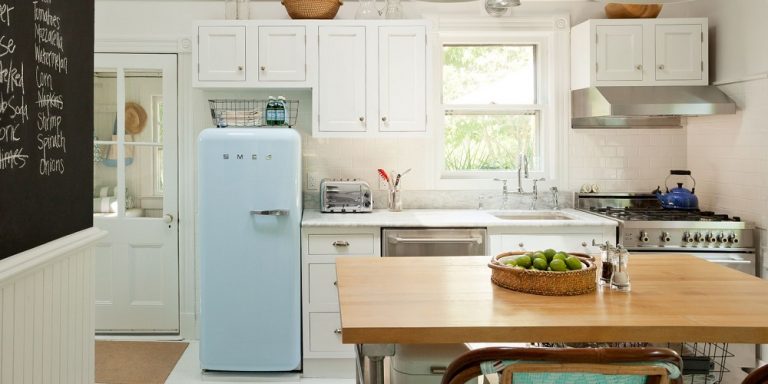
Whether you’ve just moved into your first place or are living in the city, saving space can make a room feel bigger than it is. With so many large utensils to accommodate, it can be hard to make room in a kitchen, and when surfaces are small, this can be an important task. We’ve compiled a list of some of the easiest ways to save space in the kitchen, some are easier than others but each one can make your time there seem less of a squeeze.

[wc_fa icon=”cutlery” margin_left=”” margin_right=”10″ class=””][/wc_fa]Install A Multipurpose Backsplash

Using a pegboard backsplash that runs the length of your surface area can make a useful backdrop with plenty of places to hang utensils, even allowing you to put shelves up to display and keep out the way. If your cheese grater is taking up too much room in your small drawers, hang it on the wall next to your other items.

They are available at most home stores and don’t take a lot of know-how to install but give you more places to make room in your cupboards.

[wc_fa icon=”cutlery” margin_left=”” margin_right=”10″ class=””][/wc_fa]Folding Kitchen Table

Just about every home store will sell a couple of different folding tables that can pack down small and push against the wall when you’re not using it. A table is one of the biggest items so if you can get rid of a bulky one for something a lot smaller, then all the better. Finish the area with folding chairs so you don’t have to get rid of them altogether and spend every night eating on the couch.

[wc_fa icon=”cutlery” margin_left=”” margin_right=”10″ class=””][/wc_fa]Portable Induction Cooktop

For the causal chef or anyone who has a particularly small kitchen, you could get rid of your induction cooker altogether. There is no installation required with a portable induction cooktop and they are usually available in either a single or double surface. One of the major benefits is that they can be packed away and stored in a cupboard after being wiped down so you can free up precious counter space.

Some of them even come with different modes so you can set it to boil water or fry and almost all of them are designed to be energy efficient. Look for a product that heats up quickly and has an easy to navigate display.

[wc_fa icon=”cutlery” margin_left=”” margin_right=”10″ class=””][/wc_fa]Door Pegs

Your cupboard doors are often unused but they can help you keep a few lighter food items out the way. Using sticky pegs on the inside of a door means you can fit more in there and any crisp packet or nuts you have opened but aren’t ready to finish will stay fresh when folded and kept in place by a peg.

[wc_fa icon=”cutlery” margin_left=”” margin_right=”10″ class=””][/wc_fa]Tiered Trolley

Saving space can often mean making more, especially when the cupboards are full. Although a tiered trolley might take up more room on the floor, they are usually conveniently sized and fit at the end of a countertop. With different tiers to fit plenty of food, there is no reason why your food shop has to be limited to what you can fit over what you want.

[wc_fa icon=”cutlery” margin_left=”” margin_right=”10″ class=””][/wc_fa]Over Sink Cutting Board

If the countertop isn’t giving you many options for food prep because space is limited, buy an over sink cutting board. They have a decent cutting area and keep everything off the counter.

[wc_fa icon=”cutlery” margin_left=”” margin_right=”10″ class=””][/wc_fa]Invest In A Boiling Water Tap

The kettle is a mainstay in every kitchen but with modern advances, it doesn’t have to be. Save some space by installing a boiling water tap that is both fast working, and always impressive when you have guests.

[wc_fa icon=”cutlery” margin_left=”” margin_right=”10″ class=””][/wc_fa]More Shelves

Sometimes you just need to add more shelves to make room. The corners of the kitchen can provide a good opportunity to install more, especially if your sink is to one side of the room as this is often space that is unused.

[wc_fa icon=”cutlery” margin_left=”” margin_right=”10″ class=””][/wc_fa]Use The Window Ledge

Some people prefer to keep this area clear but if you have a decent-sized. ledge, why not put your kitchen plants or cookbooks on there to keep them off your workspace. It is a good place to grow herbs as there is plenty of sunlight but resist the temptation to store other foods there as the sunlight will cause it to spoil.

[wc_fa icon=”cutlery” margin_left=”” margin_right=”10″ class=””][/wc_fa]Throw Out The Old

Do you have an old set of pans you never use or way too many plates considering the size of your home? These are all opportunities to make some room. Having a clearout means you are going to enjoy a clearer kitchen and you are unlikely to miss anything you get rid of.

[wc_fa icon=”cutlery” margin_left=”” margin_right=”10″ class=””][/wc_fa]Organize The Drawers

The right partition can help you to store all your utensils conveniently and orderly so that there seems to be more room. Sometimes, items get into the wrong places which are where things start to get messy so be sure to clear your drawers from time to time and put things in their correct place.

[wc_fa icon=”cutlery” margin_left=”” margin_right=”10″ class=””][/wc_fa]Use Jars For Storage

A bulky cereal box can take up a fair amount of room in a cupboard, but pouring the contents into a jar can create space, and it just looks better. Even a plastic container will save space and can be used to store just about any dry food.

[wc_fa icon=”cutlery” margin_left=”” margin_right=”10″ class=””][/wc_fa]Downsize The Sink

If you have a small kitchen but a double sink, it makes sense to install a single sink in its place. The unnecessary space-hogging double won’t be missed when you feel like your kitchen has more room.

[wc_fa icon=”cutlery” margin_left=”” margin_right=”10″ class=””][/wc_fa]Magnetic Knife Holder

Although a knife rack keeps sharp items out the way, it does take up room on the countertop. An easy way to take another item off the counter is by using a magnetic knife holder that fixes to the wall. Plus, they look pretty cool and each item is easily accessed.

[wc_fa icon=”cutlery” margin_left=”” margin_right=”10″ class=””][/wc_fa]Use The Space Above The Cabinets

Although when you first look it is likely to be a stretch of dust, this is part of a kitchen that is rarely utilized. Because of this, you can use wooden baskets to store items. Not only do they look better than plastic boxes but they are affordable and can be where you put cookbooks, tins of food, and any other spares that go unused for long periods.

Best Ways To Sharpen A Knife (And How To Keep Them Sharp)

It doesn’t matter if you are precious about your fancy kitchen knife set or just want to bring an old penknife back to life, there comes a time in every blades life where it just needs a good sharpen. The better quality the knife, the longer it will last between sharpens but even the elite need a bit of attention from time to time. Because of this, there are a variety of products on the market that can help, but before there were products available, traditional methods were used. We consider these, and other ways of sharpening a knife.

[wc_fa icon=”cutlery” margin_left=”” margin_right=”10″ class=””][/wc_fa]Sand Paper

This is something a lot of people have to hand and otherwise, it is an affordable method for sharpening a knife. Use two different types of sandpaper, a coarser grit of around 220 for giving the blade the correct shape, then move onto a finer piece of 600 grit to add sharpness. If you want to add another stage then go for a mid grit of approximately 400 grit. A good way of ensuring you get to control is by gluing the sandpaper to a block of wood and sharpen against the side.

[wc_fa icon=”cutlery” margin_left=”” margin_right=”10″ class=””][/wc_fa]Pocket Knife Sharpener

These little gadgets are essential for any trip to the woods as they are convenient, portable, and when you buy from a reputable brand, they do an excellent job. Most of them have multiple grit stone options to keep fishing hooks or a pocket knife sharp. A lot of the time they can be fixed to your keys so you are never without a way of keeping your camp side tools razor sharp. Make sure it has a grippy texture on the side for safety and if you want to get more for your money, some come with neat extras like fire starters.

[wc_fa icon=”cutlery” margin_left=”” margin_right=”10″ class=””][/wc_fa]Sharpening Stone/Whetstone

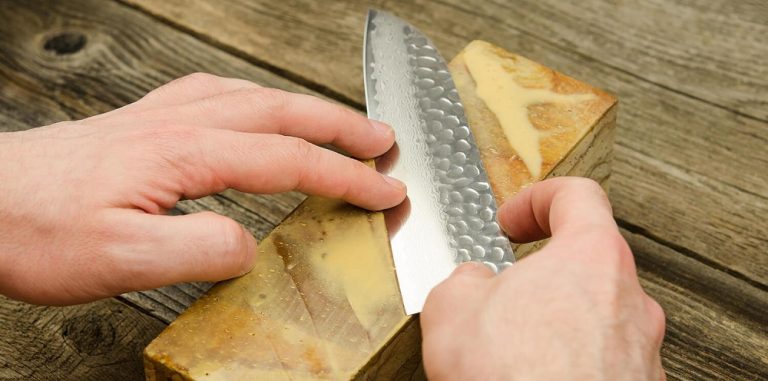
This is the best way to sharpen a knife and can be used on a variety of blades big and small. They usually come with multiple sides to choose from so you can select the right coarseness for each stage of the sharpening process. Grit ratings of 1,000 and 6,000 make the sharpening stone able to keep blades such as a kitchen knife, hunting knife, cleaver, sushi knife, and more nice and sharp. For added accuracy, buy a product with an angle guide and a non-slip base, and make sure it comes from a quality company so it will last a while.

You’ll need a little lubricant but water or oil will suffice to keep debris out the way.

[wc_fa icon=”cutlery” margin_left=”” margin_right=”10″ class=””][/wc_fa]Nail File

This is a quick fix that is easily found in most homes but it won’t be as effective as other methods. Still, if you need a quick sharpen, a nail file can be used in the same way as sandpaper but since they are smaller, it is important to work the blade with caution.

[wc_fa icon=”cutlery” margin_left=”” margin_right=”10″ class=””][/wc_fa]Leather Belt

The technique known as stropping can be used either after you have worked with a nail file or on its own although it won’t technically sharpen. By realigning the blade it can make it easier to work with when cooking, just move the blade away from the cutting edge and you should notice a difference.

[wc_fa icon=”cutlery” margin_left=”” margin_right=”10″ class=””][/wc_fa]The Spine Of A Different Knife

If you have another knife to hand, you can make good use of its spine. Think of it as you would honing steel, moving the blade down and away at a 20-degree angle. It can be a little tricky and make sure the other knife can be held firm without the risk of it moving.

[wc_fa icon=”cutlery” margin_left=”” margin_right=”10″ class=””][/wc_fa]Smooth Stones

If a sharpening stone works, then be the same logic, so does an actual stone. It can be difficult to get an accurate feel for the grit of a stone you pick off the ground but do your best to gauge it for yourself. They are a common sight on a river bed since the water has done the hard work of smoothing the stones for you but find a large one that is easier to work with. Use the same method as you would a sharpening stone.

Do You Need To Hone A Knife?

After sharpening a blade, it is important to add the finishing touch. Some people calling a honing steel a sharpener which is not necessarily an accurate name. Still, they are ideal for keeping the edge straight and won’t wear the blade, in the same way, sharpening it will. Hold the device vertically as the tip is rested on a worktop and pull the thickest part of the blade down at around a 20-degree angle. Do this on both sides, moving down to the tip.

How To Keep Knives Sharp

[wc_fa icon=”cutlery” margin_left=”” margin_right=”10″ class=””][/wc_fa]Store Them Properly

When they are out in the open, they can be exposed which will lead to them not to maintain their sharpness. Always be sure to dry them before you store them away and a knife rack or dedicated drawer is a good place to keep any knife, especially ones you have just sharpened.

[wc_fa icon=”cutlery” margin_left=”” margin_right=”10″ class=””][/wc_fa]Don’t Leave Them In The Sink

Any fluid will cause them to lose their edge and sharpness much faster so be sure to pay attention as to where you leave them. It is also important to clean them rather than leave a knife to soak, even if it has some pretty stubborn food or dirt on there.

[wc_fa icon=”cutlery” margin_left=”” margin_right=”10″ class=””][/wc_fa]Use A Honing Steel

We already mentioned how important they are, but not everyone uses them. To keep your knifes edge as straight as possible (and to make for. accurate cuts), pick one up when you buy your sharpening tool.

[wc_fa icon=”cutlery” margin_left=”” margin_right=”10″ class=””][/wc_fa]Regular Sharpening

It sounds obvious but too many knife owners wait until the knife is in desperate need of a sharpen before they actually do anything about it. Because they can be sharpened before every use, you should always have super sharp blades making your prep work in the kitchen a lot easier.

[wc_fa icon=”cutlery” margin_left=”” margin_right=”10″ class=””][/wc_fa]Buy A Quality Blade

Certain products tend to stay sharper for longer and it is all down to the materials. Look for a product that has a blade made from stainless steel and even high carbon. A professional might choose to sharpen their knives before every use though even if they use the best knives.

The Most Important Kitchen Knives

Not all knives are made equal and some are way more important to any budding chef than others. Even if you are a casual cook who doesn’t break the knives out often, it is still better to have the best knives available. Some are more versatile than others and you can get away with having a few of the more important products at your disposal. Here we take a look at some of the different types of kitchen knives and rank them on their importance. By the end of it, you’ll know which ones you are missing and the ones you don’t need so much.

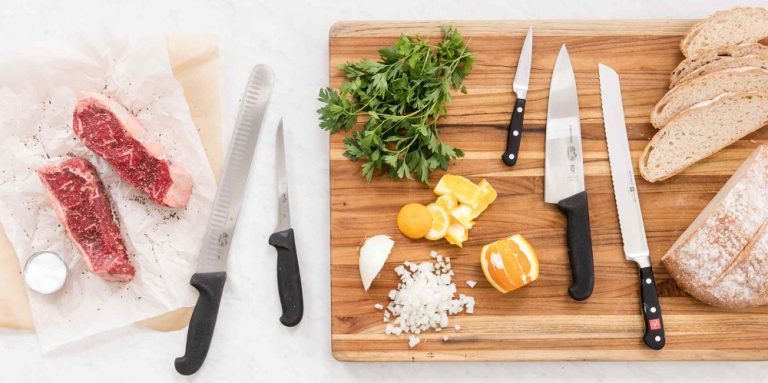
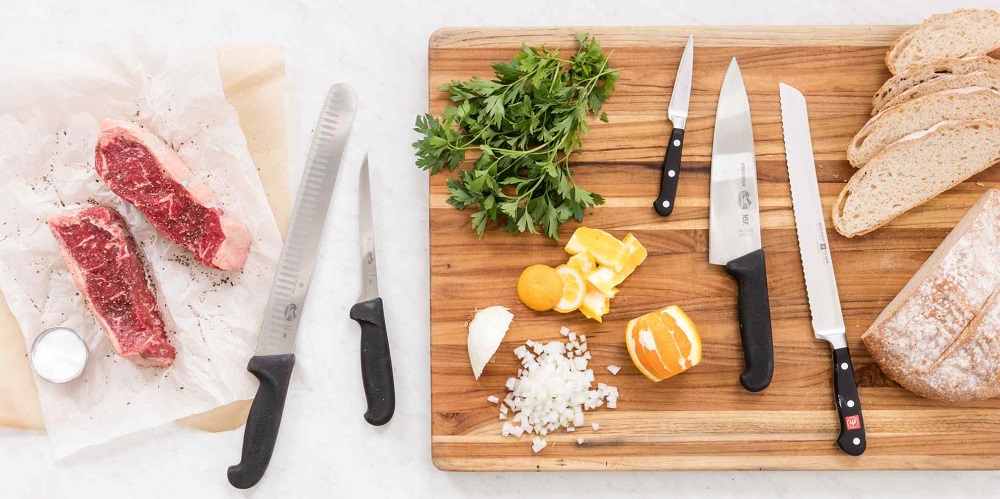
Kitchen knives on cutting board

Chef’s Knife

There’s no better place to start than with a quality chef’s knife. Anything between 8 to 10 inches is going to give you plenty of uses for just about anything. Whether it is dicing vegetables, slicing fruit into segments, or cutting meat into size. The added length makes it more efficient and ensures it does all the hard work for you.

Utility Knife

We’re a big fan of a utility knife and just as it sounds, it offers multiple uses and is convenient. The smaller blade makes it easier to handle than a chef’s knife and perfect for cutting smaller vegetables or herbs. You’re not going to be able to cut bread into slices with one of these but the best utility knives are solidly built, have tons of use, and are ideal for any kitchen. Look for a product made from Damascus steel or high carbon steel. That will give you an edge that stays sharp for longer and increased strength.

Paring Knife

Another staple in the kitchen drawer of many chefs, a paring knife is excellent for the finer details. A chef’s knife or utility knife might be too much for some tasks such as peeling fruit and vegetables, or de-seeding and de-shelling. Because the blade is only around 3.5 inches long on average, a paring knife is easier to control. One of the other benefits is that even quality paring knives can be picked up for a reasonable price.

Serrated Knife

Anyone who has tried to cut through bread will know how difficult it is to make accurate slices without a serrated blade. The teeth are to be worked in a saw-like motion to get through waxy foods as well. This is why a lot of people use them on the likes of pineapples, tomatoes, peppers, citrus fruits, and others. When using them on these foods, be sure to carefully wipe the blade as they can damage the quality. The downside to a serrated knife is that they are not as easy to sharpen.

Carving Knife

To make accurate, thin cuts, a chef’s knife won’t work in the same way that carving knife will. Sometimes known as a slicing knife, both describe its use pretty well. They require a saw-like motion to cut, and the technique can take some getting used to.

Other Knives

These might not be as essential as the previous because they do not have so many uses but if you have a specific need, these blades make great additions to your kitchen drawer.

Steak Knives

It doesn’t matter if you like your steak rare or well done, steak knives are important to have if you enjoy a regular steak night. They are usually available in sets of 4 or 6 and are ideal for hosting. You can find them in serrated and non-serrated form and look for the better materials and comfortable handles.

Santoku Knives

Another specialist knife. This one is ideal for preparing and cutting meat. Known for having one of the sharpest blades in the business, a santoku knife is commonly used in Japanese cuisine and ideal for mincing, dicing, and slicing. The flat blade keeps the surface still and makes for a comfortable alternative to a chef’s knife. We should also mention that they look great.

Cleaver

As imposing as a knife can get, these are certainly a specialist knife. The strong blade allows the user to get through bones and tougher foods easier. The added weight behind it helps as well. Although it is synonymous with cutting meat and crushing garlic, a cleaver can also be used to get through the likes of squash easier.

Fillet Knife

Similar to a boning knife, this is actually made for slicing thin strips of meat and has a more flexible feel to its thinner blade. It is important for sushi prep, but it can be a little niche otherwise.

Be Sure to Buy a Honing Steel

Also make sure you don’t call this a sharpener, although it is close to what it does. When you purchase a quality knife or set of knives, they can still lose their sharpness over time, especially when you make good use of them. This is why it is good to have a honing steel on hand. It won’t actually sharpen the blades in the same way a professional will which is why it is recommended that you send yours to a pro once a year.

The Most Important Knives in a Kitchen

All knives earn their place in a kitchen although some are more important than others. Still, it very much depends on personal preference as some will be less useful if you do not cook certain foods. You can’t go wrong with a chef knife, paring knife, and utility knife to get started. However, a lot of people will consider a santoku knife to be better and easier to handle than a chef’s knife and prefer to use them.

This is why it is best to be versatile knives that fit different purposes although having different blade lengths and thicknesses is always good as you never know what that new recipe is going to throw at you.

Different Ways To Use A Coffee Grinder

Whether you have an extra one lying around or are in the market for a new coffee grinder, these devices are more versatile than one might think. As long as the product itself gives you more than one grind option, you should be able to put it to work in different ways. We have compiled a list of some of the unusual ways to use a coffee grinder.

Grind Spices

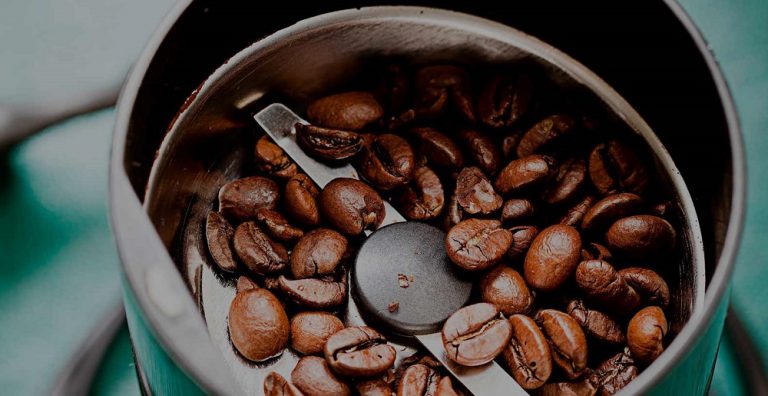
You may have heard of this as it is one of the common alternative uses of a coffee grinder but it is also the best way to use spices. By grinding them fresh, it allows you to unlock all the flavor and maintain the benefits in ways that shop-bought spices cannot offer. For example, fresh peppercorn can provide added piperine which can give the user antioxidant properties. Plus, using an electric burr grinder is a lot easier than a mortar and pestle.

Grind Different Types of Coffee

Not everyone realizes it, but the better coffee grinders give the user plenty of different grind settings. This makes it suitable for a variety of machines so whether you are looking for a coffee grinder to make an espresso or something for a French press, there are lots of options. As always, the grind will go a long way towards making the perfect cup, but so do the beans so be sure to buy one of the best coffees to make every morning brew as enjoyable as possible.

Grind Lavender Flowers

One of the most underused flowers that are found in many gardens, fresh lavender can be ground to add a little flavor and color to a salad, some sugar, or just to unlock the pleasant aroma. Grind fresh flowers and leaves and use it alongside other herbs to bring new life to a favorite dish.

Make A Meat Rub

To season and add some flavor to grilled meat, grind garlic cloves with your choice of spices and herbs into an enticing paste. The aroma and taste will be a hit at your next gathering.

Grind Herbs For Tea

Mix a variety of fruits, herbs, and dried flowers to make a tea worthy blend. Find a recipe online and put it in a tea infuser to make a brew that is all the more satisfying since you made it from scratch. Grind them to different sizes making sure there are some finer grinds in there and experiment with strengths and flavors.

Make Your Own Chili Flakes

Fresh chili flakes have more of a punch and flavor to them rather than simply blowing your head off. The best way to do it is to dry the chilis and grind them until you make your own chili flakes. Add a little spice to your homemade pasta sauce or whatever else you like with a bit of a kick.

Make Bread Crumbs

Some recipes will require you to add a large measure of breadcrumbs. The efficient and effective way to turn pieces of bread into recipe worthy breadcrumbs is by using a coffee grinder. This can leave a little under the blades so be sure to unplug it before you attempt a cleanup. Add small amounts at a time so it doesn’t make the machine work harder than it should and make it as fine as you like by leaving it for longer.

Confetti

Have a wedding coming up and want to get involved in the celebrations? Then make your own homemade confetti. Cut paper into small pieces and blend it in the grinder for a short time to make throw-worthy bits of confetti.

Make Powdered Sugar

Some recipes call for finer sugar which is another way that a coffee grinder can be put to use. Grind your regular sugar until it is as fine as you need it.

Chopped Nuts

Another culinary use that is more common than you think, nuts are easy to grind. The softer the nut, the easier it is to grind so expect it to make light work of pecans, walnuts, and peanuts. These make an ideal topping for ice cream or yogurt but be sure to not over grind. You don’t want to overdo it or you’ll end up with a paste.

DIY Body Scrub

Did you know you can use ground coffee as an exfoliating ingredient for a scrub? Combine it with sea salt and some essential oils among other ingredients and you have something that will smell and feel great.

Garnish

Again, there are certain food items that are either hard to create or difficult to get your hands on at short notice, and garnishes are among them. The likes of fruit peel or small flakes of chocolate are yummy when added to different dishes and a coffee grinder makes it possible to create your own.

Benefits Of Using A Coffee Grinder For Everyday Use

As you can see, a coffee grinder proves that it is versatile, but also convenient. It is much easier to grind spices in a grinder than work away on a mortar and pestle or get out your heavy blender. Because it has a smaller capacity, it is ideal for small to mid-sized tasks, and most of the time, it is easy to clean.

Also, a coffee grinder is a fraction of the price of a food processor so save yourself some money. They can be used for just about any cuisine item that needs to be ground so get creative.

What Are The Best Cookware Materials?

As long as you can fry the perfect egg, it doesn’t matter what material you are using right? Wrong! There is a reason there are so many different types to choose from and it is not all about price. Some are safer to use, some materials will be faster to heat whilst others will be more durable to see which is the best overall, we have taken a close look at the most common. There are those that are better for different techniques but whatever you are after, here is a guide to the different types of cookware materials:

[wc_fa icon=”cutlery” margin_left=”” margin_right=”10″ class=””][/wc_fa]Stainless Steel

One of the most common materials used in cookware, and for good reason. For the every day casual chef, these are well suited and are one of the best materials for scratch resistance. This means you can use metal spoons, spatulas, you name it and it won’t impact the finish. The user also gets plenty of control as they offer reasonable heat responsiveness so when you need to reduce the heat, it’ll respond in kind.

Anyone worried about transferring flavors between the. cookware material and the food they are cooking should consider stainless steel as it isn’t an issue. When it comes to cleaning, they can go in the dishwasher and take a fair amount of punishment in terms of scrubbing. The main thing to look out for is the difference between a quality product and the ones worth avoiding.

[wc_fa icon=”cutlery” margin_left=”” margin_right=”10″ class=””][/wc_fa]Carbon Steel

Another common material that is known for its quality which is why it is a mainstay in various professional kitchens around the world. Not only for the elite, although they can help moves your skills to the next level, they are versatile enough to be used on any surface but should not be put in the dishwasher or used with detergent. The best approach for cleaning is to use a paper towel otherwise it could rust due to its lack of chromium.

Still, the best carbon steel pans are of high quality because they heat fast and create an evenly distributed surface for heat. They are more brittle than most so if they are dropped they are less likely to break or damage and they are also easier to handle because they are lighter than the likes of cast iron.

[wc_fa icon=”cutlery” margin_left=”” margin_right=”10″ class=””][/wc_fa]Non-Stick

According to the experts in I Love Cookware, non-stick pans are usually found in most households but not in a professional kitchen. This is due to the fact that while these kinds of cookware may be affordable and easy to use, they are not as durable as the other types.

The coating tends to chip and fray over time which can find its way into your meal. Although they are good for when you are cooking sticky foods, you will need to use plastic or wooden utensils, and do so with care since they don’t offer much in the way of scratch resistance.

Non-stick pans are easy to clean although they are not well suited to high heat as it can cause the coating to wear faster.

[wc_fa icon=”cutlery” margin_left=”” margin_right=”10″ class=””][/wc_fa]Copper

Arguably the most eye-catching type of cookware material, copper is resistant to changing cooking temperatures so whether you need to heat fast or cool down without scolding what is in the pan, copper is a good option. The user gets an even cooking surface and versatility as they are fine for sauteing, boiling, searing, simmering, and beyond.

Sometimes these products can be on the heavy side and to maintain their appealing shine there is a level of upkeep that will not be necessary with other options they are also expensive, can dent easily, and are not suited to induction surfaces.

[wc_fa icon=”cutlery” margin_left=”” margin_right=”10″ class=””][/wc_fa]Cast Iron

These heavy yet durable cookware items are ideal for cooking with plenty of heat and stay hot for longer than other materials. On the other hand, this makes them difficult for cooling down once you want to take the edge off. Still, they are good for non-stick purposes and can transfer minerals such as iron into your food naturally.

In terms of durability, these are some of the best which is why they have been used for the generation, passing their quality cast iron cookware down. You’ll get a good workout using them as they are heavy, and need some maintenance to prevent rust.

[wc_fa icon=”cutlery” margin_left=”” margin_right=”10″ class=””][/wc_fa]Enameled Cast Iron

These offer more versatility than regular cast iron products, heating slower and more evenly. They are colorful and can be used for everything from sauteing to frying. Both dishwasher safe and fine to go in the oven up to around 500 degrees F depending on the product and other materials used. Much like their regular versions, these are heavy pans and will last a long time.

You can wash them with soap and water without any issue so they are also low maintenance compared to other types. However, they take a while to cool down and are not as responsive heat-wise.

So, What Is The Best Cookware Material?

We are not taking into account price here as we are purely looking for the best material and because they are used by professional chefs and anyone who takes their cooking seriously, we have to go with carbon steel. Although they are not as easy to clean, it only takes a little added care to keep these highly versatile and quality pans in good condition.

When cooking under pressure or even when you want to get the most out of your time at the stove, carbon steel pans are great as they are fast to heat but also responsive to changes in temperature. These are traits you don’t get from the likes of cast iron and they are certainly lighter and easier to handle.

For aesthetic purposes, you can’t beat that shine of a copper pan but the upkeep and price given that they are not as versatile as carbon steel makes them less ideal. The cooking style is a big factor when looking for the best products for your need but carbon steel are good for multi-purpose cooking as they offer even heat distribution.

Does The Cooktop Matter?

The surface you are cooking on should influence your choice of cookware material. Make sure it is suitable as some are not to be used on the likes of induction stovetops for example. Round bottom products such as woks will also not be usable on a flat surface so there is much to take into account when looking for the ideal cookware material and style.

Electric Vs Manual Can Openers

Although there is no one size fits all, can openers are made for convenience. No one wants to be trying to prize open a can with a knife but since most of us have been using manual products all our lives, something is tempting about the appeal of an electric can opener. Although this isn’t new technology it has certainly come a long way, but it is hard to decide which is better if you’ve never used one of the options. To help make this decision easier, we compare the pros and cons of both to see which has the edge.

[wc_fa icon=”cutlery” margin_left=”” margin_right=”10″ class=””][/wc_fa]Durability

This is the first point to the manual products. Since they have less intricate parts, they tend to last longer. Their materials are also sturdier since they are just solid metal parts. They do tend to rust more frequently than electric models but it should be a while before this becomes noticeable. Both products will be solid and you can expect it to be a long time before you need to fix an electric product, but manual can openers usually last longer.

[wc_fa icon=”cutlery” margin_left=”” margin_right=”10″ class=””][/wc_fa]Ease of Use

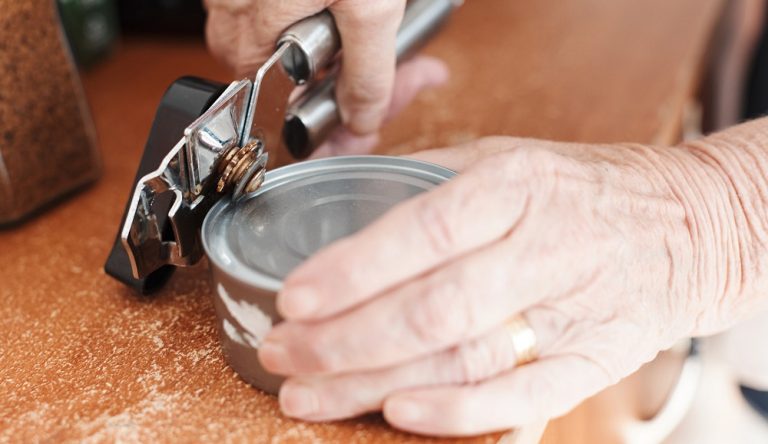
Whilst many people would see a manual can opener as a basic, easy to use device, electric products are as easy as it gets. The problem with manual options is that they require a little graft on the user’s side and this twisting can dig into your hands with a stubborn can. An electric can opener is so simple, the user only needs to fix the can into the device so it locks into place and press a button before it turns and cuts the top off.

Although some manual products will be smoother than others, there isn’t a product out there that is as easy to use as an electric device. Unless you start to use larger cans that are too big or heavy for an electric can opener, it should be simple.

[wc_fa icon=”cutlery” margin_left=”” margin_right=”10″ class=””][/wc_fa]Maintenance

After being easy to use comes the ease of cleaning and both score pretty evenly here. A manual product can usually be rinsed under the tap or in soap water and although some can go through the dishwasher just fine, this isn’t always the case. There is a level of caution required to clean an electric product as you wipe the blades and surrounding area but for the most part, this doesn’t take long and is easy when done carefully.

Any product with a detachable blade is going to be easier to clean and safer since you want to keep any fluid away from an electrical product. Still, a manual product might be a little easier, but not by much.

[wc_fa icon=”cutlery” margin_left=”” margin_right=”10″ class=””][/wc_fa]Performance

Ever tried to run a manual around the side of what seems to be a perfectly normal can, only to find it gets stuck every couple of turns. This is one of the biggest annoyances when it comes to performance. Thankfully, the best electric can openers are built for convenience and make light work of most cans without needing any extra interaction.

Of course, any power cut is going to make a manual opener an ideal option, but this should be a rare occurrence. For the simple task of opening cans, ane electric product will outperform the manual most of the time.

[wc_fa icon=”cutlery” margin_left=”” margin_right=”10″ class=””][/wc_fa]Portability

This is where most people expect a manual product to be the only option, but this isn’t the case. Because of the advances in technology, there are now electric can openers that can be powered by batteries. Most of the time, these can still be mains operated as well. So, when it comes to using these products anywhere, it is an even playing field if you buy. the right product.

[wc_fa icon=”cutlery” margin_left=”” margin_right=”10″ class=””][/wc_fa]Safety

You often get fewer jagged edges with an electric product and the smooth cut makes it safer to handle after. The rough edges left from a manual product can make them difficult to handle without getting nicks from time to time. Also, removing the manual opener from the can means you have to get move the lid around whereas an electric product allows the user to hold the can to take it off.

[wc_fa icon=”cutlery” margin_left=”” margin_right=”10″ class=””][/wc_fa]Additional Features

Both products tend to give a couple of extra conveniences with a bottle opener being a common one. For an electric can opener, this will be on the side of the device whereas a common manual product will have it at the tip of one of the handles. This is about as good as it gets with a manual product but with electric, there are other additional features available.

A blade sharpener is a common one, as is the ability to mount the device so it doesn’t take up counter space.

[wc_fa icon=”cutlery” margin_left=”” margin_right=”10″ class=””][/wc_fa]Value

This is difficult to define since, on the one hand, you are paying more for an electric can opener but getting more in terms of convenience. The price of a manual is going to be a lot cheaper but there is no added convenience involved. Still, even reputable electrical products can be reasonably priced but if your budget is restrictive then a manual is a safe choice.

However, for anyone looking to add a little modern technology to their kitchen, an electric product is the one to go for. For repairs, a manual is not the sort of product you look at getting fixed, rather replacing, but an electric should come with a warranty and at the very least, can be fixed so you can keep using it. The best product for you is the one that ticks the boxes you rate the highest.

Can You Get Battery Operated Can Openers?

If you want the convenience of portability, you don’t have to buy a manual can opener. Some products work with both batteries and a mains connection so you can take it with you camping or can still use it during a power cut. They work in the same way as any other electrical opener, using a magnet to hold the can in place, a motor turns it as the blade cuts so, after a full rotation, it gives you a clean cut.

Is An Electric Can Opener Easy To Use?

As you may be able to tell, these products offer the most convenience. They are ideal for anyone with hand injuries or the likes of arthritis and are often favored by the elderly. This is because they are easy to operate and take all the strain away from what can be a tricky job when using a manual opener.