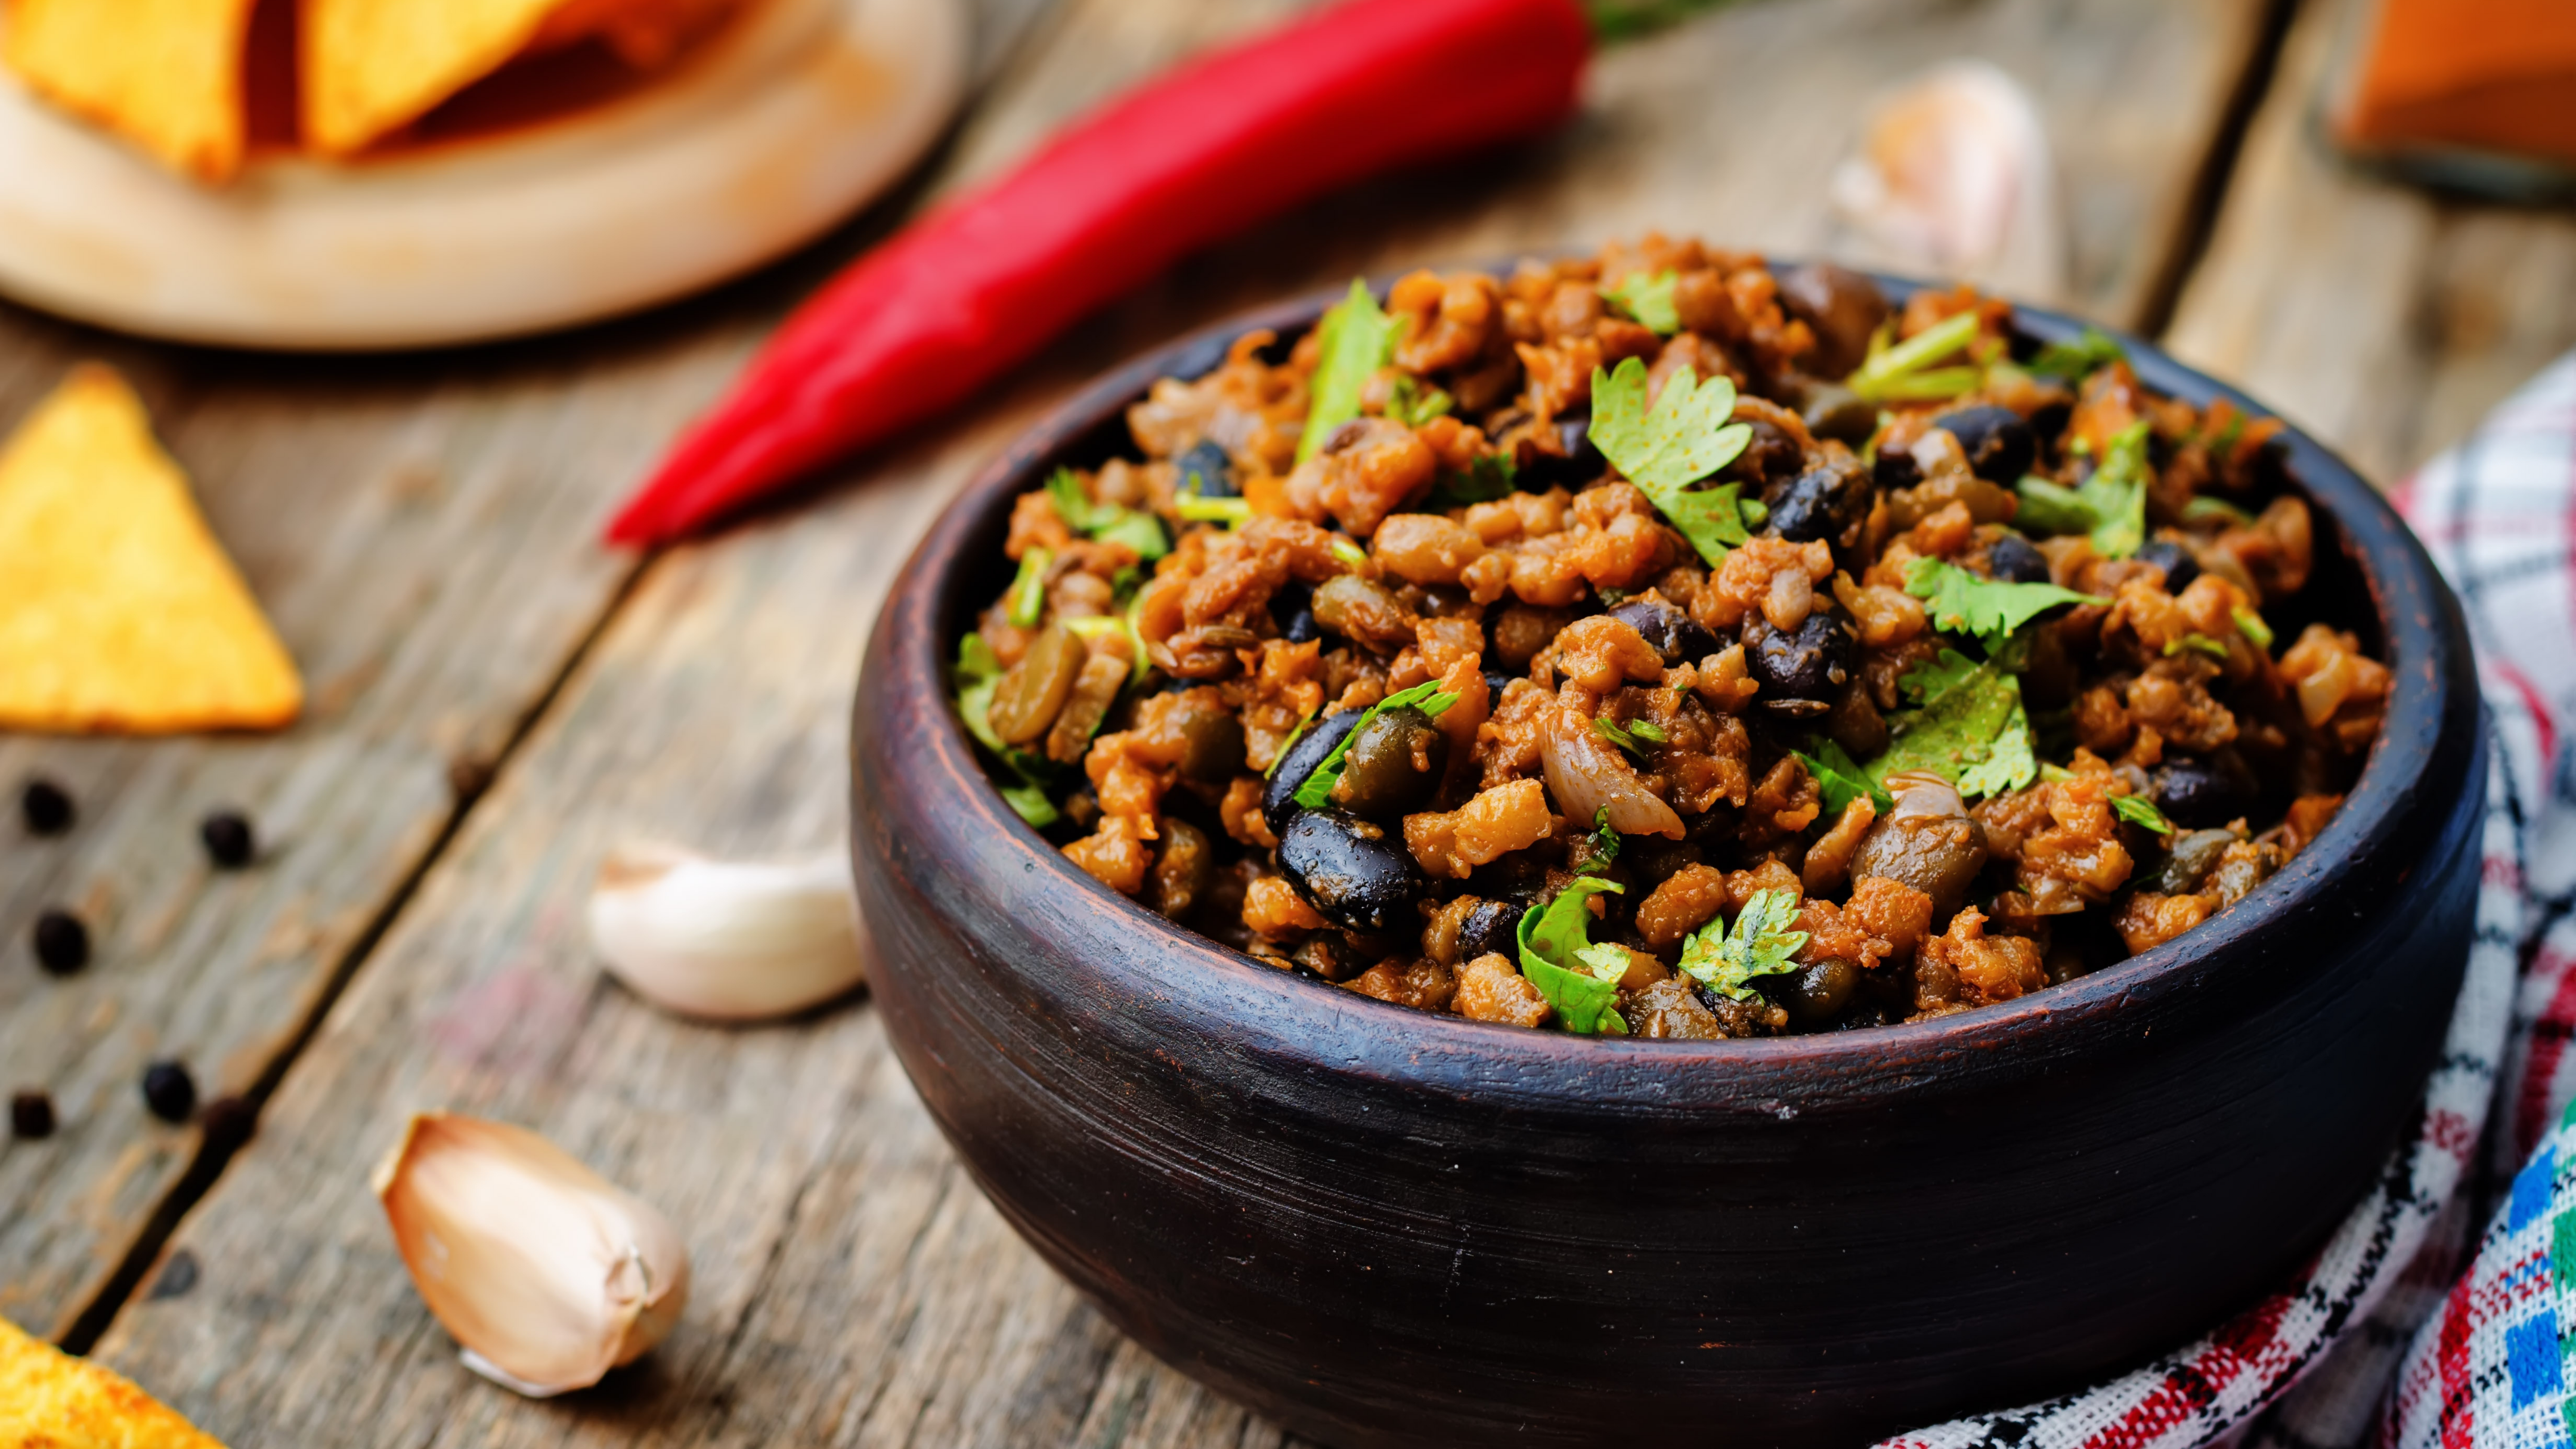
Home Blog Page 44

Traditional Peanut Brittle made with Natural Sweeteners

Traditional peanut brittle is the ultimate dessert that can be made fully with organic ingredients. There’s no need for artificial sweeteners anymore so say goodbye to refined white sugar and corn syrup! We have enough of them in other food so let’s try to reduce their intake whenever we can.

Peanut brittle

Of course, I won’t condemn anyone for eating ‘regular’ peanut brittle when they don’t have the time to make their own. I sometimes do it myself too – especially when my kids beg me for some peanut brittle, but I literally don’t have the time to make one from scratch. And that’s okay too. I try to make up for it by feeding them something healthier the next day.

What I love about this recipe is its rich taste. The honey gives it that distinctive sweetness while the nuts, peanuts in my case, provide the saltiness. This sweet and salty combination results in a dessert that isn’t too overwhelmingly sweet and can be eaten freely without feeling sick afterward.

I also add coconut sugar to bring out the sweet taste even more. Coconut sugar is a relatively new trend in organic eating and it’s one of the best natural sweeteners available right now. Coconut sugar is the sap from a coconut tree that was collected and then evaporated. You can also source coconut sugar from palm trees. Be careful, however. Some producers sell coconut sugar that is far from what we could natural. I recommend buying only from trusted brands.

There is some controversy surrounding coconut sugar, though. When coconut tree sap is collected then the tree will revert to producing solely sap and it won’t grow any coconut fruit. Some people say that we should not collect the sap so that we can use the trees as a source for coconuts, coconut oil, etc.

I personally don’t see a problem with coconut sugar because coconut trees produce much more sugar than the typical sugar canes – so in that sense, they would be more sustainable than regular sugar. But if you are on the fence about this issue and would rather avoid coconut sugar at all then feel free to substitute with any other natural sweetener.

Necessary equipment:

  • two large rectangular baking dishes
  • a measuring cup
  • a large saucepan
  • a candy thermometer
  • a wooden spoon

Ingredients:

  • 2 ½ cups of peanuts
  • 1 cup of raw honey
  • 2 cups of coconut sugar
  • ¼ cup of butter
  • ½ cup of filtered water
  • 1 ½ t. of baking soda

Instructions:

  1. Prepare the large baking dishes first. Butter the sides or line with parchment paper. Set aside.
  2. Combine the coconut sugar, honey, butter, and water in a large saucepan.
  3. Heat over medium high heat while constantly stirring and wait for the mixture to start boiling.
  4. Lower the heat to medium low and measure the temperature with the candy thermometer. Continue to boil steadily for about 30 minutes or until the mixture reaches so-called soft crack stage (about 275 degrees).
  5. Add in the peanuts and stir together. Continue to cook for another 15 to 20 minutes, stirring frequently. After the time has passed the mixture should be around 295 degrees, hard crack stage.
  6. Turn off the heat.
  7. Sprinkle the baking soda on top and stir it in quickly.
  8. Immediately pour in the mixture inside the prepared baking dishes evenly. Let it sit and wait until completely cool.
  9. Break the peanut brittle into pieces.
  10. Store in a covered container at room temperature and snack whenever you want!

Mini Grain-free Chocolate Souffles

I just love mini chocolate souffles! They taste especially great when still hot and fresh out of the oven. It’s like this mini treat I can quickly make any time to spoil myself or lift my spirits when I’m feeling down. I feel like they are the perfect dish for any dinner party because everyone loves them. They look fancy in their little souffle dishes and if you are really in a pinch time-wise, they can even be prepared beforehand and frozen for later!

Chocolate Souffle

My chocolate souffles don’t use any flour so they are a grain-free and guilt-free dessert! Well, almost guilt-free – they still contain some chocolate and sugar. But because of their size, it doesn’t feel like I’m stuffing myself with dessert. These mini treats are perfect for adding a good satisfactory finish to a long course of savory meals.

I based my recipe on America’s Test Kitchen site. What I also love them about is the multitude of customization options. You can put some colorful sprinkles on top and they become an ideal dessert for a kids party. You can get mix in some chopped nuts for a bit more sophisticated feel perfect for an elegant dinner party. Pour some sauce on top as a topping and try out different variations to find the one that is the most delicious for you. I literally cannot think of any sauce that doesn’t work with these chocolate souffles.

Personally, my family loves them with caramel or strawberry sauces. In the summer, I additionally top them with fresh berries. The possibilities are endless!

Necessary equipment:

  • measuring cups
  • 6 ounce ramekins
  • a large glass bowl
  • a large saucepan
  • a rubber scraper
  • a wooden spoon
  • a large mixing bowl
  • an electric hand mixer
  • a medium glass bowl
  • a jelly roll pan and parchment paper

Ingredients:

  • 4 T. of unsalted butter + some more to butter the ramekins
  • 8 oz. of bittersweet or semi-sweet chocolate
  • 1/3 cup of whole cane sugar
  • 6 large egg yolks
  • 8 large egg whites
  • ½ t. of vanilla extract
  • 1 T. of orange liqueur
  • 1/8 t. of sea salt
  • ¼ t. of cream of tartar
  • 2 T. of powdered whole cane sugar (you can powder it yourself using a blender)

Instructions:

  1. Preheat the oven to 400 degrees.
  2. Put the parchment paper on the jelly roll pan.
  3. Butter 8 ramekins and dust with whole cane sugar to prevent the butter from sticking. Set the ramekins on the jelly roll pan and set aside.
  4. Melt the chocolate and 4 tablespoons of butter using a large glass bowl set over a saucepan filled with simmering water. Stir with a wooden spoon until smooth.
  5. Remove from the heat.
  6. Add in vanilla extract, orange liqueur, and sea salt. Stir until combined and set aside.
  7. Use a large mixing bowl to whisk the whole cane sugar with the egg yolks for about 8 minutes. The mixture should double in volume.
  8. Gently fold in the chocolate mixture.
  9. Whip the egg whites in another glass bowl. Be careful to use a very clean and dry mixer attachments or the egg whites won’t become whipped properly. Even the slightest particle of egg yolks will also have the same effect so make sure your eggs are separated properly.
  10. Whip the eggs for about 1-2 minutes, until soft peaks appear.
  11. Add the cream of tartar and continue to whip until you can see hard peaks (for about another 2-4 minutes).
  12. Fold into the chocolate and egg yolk mixture gradually. Delicately stir it together so that the egg whites don’t deflate.
  13. Put the mixture into the ramekins. Fill each dish until about ¼ inch below the top edge.
  14. Bake for 12-15 minutes or until the top becomes puffy. The center should still be slightly loose. (Alternatively, if you are preparing the souffles beforehand: cover with plastic wrap, and freeze for up to 1 month. Bake straight out of the freezer, without thawing, at 400 degrees for about 25 minutes)
  15. Serve while still warm with your chosen toppings!

Ramekin Berry Crumbles

I love baking using my little ramekins! They are ideal for preparing individual portions for your guests so you can serve them without the hassle of cutting up a cake. I have tried out tons of different ramekin recipes and I want to share the best ones with you here.

In this post I’m going to show you guys how I prepare my individual berry crumbles. Most people love chocolate desserts but I feel that we should also get some fruit in there once in a while. The combination of cinnamon and berries is simply mouth-watering and the delicious crumble is what binds it all together. If you prefer other fruit, feel free to substitute my blueberry filling with another one. Apple also works wonderfully!

Necessary equipment:

  • measuring cups
  • a large mixing bowl
  • a whisk
  • a stand mixer
  • a rubber scraper
  • a pastry blender
  • 8 ceramic ramekins
  • a jelly roll pan
  • parchment paper

Ingredients:

  • 2 cups of freshly ground flour OR sprouted flour
  • ½ cup of soft butter
  • 2 ½ t. of baking powder
  • ¼ t. of sea salt
  • ¾ cup of whole cane sugar
  • 2 t. of vanilla extract
  • 1 egg
  • ½ cup of whole milk
  • 2 cups of fresh blueberries

crumble topping:

  • ½ cup of whole cane sugar
  • ½ cup of freshly ground flour
  • ¼ cup of butter
  • 1 t. of powdered cinnamon

Instructions:

  1. Preheat the oven to 350 degrees.
  2. Butter the ramekins, place them on the jelly roll pan lined with parchment paper, and set them aside.
  3. In a large mixing bowl combine the flour, baking powder, and sea salt using a whisk.
  4. Use a stand mixer with the paddle attachment to beat the butter in a separate bowl for about 30 seconds.
  5. Add in the sugar and beat for another 3 minutes until the mixture is pale and fluffy.
  6. Steadily add in the beaten egg and the vanilla extract.
  7. Now it’s time to add the flour mixture and the milk to the stand mixer bowl. Do it gradually, alternating the ingredients. Mix the mixture on low speed after each addition.
  8. Transfer the batter to each ramekin.
  9. Sprinkle the tops with fresh blueberries.
  10. For the crumble, combine the flour, sugar, and cinnamon using a fork.
  11. Cut the butter into small pieces and add to the mixture. Combine everything using a pastry blender or your fingers.
  12. Sprinkle the crumble topping on top of each ramekin so that the blueberries are fully covered.
  13. Put the ramekins in the oven and bake for 40 to 45 minutes. You will know they are ready when the crumble top becomes golden brown.
  14. Take them out of the oven and cool for at least 15 minutes before serving.

Enjoy your fragrant and delicious berry crumbles!

My Taco Seasoning alternative

I love me some delicious tacos. I grew up in California so I had plenty of chances to eat authentic tacos at different food trucks and restaurants and I never had enough! Now that I live in Arizona, I am always on the prowl for good Mexican restaurants and I sometimes even make my own tacos. You can create delicious tacos with your own taco seasoning too!

But to enjoy good tacos at home, I need to use the right taco seasoning. I used to use whatever is available at the grocery stores, but ever since I learned how to read ingredients labels on food, I make my own seasoning. And I’m sure you will feel the same once you read what can be found in your typical store-bought taco seasoning:

SPICES (INCLUDING PAPRIKA, CHILI PEPPER, CUMIN), ONION, WHEY (MILK), POTATO STARCH, SALT, SUGAR, GARLIC, AND CITRIC ACID. (SOURCE)

Let’s start with the spices. The maker of this seasoning listed some of them in parentheses but that doesn’t mean there aren’t any more “spices” involved. That’s how companies hide chemicals, MSG additives, and other preservatives. The whey has oxidized by now and the sugar is definitely the cheapest and the most unhealthy version of refined sugar they could possibly find (besides, I don’t even think sugar belongs in healthy tacos). The same goes for salt – it’s not the best quality. Citric acid is how they sneak in some more MSG.

I use my homemade taco seasoning for most Mexican dishes I prepare at home, not only tacos. It works perfectly with ground beef and ground turkey. It binds together burritos, burrito bowls, tostadas, and more. I even sometimes mix it with sour cream for unique-tasting dips and sauces!

The ratios I use are 2-3 Tbsp. to a lb. of ground meat, 1 Tbsp. to a cup of sour cream.

Necessary equipment:

a large mason jar or any other closed container

Ingredients:

1/2 cup of dried minced onion OR onion powder
1/4 cup of sea salt
1/4 cup of chili powder
1/8 cup of ground cumin
1/8 cup of garlic powder
1 T. of dried oregano
1 1/2 t. of cayenne pepper

Instructions:

  1. Add all the ingredients to your chosen container.
  2. Shake vigorously to combine.

Enjoy! For the best seasonings for chicken click here.

Chicken Salad wrapped in Lettuce

I love making healthy versions of the food you would usually find in the local fast food location. It lets me satisfy my fast food cravings without the guilt I feel after stuffing myself with fatty cheeseburgers. These chicken salad lettuce wraps are like an extreme, grain-free version of a chicken wrap.

What makes this chicken salad really great is the herbs. I have several different herbs growing on my patio and I use them whenever I can. I used to think it wasn’t worth it but it took me only one time making a meal with fresh herbs to see what difference they make. They don’t take up a lot of space, you can even grow them on a window sill or on the kitchen counter by the window. Give it a try if you haven’t yet!

I use freshly made homemade mayonnaise to transform this chicken salad from something simple to a real heavenly meal. You can read about how to make mayonnaise in another post of mine. If you don’t want to make your own then make sure that the mayo you buy at the store doesn’t contain any suspicious ingredients. Yes, they are rare but they do exist! The mayonnaise is what gives the salad that tasty creamy texture so it’s really important you use a good quality one.

And, of course, the chicken. I’m sure I don’t need to tell you this but we should all support real field-raised chicken farms. They are being replaced by the so-called factory chickens that are cheap to raise and cheap to sell. But their taste is far from what a real chicken should taste like, not to mention all antibiotics we ingest together with their meat! That’s why I buy from local farmers whenever I can and if you don’t have access to one, do some research about what kind of chickens are available at the stores near you. You won’t regret it, I promise!

Necessary equipment:

Ingredients:

  • 4 cups of cooked and cubed chicken
  • ½ cup of homemade mayonnaise (learn how to make your own at home here)
  • ½ cup of sour cream
  • three sprinkles of chopped fresh parsley
  • two sprinkles of chopped fresh thyme
  • two sprinkles of chopped fresh tarragon
  • one sprinkle of chopped fresh dill
  • several chopped sage leaves
  • salt and pepper to taste
  • 2 dill pickles cut into cubes
  • 1 cup of chopped pecan nuts
  • 1 cup of halved grapes
  • romaine lettuce leaves

Instructions:

  1. Combine mayonnaise and sour cream in a large mixing bowl.
  2. Add the herbs (parsley, thyme, tarragon, dill, and sage) and stir until well blended.
  3. Add the dill pickles cubes and stir again.
  4. Now add the chicken, pecan nuts, and grapes. Stir so they are all coated well.
  5. Scoop the salad onto lettuce leaves and wrap as you would do with a tortilla wrap.

Enjoy your healthy chicken wraps! If you don’t have lettuce, you can also eat this salad with some whole-grain crackers.

The Start of my New Weight Loss Journey

I have always struggled with my weight on and off but I think I really hit a low point this past year. But now I’m ready to get back on the right track and I hope that by sharing how I feel right now, I will be able to help some of you that might be in the same boat.

My mental health has been through a lot in the last few months.

I have been trying to eat healthy for a few years now but sometime around 10 months ago, I stopped seeing the effects. My weight has been gradually dropping, slowly but gradually. But then it just didn’t drop anymore. It seems that I have reached the limit of what just eating healthy can do. I was discouraged because it’s not like I changed anything else about my life that might have affected my weight loss. I felt cheated that it suddenly stopped working.

So I said to myself “To hell with it then” and stopped caring about what I eat. I quickly gained 50 pounds that I worked so hard to lose. Funnily enough, for a short while, I actually felt like I had more energy simply because my calorie intake increased. I was moving more and felt really alive.

After about three months, I had another mental crisis. A sudden onset of untreated PTSD caused by trauma from my childhood made me shut down. I was apathic all the time and I didn’t let anyone near me. I would not leave my room unless absolutely needed and just lied in bed all the time, unable to even fall asleep. Naturally, my weight soared again during this time.

Fortunately enough, I had people around me who cared for me and wanted me to get better. If it weren’t for my family and friends, I would probably still be hiding under the covers of my bed. They convinced me to find a therapist and I know now that it was the best thing I could have done. I had an amazing support system and I didn’t even know it until I really needed it. I am forever grateful to people who stood by me in that difficult time.

Recovery

I was slowly getting better. My weight gain stopped and I was finally able to get some good night’s sleep. I started leaving my house and was active on the weekends.

I combed through the Internet hoping to find some advice from someone who was in a similar situation. Then I found Go Kaleo and I truly consider her to be my savior. Talking with her made me believe that I could change for the better because finally, I had someone who would believe in me without even knowing me. It was such a refreshing change. Some other people understand it too. I gained immense inspiration from Fit Mama Training as well.

These people know how hard it is to feel motivated when you have so much weight to lose, especially when all you see around you are skinny influencers who make weight training seem so effortless. I highly recommend checking them out if you’re looking for a stress-free way to a healthier life.

Do you want to transform your life too? Let’s do this together.

It’s hard not to be skeptical when it comes to weight loss, especially if you tried several different methods already and none of them gave you the results you were hoping for. Story of my life. It’s always the yoyo effect or the temporary bursts of energy just to feel down again due to a diet that’s too restrictive.

It took me many years to finally realize that losing weight is not about finding the magical diet that works for you. It’s not about forcing yourself to work out even if it literally makes you vomit from the effort.

Now I think that weight loss is not about the goal but about the journey. By putting your mind to it and by creating new good and healthy habits, you transform your life into one you can enjoy without that constant nagging voice in the back of your head telling you that you eat like a pig. And that’s what I intend to do. Also, weight loss drinks in nz can be a critical solution to your weight loss journey.

First, I need to find a form of activity that will get me moving and one that I enjoy. Otherwise, I’m just going to abandon it after a few tries just like I did with hiking and jogging. These are simply not for me. When I was a child, I really enjoyed swimming at the local pool but now, I feel self-conscious due to my body. But I found a good selection of rash guards at SwimOutlet so I’m going to start swimming regularly, as well as taking an aerobics class at the local gym. If I think that they are not for me after all, then I will simply stop forcing myself to do these activities and search for something else. I want to become strong enough so that I can play tag with my children at the park.

It’s time to make a change.

Here is my guidebook for the next year:

  1. I will get in at least 45 minutes of activity each day with two 90 minute sessions per week. It will be an activity I enjoy, not the one that will get me to burn the most fat. Whenever possible, I will try to spend that activity time with my family so that we can bond even more. I will start with walking the dog together.
  2. I will spend more time outside. At least half an hour every day so that I can regularly breathe in the fresh air to clear my mind.
  3. I will eat enough calories to support my activity level, not more and not less. Right now this is about 2500 calories. You need to be honest with yourself that you cannot suddenly cut your calorie intake and expect to reach a healthy weight. Big bodies need more energy and that’s a fact. Ignoring it will lead you straight to bouncing back once you stop dieting and will make you too tired to function properly. Believe me, I learned that the hard way. As I lose weight, my suggested calorie intake might decrease (unless I increase my activity level simultaneously!). You can calculate your recommended calorie intake using simple calculators available online.
  4. I will not restrict my diet. Dieting is not about forcing yourself to eat salads every day, it’s about stopping yourself from eating too much. Everything in moderation – yes, even chocolate! I know that my problem isn’t caused by eating too many grains or dairy so I am not going to stop myself from eating them. As long as I am within my suggested calorie intake and the food I eat isn’t processed or filled with unhealthy additives, then I will continue to eat it. And I will not hate myself for having an occasional scoop of ice cream or a piece of cake. Don’t fall for mainstream lies about nutrition either; check out one of my articles for additional tips.

As a reference, I use the Metabolism Bundle that has all the information you might need about how metabolism works and how to eat better in a painless way. In the bundle, you will find 4 books: Eat for Heat, Diet Recovery, Diet Recovery 2, and 180 Degree Metabolism. I read them all and I found them to be a really good value for money!

  1. I will sleep for at least 8 hours every night. The importance of sleep is often overlooked but it is actually crucial to maintaining healthy life habits. Not enough sleep causes problems with metabolism and increases stress. If I cannot fall asleep for some reason, then I would rather miss my daily activity session and take a nap than force myself to work out despite low energy levels.
  2. I will practice relaxation techniques. Stress is my biggest enemy right now and I will do everything I can to keep it away from me. I will meditate and practice being grateful for what I have. I will keep seeing my therapists and if I feel like I’m slipping, I will ask my family for support. I will not stress about the pace of my transformation but rather focus on making the change one small step at a time.
  3. I will keep myself accountable. I will write down my body measurements every month and take before and after pictures. Doing it more often can actually discourage you because you might not see the change you are looking for. I will post regular updates here too.
  4. I will get stronger. That’s the whole point of this transformation. I want my body to be as powerful as my mind is.

Breakfast Scones with Cheddar Cheese and Bacon

As much as I love sweet breakfasts (wholegrain waffles with raw honey and season fruit, anyone?), there are times when I need to start my day with a rich and savory meal. Having one of these cheddar bacon scones with a cup of black coffee kicks my motivation into overdrive so that I am ready for a full day of work.

The perfect combination of salty bacon and cheddar cheese together with just a bit of coconut sugar meshes wonderfully together in the crumbly scone pie. They are perfect not only for breakfast but also as a savory snack in the afternoon or a lunch you can bring with you to work. I usually bake around 12 of these scones at one time and then eat them throughout the following week. Thanks to this I don’t have to waste time in the morning to make myself breakfast. I just brew some coffee, pop two scones in the oven to warm them up, and I’m ready to go!

I think hot food for breakfasts is the key to good metabolism. If you read the acclaimed Eat For Heat book then you know what I’m talking about. The gist is that eating warm foods raises our body temperature which in turn has a positive effect on, among many, blood circulation, stress levels, and better sleep. So for example, if you often find your feet and hands cold then try warming yourself up with hot food. Try it out and let me know what you think!

Necessary equipment:

  • a food processor
  • a large mixing bowl
  • a rubber scraper
  • a glass pie plate
  • a jelly roll pan
  • parchment paper

Ingredients:

  • 2 cups of freshly ground whole grain flour OR sprouted flour (I recommend using a light variety if possible)
  • 2 T. of baking powder
  • 1 t. of sea salt
  • 3 T. of coconut sugar
  • 5 T. of unsalted butter (chilled)
  • 1 – 1,5 cups of shredded cheddar cheese
  • 1 cup of cooked bacon cubes (about 6 pieces)
  • 1 ¼ cups of heavy cream

Instructions:

  1. Preheat the oven to 425 degrees.
  2. Cut the chilled butter into small pieces.
  3. Put the flour, baking powder, salt, and coconut sugar into a food processor a pulse together until combined.
  4. Add in the butter pieces and pulse about 10 more times so that the butter pieces become very tiny.
  5. Add in the cheese and bacon and again, pulse twice so that they combine well with the mixture. Transfer the mixture to a large mixing bowl.
  6. Pour the heavy cream over the mixture and stir gently with a rubber scraper to combine. It should gradually turn into a dough.
  7. Transfer the dough onto a floured countertop and lightly shape it with your hands into a roll.
  8. Use a knife or a pastry scraper to cut the dough into 8 wedge-shaped pieces.
  9. Place the wedges onto the parchment-lined pan. Remember to leave ample space between each wedge.
  10. Bake the scones for 11 to 14 minutes, or until the tops become nicely browned.
  11. Cool for at least 10 minutes before eating. Store in the fridge in an air-tight container.

Enjoy these delicious savory cheddar bacon scones!

My Journey: 30 Days in

One month ago I made a post proclaiming my will to change myself. I set out on a journey to lose weight for good and more importantly, to become a stronger version of myself.

This post is an update on how I’m doing after exactly 30 days. I want to show you whether my plan is working as intended and how I am feeling right now. Spoiler alert, I feel amazing!

However, I want to make a disclaimer first: it has been 30 days since I decided to count my calories to make sure I’m only eating around 2500 to 3000 per day. It has been 30 days since I decided to start doing daily activities with at least two longer weekly sessions at the gym. It has been 30 days since I started holding myself accountable for what I eat and what I do. But I have been quite health-conscious even before that so for me, it wasn’t such a dramatic change of lifestyle habits.

Sometime at the start of the last year, I read Diet Recovery by Matt Stone. Up until that point, I had been following restrictive diets that did indeed cause some positive weight loss effects but also made me stressed and fearful of the weight bouncing right back. I was not in a good place, mental health-wise.

RRARFing

Diet Recovery suggests doing something called RRARF. It stands for Rehabilitative Rest and Aggressive Re-Feeding. The process helps you fix your relationship with food and get rid of the stress of following diets all the time. I did for one month and I let my body rest. I ate what I wanted and how much I wanted without measuring my weight all the time (although I still avoided processed foods and tried to eat generally healthy things). RRARF also prohibits you from working out at all which I welcomed very gladly. I slept a lot and didn’t care if I didn’t leave the bed for 10 hours – it meant that my body was craving that rest.

The point of RRARF is to improve the body’s metabolism by increasing body temperature and thyroid function. The whole process is supposed to feel like a long session of meditation that rids you of the toxic stress and prepares you for a lifetime of healthy eating.

And while I did definitely feel more relaxed at first, it didn’t take long for the stress to appear again, this time due to different reasons. I felt guilty for sleeping all day and for stuffing myself with food. I looked at people around me who were going to the gym after a long day at work and I thought to myself: “is what I’m doing really the right thing?” I felt lazy and disgusted with myself.

SOCIETY PRESSURE

But now I see that what I was feeling was the pressure from the environment around me. I’m not blaming anyone from my family or friends. They have been really supportive and it’s not like anyone ever told me “wow, you let yourself go, didn’t you?” But it’s just that my mind has been conditioned by the media to think a certain way. I was feeling lazy not because I was lazy – after all, I was simply working on my mental health. I was feeling lazy because people on TV were telling me that heavy people are lazy. That I don’t care about my health or about how I look. I was miserable because I felt I didn’t deserve the rest.

But now I realize that what they were telling me was a lie. I wish I could have noticed it sooner. Now I focus on loving my body the way it is and I enjoy the process of shedding the unnecessary pounds. Not because I hate them but because they keep away from doing what I really want to.

I even started talking directly with Matt Stone and he encouraged me to keep RRARFing. And he was right, I did have more energy. I did gain a lot of weight (around 50 pounds) but I also felt more vigorous, I felt like moving because I wanted to, not because I was supposed to. It was such an amazing feeling!

But then it all crashed down when I had a mental breakdown due to untreated PTSD. If you want, you can read more about it in another post. It caused me to lose all of that gained energy. I kept to myself and rarely left my bed. I was in a really bad place and I quickly gained another 50 pounds. Thankfully I found a great therapist that helped me overcome my mental blocks and I was ready to set out on my weight loss journey again. I found inspiration in looking through before and after photos of other people and decided right there that I want that too.

IS MY APPROACH WORKING?

Yes, it is! I am gradually losing weight at a steady pace without feeling like I’m starving myself or forcing myself to do what I hate.

I eat healthy food but I do not care about whether I’m eating a lot of fat, or a lot of gluten, and so on. As long as it’s healthy, I put it in my mouth.

I move for at least 45 minutes every day. This is either a long walk with my family or a quick swimming session at the local pool. When it’s not crowded I swim for longer. I haven’t done that since childhood so it is such a thrill to be able to swim again! It is something I look forward to each week.

I also take a 90 minutes class at the gym twice a week. At first, I decided on aerobics but quickly found that it wasn’t for me. It simply wasn’t something I enjoyed. So I went for weight training with a personal trainer and for now, I’m sticking with it! It’s great to have someone experienced to guide you and show you the right way to maximize your efforts. It takes me around 90 minutes because I also make sure to do a proper warming up session before and a stretching session afterward. It helps increase my mobility and prevents injuries.

I make sure to play with my kids (they love tag so I get some more activity there). It’s been great because I finally feel like I can keep up with them! I still do get tired rather quickly but I expect that it will also improve with time.

And for the actual weight loss results, I lost 10 pounds! This was so much more than I was hoping for so I am really pleased right now. I hope to keep up the same pace for the rest of my journey but I won’t stress over it if next month I will only lose 5 pounds. You know why? Because I now believe the number of pounds you shed is not an accurate measurement of how healthy you are.

I get enough sleep and I don’t let stress take over my body and mind. I eat the food I like and I don’t spend all my time counting carbs and proteins and so on.

All of the above are indicators of a healthy change happening. The 10 pounds I lost are just a bonus.

I am living proof that you don’t need to follow restrictive diets to see an evident change in your weight. I know now that these diets are the last thing that will help you be fit and healthy.

THE NEXT STEP

I think for the next month I will try to write down what I eat during the day so that I can share it with you later. It might be hard to imagine what 3000 calories look like so I want to help people visualize that.

Hopefully, I will see another weight drop next month but I’m not thinking about that too hard. I simply want to get even stronger.

See you next month!

Ultimate Iced Caramel Macchiato

I was never a big coffee drinker until I learned how to make my own iced caramel macchiato. Coffee often made me feel drowsy instead of energized and I found that it would often cause me to have painful headaches a few hours after I had drunk it.

Iced caramel macchiato coffee

My sister, on the other hand, is a big fan and a self-proclaimed coffee expert. She knew about my dislike for coffee and would never push me to drink it for which I am very grateful. But one day, at a family gathering, she served a drink called ice caramel macchiato.

This coffee was so fragrant that it immediately caught my attention. The honey color was very inviting and I asked her to make me a glass too. That was the drink that finally convinced me to give coffee one more chance!

Caramel macchiato

A caramel macchiato, whether it’s iced or hot, is still my favorite type of coffee beverage. Since then I have grown to drink other varieties as well but this one tops them all. It’s a perfect mix of sweet and salty caramel that combines very well with the deep coffee bean roast. And even though I am nowhere near being as knowledgeable as my sister when it comes to coffee, I believe I have perfected the art of preparing caramel macchiato at home.

Caramel macchiato is a beverage made up of a cup of espresso and milk. Another name for it is latte macchiato. The hot milk serves as the base to which you add a cup of espresso. It’s more of a coffee beverage rather than just coffee because the emphasis is put on the milk.

How I make coffee at home

Ever since my sister’s heavenly drink finally introduced me to the wonderful world of coffee, we have come to own a few different coffee machines at home. We have a single cup coffee maker, a French press, and a stovetop espresso maker (sometimes called a mokapot).

I love the French press because it can be used for other beverages besides just coffee. I use it to prepare homemade infusions and loose teas as well! It’s a great and versatile machine. The single cup coffee maker, on the other hand, is great for larger parties because it can whip up a cup of steaming coffee quickly and without much hassle.

But when I need a nice cup of espresso (for example, for my caramel macchiato) then the steel stovetop espresso maker is an absolute beast. I originally got it because I was tired of making espresso in the French press (it can be done but it’s quite bothersome). I found it hard to justify the purchase of a third coffee machine but I do not regret it one bit. The espresso maker makes preparing espresso and various types of lattes a breeze!

What types of coffee and espresso are needed to make caramel macchiato?

The vast array of different coffee beans can be confusing, I know. I have been there. But just like me, you can learn the basics of coffee making fairly quickly!

For starters, you should know that you do not necessarily need to have separate beans for the coffee and beans for the espresso. The same type of beans can be used to prepare both but they will need to be ground differently. Beans for espresso need to be very finely ground while beans for coffee should be left coarse.

Secondly, I whole-heartedly recommend buying whole beans rather than pre-ground beans. This way, you can grind them yourself and it will give you full control over their shape. Freshly ground beans also taste so much more amazing than the pre-ground ones. You will need a coffee bean grinder but believe me when I say that it is worth it.

Also, remember to buy organic coffee beans that were grown on fair trade farms to avoid giving money to big corporations that exploit farm workers!

Caffeine or Decaf?

Personally, I always go for decaffeinated coffee. I have now realized that the negative symptoms I was experiencing when drinking coffee in the past were actually caused by caffeine rather than the coffee itself. That’s why I only buy decaf when in coffee shops and prepare my own coffee from decaffeinated coffee and espresso beans. I might occasionally drink regular coffee but in general, I try to avoid it.

But the decaffeination process is not so straight-forward. A few different methods of extracting the caffeine from coffee beans exist. Most of them work by soaking the beans in various chemical solvents to separate the caffeine from the beans. There is nothing wrong with using chemistry to do that. I took chemistry in college so it’s not like I perceive the words ‘chemical processing’ to mean something bad and harmful. It’s a normal part of modern food processing.

But do you know what the traditional method of decaffeinating beans was? Steaming them in a chemical compound called benzene. Benzene is one of the most common petrochemicals and is responsible for that gasoline smell at petrol stations. How could we ever decaffeinate coffee beans using benzene is beyond me! It has since been proven to be toxic and causing cancer.

Other methods involve soaking the beans in either dichloromethane or ethyl acetate which are also suggested to be potential carcinogens. Just perfect, right? It is unbelievable how little corporations care about their customers’ health.

You might think that if you rinse beans enough times in water then there will be no harm anymore. But I respectfully disagree. Soaking something in ethyl acetate for ten hours is bound to make the toxins permeate deep into the beans which is something that can’t be simply removed with a flow of running water.

That’s why I’m not taking any chances. There are enough potential health hazards in our supermarkets as it is, I don’t need to add another one.

Safe Decaf Coffee

The safest method of decaffeinating coffee is called ‘the Swiss water process’. The coffee beans are repeatedly soaked in hot water and rinsed for as many times as is needed. This makes them 99,9% caffeine-free. You might get the slightest amounts of caffeine in your coffee but at least you won’t get any carcinogens which is a win in my book. Search for the words “water process” when buying your beans and remember that the more ethical the brand is, the more chances you’ll have that they are not lying to you. If you can’t find the description of the decaffeination process on the product then it is best to confirm with the manufacturer. USDA organic Swiss water decaf coffee with no mycotoxins or pesticides.

Coffee substitutes

Some people are allergic or sensitive to coffee beans, decaf or not. But this caramel macchiato is so amazing that I still recommend you try making it using a coffee substitute. There are many different ones on the market so I’m sure you can find something that works for you.

Most of them do contain grains, however, so they won’t work for people on the GAPS diet. In that case, I always recommend this delicious coffee substitute made from…dandelion! It is incredible how coffee-like it tastes!

Ok, let’s move on to the recipe!

Necessary equipment:

  • a stovetop espresso maker OR a French press
  • a saucepan OR a milk steamer
  • a glass bowl
  • a whisk
  • an Irish coffee mug (the tall one) for serving

Ingredients:

  • 3/4 cup of whole milk
  • 1/4 cup of espresso (2 shots)
  • 1/8 t. of vanilla extract
  • sweetened whipped cream (recipe below)
  • 1 T. of caramel sauce (or more if you are a caramel-nut like I am!)
  • whole cane sugar, to taste
  • ice cubes

Instructions:

  1. Brew two shots of espresso and pour them into a glass.
  2. Add the vanilla extract and sweeten it with whole cane sugar to taste. Set aside to cool.
  3. Steam the milk. You can use a steam want or a handheld frother. If you don’t have either of those, you can use a saucepan. Scald the milk by heating it to just before boiling point (you will know because steam will appear).
  4. Pour the steamed milk into another tall glass.
  5. Add the cooled espresso. At this point, you can stir the mixture if you want but do it gently.
  6. In a glass bowl, beat plain cream with a whisk until you can soft peaks. Add some whole cane sugar to taste and keep whisking. This is your sweetened whipped cream.
  7. Now cover the bottom of your Irish coffee mug with one tablespoon of caramel sauce.
  8. Fill the mug with ice cubes, almost to the top.
  9. Pour the espresso and milk mixture over the ice cubes. Leave an inch for more of free space.
  10. Cover the top of your drink with sweetened whipped cream.
  11. Drizzle some more of the caramel sauce on top of the whipped cream.
  12. Serve immediately, preferably with a straw.

Enjoy your newfound love for coffee with this iced caramel macchiato!