A quality cheese slicer always looks impressive as it makes consistent slices of even delicate cheese that a knife is just not able to replicate. Most people have tried and failed to make perfect slices with a knife but no matter what technique you use, things get a little messy.
To make cheeseboard worthy cuts, only the best cheese slicers will do. Thankfully, we’ve managed to find a list of the greatest products available to save you time and make the cheese at your buffet table look presentable. No other technique will do and we consider everything from the quality of the handle as well as the different types of cheese slicers so there is something for all cheese lovers.
Quick Summary of Best Cheese Slicers
Mieriscle Cheese Slicer for Thin Slices[wc_spacing size=”10px” class=””][/wc_spacing]
Check price on Amazon –
more Best For Thin Slices
Note: We may earn a small commission when you buy through links on our site.
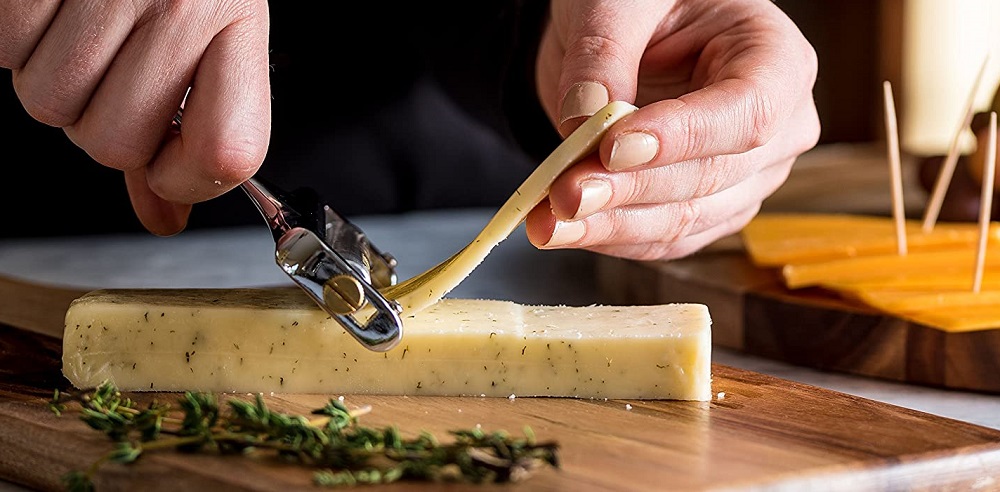
Learn moreBellemain Adjustable Thickness Cheese Slicer

Editor’s Choice
It’s hard to look past any cheese slicer that has an adjustable thickness which is exactly what you get here. Because it has a wide scope it can cut blocks of up to 3.5 inches wide and you can choose to scale at anything between a wafer-thin slice of cheese to 1/4 inch thick.
The sturdy wire makes light work of various cheeses but is ideal for cutting perfect slices for a grilled sandwich – never buy the cheap plastic types again thanks to this neat product. What a lot of people don’t realize is that it is made from a single piece of Zinc alloy, making the body incredibly sturdy and robust enough to be used all the time. You can use it to slice soft cheeses like Brie and gorgonzola, semi-hard like cheddar and gouda, but also hard cheeses like Gruyere and everything in-between.
PROS:
- Adjustable handle
- Can cut cheese up to 3.5 inches wide
- Cast from a single piece of Zinc alloy
Prodyne 805B Thick Beechwood Cheese Slicer
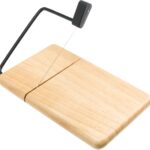
Best Wire Cheese Slicer
This has the look of something you find at the cheese counter which is exactly what a lot of people need in their home. Any cheese lover will get a good amount of use out of this impressive cheese board and wire cutter set. Made from quality beechwood, the board looks great and is ready to serve your perfect slices once you have pushed the wire through your cheese of choice.
A lot of people will enjoy being able to choose whatever width you like as you aren’t restricted by the boundaries of a manual wire cutter. The wire itself has a lifetime warranty so if it breaks Prodyne will send you a new one to attach to the board that has non-slip rubber feet to keep your slicing accurate and safe. The wire can get a little stretched which reduces some of the tension but it is one of the best products for entertaining.
PROS:
- Quality beechwood board
- Non-slip feet
- Lifetime warranty on the wire
CONS:
- Wire can get a little loose
Westmark Germany Multipurpose Stainless Steel Cheese and Food Slicer
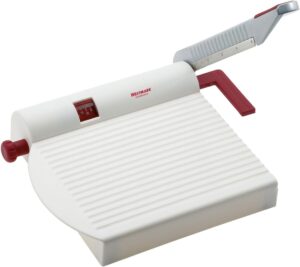
Best Stainless Steel
Almost as much of a unit as it is a cheese slicer this makes getting perfect cuts every time simple. What impresses is the materials used, the blade is made from stainless steel so it will last a long time and is easy to clean and the handle is made from aluminum. One of the best features of this product is that it is more than a cheese slicer.
It can also be used to cut other foods such as sausages, cucumber, peppers, and more. In terms of being user friendly, it is one of the easiest cheese slicers when it comes to adjusting the thickness because the scale displays the thickness so you can get the same width time and again. To top it off, Westmark includes a 5-year warranty so this is going to be at your disposal for some time.
PROS:
- Easy to adjust the thickness because of the scale
- Quality materials used
- Easy to clean
CONS:
- Not as good with hard cheese
OXO 1071567 Cheese Slicer with Replaceable Wires
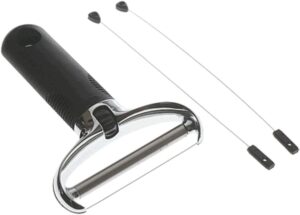
Best for Adjustable Tension
The best thing about this comfortable cheese slicer is that you can adjust the tension so when the wire starts to loosen, you can tighten things up again. On top of that, the wire is also replaceable so if it ever breaks, the handle is good to go again, especially since Oxo includes an additional wire with every purchase.
The die-cast Zinc construction is sturdy and dishwasher safe so it is easy to clean up after you’ve sliced a buffet board worth of cheeses. You can change the angle you slice at to adjust the thickness but it feels good in your hand and is easy to control.
PROS:
- Dishwasher safe
- Comes with an additional wire
- Can adjust the tension of the wire
CONS:
- Difficult to make consistent slices
Boska Stainless Steel Cheese Slicer
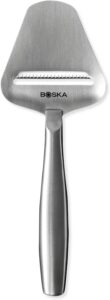
Best For Hard Cheese
This is the no-frills type of cheese slicer but is still made from quality materials such as stainless steel. The handle is made from soft rubber to ensure it fits nicely in the user’s hand and even has a hanging hole at the top for easy storage. Speaking of convenience, it can also go in the dishwasher so it is one of the easiest products on our list when it comes to cleaning.
The angled blade is sharp, making it ideal for making those thin, intricate slices without risking them breaking halfway through. A lot of people trust the brand because this cheese slicer comes with a lifetime guarantee so consider it a cheese slicer you never have to be without.
PROS:
- Dishwasher safe
- Comes with a lifetime guarantee
CONS:
- Blade is a little narrow for some people
Mieriscle Cheese Slicer for Thin Slices
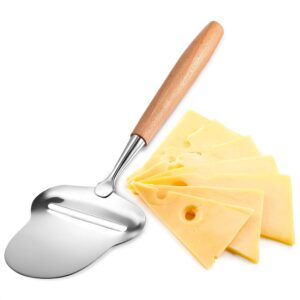
Best For Thin Slices
The wooden handle makes this a great cheese slicer to put beside the cheese board and let everyone slice their cheese to their taste. With a stainless steel head, it stays sharp for a long time and is easy to clean, because of the wooden handle it is advisable to dry it as soon as you have finished rinsing. You don’t need to use a lot of pressure, glide it flat across the cheese for best results.
Ideal for making consistent, thin slices of around 2 – 2.5mm, it might be simple but Mieriscle has used quality materials to ensure it will last a long time.
PROS:
- Easy to use
- Great for making thin slices
- Quality materials and comfortable handle
CONS:
Cheese Slicer Guide
It doesn’t matter if you have owned a cheese slicer for years or you are trying to ensure you always get even slices at home for the first time, some subtle differences go a long way towards ensuring you buy a quality product.
Not everyone knows what to expect from a cheese slicer which is why so many people end up with flimsy products that don’t last a long time. The better options will give you more than just adjustable slice widths and the following guide is designed to show you exactly what we mean.
What To Look For In A Cheese Slicer
Adjustable Thickness
This is going to be easier with certain types of cheese slicers than others, for example, a handheld cheese plane might make it difficult to cut at a different thickness compared to a wire cutter with a wheel for changing the position of the wire.
Easy To Clean
Because you might be cutting through soft cheese with some being left behind, it can be difficult to clean some cheese slicers. However, certain products are fine to go in the dishwasher or those that are easy to wipe clean by hand. A clean cheese slicer is vital to its ongoing performance.
Compatibility
The best cheese slicers are those you can use on all types of cheeses. It shouldn’t matter if you are cutting soft cheese like Brie and anything as hard as Gruyere. If you want your cheeseboard to look presentable, you’ll want to create as many even slices as possible, no matter what the cheese.
Warranty/Guarantee
Because some of the parts on a cheese slicer can be very fragile such as the wire, it can be important to make sure you protect your purchase with a guarantee. Some companies swear by their products and give their customers a lifetime guarantee whilst others give you a warranty on certain parts.
Ease of Use
Beyond being comfortable to hold, the blade or wire should make it easy for you to slice through various cheeses and the handle shouldn’t be too heavy so you can balance the slicer with ease.
Safety
Because you are working with sharp tools it is always good to use one that has your safety in mind. To make sure the slicer doesn’t slip it needs to have a handle that has a decent level of grip and if you use a wire cutter on a board, the base should feature non-slip feet to keep everything in place.
Durability
For it to be worth considering, look to the materials used and other user reviews to make sure the product has a reputation for durability. Even if it has a long warranty, you want to know the cheese slicer isn’t going to break within a few months, these are the sort of kitchen utensils that should last a long time.
Keep in mind that wire cutters tend to be more fragile so don’t be overly alarmed if the wire breaks as they are often easy to replace.
Different Types of Cheese Slicers
Most people don’t even realize there are different types available but when making an informed decision, it is a good place to start.
Wire Slicer – Sometimes known as a roller slicer because the wire is attached to a roller, a lot of them allow you to adjust the thickness.
Plane – Using a flat surface and a single blade that resembles a plane, these are one of the most common types but can be limited in how thick they slice the cheese and don’t leave as much room for error.
Board Slicer – Usually you’ll find a board cheese slicer comes with a wire to cut at a thickness of your choosing although some make it easier with a scale to show you the thickness. A good cheese slicer for entertaining and one that will come with a board of various materials but usually certain types of wood.
Why Purchase A Cheese Slicer?
Before we say that seeing is believing, here are some of the main reasons why you should buy a cheese slicer.
Consistency – If you have always used a knife, even a sharpest of blades will result in odd cuts that are almost impossible to replicate time and again. The major plus point of a cheese slicer is that you can get the same thickness every time.
Appearance – If you’ve ever had guests over and brought out the cheese board at the end of a meal, you might have been too embarrassed to pre-cut without a slicer. A cheese slicer allows you to create perfect slices with a clean cut that looks great on a cheeseboard.
Easy To Use – Until you’ve used a cheese slicer you might be incorrectly thinking they are difficult to master. In truth, it takes just a couple of strokes to get it right and when you do, you’ll see that using one can save you a lot of time and effort.
How To Use A Cheese Slicer
Depending on the type of cheese you wish to cut, you should use a different approach and usually based on the hardness of the cheese. A wire cheese slicer is best used on medium to hard cheese.
After adjusting both the position of the cheese and the wire to the desired thickness you press the wire over the cheese until the cut is made before moving the block back to leave yourself with a perfect slice.
It is better to use a cheese plane for soft cheese, simply by dragging the plane over the cheese slowly. Use a slightly faster technique for making thin slices of harder cheese.
Conclusion
Although it is tempting to try and get by with a sharp knife, it never looks good when entertaining and makes some pretty rough cuts most the time. The best way to stay accurate is by using a quality cheese slicer and now you know what to look for, there are no excuses for settling for anything less.