Home Blog Page 63

The Ultimate Guide to Fat and Why You Should Not be Avoiding it

Today I want to talk about fat. Specifically, about different kinds of fat.

Fat is often what takes the most blame for high obesity rates in our country. It’s up there on the top of the list together with carbs, grains, and sugar. But we rarely stop to think what is the term “fat” entails exactly. Is a stick of grass-fed butter just as bad as the trans fats we find in fast foods? Logically thinking, that doesn’t seem likely, right? So why do we still cling to the idea that fat = bad?

Types of fat

Just like sugars, proteins, and other nutrients, fats can be of worse or better quality. They are not all equal. Let’s take butter for example.

If you go to a grocery store, you will see sticks of pale butter lining the refrigerated shelves. But if you go to a locally-supplied health store and search for grass-fed butter, that grass-fed butter will have a much more yellow coloring than the regular commercial butter. Although technically, they are both butters.

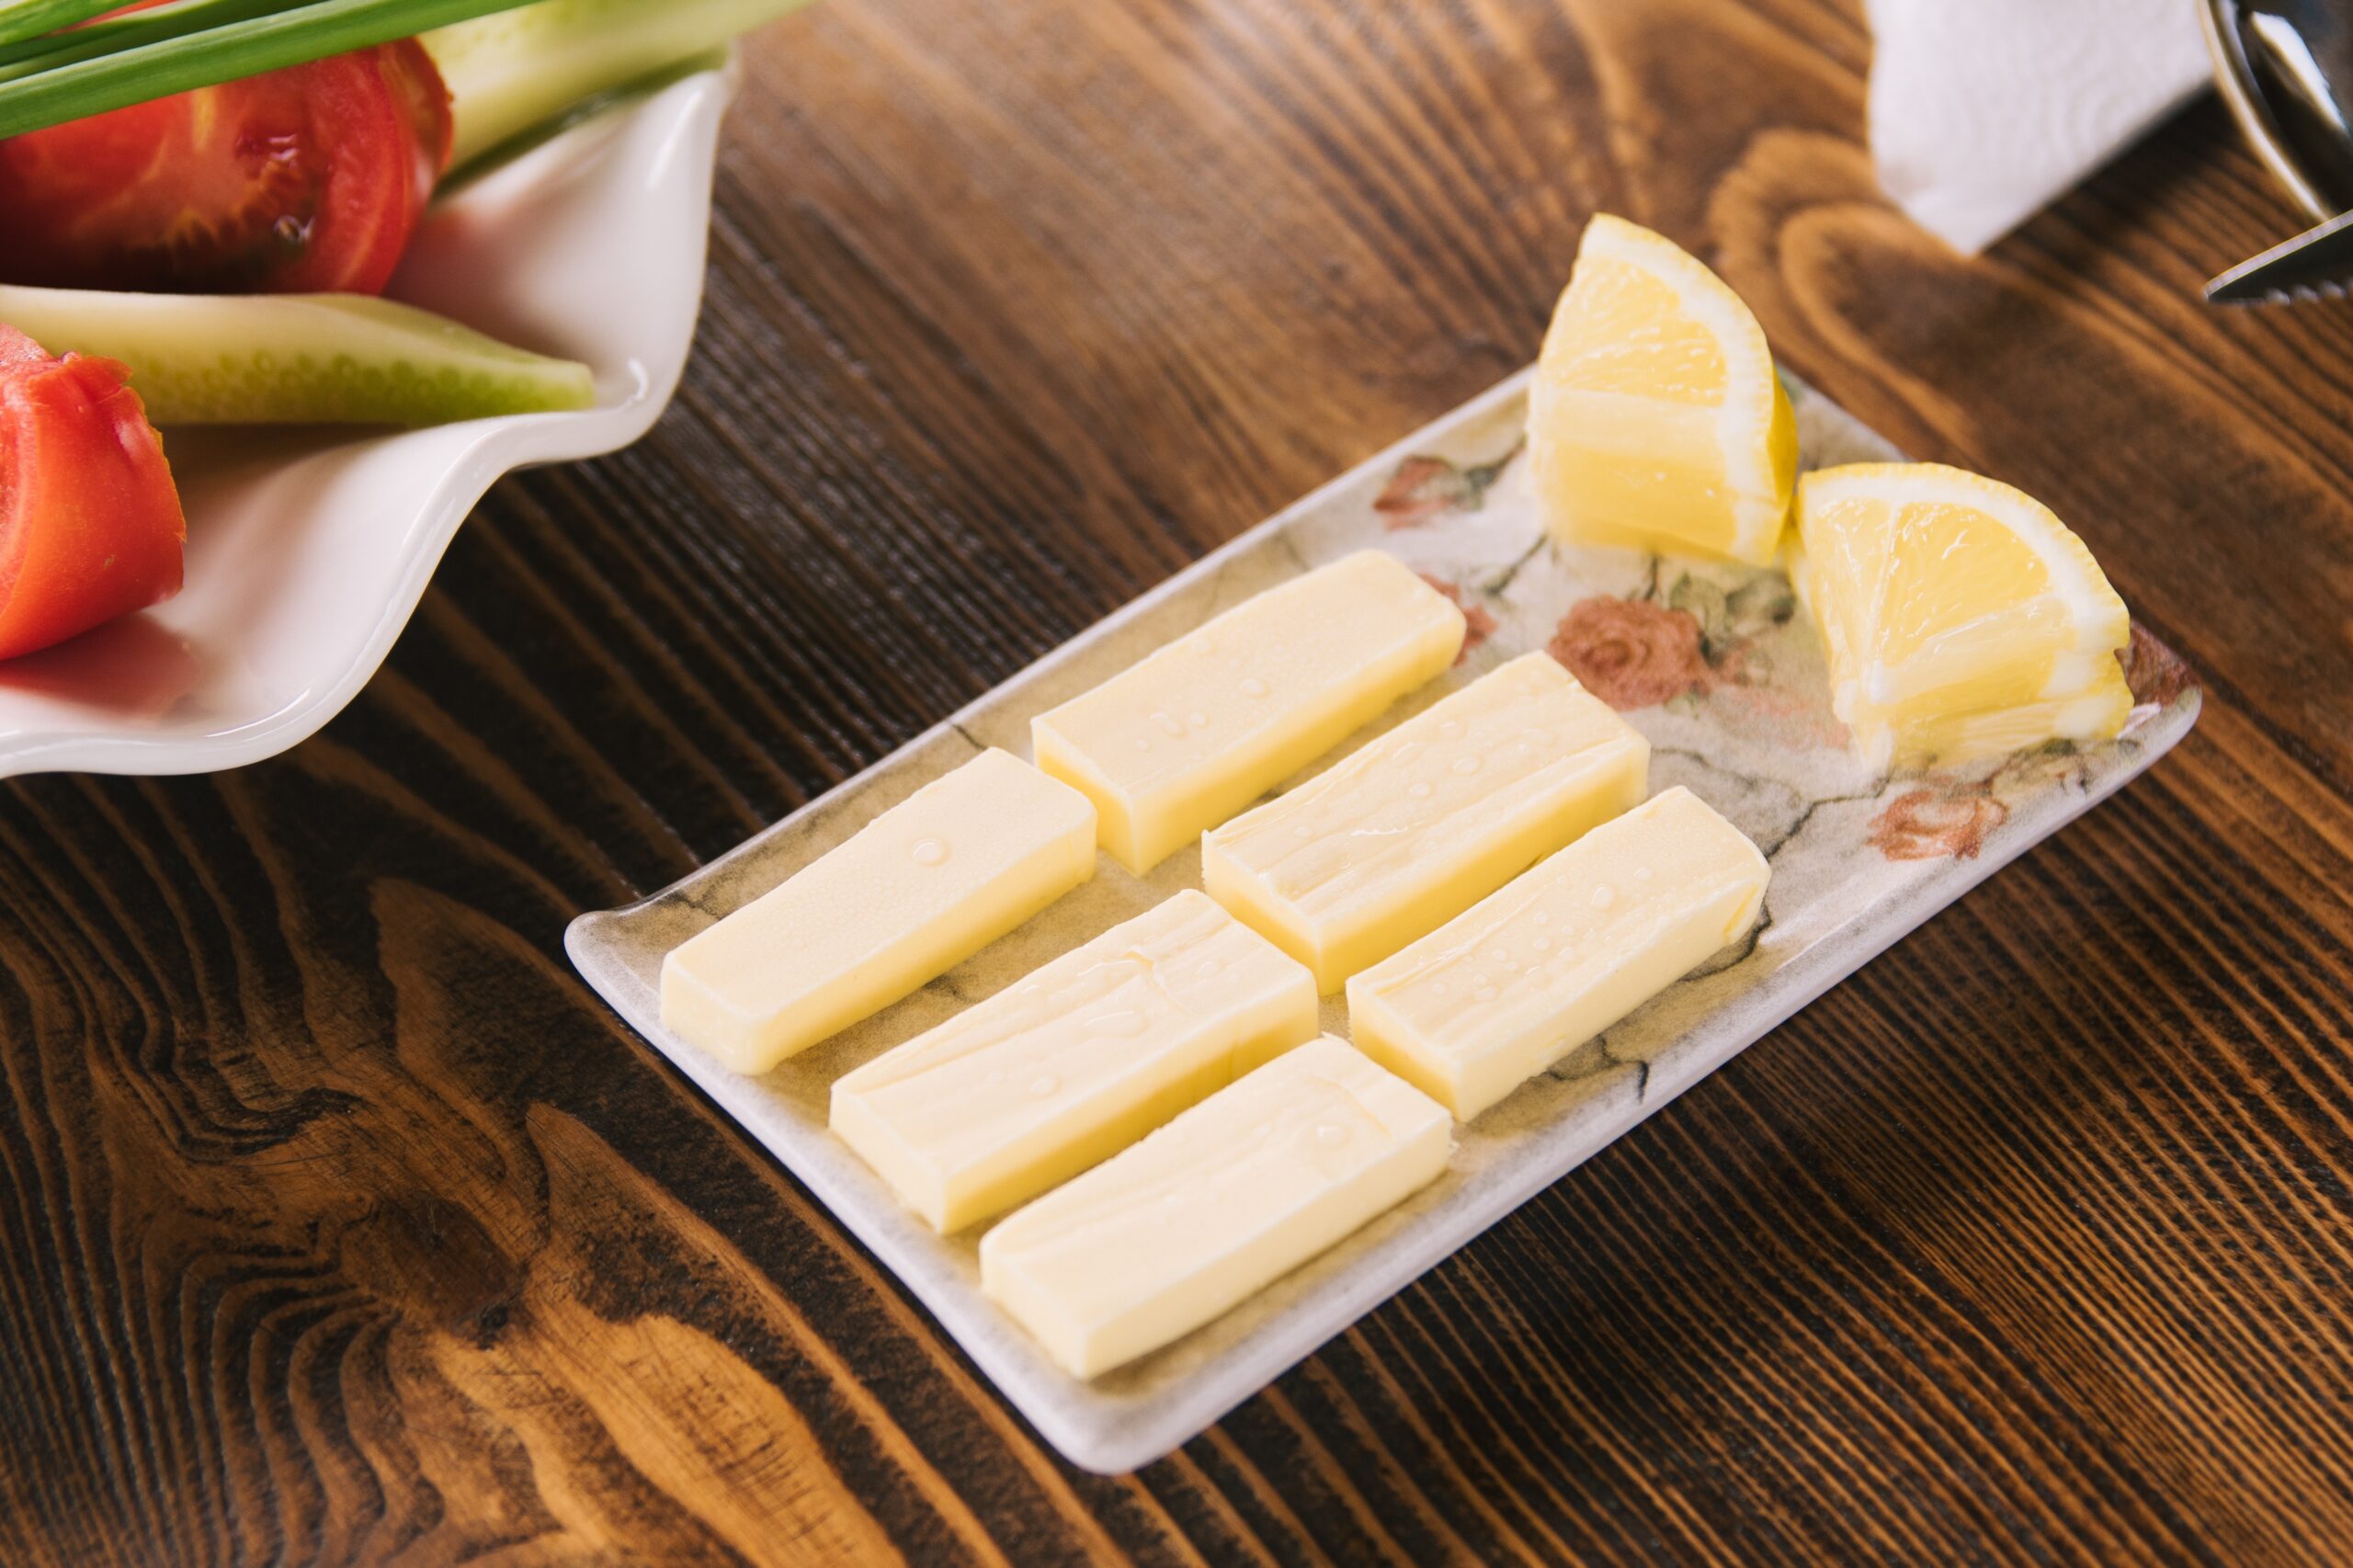
The yellow color is indicative of vitamin K2 content. When cows eat grass and use that grass to produce milk, it creates vitamin K. Vitamin K from the grass converts to vitamin K2 in the milk. And vitamin K2 is particularly important for our health because it’s one of the vitamins responsible for proper nutrient absorption. It also plays a big role in keeping our bones and teeth healthy.

We are severely lacking vitamin K2 in our diets compared to our ancestors. Drinking grass-fed milk and eating dairy products made from that milk is how we can supply our bodies with vitamin K2 again. Grass-fed dairy tends to be more expensive but I don’t think it’s worth it to save money on our health. Besides, you will spend less in the long run because your bones will be stronger and your teeth won’t deteriorate. Make your own butter and buttermilk to ensure you’re getting vitamin K2.

But grass-fed butter is only one of the many other traditional types of fat that can make our bodies healthier. Here are some of them:

  • coconut oil (both virgin and expeller-pressed)
  • pastured lard and bacon fat
  • pastured chicken and goose fat
  • duck fat
  • beef and lamb tallow
  • ghee
  • raw cream and raw cheese
  • organic palm oil and palm shortening
  • unrefined extra virgin olive oil
  • fermented cod liver oil
  • high vitamin butter oil
  • cocoa butter
  • pastured egg yolks
  • grass-fed meats
  • flaxseed and flaxseed oil
  • macadamia nuts

What about cholesterol and heart disease?

Many of the fats I listed are saturated fats. They generally stay solid at room temperature and have high smoke points, making them a good choice for cooking at high heat (but there are exceptions! For example, butter burns easily because it has leftover milk solids inside).

We may have heard that saturated fats are bad for us because they cause cardiovascular diseases. The same myth has been perpetuated by most leading health organizations and not many dare to put that statement under scrutiny. But as hard as it might be to believe, saturated fats do not give people heart disease.

Cholesterol and saturated fats have a very close association because they often appear in the same types of foods. And just like saturated fats, cholesterol has been villainized to an extreme point. Just like fats, there is both good and bad cholesterol. But that’s not the point of this post.

Matt Stone, an expert on nutrition and the author of Diet Recovery and Eat For Heat, says this about cholesterol and heart disease:

“Cholesterol levels are a pitiful indicator of heart disease risk to the point where they are really no indication at all. Mean serum cholesterol levels in France for example are almost identical to that of Americans, yet their heart disease risk is but a fifth of what America endures. This is just one of literally dozens of striking contradictions.”

The key takeaway

Our ancestors have lived their whole lives eating plenty of traditional saturated animal fats. Their foods were full of cholesterol. And their bodies were often much stronger than ours are right now because we have been weakened with years of eating processed foods that wreck our immune systems. Our ancestors kept eating saturated fats and didn’t all die from cardiovascular diseases. What does that tell us?

It tells us that we should embrace the traditional way of living and all the foods it contains. Yes, even saturated fats. Eating processed foods is what is going to kill us, not eating butter or coconut oil. So let’s stop clinging to the idea that fat is bad and unhealthy. Let’s choose what we eat in a mindful and responsible way, stopping to think on our own and not just accept whatever the media decides to feed us this time without questioning. I will stuff myself with grass-fed butter over drinking a spoonful of canola oil any day and I hope you can see why.

How to Make All-Purpose Yogurt Dough

I love this recipe for yogurt dough because of its versatility. It’s easy to make and it can be turned into so many different types of foods. I have made pizza with this dough. I have made whole grain crackers and fruit pies with flaky crusts. It also works beautifully as quiches. This is what I call all-purpose!

All Purpose Yogurt Dough

This is a very solid foundation that can help you begin the journey of cooking with real foods and real foods only. The true basic of natural dieting. You can use this recipe as a base for plenty of other meals you want to try and you’ll know that it will turn out delicious every time! I feel like having a reliable base like this makes all the difference. It definitely makes the transition to real food much easier!

I hope that I will be able to introduce you to more recipes like this. Recipes that rely solely on whole foods and do so without sacrificing any flavor.

I especially like the fact that this dough is made with soaked flour instead of just sprouted flour. I find that grains are easier to digest when they have a chance to soak overnight. That’s because the phytic acid in the flour becomes more neutralized. Of course, if you don’t have the time you can still make this dough with sprouted flour.

Necessary equipment:

  • a large mixing bowl
  • measuring cups
  • a wooden spoon
  • a dish towel
  • a rolling pin
  • a pizza cutter
  • optional: a dehydrator

Ingredients:

Instructions:

  1. Combine yogurt and butter in a large mixing bowl using a wooden spoon.
  2. Add in the flour and salt. Keep combining until clumps form.
  3. Use your fingers to knead the dough further. Continue until the surface of the dough is smooth to touch.
  4. Cover the mixing bowl with a dish towel. This will keep any dirt out while still allowing the dough to breathe.
  5. Leave to rest in a warm place overnight or for at least 12 hours. You can use a dehydrator for this or the oven with the inside light turned on.
  6. Once 12 hours have passed, take out the dough and roll it out on a surface sprinkled with sprouted flour or arrowroot powder. Use a rolling pin to give it the desired shape and thickness:
  • crackers: The dough should be about 1/8 inch thick. Cut it into cracker shape using a pizza cutter or a similar tool and bake for 15 to 20 minutes at 350 degrees. A delicious substitute for store-bought cheese crackers!
  • pie crust: Cover the dough with aluminum foil and put something on top to weigh it down. Bake for 8 minutes at 450 degrees. Remove the weights and aluminum foil and bake for another 6 minutes or so.
  • pizza crust: Bake for 15 minutes at 375 degrees so that it hardens but doesn’t turn brown yet. Cover the crust with your desired pizza sauce and toppings. Bake for another few minutes until the crust becomes slightly browned.

I told you it’s easy!

Pumpkin Seven Layer Bars

Ever since I began making my own sweetened condensed milk, I have been searching for different recipes to try it out in. Not everything that I have tried worked as I would like it to have but some recipes turned out just too good not to share!

The seven layer bars are something that I always wanted to learn how to make but could never get them to taste right. At least not until I tried making them with my homemade sweetened condensed milk. It was a real game changer for me.

The layers I use in this recipe are as follows: graham crackers, pumpkin puree with spices, cream cheese, chocolate chips, pecan nuts, shredded coconut, and sweetened condensed milk. As you can probably imagine, those are not really seven distinctive layers and they kind of combine together as you make the bars but the point is that together, they simply taste amazing. These bars are so good and perfect for the fall season. The pumpkin, the cinnamon, the baked coconut – that’s the ultimate combination for a perfect fall snack. The rich flavors are amazing on their own but the scent that will be coming out of your kitchen will make you feel truly cozy and warm.

The only thing not perfect about this recipe are the store-bought graham crackers but that’s because I still haven’t figured out how to make them on my own. So I use store-bought in the meantime but I’m always careful to choose ones made from sprouted grains.

Pumpkin Seven Layer Bars

Necessary equipment:

  • measuring cups
  • a small saucepan
  • a plastic bag, preferably sealed
  • a rolling pin
  • a wooden spoon
  • a large mixing bowl
  • a hand mixer
  • a large baking pan
  • a spatula
  • a knife

Ingredients:

Instructions:

  1. Preheat the oven to 350 degrees.
  2. Melt the butter in a saucepan.
  3. Put the graham crackers in a plastic bag. Try to remove as much air as possible.
  4. Use a rolling pin to crush the crackers until they form fine crumbs.
  5. Combine the crumbs with melted butter so that you will have a wet sand-like consistency.
  6. Transfer the crumbs mixture to the bottom of your baking pan in an even layer. This will be your crust.
  7. Bake for 10 minutes and set the baking pan aside for now.
  8. Combine the pumpkin puree, cream cheese, whole cane sugar, and cinnamon in a large mixing bowl. Use a hand mixer to make the mixture completely smooth.
  9. Spread the pumpkin cream cheese mixture over the baked crust in your baking pan. Make it an even layer as much as possible.
  10. Now sprinkle the chocolate chips, the chopped pecans, and the shredded coconut on top of the previous layer.
  11. Drizzle the top with homemade sweetened condensed milk. Be careful not to cover all of the bars with milk, it should be just a light drizzle. Otherwise, the sweetened condensed milk will harden on top and become crusty. The chocolate chips, the chopped pecans, and the shredded coconut should still be visible.
  12. Bake in the oven for about 40 minutes. You should be able to tell when it’s ready because baked coconut gives off a very aromatic scent.
  13. Take out of the oven and let cool for at least 30 minutes.
  14. Cut your bars into the desired shape. I prefer to cut them in tiny squares because they’re packed with many wonderful flavors and eating too much at once can be overpowering.

How to Make Chicken Stock

Ultimate GAPS-friendly warming comfort food? The answer is simple. It’s chicken stock.

chicken stock

There is nothing better than lounging on the couch while watching fall turn to winter outside and sipping a mug of delicious homemade chicken stock. Full of nourishing fat, chicken stock is a great method of fulfilling all my savory cravings.

Chicken Stock and Good Fat

I used to avoid fat at all costs, and I suspect many other people were, or are, the same. Our society has turned fat into the sole culprit behind rising obesity rates and cardiovascular diseases. I believed that too for a long time and denied myself any kind of fat, whether it was a cheeseburger or a piece of grilled salmon. But it didn’t make me lose weight nor become happy with my body. So, I searched for answers.

chicken stew

That’s when I learned that there is nothing wrong with fat if it comes from a healthy source. I learned that our bodies need fat to function properly and that fat can be nourishing too. My worldview was turned upside down and I accepted that fat should have a place in my diet too. Now I eat butter (grass-fed) and coconut oil and fish and many other healthy fats. I have since lost weight and my energy levels are up.

Of course, chicken stock is great in general, not only for people who are on GAPS. I mentioned GAPS because I am currently doing it and have a restricted selection of foods I can eat. If you haven’t heard about GAPS, it’s a special healing diet (temporary!) that heals your gut from previous destructive eating habits so that you can enjoy all kinds of real foods once more (like grains, gluten, dairy, and so on). Stocks are heavily utilized on GAPS due to their nutritional value. I am currently having stock three times a day.

And even if I weren’t doing GAPS, I am sure I would be drinking chicken stock frequently. The fall season is that time of the year where all I want to do is baked cinnamon goods, eat pumpkin meals, and drink chicken stock.

Chicken Stock’s Nutrition

The Weston A. Price website says the following about broth:

“Science validates what our grandmothers knew. Rich homemade chicken broths help cure colds. Stock contains minerals in a form the body can absorb easily—not just calcium but also magnesium, phosphorus, silicon, sulphur and trace minerals. It contains the broken-down material from cartilage and tendons–stuff like chondroitin sulphates and glucosamine, now sold as expensive supplements for arthritis and joint pain.”

Sometimes you can see how chicken stock solidifies when cooled. That’s the sign of gelatin presence that came from chicken bones. The longer you simmer your chicken stock, the less likely it is to solidify (but it will still contain plenty of gelatin and minerals inside). I prefer to simmer my stock for an overnight at least so that I can make sure I get everything possible out of the bones. In the colder months, the overnight simmering keeps my house just a little bit warmer. On the other hand, if I am making stock in the summer and don’t my house to get all hot, I simmer it in a slow cooker in the backyard.

How to Make Homemade Chicken Stock

There isn’t anything complicated about making chicken stock. All you need is a quality pastured chicken (with bones) and vegetables with just a splash of apple cider vinegar to make a delicious chicken stock. You don’t even need to peel or cut vegetables because they will be strained out later! If you use quality ingredients then you will get a flavorful batch of chicken stock that will last you for a long time. It can also be used as a base for other dishes. Add some tomatoes and you will get a great traditional tomato soup. Put some of the stock in any sauce to give it some more depth. Reduce gravy with it. Or just drink it on its own, like I do!

Chicken stew and stock

Necessary equipment:

  • a large stockpot OR a slow cooker OR a French oven
  • a large baking dish
  • a large mixing bowl
  • a large steel strainer
  • glass jars with lids for storage

Ingredients:

  • 1 whole pastured chicken
  • 1 bag of chicken giblets (heart, gizzard, and liver)
  • 3 stalks of celery
  • 3 carrots
  • 1 onion
  • 2 T. of apple cider vinegar
  • 1 bay leaf
  • 1 handful of rosemary
  • 1 handful of thyme
  • 1 bunch of fresh parsley
  • sea salt to taste

Ingredients:

  1. Put the chicken and the giblets in your stockpot. Add the vegetables (celery, carrots, and onion). You can cut them in half if they are too large. Add the spices (bay leaf, rosemary, thyme, parsley).
  2. Fill the stockpot with water almost to the top. Leave an inch or an inch and a half of free space. Add the apple cider vinegar to the mixture.
  3. Cover the stockpot with a lid and leave at room temperature for one hour.
  4. Put the stockpot on a stove and bring to boil.
  5. Lower the heat and keep simmering for overnight. Remember to cover the stockpot with a lid.
  6. Once done simmering, use a strainer to remove the solids. You should be left with a liquid broth full of shiny fat circles on the surface.
  7. Don’t throw out the solids, you can still eat them. Especially the chicken meat will be deliciously soft and fragrant by now. You can slice off some of the meat and add it back to the broth.
  8. Transfer the liquid broth into glass jars and cover with a lid. You can keep broth jars in the fridge for up to a week. You can also freeze them for later. A good idea is to put some of it in ice cube trays – that way you will have a perfect portion of chicken stock to use in sauces or gravies.

Enjoy your homemade chicken stock! And if you want beef stock, then check out my beef stock recipe.

Honey-Sweetened Almond Roca

Making real food versions of commercial candies and snacks is how I know that I don’t need store-bought products to enjoy myself. To be honest, they don’t even taste to me as good anymore. I suppose that all the artificial sweeteners and chemical substances that are found in most foods nowadays have stopped having any effect on me since I began eating a clean diet. And I hope I never go back.

Almond Roca

It’s surprisingly easy to make your own homemade versions of popular products and this almond roca is no exception. Quality grass-fed butter, healthy almonds, honey, and my homemade GAPS-friendly chocolate chips are what make this recipe so good. All candy tastes much better when you know for sure what is in it!

Almond Roca

I like to make these almond rocas to serve in a glass bowl as a snack, especially at kid’s parties. Children eat too many artificial sugars already so I want to do whatever I can to introduce them to what healthy food tastes like. They also are great for putting in gift baskets and other presents. I usually pick a pretty container, put the candies inside and tie the whole thing with a large ribbon. It’s a really inexpensive and not much effort-consuming idea for a gift!

Almond Roca

Necessary equipment:

  • a large saucepan
  • a wooden spoon
  • a candy thermometer
  • a food processor OR a sharp knife
  • a jelly roll pan
  • parchment paper
  • a glass bowl
  • a rubber scraper

Ingredients:

  • 2 cups (4 sticks) of butter
  • 1 1/3 cup of raw honey
  • 2 cups of melted chocolate chips
  • 1 cup of almonds
  • 2 t. of vanilla extract
  • optional: more chopped almonds for sprinkling

Instructions:

  1. Line your jelly roll pan with parchment paper. Set aside for now.
  2. Chop the almonds into fine pieces using a food processor or a knife.
  3. Melt the butter in a large saucepan on low heat so that it doesn’t burn.
  4. Add in the honey and stir with a wooden spoon until fully combined.
  5. Up the heat and continue to stir the mixture occasionally until it reaches 305 degrees. Use a candy thermometer for this. 305 degrees Fahrenheit is the so-called “hard crack stage” of candy making. If you want your candy to be softer and bendier then you should use 275 degrees, the “soft crack stage”.
  6. Immediately after reaching 305 degrees, remove the saucepan from heat and stir in the chopped almonds.
  7. Add in the vanilla extract, stir to combine.
  8. Spread the mixture over the parchment paper. Leave to cool for at least 45 minutes. Put in the fridge if your kitchen is too warm and the candy won’t harden.
  9. Set a glass bowl over simmering water in the saucepan. Put the chocolate chips inside the bowl.
  10. Melt the chocolate chips completely and then pour the liquid chocolate over the chilled almond roca.
  11. Leave to harden completely either at room temperature or in the fridge.
  12. Once your almond roca has set, you can now break it up into your desired candy shape.
  13. Store in an airtight container at room temperature. Again, if it’s too hot in the house you can also store the candy in the fridge but remember to take them out about 30 minutes before serving.

Enjoy! Want to try my roasted almonds with cocoa and cinnamon? Click here for recipe.

How to Roast a Pastured Chicken

This recipe is going to be preceded by a long intro. I feel it’s necessary because today we are talking about making a roast chicken.

I feel like most people have roasted a chicken in their life but I suppose not that many were pleased with the results. That’s because roasting a chicken, although it seems simple, is actually very easy to mess up accidentally. I will introduce you to a few basic rules that should hopefully help you understand how to roast a chicken and then we’ll move on to the recipe.

But first, let’s talk about the chicken itself. I highly recommend that you choose a pastured chicken over any commercial or free-range chicken. Pastured chickens were actually able to freely roam the outdoors, were able to eat grass and bugs as they pleased. They were happier and you can really taste that! Pastured chickens have leaner meat because they are not getting fattened with grains or injected with artificially bloating solutions after being packaged.

Whenever I make roasted chicken for anyone else besides my closes family, I mention that this chicken is a pastured one. I hope that this way, they will be able to appreciate the difference in taste and choose a pastured bird themselves when they are roasting something. I do it casually because I don’t want to force other people to follow the exact same principles as I do but because I just want to normalize making an ethical choice.

Things you need to remember when roasting a pastured chicken:

  1. Roast longer but at a lower temperature. The bird will stay moist while still having crispy skin when roasted at about 325 degrees F.
  2. Place the chicken breast side down so that it will soak up all the juices flowing downwards. The breast is made up of white meat which is the most prone to drying out.
  3. Don’t use a roasting pan but instead, put the chicken over a layer of potatoes and other vegetables so that they can all roast together. It helps the chicken stay moist because roasted vegetables release water as they cook, causing more steam. The chicken juices will also flow down to the vegetables, giving them a perfect flavoring without you having to do anything.
  4. After roasting, let the chicken rest for at least 20 minutes to prevent the juices from flowing out when cut. When you finally carve your chicken, all the juices will still be intact and each slice perfectly moistened.
  5. Usually, one roasted chicken can feed 6 people. But, if your chicken has less than 3 pounds, consider buying more chickens.

Necessary equipment:

  • a jelly roll pan
  • parchment paper
  • two mixing bowls, small and large
  • a kitchen twine
  • kitchen shears
  • a sharp knife

Ingredients:

chicken:

  • 1 large pastured chicken
  • 4 T. of grass-fed butter (how to make butter)
  • 1 onion
  • 1 garlic head
  • 1 lemon
  • 2 sprigs of fresh thyme
  • 1 T. of dried parsley
  • 1 T. of dried rosemary
  • 1 T. of dried basil
  • 1 T. of dried oregano

vegetable bed:

  • 3 pounds of organic potatoes
  • 2 large onions
  • 20 cloves of garlic
  • 4 lemons
  • olive oil
  • 1 t. of dried parsley
  • 1 t. of dried rosemary
  • 1 t. of dried basil
  • 1 t. of dried thyme
  • salt and pepper to taste

Instructions:

  1. Preheat the oven to 325 degrees.
  2. Prepare a jelly roll pan by lining it with parchment paper and set aside for now.

vegetable bed

  1. Prepare the vegetables. Cut potatoes and onions into 1-inch pieces, and peel all of the garlic. Slice the lemons very thinly.
  2. In a mixing bowl, mix the potatoes, onions, garlic cloves, and lemon slices.
  3. Drizzle with a few generous dashes of olive oil and add all the dried herbs. Use a wooden spoon to make sure all the veggies are seasoned roughly the same.
  4. Transfer the vegetables onto your parchment paper-lined jelly roll pan.

the chicken

  1. Cut the onion, garlic head, and lemon in half.
  2. In a small mixing bowl, combine all the dried herbs (parsley, rosemary, basil, oregano).
  3. Remove the giblets from your chicken’s cavity and set them aside. You can use them to make, e.g. a chicken stock.
  4. Rinse the chicken with water, both outside and inside. Pat dry.
  5. Use the onion, garlic head, one half of the lemon, and thyme sprigs to stuff the chicken.
  6. Make sure the cavity is closed by tying the chicken’s legs with kitchen twine.
  7. Now place the chicken onto the vegetable bed breast side down. Use kitchen twine again to tie the wings.
  8. Rub butter all over the chicken using your hands.
  9. Squeeze the juice out of the other half of the lemon over the chicken and vegetables.
  10. Sprinkle the herb mix you prepared earlier over the chicken.
  11. Roast on a lower rack for about 2,5 hours or until the chicken is tender.
  12. Remove from the oven and transfer the chicken onto a cutting board.
  13. Cover with aluminum foil or parchment paper and leave to rest for about 15 to 20 minutes.
  14. Remove the covering and carve the chicken. Serve with roasted vegetables on the side.

Berry Custard with Sweetened Whipped Cream

Berry custard cream

Berry Custard with Sweet Cream

I love eggs and I love finding out new methods of eating them. My latest craze is this custard made with seasonal berries and flavored with cinnamon and nutmeg. It’s perfectly smooth, tastes sweet but not overwhelmingly so, and simply looks amazing! I eat it whenever I want to spoil myself a little with some fancy breakfast or dessert and when I have guests over but don’t want to spend hours in the kitchen making food. Topped with some sweetened whipped cream, this berry custard is perfect for any occasion. Even if the occasion is just “I have too many eggs in my fridge.”

This recipe is inspired by a classic French dessert called “clafoutis” or “flaugnarde.” These two are quite similar but not exactly the same. Clafoutis is supposed to be made with cherries. The cherries should be specifically unpitted. That’s because according to baking professionals, the cherry pits contain the most flavor that is only released when in high temperature. So to keep that flavor, pits should not be removed.

But what if you want to eat the same dish but with different fruit? That’s when you get a flaugnarde. There is no such thing as berry clafoutis; it’s a berry flaugnarde. But I suppose in the States we can just call it “berry custard.” Although I like the sound of the word flaugnarde so I might just start calling it that!

Additional Notes

Any berries will do for this recipe; you don’t need to use a specific type. They also don’t necessarily need to be fresh, you can make this custard with frozen berries as well. Just remember to thaw them and drain all the liquid. Otherwise, your custard might end up too wet and it will not look that good.

You can also substitute some of the other ingredients if your body doesn’t tolerate them. Honey can replace whole cane sugar (but use less of it because it’s sweeter) and almond flour can be used instead of sprouted flour. This will be good for people who follow the GAPS diet. Coconut milk can substitute cream if you avoid dairy in your diet.

Necessary equipment:

  • a saucepan
  • measuring cups
  • a large mixing bowl
  • a whisk
  • a large baking dish
  • a stand mixer OR a hand mixer

Custard

Ingredients:

Instructions:

  1. Preheat the oven to 325 degrees.
  2. Butter a large baking dish.
  3. Put the berries on the bottom of the baking dish. Try to make them an even layer. Set the dish aside for now.
  4. Pot butter in a large saucepan and melt it over medium heat.
  5. Add in the whole cane sugar and stir with a whisk until it dissolves completely. Set aside the saucepan mixture to cool.
  6. In a large mixing bowl, put all the eggs in at once and whisk thoroughly.
  7. Add in the cream, vanilla extract, cinnamon, nutmeg, and sea salt. Whisk until combined.
  8. Slowly add the cooled butter and sugar mixture to the mixing bowl. Do it in a thin stream while constantly whisking.
  9. Gradually add in the flour and whisk until combined but not more. If you whisk too much, there will be too much air in your batter.
  10. Pour the batter over the berries in the baking dish.
  11. Bake for 45 to 55 minutes. You will know the custard is ready when it will be puff nicely and become slightly brown on the edges.
  12. Take out of the oven and let cool for about ten minutes.
  13. Serve warm with a dash of sweetened whipped cream (recipe below).

Whipped Cream

Ingredients:

  • 1 cup of fresh cream
  • 1/3 cup of whole cane sugar
  • 1/2 t. of vanilla extract

Instructions:

  1. Use a mixer with whisk beaters attached to whip your batch of fresh cream. Do it on low speed setting first until you can see some bubbles.
  2. Increase the speed and whip until the cream thickens nicely. Be careful not to over whip.
  3. Add the whole cane sugar and the vanilla extract. Slowly beat until the cream fully combines.
  4. The whipped cream is now ready. Store in an airtight container in the fridge.

How to prevent cavities (+ Homemade DIY Toothpaste)

The most obvious benefit of eating real whole foods is the improved overall well-being of your body. Your immune system gets stronger, you have more energy, and you start enjoying each bite of the food you eat more, savoring it and appreciating all the nutrients it contains. One of the less obvious benefits of a healthy diet is… improved oral health!

There are some heavily rooted misconceptions about what causes tooth decay. What gets the most blame is the S. mutans bacteria that reside naturally in human oral cavity. When you have cavities, you also have an abnormally large number of these bacteria in your mouth. But as it turns out, it’s not like they are the ones causing your tooth decay. They are actually useful because they prevent yeast overgrowth!

Now, if your teeth are in a bad condition then yes, the S. mutans can be dangerous to you. Weak teeth are in general more susceptible to decay. So instead of focusing on the bacteria, we should be focusing on strengthening our teeth so that we don’t need to fear any potentially harmful microorganisms.

So how can we do that?

Eating clean is certainly the first step to improving your body’s health, including your teeth. Some say that increased calcium intake is what prevents tooth decay. And while I don’t disagree, I don’t think it’s quite that simple. In my opinion, there are three main aspects to keeping your teeth strong and healthy:

  • Vitamin K2

Vitamin K2 plays a major role in tooth remineralization. Together with vitamins A and D, vitamin K2 is also responsible for the absorption of nutrients found in food. So the bottom line is that if you are not getting enough vitamin K2, your body won’t be able to absorb all that calcium you’re eating to keep your teeth healthy. It’s critical to keeping your body well-supplied with all the necessary vitamins and minerals.

Vitamin K2 is commonly found in dairy products, especially butter and hard cheeses. Natto is also a good source of vitamin K2. Whenever I feel the need to supplement myself with some additional K2, I take care to eat more homemade broths, raw milk, and supplements like fermented cod liver oil.

  • Metabolism

A healthy metabolism is needed in order to absorb vitamins and minerals from food. Perhaps your metabolism is already working as it should – in that case, you can skip this step. But if you often find yourself constipated, bloated, feel tired all day, experience chronic stress, then it’s probably a good idea to work on improving your metabolism first.

Eating whole foods, exercising, and leading a fit lifestyle in general is the key to having a well-functioning metabolism. What I recommend to people struggling with getting their metabolism up and running first is eating large and full of carbs breakfasts. This is a proven way of raising your body temperature and in turn, speeding up your metabolism. Take your basal temperature each day in the morning as you wake up to see if this method is working for you!

  • The right toothpaste

Most commercial toothpastes contain plenty of potentially irritating ingredients that in the long run can cause people to suffer from serious health problems. These include:

  • fluoride – a neurotoxin that has been linked with weakening of the bones, tooth discoloration, and kidney damage
  • SLS (sodium laureth sulfate) – a well-known skin irritant
  • vegetable glycerin – an irritating substance that coats your teeth as you brush them and lowers mineral absorption
  • artificial flavors and colors – all kinds of chemical substances that are only there to make the toothbrushing process more enjoyable but often come from unspecified sources

So which toothpaste should you use? Search for toothpastes that are made from natural ingredients only as those are less likely to cause you any tooth irritation. Or even better, make your own toothpaste at home!

It’s really not that difficult and will give you that much needed peace of mind that you are not poisoning yourself and/or your family with commercial products. You know exactly what goes in it and you can even control the flavor by adjusting the amount of spearmint essential oil.

I’ll share with you a recipe for the homemade toothpaste we use at our house below. There aren’t any fancy ingredients in it and you can easily get everything online.

Here are the ingredients I use and what they each do:

  • coconut oil – a saturated fat that has antibacterial and antiviral properties
  • sea salt – a mineral source that will gently scrub away the teeth debris
  • mineral powder – a great source of calcium that your body will absorb as you brush your teeth
  • mineral drops – another mineral source
  • spearmint essential oil – gives gentle mint flavoring and has anti-inflammatory properties

See, nothing suspicious, right? That’s why I think it’s worth taking the time to make a batch of homemade toothpaste now and then. Because you know that the natural ingredients won’t cause you any harm.

Necessary equipment:

  • measuring spoons
  • a small bowl
  • a spoon for mixing
  • a small glass jar with a lid for storage

Ingredients:

  • 2 T. of expeller-pressed coconut oil
  • 2 T. of green stevia powder
  • 2 T. of baking soda
  • 1 T. of mineral powder
  • 1 t. of sea salt
  • 10 mineral drops
  • 40 drops of spearmint essential oil

Instructions:

  1. Use a small bowl to combine the coconut oil, green stevia powder, baking soda, mineral powder, and sea salt. Use a spoon to mix them well.
  2. Add in the mineral drops and spearmint essential oil. Mix to combine again.
  3. Your toothpaste is now ready! Transfer to a glass jar or an empty tube of regular toothpaste if you want.

My bathroom is relatively cool so I keep the jar of toothpaste there but if your bathroom is warm and not well-ventilated then you might need to keep your homemade toothpaste in the fridge or the ingredients will separate over time.

Vegetable Chowder with Cheddar Cheese

Soups are a life savior during the cold winter. Even more so if they have a creamy consistency, like this cheese vegetable chowder. They warm me right up and make me feel all cozy. Perfect for a meal before bed!

This chowder contains plenty of different vegetables but I especially love the turnip. I never ate much of it as a child and didn’t even really know how it tasted. But ever since discovering it in my local health store, I use turnips to give my meals that nice earthy flavor. The cheese binds all the ingredients together to create a perfect harmony of different nutrients. And the butter is the main ingredient behind the creamy consistency of this chowder. I like to savor each bite of this chowder as I eat while it melts in my mouth and fills me up with delicious warmth.

The vegetables in this recipe can be mostly substituted by others if you don’t have everything in your pantry at the moment. I only recommend that you use good quality cheddar cheese, it really makes all the difference!

If you are on GAPS, then you can also modify this recipe so that it’s compliant with the guidelines. Replace the potato with broccoli or cauliflower (or both!) and use coconut flour instead of sprouted flour. The cream can be substituted with sour cream or 24-hour GAPS yogurt.

Necessary equipment:

  • a large stockpot OR a slow cooker OR a French oven
  • a sharp knife OR a food processor
  • a wooden spoon
  • a ladle
  • glass jars with lids for storage

Ingredients:

  • 5 cups of homemade chicken stock (how to make chicken stock)
  • 4 to 6 T. of grass-fed butter
  • 6 T. of sprouted whole grain flour (how to make sprouted flour)
  • 1 1/2 cup of raw cream
  • 1 large leek
  • 1 large onion
  • 3 carrots
  • 2 stalks of celery
  • 1 turnip
  • 1 large potato
  • 4 garlic cloves
  • 1 bay leaf
  • 4 sprigs of fresh thyme OR 1/8 t. of dried thyme
  • fresh parsley to sprinkle on top
  • salt and pepper to taste
  • 11 oz. of mature cheddar cheese

Instructions:

  1. Prepare all the ingredients. Grate the cheddar cheese. Chop the onion and crush the garlic cloves. Cut the carrots, celery, turnip, and potato into dice-sized pieces. Cut the leek lengthwise and slice into small pieces. Chop the fresh parsley.
  2. Melt the butter in a stockpot over medium heat.
  3. Add the onion and the leek. Cook for about 5 minutes under a cover. Stir from time to time to prevent the vegetables from burning.
  4. Add the garlic and cook for a few more minutes.
  5. Stir in the flour and stir with a wooden spoon until the flour covers the vegetables evenly.
  6. Pour in about 1/3 of the chicken stock. Keep stirring. Take care to scrape the bottom of the stockpot so that no flour sticks to it.
  7. Bring to a boil and gradually add the rest of the chicken stock.
  8. Add the celery, carrots, turnip, and potato. Add thyme and bay leaf.
  9. Lower the heat and put a lid on the stockpot. Keep simmering for about 30 to 40 minutes while occasionally stirring.
  10. The vegetables should be tender by now. Remove the bay leaf and fresh thyme branches.
  11. Taste the soup and add salt and pepper if desired.
  12. Add grated cheddar cheese gradually. Stir constantly after each added batch. Do not add more cheese until the cheese inside the soup has melted.
  13. Remove from heat.
  14. Add the cream and keep stirring until it becomes warm.
  15. The chowder is now ready! Serve with fresh chopped parsley sprinkled on top.