Home Blog Page 66

Fudge 2 ways: Choco Peppermint and Citrus

The winter holidays are a particular time of the year, filled with joy and the spirit of sharing with your family and friends. They are also filled with another thing – food.

And while I do enjoy a good meal, I also know that we tend to overstuff ourselves during the holidays with heavy and difficult to digest foods. So I am always on the lookout for healthy versions of traditional meals. This recipe for homemade chocolate fudge is just the right thing for this.

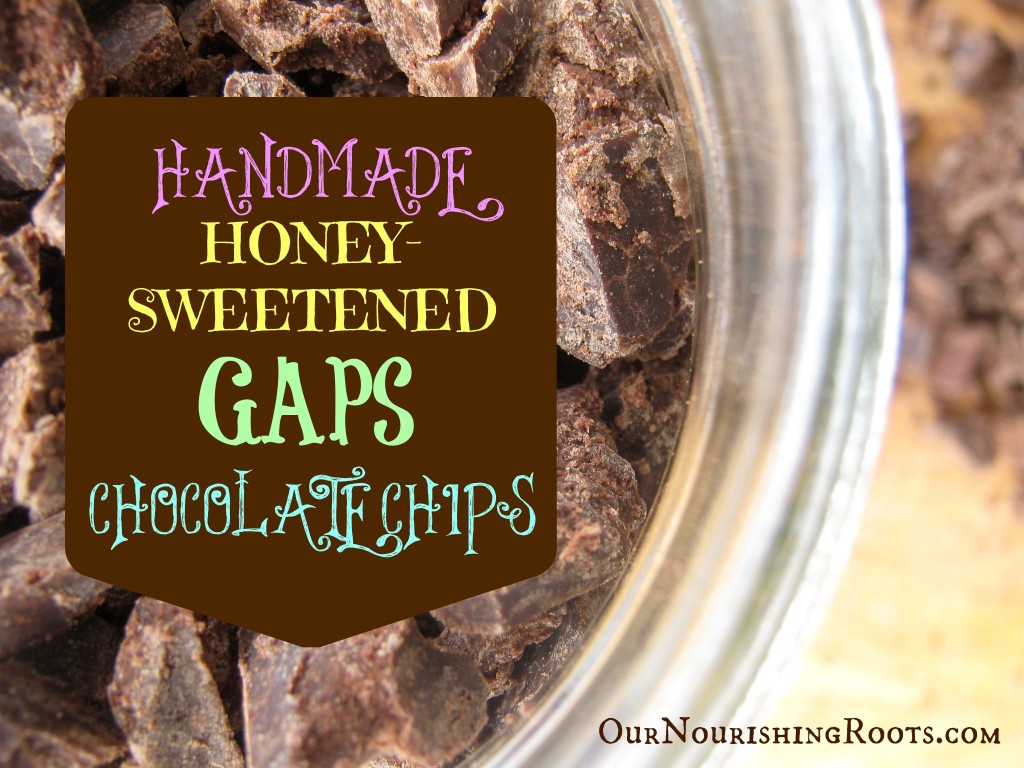
I love this fudge because it’s both unconditionally delicious and diet and GAPS-friendly. I have fed it to several friends and none of them noticed that this fudge is filled with only natural, non-processed ingredients. That is a big win!

This recipe uses a lot of coconut oil which has been a personal craze of mine lately. It contains plenty of fatty acids, like lauric acid, which are unbelievably good for your heart. Coconut oil is a perfect substitute for less healthy fats that are usually used in traditional fudge recipes. There are two basic types of coconut oil: virgin coconut oil and expeller-pressed coconut oil. They are both full of beneficial nutrients but the virgin coconut oil has that distinct coconut flavoring and fragrance. Expeller-pressed coconut oil is more neutral so I usually choose it over the virgin one. Because the recipe also uses shredded coconut to add some more texture to the fudge, I feel like it would become too coconut-y. But it’s perfectly ok to use virgin coconut oil if that’s more to your liking!

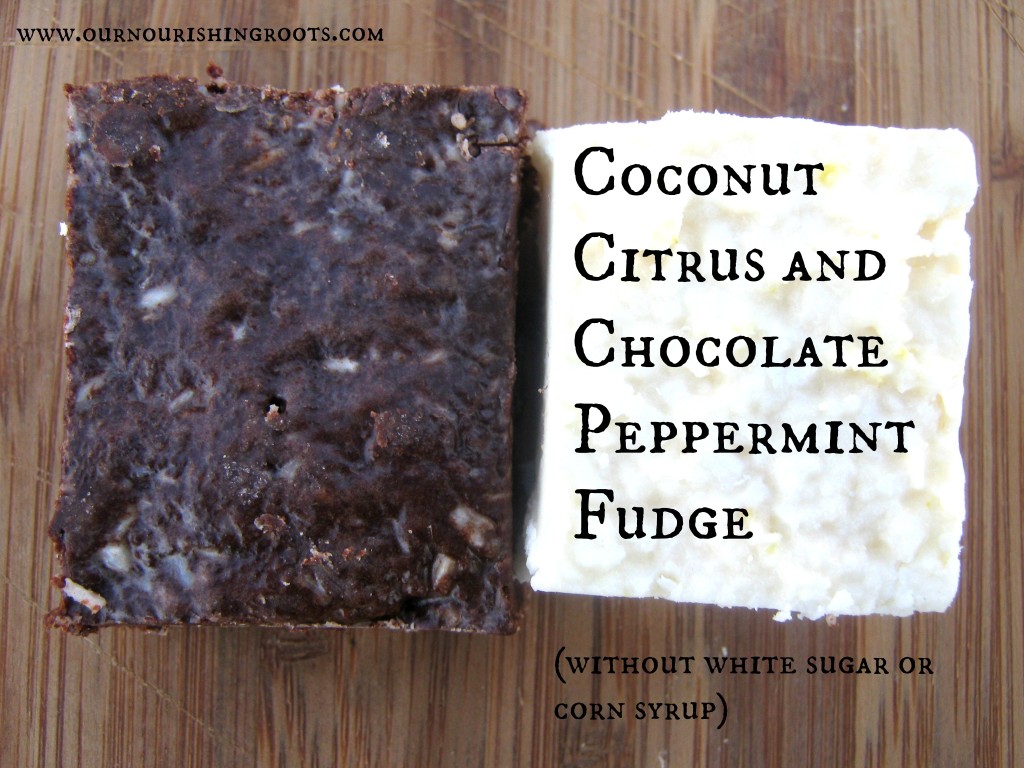
Now I prepared two different versions of this fudge for you. One is peppermint and the other one uses citrus flavorings. Both are perfect for the holidays so choose whichever one you prefer!

Necessary equipment:

  • a baking pan
  • parchment paper
  • measuring cups
  • a food processor
  • a spatula
  • a cutting board
  • a knife

Chocolate peppermint fudge

Ingredients:

  • 1/2 cup of cocoa powder
  • 1/2 cup of coconut butter (also called coconut spread)
  • 1/2 cup of virgin coconut oil OR expeller-pressed coconut oil
  • 1/4 cup of raw honey
  • 1 cup of shredded coconut
  • 2 t. of peppermint extract
  • 1 t. of vanilla extract

Instructions:

  1. Line your baking pan with parchment paper and set aside for now.
  2. Put all the ingredients except for the shredded coconut in a food processor. Pulse until they all combine.
  3. Add in the shredded coconut and pulse a few more times.
  4. Transfer the mixture into your baking pan. If you need to, use a spatula to make it even.
  5. Put the baking pan in the fridge for 30 minutes so that your fudge can harden.
  6. Take out of the fridge and lift the fudge out of the baking pan by holding the parchment paper. Transfer onto a cutting board and cut into even squares or rectangles. If the fudge is too hard to cut, let it sit at room temperature for about 10 minutes.
  7. Keep the individual fudge squares in an airtight container in the fridge. Take them out about 30 minutes before serving.

Citrus fudge

Ingredients:

  • 1 cup of coconut butter (also called coconut spread)
  • 1 cup of virgin coconut oil OR expeller-pressed coconut oil
  • 1/2 cup of raw honey
  • 1 cup of shredded coconut
  • 2 T. of lemon zest (or other citrus)
  • 1 T. of lemon juice (or other citrus)

*If you use orange to make this fudge then lessen the amount of honey because orange is sweeter than lemon or lime.

Instructions:

  1. Line your baking pan with parchment paper and set aside for now.
  2. Put all the ingredients except for the shredded coconut in a food processor. Pulse until they all combine.
  3. Add in the shredded coconut and pulse a few more times.
  4. Transfer the mixture into your baking pan. If you need to, use a spatula to make it even.
  5. Put the baking pan in the fridge for 30 minutes so that your fudge can harden.
  6. Take out of the fridge and lift the fudge out of the baking pan by holding the parchment paper. Transfer onto a cutting board and cut into even squares or rectangles. If the fudge is too hard to cut, let it sit at room temperature for about 10 minutes.
  7. Keep the individual fudge squares in an airtight container in the fridge. Take them out about 30 minutes before serving.

Benefits of Drinking Beet Kvass (+ Recipe)

Lacto-fermented foods and drinks are currently the key to my well-being and this beet kvass might just be my favorite one. It’s remarkably simple and full of vitamins and probiotics that will boost your overall health.

Besides being a very good probiotic drink (so it helps your gut flora), beet kvass is also supposedly able to cleanse your blood and liver from toxins, improve kidney health, and do some other wonderful things for your health. I haven’t found good and proven research that would support that claim but I do know that I feel great when I drink beet kvass on a regular basis. The recommended dosage is four ounces of beet kvass in the morning before breakfast. I like to drink this homemade beet kvass with my whole family after waking up together – it’s our little tradition now!

You will need some specific equipment to make this beet kvass (like a sprouting lid) but since they are used in making other lacto-fermented drinks as well, I recommend you buy them anyway. For the ingredients, you won’t need much. It’s just beets, water, whey, and salt. I love how simple this recipe is!

gap

The beet kvass recipe you can find in Nourishing Traditions uses a 1/4 cup of whey and quite a bit of salt (buy Nourishing Traditions here). Those are perfectly fine proportions but I personally prefer to use more whey and less salt. The overly salty kvass just doesn’t do it for me. The fermentation process still works perfectly and the fizziness is just right. But you can try it whichever way you prefer! The recipe below uses my usual proportions.

The only potentially problematic ingredient in this recipe is the whey. But it’s very easy to make yourself, as long as you have a quality source of dairy in your area (learn how to make whey at home).

You can make whey from raw milk. If you leave your raw milk covered with a towel at room temperature, the whey will naturally separate from the curds in the milk. That’s when you can use a sieve. You will get liquid whey and solid curds. The proportions are usually perfectly half and half so if you need a gallon of whey, you will need to use two gallons of raw milk.

gap

If you don’t have raw milk, then you can also use plain whole milk yogurt. Similarly, you just put it on a sieve and the whey should drip right through into a bowl below. This is my preferred method of getting whey and I usually do it with my own homemade yogurt made from raw milk. It’s easier than waiting for the milk to separate and I also feel it tastes better as well. The strained yogurt solids can later be turned into a tart when mixed with honey and vanilla extract. Or you can make savory yogurt cheese with it. Everything can be utilized if you know how!

And if you cannot have dairy at all due to allergies, then you can still make this beet kvass. You will just need to use even more salt to account for the missing whey. It will still lacto-ferment as it should but be careful because the end result will be quite salty. In this recipe, the half a cup of whey can be substituted with 1 tablespoon of sea salt.

Necessary utensils:

  • a half gallon glass jar
  • a wooden spoon
  • a sprouting lid OR a regular mason jar lid
  • a small strainer or sieve

Ingredients:

  • 1 large beet OR 2 small beets
  • 1/2 cup of why
  • filtered water
  • a large pinch of sea salt

Instructions:

  1. Peel your beet (or beets) and cut into small cubes.
  2. Put the beet cubes in a half gallon glass jar and sprinkle them with sea salt.
  3. Pour in the whey.
  4. Pour in the filtered water so that the jar is completely filled.
  5. Stir well with a wooden spoon.
  6. Cover with a dish towel and leave to ferment at room temperature for 1 or 2 days. The kvass is ready when you can see white foam forming on the surface.
  7. Remove the cloth. At this point, you can strain out the beet cubes. I personally like to leave them in.
  8. Cover the jar with a sprouting lid or a regular jar lid.
  9. Put the jar with the kvass in the fridge to stop the lacto-fermentation process.

Enjoy all the benefits of drinking beet kvass!

DIY Watermelon Face Mask

In this post, I will not be showing you any food recipes (well, kind of). I wanted to try to introduce my readers to something different – the world of DIY cosmetics! You’ll learn how to make a watermelon face mask that has been thoroughly tested by me so I know it’s safe. I am so excited to share this with you!

Watermelon Yogurt Facial

Although I am not really that much into makeup and cosmetics, I do love to treat myself to an evening full of relaxation. If I had all the money in the world, I would probably never leave the spa! But alas, that’s not really possible nor realistic.

Homemade Spa Treatments

But homemade spa treatments? Count me in! One of the easiest ways to give yourself that spa relaxation at home is by preparing a simple face mask and applying it while you lie in the bathtub full of bubbles and essential oils. Even a quick facial can make a difference in how you feel and how you sleep that night.

The one I use most often is this watermelon and yogurt face mask that is incredibly hydrating. What I love the most about it is how easy it is to make yourself. I love these kinds of recipes that allow me to make sure that whatever I put on my body (or inside it!) is made from pure organic ingredients without sacrificing too much of my free time. The only ingredients are yogurt and watermelon so if you know it’s safe to eat, it’s surely safe to put on your face!

And that’s another reason I prefer homemade treatments over real spas. I feel like I can never fully trust someone, especially a company that is trying to make a profit, that they are only going to use natural ingredients that are proven to be safe. Authentically ethical spas can be hard to find and even if you have one in your local area, it’s probably more expensive than a regular spa.

Store-Bought Cosmetics

All of my store-bought cosmetics are first vetted using the Skin Deep database. It allows you to check whether a particular product contains any potentially harmful substances so you can make an informed choice as a consumer. But spas don’t always make it clear what products they are using to give you that wonderfully-fragrant oil massage (psst, fragrances are one of the most common offenders that companies use to trick you into thinking they are using natural ingredients).

So I will gladly continue to make my own spa treatments whenever I can.

Yogurt is full of probiotics that are most commonly associated with improved gut flora but they can also help improve your skin. The enzymes and the lactic acid are natural exfoliants that will leave your skin radiating and pure.

Watermelon is mostly made up of water so it can aid in restoring your skin’s moisture barrier and hydrate it. It has plenty of electrolytes and vitamins (mostly vitamin A and B6) that are easy to absorb by your skin. I like to think of it as a natural sports drink!

Necessary equipment:

a small glass bowl
a spoon

Ingredients:

2 T. of natural yogurt (how to make yogurt)
1 t. of watermelon juice

Instructions:

  1. Press a spoon onto watermelon flesh to release some of the juice. Transfer one teaspoon of the juice to a glass bowl.
  2. Combine with two tablespoons of natural yogurt until the mixture reaches the right consistency.
  3. Apply the face mask you just made to your face and neck. Leave for 10 to 20 minutes. Rinse.

Simple, right?

You can also make another version of this face mask by replacing the yogurt with mashed avocado. Avocado mask plumps up the skin and works better for delicate skin. So if you want to prevent signs of aging, avocado is the way to go.

I use some other DIY recipes that I found in this DIY Organic Beauty ebook. I love it because it contains plenty of recipes for homemade lotions, shampoos, and even sunscreen! And the recipes are all pretty simple and don’t require you to become knowledgeable about DIY cosmetics techniques. I cannot recommend it enough!

GAPS-friendly Honey Sweetened Chocolate (and Chips)

Chocolate isn’t considered to be the healthiest snack but the truth is that true organic chocolate is not as evil as everyone seems to think. But it can be difficult to find really good chocolate from a brand that can be trusted. And it’s even more difficult if you are on the GAPS diet which is pretty restricting regarding what you can and cannot eat (but for good reasons!).

But I simply cannot give up on chocolate. This is why I combed the Internet resources in search of a recipe or a clue to making tasty GAPS-friendly chocolate. I wanted to use that chocolate as a substitute for store-bought chocolate chips for use in desserts. Because who doesn’t love guilt-free chocolate chip cookies?

At the end of this post, you will find such a recipe. I have tested it multiple times and I am confident that it’s the ultimate recipe for GAPS chocolate chips. And give it a try even if you aren’t on GAPS. It’s bound to be healthier than whatever you can find in a supermarket. It’s surprisingly easy to make too.

Why Make Your Own Chocolate Chips?

Store-bought chocolate chips are simply not something you should eat when attempting to fill your regular menu with whole foods and organic ingredients. Most of them are made using soy lecithin. Soy lecithin is what makes chocolate chips so nice and smooth to touch. Obviously, this is a very big problem if you are allergic to soy. But even if you’re not, soy lecithin is not exactly what experts would call ‘whole food’.

Moreover, big food corporations sweeten their chocolate chips using either white sugar or evaporated cane juice. This is a big no-no for people on GAPS and those who try to watch what they put in their mouth. Honey is a good GAPS-friendly sweetener that can be used to sweeten chocolate chips but almost no companies use it.

Making Homemade Chocolate Chips

Many people avoid making their own chocolate chips because the process seems too difficult and complicated. It’s true that homemade chocolate chips can be messed up quite easily but all of that can be avoided if you know exactly what you’re doing. There are two common problems that occur when making homemade chocolate chips.

The first one is tempering chocolate, i.e. stabilizing it by heating and cooling alternatively. Chocolate is traditionally set at room temperatures, it cannot become too hot or too cold. Unless you’re an experienced cook, this can be quite a hassle because you need to control the temperature exactly with 1 degree accuracy.

Some people recommend using a microwave, but I stray away from microwaves. If you have one then feel free to try out this method. In my recipe, I will explain how I do it and I believe that if you follow my instructions exactly then you shouldn’t have problems with tempering your homemade chocolate.

Prevent Chocolate From Seizing

The second problem is preventing the melted chocolate from seizing and turning into clumpy chunks. This is difficult to prevent if you don’t know what causes the seizing.

But seizing is actually avoidable. The only thing you need to remember is the seizing of chocolate occurs when the chocolate comes into contact with water. And it doesn’t even have to be a big splash of water. A small droplet on the surface of the whisk you use to mix your chocolate is all that is needed. Steam from a boiling pot in your kitchen will do the same. Similarly, covering your chocolate with a lid while it’s still warm will cause condensation to appear on the inside of the lid and your up-to-now-smooth chocolate will seize. So take great care not to let your chocolate come into contact with an unnecessary amount of water (or any liquid, for that matter). A hint: wooden spoons and other similar porous utensils retain water so avoid them when making chocolate.

However, chocolate can also seize if the mixture doesn’t contain enough liquid (complicated, I know). The key is in adding a substantial amount of liquid, like vanilla extract or coffee, all at once. If the liquid comes from condensation then the chocolate will become grainy but if it receives a lot of liquid at once then it will simply turn softer. The bottom line is: follow the recipe carefully and avoid additional sources of liquid.

Coffee and Cocoa Butter

I use both of the above ingredients in my recipe. Let me quickly explain why.

Some professional cooks enhance the flavor of chocolate/cocoa with just a hint of coffee. If it’s a really small amount then the end result won’t taste like coffee at all but the overall flavor will be much deeper. I have tried it on myself and I think it really works!

But since it’s just an additional ingredient then you can leave it out if you don’t have any coffee at hand or simply want to avoid it.

Cocoa butter is a good substitute for cocoa powder that is easier to digest and hence, more GAPS-friendly. Cocoa butter is the white solid fat that comes from a cocoa pod. It’s also the main ingredient in white chocolate (additionally sweetened, of course). I recommend searching for an organic source of cocoa butter in your local area.

And just as a side note, cocoa powder can still technically be consumed even when doing GAPS. If your body can tolerate it just fine then there is no need to substitute it with cocoa butter. Try a small amount first and decide for yourself.

Onto the recipe! Or recipes, actually. The first one will tell you how to make homemade chocolate and the second one is homemade chocolate chips.

Necessary equipment:

  • a double boiler OR a medium saucepan + a large glass bowl
  • a rubber scraper
  • a jelly roll pan OR a large glass pan
  • a cutting board
  • a sharp knife for chopping into chocolate chips (best way to sharpen a knife)

Homemade Chocolate

Ingredients:

  • ¾ cup of cocoa butter
  • ¾ cup of cocoa powder
  • 6 T. of raw honey
  • 1 T. of brewed coffee
  • 1 t. of vanilla extract
  • seeds from one vanilla bean

Instructions:

  1. Melt cocoa butter in a glass bowl set over simmering water in a saucepan. Be careful not to let the water boil.
  2. Remove from heat and gradually add cocoa powder while whisking the mixture. Continue whisking until there are no clumps left.
  3. Add in the honey and vanilla seeds. Whisk again until fully combined.
  4. Add the vanilla extract and coffee. Whisk until smooth.
  5. Let cool for 30 minutes but stir the mixture every 10 minutes.
  6. Your homemade chocolate is now ready. You can pour it into molds and leave to harden or use it to make candies.

GAPS-friendly Chocolate Chips

Ingredients:

  • ¾ cup of cocoa butter
  • ¾ cup of cocoa powder
  • 6 T. of raw honey
  • 1 T. of brewed coffee
  • 1 t. of vanilla extract
  • seeds from one vanilla bean

Instructions:

  1. Melt cocoa butter in a glass bowl set over simmering water in a saucepan. Be careful not to let the water boil.
  2. Remove from heat and gradually add cocoa powder while whisking the mixture. Continue whisking until there are no clumps left.
  3. Add in the honey and vanilla seeds. Whisk again until fully combined.
  4. Add the vanilla extract and coffee. Whisk until smooth.
  5. Pour the mixture onto a jelly roll pan or a glass pan and leave to harden at room temperature.
  6. Once hardened, chop the chocolate into small pea-sized pieces.
  7. Use when making chocolate chip cookies, chocolate chip pancakes, and other desserts.

Coconut Cake frosted with Cocoa Buttercream

This yellow coconut cake is perfect for any large parties like birthday celebrations or baby showers. The best thing about it is that there is nothing in there to make you feel guilty of eating it!

Slice of coconut cake with cocoa buttercream


The soft yellow cake is sweetened with honey, a natural sweetener. Between the layers you will find rich and fluffy cocoa buttercream frosting that is simply addictive. By using coconut flour instead of regular white flour, your cake will be denser and have more depth. The coconut flour also means that this cake is much richer in fiber than a regular cake. It will fill you up quickly so don’t cut the pieces too big!

Cakes from boxes don’t even compare to this one! I feel sorry for my younger self for having to grow up eating store-bought cake mixes. But I am more than glad to make up for this now, as I enjoy every little piece of this delicious coconut cake. And I’m even more glad that my kids get to taste how real food tastes like before they are old enough to get addicted to unhealthy commercial sweeteners found in supermarket foods.

I based my recipe on Jenna’s coconut cake which you can find here. I tweaked a few ingredients to my liking and I’m very pleased with the results; I heard only rave reviews about this one and my kids even prefer it over double chocolate cake! If that’s not a good endorsement then I don’t know what is.

Necessary equipment:

Cocoa Buttercream Frosting

Ingredients:

Instructions:

  1. Whisk the butter and honey with a mixer on a high speed setting. You should get a light-colored soft mixture in three to five minutes.
  2. Add in the cocoa powder, coffee, and vanilla extract.
  3. Continue whisking. First at low speed and then again on high speed for another three minutes.
  4. Your frosting is now almost done. Scrape the sides of the bowl if you need to and chill the frosting (in the mixing bowl) in the fridge for at least 30 minutes.
  5. Take out of the fridge and whisk one last time for three minutes. Frost the cake immediately.

*I like to use a small amount of coffee in recipes which use chocolate or cocoa. It’s completely optional but it makes the chocolate flavor ‘pop’ by giving it more depth. Weak coffee is okay even on GAPS. If you can’t or don’t want to drink coffee for some reason then you can also use a coffee substitute, like Teeccino or Dandy Blend. Just remember that they both contain grains which you should ingest when on GAPS.

Coconut flour cake

Ingredients:

  • 2 1/4 cup of milk (can be substituted with coconut milk if you are on GAPS)
  • 2 cups of flour
  • one dozen eggs
  • 3/4 cup of honey
  • 1 1/2 T. of vanilla extract
  • 1/2 t. of baking soda
  • 1/4 t. of sea salt

Instructions:

  1. Preheat the oven to 350 degrees.
  2. Butter your round cake pans and line the bottom with parchment paper cut to fit into the circle. Spread some butter on the cake pan to help the paper stick. Set aside for now.
  3. Mix all the eggs, milk, honey, and vanilla extract together in a large mixing bowl.
  4. In a separate bowl, whisk the coconut flour with baking soda and salt. Make the mixture as smooth as possible with no lumps.
  5. Add the dry ingredients to the wet ingredients. Use a mixer to fully combine them together.
  6. Pour the batter into your cake pans and bake in the oven for about 40 minutes OR until the edges turn slightly brown. You don’t want to over bake them because the cakes will then rise and be uneven.
  7. Cool the cake pans on a cooling rack. Once cooled, use a knife to carefully separate the cake from the sides of the pan.
  8. Put one of the cakes on top of another one with a layer of cocoa buttercream frosting between. Frost the entire cake with the remaining frosting.

Sour Cream Ice Cream with Dulce De Leche Topping

0

I’m the girl at the frozen yogurt shop who bypasses the special flavors and toppings and fills up on the plain.  I love the tartness and the fact that it’s not overly sweet.

One of my favorite Brazilian cookbooks has a recipe for molton dulce de leche cake. The author recommends serving it with sour cream ice cream.  Although the cake recipe was a bit too fussy and precise for my temperamental oven, I loved the idea of pairing sour cream and dulce de leche.

Enter this simplified combo: a tangy sour cream ice cream recipe that’s surprisingly smooth and creamy for being eggless and a simple one ingredient recipe for dulce de leche that doesn’t involve potentially exploding cans.  Do the dulce de leche recipes involving boiling a can of scare the bejezus out of anybody else?  For my fellow plain frozen yogurt fans, the ice cream is great by itself as well.

Sour Cream Ice Cream

Ingredients:

1 pint sour cream
1/2 cup water
1 cup sugar
1/4 cup Lime Juice
Zest from a lime

Directions:

Make simple syrup:

In a medium saucepan combine 1 cup of sugar and 1/2 cup water over medium heat. Once sugar is dissolved, remove from heat and let cool to room temperature.

Whisk sour cream in a bowl and gradually add in the syrup, the lime juice and the zest until smooth. Mix until smooth.

Refrigerate mixture until thoroughly chilled. Add the mixture to your ice cream maker and follow your machine’s instructions. Place into freezer to harden.

Dulce De Leche:

1 or 2 cans sweetened condensed milk (or make your own with this recipe!)

Preheat oven to 425.

Pour the condensed milk into a glass pie plate or small baking dish. Place within a larger baking or roasting pan and add hot water halfway up the pie plate or baking dish.

Cover with aluminum foil and bake 1 1/2 to 2 hours until browned. Stir and serve immediately or let cool, whisk and refrigerate in a covered jar or container.

Spicy Cashew and Coconut Snack Mix

What do my favorite snacks, i.e. kettle corn, chocolate-covered potato chips, and Costco’s cashew, almond and pumpkin seed clusters have in common?  The irresistible combination of salty and sweet.

And while spiced, candied nuts are certainly nothing new (my previous go-to combined almonds, candied sugar, cumin and cayenne), this Thai snack mix ups the ante by combining cashews, dried coconut, honey and fresh red jalapeno chile pepper into an addicting and slightly spicy treat.

Spicy Thai Cashews

Unlike many of the spiced nut recipes out there, this cashew mix is made on the stove-top.  And why, exactly, is that important or noteworthy?  Well, you could already be enjoying the fruits of your labor in just about the same amount of time it would take you to preheat your oven.  In my book, that’s a good thing.  Dangerous, but good.

And for my fellow foodies who are similarly without access to Trader Joe’s (I feel your pain!), your best bet for tracking down raw, unsalted cashews would probably be your local Asian market or health food store.

Spicy Thai Cashews

Spicy Cashew and Coconut Snack Mix

PREP TIME: 5 minutes

COOK TIME: 10 minutes

TOTAL TIME: 15 minutes

Ingredients:

1 Tablespoon coconut or canola oil
2 Tablespoons honey
2 cups raw, unsalted cashews
1 cup shredded unsweetened, dried coconut
1 red Jalapeno chile, seeded and minced
1/2 teaspoon salt
pinch freshly ground pepper

Directions:

Heat the oil and the honey in a large pan over medium-high heat. Add the cashews, stir to coat and cook, stirring constantly, for about 2 minutes. Next, add the coconut and continue to cook. Stir constantly until both the cashews and the coconut are beginning to turn golden.

Add the chile pepper, salt and ground pepper and continue to cook. Stir constantly until the cashews and the coconut are both golden brown and the chile has toasted a bit. Remove from heat immediately and transfer to a serving bowl. Taste and add additional salt, if necessary.

Chicken with Chinese Broccoli, Thai Basil and Cashews

Thai Tamarind Chicken

What to do when you can’t decide between Thai basil chicken, chicken with cashews, and chicken with broccoli?  Make this Thai-inspired dish that combines elements from the three Asian favorites!

This was the first time I’ve cooked with Chinese broccoli (also called kai lan, gai lan, and Chinese kale) and guys, I’m in love.  I’m not entirely sure whether it’s a completely new to me Asian green, or whether I’ve been oblivious to what’s in the food I’ve been eating.  Regardless, I’m smitten.

Thai Tamarind Chicken
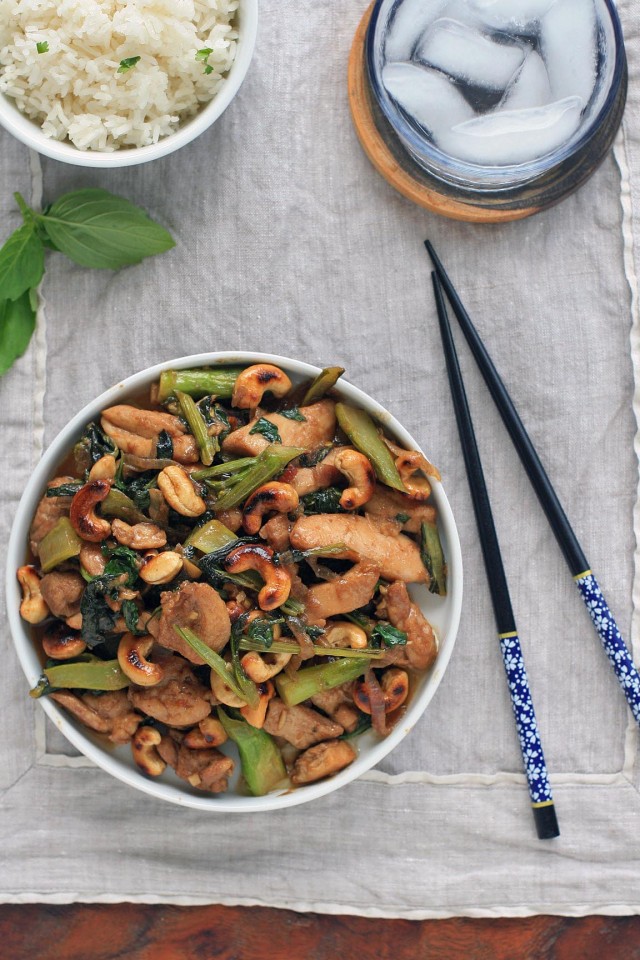
The stems may remind you a bit of regular old broccoli, but Chinese broccoli has sturdy leaves and small, yellow flowers in lieu of florets.  The leaves have a slightly bitter flavor, which pair really well with this Thai chicken’s tangy, salty, and sweet sauce.

Things only get more delicious with the addition of crunchy, toasted cashews and spicy, peppery Thai basil.  Don’t get discouraged by the seemingly long list of ingredients.  Everything should be available at an Asian grocery store.  Once you’ve got your ingredients purchased and prepped, you’re just a quick stir-fry away from this Thai-inspired dish. Need a drink to go with it? Try this Ginger, Lemongrass and Thai Basil Sparkler.

Thai Tamarind Chicken

Chicken with Chinese Broccoli, Thai Basil and Cashews

YIELD: 4 servings

PREP TIME: 45 minutes

COOK TIME: 15 minutes

TOTAL TIME: 1 hour

Ingredients:

* 3/4 pound boneless chicken, cubed or cut into strips
* 1 Tablespoon gluten-free oyster sauce
* 1 Tablespoon palm sugar (can also substitute regular or brown sugar)
* 3 cloves garlic, minced
* 1 Tablespoon minced ginger
* 3 Thai chiles, minced
* 3 Tablespoons vegetable oil, divided
* 1 small to medium red onion, thinly sliced
* 2 cups roughly chopped baby Chinese broccoli, both stems and leaves
* 1 Tablespoon tamarind pulp
* 1 Tablespoon fish sauce
* 1 cup roughly chopped Thai basil leaves
* 1/2 cup toasted, unsalted cashews

Directions:

Combine the first 6 ingredients and 1 Tablespoon of the oil in a large bowl. Set aside to marinate for 30 minutes.

Heat the remaining oil in a large skillet or wok, add the onions, and cook, stirring frequently, until the onion begins to soften. Add the chicken and all of the marinade and cook, stirring frequently, until the outside of the chicken is no longer pink (it shouldn’t be cooked through at this point). Add the Chinese broccoli, tamarind pulp and fish sauce and continue to cook until the chicken is cooked through and the Chinese broccoli leaves have wilted and the stems are tender crisp. Next, add the Thai basil and the toasted cashews. Continue to cook for another minute or so, until the Thai basil has just begun to wilt. Serve immediately.

Melon and Chia Seed Faux Tapioca Pudding

Melon Chia Pudding

Sure it’s kind of old-fashioned and I can certainly understand that its texture isn’t for everybody, but I love me a good tapioca pudding.  And not just the classic American variety, but the cold, soupy Asian versions as well.

Unfortunately it’s exactly the times when cold tapioca soup sounds most appealing (weather = hot, humid, unbearable) that the last thing you want to do is stand over a hot flame for an extended period of time waiting for pudding to thicken.  And that’s where chia, everybody’s favorite wonder seed, steps in to save the day.

Melon Chia Pudding

When combined with unsweetened coconut milk and pureed melon, it creates a lightly-sweetened, refreshing pudding.  It’s easy to adjust the texture by varying the amount of chia seeds you use.  Want it more soupy?  Decrease the amount of chia seeds.   Like your pudding nice and thick?  Add some more chia seeds.  It’s pretty much impossible to mess up.

This no-fuss, no-cook, vegan pudding not only makes a great dessert, but it’s quickly become one of my favorite breakfasts as well.  Getting my Omega-3s has never been so easy.

Melon Chia Pudding

Melon and Chia Seed Faux Tapioca Pudding

Yield: 4 servings

Prep time: 10 minutes

Total time: 30 minutes

Ingredients:

2-3 Tablespoons chia seeds, depending on how thick you’d like your pudding
1-1/3 cups melon (honeydew or cantaloupe) puree**
2/3 cup coconut milk
chopped melon for topping (optional)

Directions:

Combine the chia seeds, melon puree and coconut milk in a medium bowl and stir to combine. Let sit for at least 20 minutes for the pudding to thicken. Spoon into individual bowls and top with chopped melon, if desired.

** Process cubed melon chunks in a blender or food processor to create the puree.