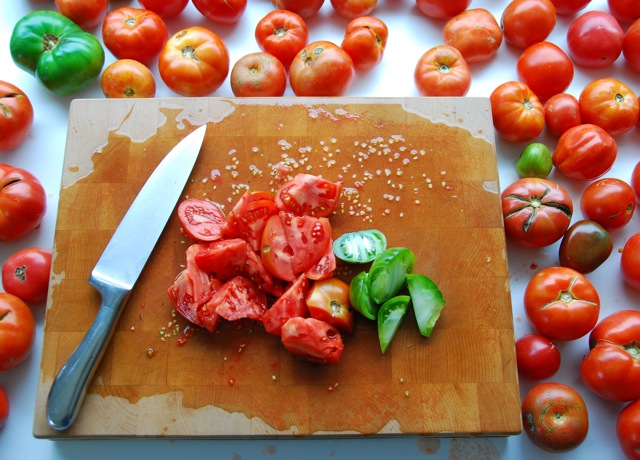
Not all pickles have vinegar in them. That may be a surprise to some of you, and for sure a lot of pickles have vinegar.
But not these:
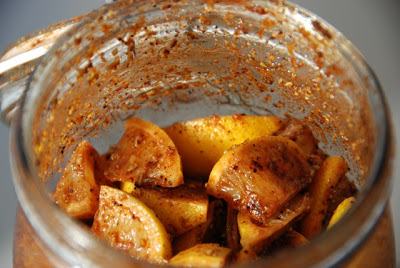 In India (and other parts of south Asia), oil or lemon juice is used to preserve many types of fruits & vegetables. I call most Indian pickles sun pickles because the best part, besides the flavor, is that they are gently cooked by the sun over time. This long and drawn out (essentially marinating) process allows the pickles to keep for a year or more in the fridge, once they are ‘cured’ in the sun.
These pickles are sweetish with a clean zing from the fennel. The cayenne can be altered depending on your tolerance for heat. A little goes a long way and this recipe should make enough to last a year. This is my favorite Indian pickle at the moment – I am just finishing the batch from last year. It is the perfect thing to eat with rice and yogurt. Actually, that is the best thing about having Indian pickles around. When you’re lazy or don’t have time to cook much of a dinner, just whip out these babies and you’ve got a jar full of intense flavor. All you’ll have to do is boil some rice. Most of the pickles and jams I make are with fruit & vegetables that are in season because:
gap
a) They travel less
b) I get to grow them myself (or get them directly from the person who did)
c) They taste better
That said, lemons, and pretty much any kind of citrus are pretty hard to grow in the northeast so I have to make the exception and buy them after their very short trip from Mexico (ahem). People I am trying…
Sun pickles do have a season though; these take about 8 weeks (yes I said 8 weeks) of sun sitting, and you want them to get as much sun as they can each day so I wouldn’t make these in the winter in the northeast where the days are short. Or they can suffer from SAD.
No wait, that’s me. They can suffer from mold if they don’t get enough sun. But don’t let that scare you, because I have made tons of sun pickles and have never had mold on any of them. The most important thing is that the lemons are organic. Really anything you want to pickle should be organic, unless you’re down with preserved pesticides.
Sweet n’ Spicy Lemon Pickle
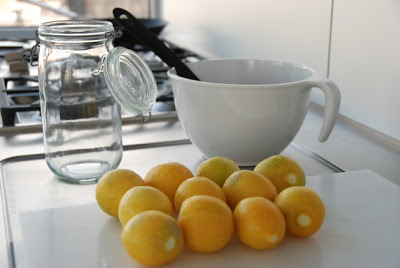
10 small very fresh lemons, no blemishes
2 small lemons, juiced
⅛ cup cayenne powder
2 cups lightly packed brown sugar
3 tablespoons sea salt
1 ½ tablespoons whole fennel seeds
1.5 tablespoons whole cumin seeds
1 teaspoon whole fenugreek seeds
1 ½ tablespoons whole peppercorns
2 liter jar with a tight fitting non-reactive (no metal) lid
There are a couple of basics when making sun pickles that need to be followed. The jar should be very clean, which means that it should either be washed in very hot soapy water by hand or in the dishwasher, and dried thoroughly. The lemons should be wiped with a damp cloth and then with a dry cloth. They also need to be dried thoroughly. Any water left in the jar or on the lemons could cause them to spoil. But don’t let this scare you because it has never happened to me. Just get ’em dry.
Directions:
1. Make a very small slice on the ends of each lemon, just to get the ‘scars’ off either end.
 2. Slice each lemon lengthwise, then slice each quarter lengthwise again, and slice each eighth in half. While you are doing this, you can take out the large pits. You don’t have to go crazy digging out the small ones. Just leave them, you wont even notice them in the finished pickle.
3. Heat a dry pan on medium heat. Roast the fennel, cumin and fenugreek seeds just until they get a shade darker and their aroma intensifies, about 3 minutes. Do not let them burn, or they will taste bitter. Let them cool in a plate.
4. Combine the roasted seeds and peppercorns in a spice grinder and grind to a powder.
5. Mix brown sugar, cayenne powder, ground spices and salt together.
6. Place half of the lemons in the jar. Spoon half of the sugar & spice mixture in the jar, then the second half of lemons and the rest of the sugar & spice on top of that. Close the jar and shake.
7. Add the juice from the two lemons in the jar and close and shake again. Try and get the sugar & spices to all of the lemons.
gap
This will be your pet for the next 8 weeks.
It needs to be put in the sun everyday and if you are starting it in the spring and live in a northern climate, then that means you will be rotating it to different windowsills throughout the day. If it is warm where you are or you are starting it in the summer months, then you can leave it outside all day in direct sun; just remember to take it in at night. You also need to shake it at least once a day. If you are like me and you like fiddling with your pickles (umm) then you will shake it a few times a day. But one good shake a day is good enough.
If in that 8 week time frame you go on vacation or somewhere for a few days where you cannot take it with you (yeah, so?), you will have to ask a family member, friend or co-worker to take your pickle home and make sure to keep it in the sun and shake it once a day.
This said family member, friend or co-worker will think you are weird.
You can check the pickle after about 7 weeks. When the liquid has thickened and the peels of the lemons have softened, it is done. Depending on the amount and intensity of the sun and the thickness of the lemon peels, this time will vary. But they should be done at 8 weeks. When they are done, they should go in the fridge where they will last for a year or more. You can spoon them into smaller jars if you like. Always use a clean spoon when you are taking the pickle out of the jar; this will help them last longer.