Home Blog Page 28

How To Buy The Best Food Chopper

If most of the meals that you make come out of a cardboard box and are warmed up in the microwave, then they probably won’t have the need for any specialized cooking utensils or gadgets. After all, you really don’t need anything to open up a TV dinner and cook it for its recommended cook time. However, anyone who is looking to do any sort of real cooking is going to need to have at least a few cooking tools in their kitchen, and an important one for a person to have is a food chopper.

Food choppers are designed to make short work of the basic chopping that every cook—both amateur and professionals alike—will need to do. They can be used to chop herbs, veggies, and even nuts or cooked meats. They can be used to crate salsas, soups, chutneys, and hundreds of other dishes. And to utilize this power, all you have to do is to choose the one that works best for you.

I wanted to help people find a chopper that works well for them, so I decided to look around and see if I could find one that met what I consider to be the basic criteria for a food chopper: an electric-powered one that’s easy to use is portable and is well constructed. What I found was a Wireless Mini-Food Chopper.

Wireless Mini-Food Chopper

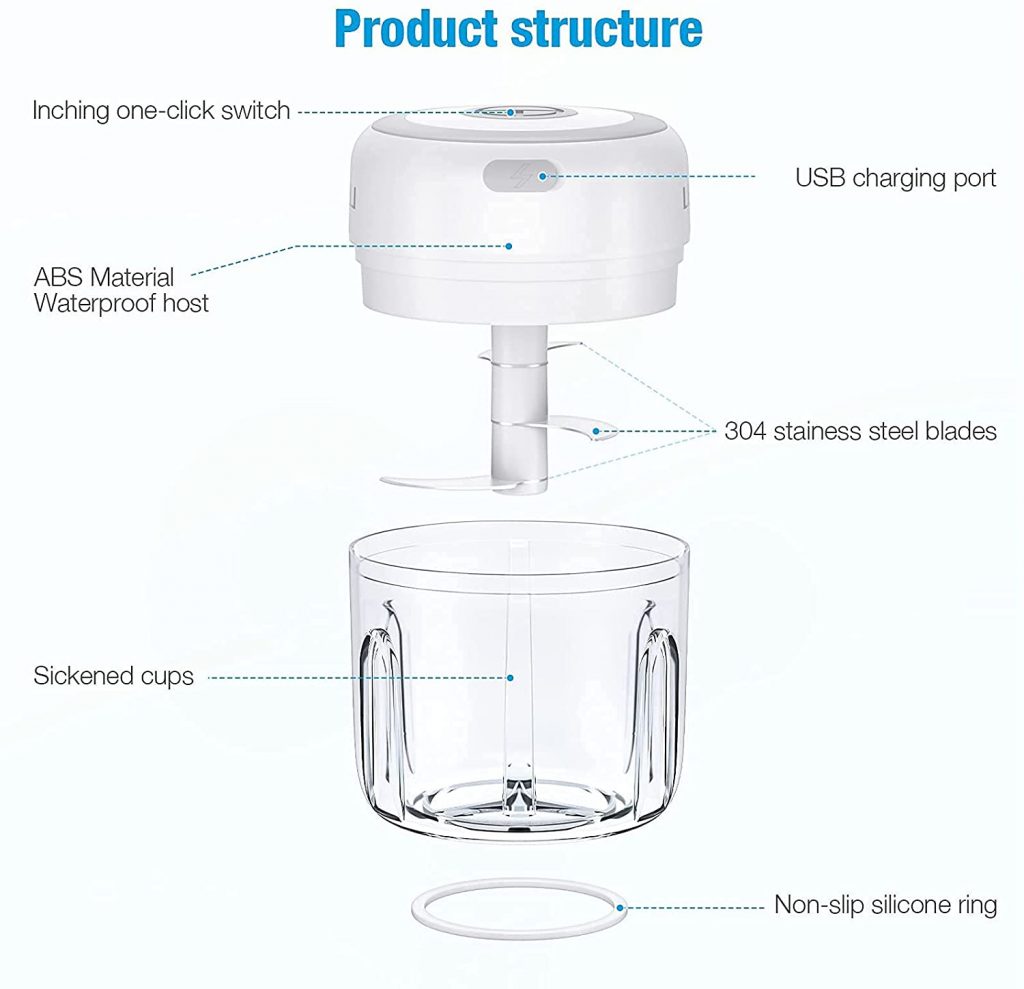
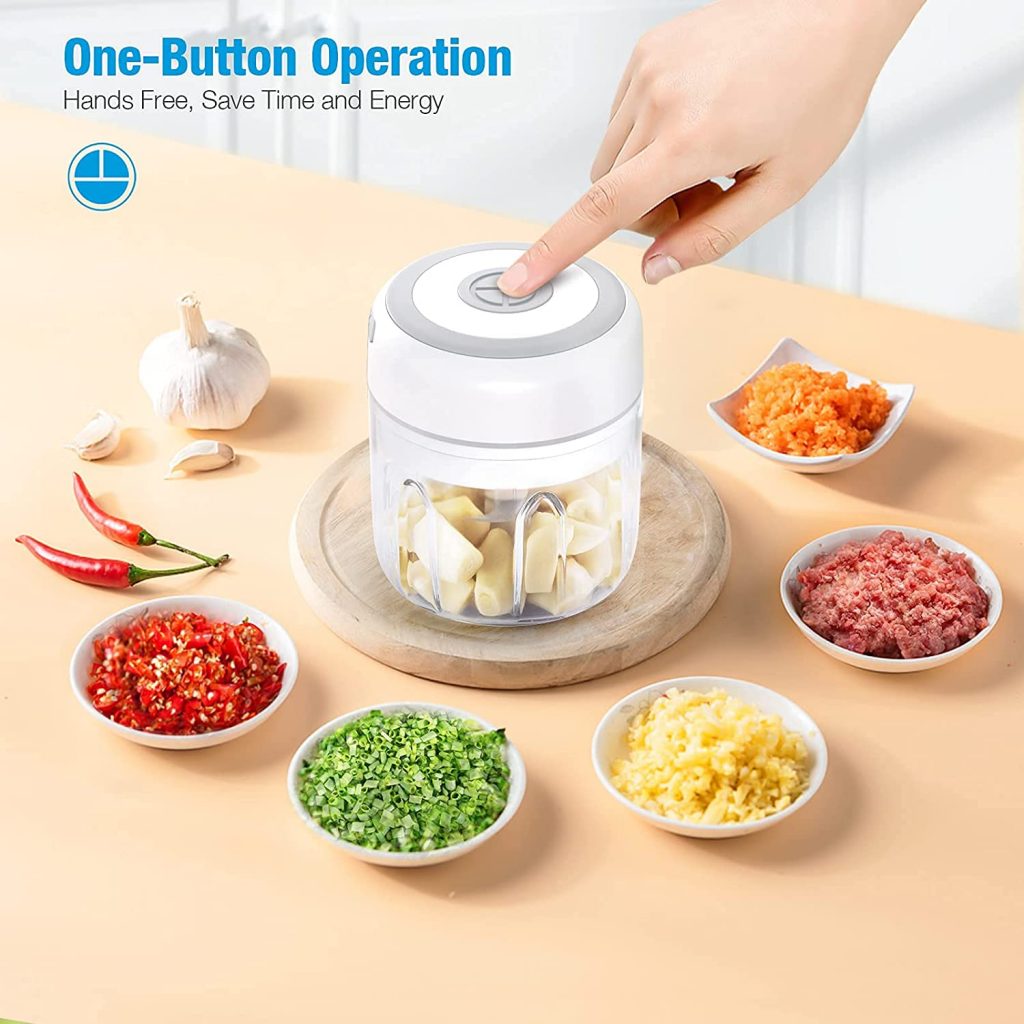
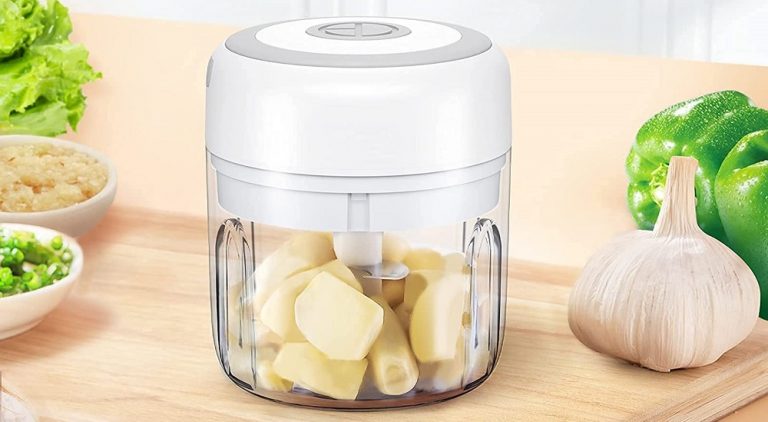
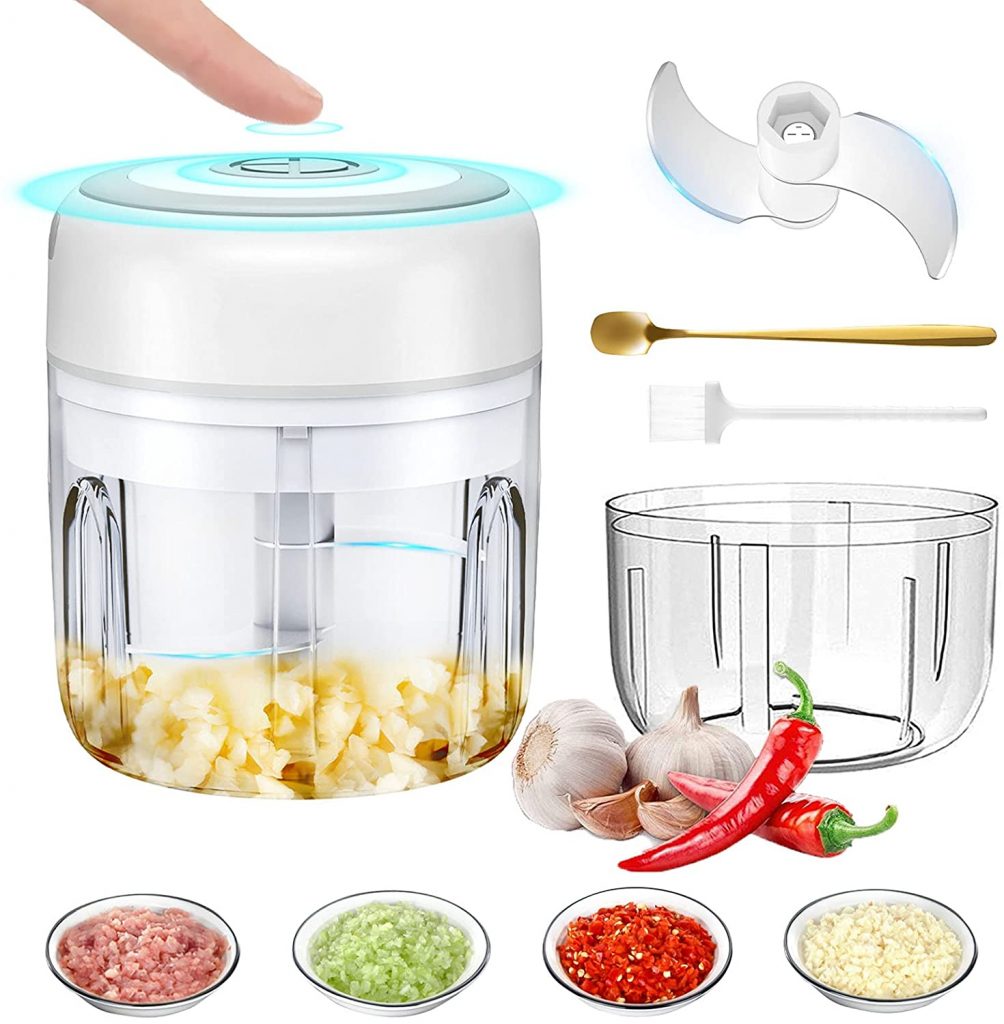
This mini-food chopper had everything that I feel a great food chopper needs. It could be operated with the touch of just one finger and had two different-sized cups that meet just about anyone’s needs. It had a 100ml cup that was equipped with two sharp blades and then there was a 250ml cup that was equipped with three sharp blades. These cups were BPA-free too, so anyone using it could be confident that chemicals weren’t going to be transferred to their food—regardless of what they’re chopping.

Mini Food Chopper Simple Construction

Another thing that I liked about this chopper was that its blades were made of stainless steel that made short work of cutting up food and was resistant to rust and corrosion. This allows it to meet just about any of your food chopping needs. It doesn’t matter if you are chopping vegetables such as onions or carrots, spices or herbs such as ginger or cilantro, or even cooked meat and nuts.

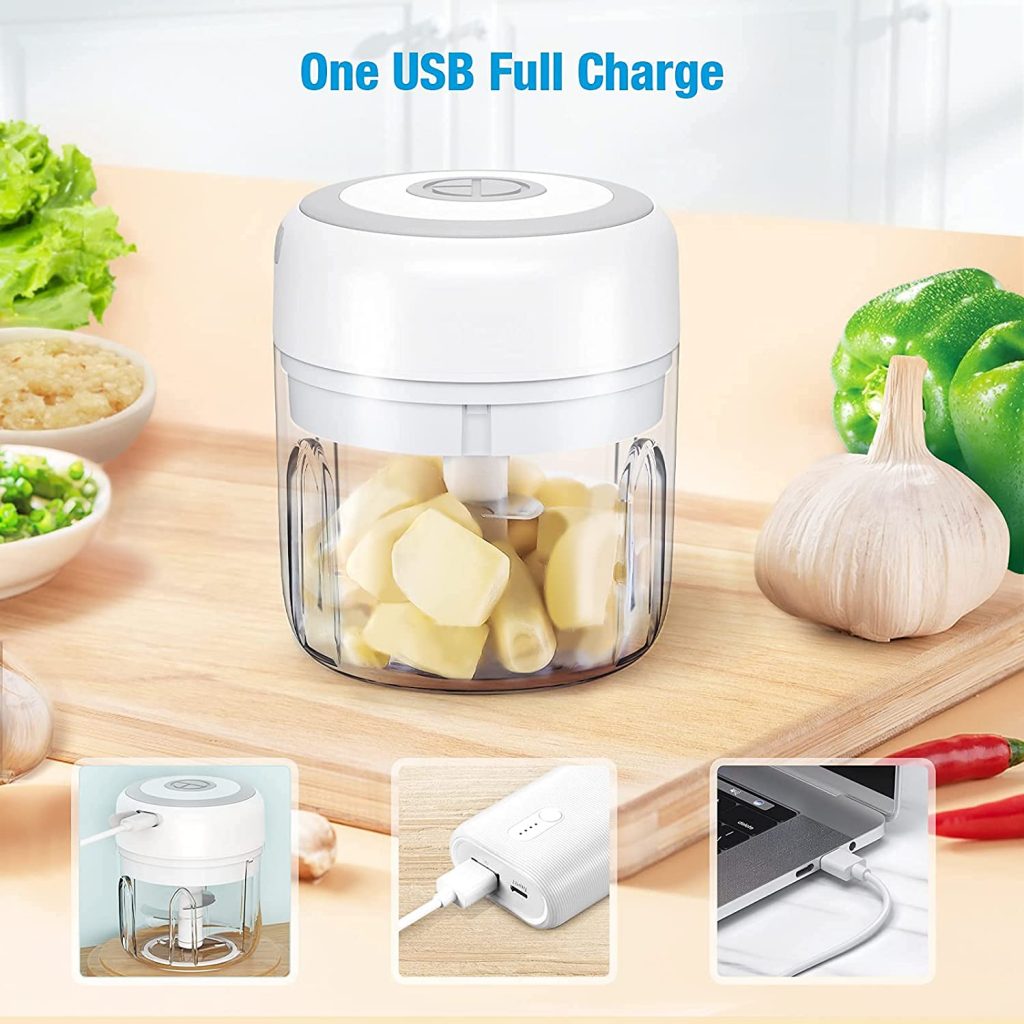
I was also pretty impressed that the wireless chopper wasn’t tied to the counter the way that many other food choppers are. The majority of food choppers have to stay plugged into a wall outlet, so they’re stuck sitting on the counter. That isn’t the case with this one, however. It has a USB charger that allows it to be charged so that it can be used just about anywhere. It can be used on your kitchen counter or taken to a campsite. How many food choppers can do that?

Of course, ease-of-use is also another important consideration that we think everyone needs to consider. If a food chopper isn’t easy to use, then you’re not going to want to use it and it will end up sitting in a drawer or cabinet. It’s as simple as that. Fortunately, this chopper is pretty easy to use and can be operated with just the push of a button. It doesn’t get much easier than that.

Which Food Chopper To Buy

Regardless of what food chopper you choose, however, you need to make sure that it meets a few basic criteria. I’ve already mentioned that it’s important for a food chopper to have a large enough capacity to meet your needs and for it to be made out of quality BPA-free components. I also talked about how the blades should be made out of stainless steel so that it holds up to frequent use. So what’s left to talk about? There’s only one thing left, and that’s what you personally need.

It’s important for you to choose a food chopper that fits your individual needs. And that’s going to require that you take a personal inventory of the features that you might need. You’re going to have to consider if the chopper is the right size for your cooking needs and if it has the features that you need. If you find a food chopper that can satisfy that one simple thing, then you’re sure to find the one that works the best for you. And trust me when I tell you that a food chopper is one of the most important tools that you’re going to use in your kitchen.

Launching a Pop-Up Restaurant: Practical Tips for Enterprising Foodies

Pop-up restaurants can be a great way for restaurant owners to showcase their brand in different markets and see if there is a real demand there. They can also be a great tool for new chefs who want to test the waters and see if they have what it takes to run a restaurant. While running a pop-up restaurant is less costly than running a real one, you still have to be careful. Being prepared will allow you to reach your objectives without wasting too much money in the process. Let’s take a look at a few practical tips for launching your pop-up restaurant.

Look at Your Objectives

You first have to assess your goals for your pop-up restaurant as it will affect your strategy. It will affect things such as how extensive a menu you should be serving and how long it will remain open. If you want to test a market, for instance, you may want to stay there for a few weeks so you can see if your restaurant can build traction. But, if it’s for a charity, you can have it up only for a few days. You won’t need to have as extensive of a menu either.

Find a Location

Any location that has the installations for cooking and meets safety standards can be used for a pop-up restaurant. But, in most cases, it’s usually better to go for an existing kitchen space. You may have trouble finding a regular space where you’ll be able to build a dining area that will have the electric and plumbing setup to operate a commercial kitchen. Checking lists of interesting locations I found these restaurants in Birmingham, for example.

Renting a food truck is another option you can pick. This could allow you to save money and have a nice little space that won’t require much maintenance. The only issue is that you might be limited in your choices and won’t be able to have an inside dining room. But this can be fixed by setting up an outside dining area with patio chairs, tables, and tents.

Build Your Menu

If you already own a restaurant and your goal is to showcase your brand, you should consider limiting your menu to a few items. Concentrate on the items that you do the best and sell the most. You won’t have to worry about wasting inventory, increasing the chance that people are satisfied with what you serve them.

Look into the Logistics

You might also want to revise your processes if you want to run the pop-up restaurant as efficiently as possible. You can decide to par-bake some of the items or prepare some dishes in advance. Or you could prepare the food at your main location and use eating stations and cabinets to keep them warm. There are some cases where there will be little noticeable difference in quality and your logistics will be greatly facilitated.

Get Insurance

You will need to look into restaurant insurance before you launch your pop-up restaurant. You could get into an accident while delivering items and equipment to the location, or you might end up causing significant damage there. If you decide to hire workers for that day only and they get injured, you need to be covered as well. There’s also the chance that one of your patrons gets injured or that one of your employees causes damage to their property. This is also a case where you’ll need coverage.

Start Advertising it

You will now have to build hype around your pop-up restaurant. One of the best ways to do this is through social media. If you have a solid Facebook following, this is a great place to start advertising your pop-up restaurant. You can also set up a temporary website for your pop-up restaurant using a platform like Wix or Yola. If you have a loyalty program and newsletter, blast messages to your subscribers and try to give them an incentive to come, like free items, for instance. You should also encourage them to spread the word about the restaurant to people they know.

If you follow these few simple tips, you’ll have a much greater chance of success with your pop-up restaurant. Take your time, choose the right spot, and have clearly defined objectives from the get-go.

Espresso with Lemon

0

Coffee with lemon is a very interesting and refreshing drink that is easy to prepare at home. Start with an espresso or Americano, and then add a slice of lemon, lemon juice, or zest. Serve it hot or as a summer cocktail with ice. There are a lot of recipe options.

History of coffee with lemon

Some historians believe that Romano coffee began immediately after the Second World War. Italian enterprises lay in ruins, crowds of refugees flocked to Rome. Due to interruptions in water supply and the inability to clean it qualitatively, epidemics could start in the city at any time.

Lemon juice, rich in vitamin C, was the only available preventive remedy. It was added to the first dishes, to drinking water, and, of course, to the espresso coffee adored by Italians. Later, when the country recovered a little from the war, the inhabitants of Rome remained in the habit of coffee with lemon. The drink was named Caffe Romano (espresso Romano, Roman coffee, Roman coffee).

Nowadays, this drink is not very popular in Italy, many Italians claim that it has never been prepared in their families and that it is not included in the standard café menu. Rather, it was popularized by the Americans in the format of “American Italian” cuisine.

Lemon helps to smooth out the taste of poorly fried or badly overcooked grains, which was once important for inexpensive fast food. Since then, roasting technologies have significantly stepped forward, but the drink has already become well-known and popular.

Various Names of the Drink

Most often, this drink is called “Espresso Romano” (Roman coffee) or “Sicilian Coffee.” However, in general, these are two different cooking options. In Espresso Romano, a slice of citrus is put directly into a cup of espresso. The “Sicilian Coffee” is topped up with lemon juice and finely grated zest. Sometimes, when serving, a slice of citrus is placed separately, on a saucer.

Espresso Base of Coffee with Lemon

To prepare such a tonic drink is very simple: make coffee according to your favorite recipe and put a slice of lemon in it. Coffee can be any: espresso or Americano, brewed in a Turk, geyser, or filter. Traditionally, this is still espresso. There are many excellent espresso machines for making espresso at home.

Also, there are plenty of large and miniature automatic coffee machines, as this is required by the modern rhythm of life.

The Benefits of Coffee with Lemon

Doctors and scientists have long discovered many useful properties of coffee, as well as lemon juice, and by combining these components in your cup, you strengthen their positive effect on the body. Mostly, however, it concerns improving metabolism and increasing energy levels.

The benefits are as follows:

  • Natural detoxification. The drink helps to remove toxins from the body.
  • Improved digestion. Natural acids in both components break down food and fats better.
  • Improved metabolism. More efficient conversion of food into energy and acceleration of fat burning.
  • Increased energy. It helps to awaken the nervous system in the morning and stimulate the brain.
  • Improvement of intestinal peristalsis. Food is better digested, and fat is not deposited on the intestinal walls.
  • A natural antioxidant. Both components help to reduce the amount of free radicals, improve the condition of the skin.
  • Monitoring the level of stress. The drink calms the nervous system and causes a rush of oxygen to the brain.
  • Improving immunity. Citrus contains a large amount of vitamin C, which helps to increase resistance to diseases.
  • Increased stamina. It helps to move more actively and engage in physical activity more productively.
  • Citric acid somewhat neutralizes the effect of caffeine, while preserving other natural substances contained in coffee beans, which also has a positive effect on health.

The Harm of Coffee with Lemon

Even healthy people should not constantly consume coffee with lemon on an empty stomach, so as not to cause an increase in the concentration of acid.

The best time to drink espresso with lemon is after a meal, as this will help digestion and reduce the risk of food being deposited in fat.

  • For people who have stomach diseases, gastritis or ulcers, it is advisable to abandon citrus.
  • The drink is not recommended for pregnant and lactating women because although it causes cheerfulness, this happens due to the effect on the nervous system, and when the effect subsides, a stronger “rollback” to anxiety and depression is possible due to hormones.
  • For hypertensive patients, or those with other diseases of the cardiovascular system, the drink, on the contrary, is useful because of the reduced caffeine content.

Various Recipes

  • Coffee with lemon can be prepared directly in the coffee maker. To do this, add a little zest to the ground coffee.
  • Classic Espresso Romano. Prepare a single or double espresso, add a slice sprinkled with sugar for a few seconds. Alternatively, you can sprinkle salt on the citrus, if you do not like sweetness.
  • Classic Sicilian Coffee. Cook a double espresso, add half a teaspoon (4–5 drops) of lemon juice, and half a spoonful of finely grated peel.
  • With cinnamon. In addition to citrus, add more spice on the tip of the knife, the taste will reveal new shades. You can also add nutmeg.
  • With milk. Caution: the network sometimes suggests adding a slice of citrus to fresh milk, but the milk will curdle in this case! It is better to make espresso with milk, add ice cream and zest.
  • With ginger. Add a little finely grated ginger directly to the cup. Just a little bit. The dry ginger powder will not work.
  • With cream. Use ready-made whipped cream, or cook them independently, and the zest.
  • With cognac. Add cognac or liqueur to the finished drink to taste.
  • Coffee with lemon liqueur. Add a spoonful of liqueur to espresso, and you can add more to Americano, for taste.

How to Serve

Traditionally, the drink is served in an espresso cup, thick-walled, with a saucer. As with all the rules for serving espresso, it is desirable to warm up the cup first. You can do this by rinsing it with boiling water. You definitely need a saucer and a spoon, with which you can get (or put) a slice or strip of zest. Separately, you should serve sugar. Soft sweets, such as marshmallows or chocolate, go well with such a sour-bitter drink. You can read useful tips on how to keep coffee with lemon hot and enjoy its aroma and taste to the fullest.

Cold Coffee with Lemon

It is a whole separate category of cocktails that are great for hot weather when you want to refresh and cheer up. The main ingredients are still the same, only you add a generous serving of ice cubes to it. But there are nuances. If you add ice, keep in mind that it will dilute the drink. Therefore, brew espresso about twice as strong as usual, or a double portion. You can add citrus in slices and leave it in a glass with ice; it will not be bitter. You can squeeze the juice separately in an espresso. As an additive, fresh mint or the same citrus slices, grated or cut peel are used.

Important: the drink will turn out sour and bitter. If you need sweetness, dissolve sugar or honey directly in hot espresso, and only then pour ice with it. It will be difficult to stir it among the ice cubes.

Calorie Content of Coffee with Lemon

The number of calories in the classic version is very small:

  • In a serving of espresso: 2 kcal;
  • In a lemon: 1.5 kcal in a teaspoon of juice.

That is, if you do not add alcohol, sugar, or honey, whipped cream, it will be a very low-calorie drink. Calories from spices can be ignored.

Conclusion

Thanks to the use of coffee with lemon, digestion improves and metabolic processes accelerate. Vitamin C prevents the formation of a cellulite crust. Espresso Romano is best to drink 30-40 minutes after a meal, before a walk or workout. Enjoy espresso with lemon by various recipes we included in the article!

Pellet Smoker for Turkey

0

A pellet grill is a device that combines all possible modes of cooking products: baking, cooking, frying, smoking, stewing, languishing. The peculiarity of the barbecue is not only in the multi-mode, but the very process of the device is also unusual. Pellet grills operate from the electric grid, while natural wood pellets – pellets serve as fuel. Working from the network makes it possible to control the temperature and cooking mode, and wood pellets will provide a smoky taste and aroma.

Wood pellets are made from various tree species (cherry, apple, mesquite, hickory), which makes it possible to choose the shade of the prepared products. Pellets are 100 % natural fuel and 99% burns during the operation of the grill, so we get a small amount of ash at the output. The consumption of pellets is small: for smoking for an hour, about 1 kg of pellets is needed, for cooking in high heat – 2 kg (4.5 pounds) per hour.

The first pellet grills worked at low temperatures (up to 230 °C / 446 °F), which made them suitable for smoking but unsuitable for cooking steaks on fire. But some manufacturers like Weber decided to turn the idea of pellet barbecues around by introducing models with a temperature range of 90–320°C (194–608°F).

The design of the pellet grill provides a special compartment for wood pellets. In the compartment, there is an auger that sends the pellets to the working area, where the fuel is burned and gives off heat.

Temperature control is carried out remotely. It is enough to install a special application. This option is convenient for long-term smoking: we fill the compartment with full pellets, set the temperature, and continuously smoke for up to 14 hours, looking at the application.

Advantages of pellet smokers:

  • multi-mode
  • temperature control
  • remote control
  • easy cleaning
  • saving fuel consumption

The disadvantages include a relatively high price and the mandatory availability of power supply. Nevertheless, given the capabilities of the equipment and ease of operation, the disadvantages become insignificant.

The pellet smoker is more than the grill for connoisseurs of maximum flavor. Food in the smoker takes longer to cook than on the grill because of the lower smoking temperature. This allows the aroma of the spices and smoke to penetrate the food. Also, it is almost impossible to cook a large bird on a barbecue grill. A smoker is best suited for this. There are a large number of recipes for cooking turkey.

If you’re in doubt about choosing pellets as a fuel for cooking turkey, check out a good comparison review on the subject.

Tips on Choosing a Pellet Smoker for Turkey

There is a great variety of pellet smokers on the market. Let’s take a look at the main features of pellet smokers that will help you in the difficult choice of the ideal smoker for you. The first thing to look at is how big the cooking area should be. The next step is to determine the type of smoker. There are two types, horizontal, very similar to a standard grill, and vertical, or upright, a great option for small backyards or flat balconies. Then, it’s worth deciding whether or not you need a warming shelf. If you intend to cook a lot and for a large group, a warming shelf is necessary for your smoker.

Another important characteristic of your smoker is the capacity of the hopper. The larger the hopper capacity, the longer you will be able to cook. However, the possibility of adding pellets during cooking can solve the problem of a small hopper. Size, weight, and warranty are other important features. Pellet smokers are relatively high-tech. So, it’s worth thinking about non-obvious things like cord length if the model you choose requires a network connection, Wi-Fi support if you choose a model with a programmable schedule option, and an accurate and well-read thermostat.

The most important thing for us when making the list was the cooking area, which determines the amount of food cooked at a time. Equally important to us were the dimensions of the smoker. Then we checked for a grill to heat the food already cooked, this will ensure that all your guests get a hot meal.

Cost of Operation

In the frying mode, at a temperature of 250 °C (482 °F), pellet smokers usually consume about 1.4 kg (3 pounds) of pellets per hour. In the smoking mode, at a temperature of 135 °C (275 °F) – 700 grams (1.5 pounds) of pellets per hour, at a temperature of 80 °C (176 °F) about 400 grams (0.9 pounds).

So, compared to coal kinds of grills, pellet smokers are rather cheap and more expensive compared to gas grills. One of the main advantages of such smokehouses is their unforgettable smell.

Meat, fish, and vegetables cooked in a pellet smokehouse retain their taste for a long time and are remembered by a delicate aroma. In addition, they are very easy to use. You do not need to be constantly around; you can safely leave the turkey to smoke for several hours.

Recipe for Cooking Turkey in a Smoker

If Thanksgiving is approaching, then you will certainly want to try your pellet smoker to cook a turkey.

Turkey is a big bird, and if you don’t call a crowd of guests, then it can be difficult to manage (eat) it in one day. And smoked fish can lie in the refrigerator for a week or two, and it is very good in cold form, even better than in hot. Turkeys are often 8 kg (17.5 pounds) in weight. Below is a recipe for how to smoke such a large bird.

Step 1. Preparation

Cut off the long neck, the fingers of the wings, and the excess skin from under the neck. Put the turkey in a large container so that it completely enters there. Fill the turkey with cold water so that the water completely covers the bird. After that, pull the turkey out of the water and measure the amount of water in the container. You need to know this for a good pickle. Most likely, there will be 15 liters (4 gallons) of water for an 8 kg (17.5-pound) turkey.

Put 750 g (1.65 pounds) of salt and 500 g (1.1 pounds) of sugar in this water, stir. Immerse the turkey in this solution again. Please note: the turkey drowned in freshwater and surfaced in brine. That’s right! Place the container with the turkey floating in the brine in the refrigerator and keep it there for a week. Turn the bird over every day so that the part protruding on the surface of the saltwater is underwater.

Step 2. Smoking

After a week, remove the bird from the brine, wipe it with a towel, and put it on the grill to dry. It will dry out in five hours.

Pour 2/3 of the coals into the starter glass and light them with a crumpled newspaper slipped under the starter and set on fire. When the coals are heated, pour another full glass of coals on the grill for coals in the smokehouse, and pour hot coals on cold coals. In the water bowl, you can pour water or just pour the sand.

Place the turkey on the upper grill of the smokehouse. Close the system with a lid, cover the flaps almost to a minimum. When the temperature has normalized around 70 °C (158°F), throw a few pieces of a branch from a cherry on the coals. Leave the process for 18 hours.

Add coals from time to time. In the first 3–4 hours, you can put a few more cherry chunks. By night, the temperature outside may drop, so you can open a little room. The next morning, your turkey will be completely ready!

Step 3. Enjoy Your Turkey!

The meat thermometer stuck in the turkey breast should show 65–67 °C (149–153 °F). Remove the bird and let it cool down. After an hour, you can enjoy gently elastic, juicy, moderately salty, and magically fragrant meat.

There are so many different brands of pellet smokers on the market. It is not easy to choose the best one for you. Fortunately, here is an article that gives you a complete and comprehensive analysis of the best brands of pellet smokers.

Conclusion

Pellets and devices working on them are far from a fresh revolutionary breakthrough – they have existed for several decades. You can try this device if you follow the following conditions:

  1. If your goal is always to get the most fragrant result
  2. If you have an electrical outlet in the area where you plan to operate the grill.
  3. If the cost falls within your budget.

Pellets are wood, which means that a pellet grill can be considered wood-burning, but since it works from an outlet, it means, to some extent, electric. Very often, pellet smokers can both fry and smoke. When a pellet smoker is brought to the frying state in the same 10–15 minutes as a gas grill, and in the smoking mode, it is ready to work faster than a wood-burning grill and the cost of operation, with all the aroma, is cheaper than operating a coal grill.
Simple Ways To Increase Your Cooking Expertise

0

49% of people say that they would like to be able to cook more challenging recipes, according to the New York Post. The key to cooking bigger and more exciting meals as a home chef is to hone your cooking skills. By following these tips, you’re sure to take your cooking skills up a notch and become the best chef in town.

Practice makes perfect

Just 20% of people cook daily, according to Treehugger. This is not enough to perfect a recipe. To really improve your cooking skills, you need to be cooking from scratch on a daily basis. If you have a disaster with a dish, don’t give up. One-third of people say they feel judged in the kitchen. But rather than letting a cooking-mishap throw you, learn from it. Where did it go wrong? How could you improve things next time? What could you add or remove from the recipe to improve it? You may need to cook the recipe 10 times until it’s flawless, but it will make you a better cook to do so.

The right tools for the job

To become a true cooking connoisseur, you’ll need to have the right tools for the job. Some kitchen equipment doesn’t last very long at all. For example, pots and pans have a maximum life of 5 years and can spoil food if used when they’re past their best. Instead, ensure you have the best equipment for preparing food. You’ll need equipment such as a slicer so that food items are sliced evenly and neatly, and a pasta maker so that you can make fresh pasta rather than relying on dried goods. Also, consider buying a mincer which minces meat quickly and smoothly for the best quality home-made burgers.

Get your hands on the finest ingredients

The best chefs only use the finest ingredients, which is why you should too. Dry ingredients are handy, but it’s recommended that you use fresh produce wherever possible. Fresh fruits, vegetables, herbs, spices, and similar give a flavor like no other, meaning your dishes will be as tasty and satisfying as possible. For best results, avoid produce which has had pesticides or herbicides used on them as these can be tasted. Instead, opt for organic food items.

It’s easy to take your cooking skills to the next level when you know how. Simple things, such as the right equipment and produce, can make a significant difference to the way your food looks and tastes. In turn, this will make you a more confident and improved home chef.

How To Bring Your Foodie Lifestyle to Off Grid Living

According to the Conservation Institute, over 1.7 billion people are living off grid, or not relying on public utilities like water or electricity. If you’re considering converting to off grid living and leading a more environmentally friendly lifestyle, it’s important to keep in mind that you don’t have to sacrifice good, high quality food along the way. From the benefits of growing your own vegetables to sourcing your own water, here’s what you need to know in regards to successfully maintaining your foodie lifestyle.

Clean water for quality cooking

There’s no doubt that water plays a vital role in cooking high quality food, whether you’re boiling a hearty soup, poaching an egg, or creating a spectacular sauce. However, when living off grid, sourcing your own water might seem like one of the most difficult things to do, though there are a myriad of options to choose from. Well water, for instance, is perhaps one of the most common sources of water for off grid living, though if you’re not near one, it can be expensive to install one. On the other hand, natural springs, while not common, are another great solution for fresh water. If these aren’t available to you, buying your water and transporting it to where you’re living is yet another accessible option, as it can be purchased in a large tank (thus making it more convenient if all else fails).

The benefits of growing your own food

Growing your own fruits and vegetables is another great perk of living off grid, and presents numerous benefits of its own that contribute to both an eco friendly and healthy lifestyle. In this way, not only will you know exactly where your produce comes from, but you can ensure you’ll be getting the freshest produce possible that you’ll need for even the most complex dishes. Another benefit is that home grown produce also tends to be more healthy due to it containing more nutrients. This is primarily due to the fact that the majority of produce that is sold in grocery stores has to go through a long process of harvesting, shipping, and distribution, where it then sits in storage or on the shelves – thus causing it to lose nutritional value over time.

The equipment you’ll need

While you obviously won’t have access to a five star kitchen, living off grid can present the unique opportunity to use other styles of cooking that can produce just as good of a result. For example, learning to cook on an open fire can present a learning curve (which is why it’s important to get some practice in before making a full meal), though you’ll learn valuable insights along the way – such as how it’s better to cook over glowing coals rather than actual flames, since the heat will be more stable. Other off grid cooking methods involve the use of a BBQ grill, a wood burning stove, or even a solar oven, each that come with their own learning curve and ability to suit a myriad of different gourmet dishes.

Although continuing a foodie lifestyle while transitioning to off grid living can seem like a lost cause, there are actually a number of ways that you can create healthy, gourmet dishes. From sourcing your own water to growing your own food and investing in the right equipment to cook with, you’re sure to learn a great deal about the art of cooking off grid.

Tips for Designing an Eco-Friendly Kitchen

Sustainability is a buzzword among consumers across the globe, reports IBM. Consumers “increasingly embrace social causes and seek products and brands that align with their values.” The affinity for eco-friendly products is far-reaching. Not only does it cover kitchen and home design, but also food products, fashion, and other realms. If you are currently renovating your kitchen, how can you ensure it reflects the value of sustainability in your life?

Building Your Kitchen in Eco-Friendly Materials

For everything from flooring to splashbacks, you can make ‘green’ choices while also following the latest design trends. For your flooring, consider the following materials:

  • Forest Stewardship Council-approved wooden floors (which guarantee that the wood is harvested sustainably)
  • Salvaged wood floors (obtained from old homes or buildings)
  • Linoleum made from natural materials (including linseed oil, which boasts anti-microbial properties)
  • Cork, rubber, and concrete are also considered environmentally friendly.

When choosing materials for central islands and countertops, support brands that use renewable energy and recycled materials to manufacture their collections or choose inherently sustainable materials such as bamboo. For splashbacks, materials such as cork, recycled clay tile, or reclaimed wood tiles may do the trick.

Saving Energy in the Kitchen

The kitchen is one of the home’s most energy-consuming spaces. Appliances such as dishwashers, ovens, hobs, hoods, microwaves, hand blenders, and more consume energy on an almost daily basis. One of the main tenets of green home design is focused on energy savings and the use of renewable energy sources. When purchasing new appliances, watch out for those bearing recognized ratings such as Energy Star and WaterSense.

If you are using cooling in your kitchen during warmer months or heating during the cooler season, make sure your kitchen is well insulated so that air leaks don’t cause you to rely excessively on air conditioning or heating. Keep in mind that the cost to replace your furnace or air conditioner with a more energy-efficient unit will be recouped from the saving in the long term. Consider installing solar panels on your roof to generate the power you need to prepare magnificent meals without worrying about the electricity you are consuming. You can save up to $100 every month on your electricity costs by going solar.

Opting for Eco-Friendly Materials for Smaller Items

When buying items such as kitchen décor, chopping boards, bowl covers and the like, thinking before you shop can help lower your carbon footprint significantly. For instance, instead of using aluminium foil or plastic wrap to cover food before placing it in the fridge, consider reusable bowl covers (made of fabric with elastic edges) by companies like Wegreeco. For wooden items and décor, pick items made of reclaimed wood. Instead of paper towels, choose reusable kitchen towels. The latter can be used to clean up as well as to wrap foods such as bread instead of plastic. Instead of using plastic bags for foods like sandwiches, rely on silicone food bags, which are reusable.

To design an eco-friendly kitchen, plan everything from your flooring to tiny décor details with your carbon footprint in mind. Invest in energy-efficient equipment and, if possible, consider solar panels for your energy needs. Finally, choose materials that are recycled or fast-growing such as recycled wood and bamboo, which look good and sturdy enough to handle even the busiest family of cooks.

The Four Skills Every Home Chef Should Know

When I was first contacted by the “do my assignment” service to research some of the skills that every home cook should have, I didn’t know that I would find the subject so interesting. At first, I thought that the topic would involve telling home cooks what utensils to buy or how to care for their pots and pans. I didn’t know that there are a ton of things that home cooks could do to improve their cooking. I was so fascinated by the topic that I just couldn’t help myself and I had to write a compact version of the article I did so all of my readers could benefit from it.

Now that we know why we’re here, let me give you a few statistics about why this topic is so important. Approximately 36% of all Americans cook their meals daily, but only about 13.7% of those surveyed are doing so out of a strong passion for cooking. Most people are simply trying to make a delicious meal that gives themselves and their families the nutrition they need. As a result, not a lot of people are thinking about how they could improve their cooking. Fortunately for them, I’ve given it a lot of thought, and that’s why I’ve decided to write an article on some of the things that home cooks need to learn to improve their cooking.

Learn How To Save Your Bones For Broth

One of the first things that all home cooks should start doing immediately is saving their bones to make bone broth. Most people when they prepare meat for their nightly meal simply chuck any bones directly into the trash. They should stop doing that immediately. Instead, they should place the bones in a plastic freezer bag and freeze them. They can then use these bones at a later date to make a bone broth. Making a broth is easy. All you have to do is to rinse the bones, submerge them in a pot of water, add onions and/or herbs, and then boil it for 12-hours. When that’s done, the mixture is strained and the beautiful broth can be saved for up to 10-days to liven up dishes. If you want to keep it longer than that, all you have to do is to freeze it and save it for up to 6-months.

Learn How To Cook Pasta Properly

Learning how to properly make pasta can raise a person’s cooking to the next level. Most home cooks overcook their pasta until it’s a soggy mess, which definitely doesn’t result in delicious meals when tackling new pasta recipes. Properly cooked pasta is “al-dente,” a term that means “to the teeth.” What does that mean? That means that the pasta is soft, but is still firm when bit into. To achieve this pasta state, you should make sure that you bring the water to a boil before introducing the pasta to it. Once it’s boiling, add in some salt, and cook for 10-12 minutes. Be sure to stir the pasta regularly to prevent sticking, and then drain the pasta. That will result in perfect pasta. Of course, since there are different kinds of pasta, all with different cook times, it’s important to learn these cook times and cook your pasta accordingly.

Learn Some Basic Knife Skills

Something else that everyone should learn is some basic knife skills. Properly using your kitchen knives will not only allow you to expand the number of dishes you can make and improve your efficiency but having knife skills will also help keep you safe. Although professional chefs have a wide variety of different knife techniques to use while they cook, you don’t need to learn all of them. You really only need to learn how to slice, how to dice, how to mince, and how to cut. If you want to elevate your knife skills a little bit more, you can also learn how to julienne and chiffonade as well. There are a ton of videos on knife skills available that will teach you the basics in no time flat.

Learn How To Process A Whole Chicken

Learning how to cut up a whole chicken is a skill every home cook should know. Not only is it cheaper to buy a whole chicken than to buy individual chicken pieces, but processing your own can be quite satisfying as well. Besides, once you process your own whole chicken, you’ll have bones that you can use for making tasty, delicious stock.

Are Water Filter Systems Any Good?

We all want clean water, so why do so many people drink the stuff that comes out of the tap without looking at the alternatives? There are so many contaminants in tap water, which is why so many people are asking are water filter systems any good? It’s a valid question, and one we will explore in more detail.

So, What Are The Common Contaminants?

Any communal water source is going to be full of nasties that you will want to remove. The good thing about using a water filter is that they can make water safer by getting rid of, or significantly reduce the level of the likes of chlorine, arsenic, bleach, toxins, lead, pesticides, aluminum, and fluoride among many others.

It is important to find out what level of contaminants there are by using a test kit. However, there are ways to make sure your water is as clean as possible. Enter, a filter system.

So, Are Water Filter Systems Any Good?

The right brand and model is going to work wonders for the cleanliness of the water in a home, but we will get to that. In short, there are many benefits to use a water filter system, including the following:

Quality

We’ve just about covered this, but the overall improvement in quality will ensure that nasties are significantly reduced. This has a positive impact on a family’s health as the body does not have to remove toxins and the likes.

Taste

Ever been to someone’s house and tastes the water that comes from the tap. It’s not always pleasant and some have a distinct metallic taste and smell and can even have a chlorine taste to them.

Health

We touched on this but it deserves its own section. This is because a water filtration system is also good for skin hydration, digestion, absorbing nutrients, and much more. So, the purer the water the better.

Low Maintenance

Most reputable systems don’t require much attention and can be left to providing clean water without the need to do much else. The filters are easy to change and set up is usually convenient.

Saves Money

Anyone who drinks bottled water because they believe it is better for them than tap water might be right in that respect, but the price can be difficult to justify.  So, instead of spending $100’s a year on bottled water, a lot of people make the leap and enjoy the benefits of conveniently clean water.

Reduces Plastic Consumption

This is an environmental benefit, which is more important now than ever. Hundreds of millions of plastic bottles of water are sold every year. Being able to reduce this would have a positive impact on the world, and who doesn’t want to contribute to that and get better water out of it?

Easy To Install

This is where a lot of people are surprised. Reputable filter systems excel in this area. It doesn’t take long to install a water filter system at home, and because of the numerous benefits from one of the best in the business, it is easy to see why it is one of the most popular.

Weight Loss

Not only does consuming water help keep hunger pangs at bay, but it is also vital for hydration and an important part of a healthy lifestyle. The better the quality of water, the more benefit there is to the body.

Reduces Lime Scale

Ever wondered why the kettle keeps looking at the sorry state it does on the inside? This is to do with hard water, so removing it is going to be better for the water that you use to cook and the appliances that come into contact with it.

Food Tastes Better

That’s right, even cooking with filtered water brings out the best in the flavors. Contaminated water contains nasties that will strip the food of its benefits and flavor so to get the maximum taste and health benefits, go for a water filter system.

What Is The Best Type of Water Filter?

For us, the best type is a countertop water filter. These are great because they are convenient, easy to maintain, and do an excellent job of ensuring tap water is clean and healthy. Also, they are some of the most cost-effective solutions to bad tasting and contaminated filled water. For us, the best and most reliable brand is Berkey. It’s very easy to install a Berkey water filter system at home. They come in a variety of sizes for households that will use them more frequently, ensuring clean water is always available. Also, check here to see more information about a gravity water filter.

How Much Does A Water Filter System Cost?

This can vary greatly. For the real thing expect to pay around $300.

When considered the benefits, plus the savings of no more bottled water, these products pay for themselves before too long.