Home Blog Page 27

Family Dinner Ideas That Are Worth It

With these simple family dinner ideas, you’ll be able to please everyone in the house. You’ll be able to choose from a variety of family-friendly recipes, whether you’ve had all day to cook or only a few minutes to spare, night after night.

What is a family meal? That’s a question for each family and each child’s discriminating palate to answer. A sampling of our favorite dinners that are crowd-pleasers, quick to make for at least four people, and provide options for even the pickiest eaters. You can check out the Outback Steakhouse menu with prices for family dinners. This is the place to go if you’re seeking family-friendly recipes that are both quick and tasty.

To begin, here are a few pointers. You intend to cook any fresh vegetable wash and dry it thoroughly the night before. This is a time-saver on weeknights when everyone is rushing around.

Planning your meals only to buy what you need and not having food lying in your house going bad would also be beneficial. Schedule a few meals and consume what’s leftover when you don’t feel like preparing. Cleaning up as you go is the last stage. Clean up a few pots while dinner is roasting in the oven or boiling pasta water.

The following tips and ideas for low-cost and straightforward family dinners can help you get started in the kitchen.

1. Chicken Alfredo Penne

Italian food is the ultimate comfort food. It’s all there: pasta, garlic bread, and tasty sauces. We’ve got just the recipe for you if you’d like to bring some of that warmth into your kitchen. In no time, you’ll be saying “Mangia!” to this quick and easy chicken alfredo penne.

2. Chicken and Veggie Stir-fry

Getting takeout is a delectable treat. Then you can recreate the charm of Chinese takeout in your kitchen with our simple chicken and vegetable stir fry recipe. If you don’t have enough protein or vegetables on hand, feel free to substitute them. Whatever else you put in the dish, the sauce will bring it all together.

3. Honey-Chili Chicken on a Sheet Pan with Veggies

Cooking sheet-pan chicken in the oven is a new level of gourmet cuisine. Sweet bell peppers and rice or bulgur are a delicious accompaniment to this spicy-sweet marinade for roasted chicken thighs. The ideal dinner for the whole family to enjoy in an instant.

4. Lemon garlic parmesan chicken tenders

Lemon garlic-infused baked chicken tenders are crisp on the outside and moist inside. With a golden panko crumb coating, the crunch is irresistible. There’s no flour required!
These chicken tenders are infused with honey mustard, making the perfect finger snack for kids and adults alike. The golden crumb is enticing and eliminates the need for any additional mess or trouble. Looking for a quicker way for this meal idea? Consider making these air fryer chicken tenders.

5. Steak Fajitas on a sheet pan

Despite my passion for them, I rarely cook them at home because they are time-consuming. Thinking about it, there’s always a sense that it’s a lot of work. However, it’s much better if you make it in a sheet pan.

This method of creating fajitas is one of my favorites because everything cooks in the oven simultaneously. This means that you can make a significant amount and avoid standing over the stove for hours cooking all of the ingredients in a pan.

After trying one of these mouthwatering meal suggestions, everyone in the family will be clamoring for more. Do your homework on the ingredients and preparation methods, and have fun!

Tips and Tricks to Make the Perfect Espresso

In this day and age where the hustle culture is prevalent, coffee is consumed more than ever. Understandable, as it does a good job of jumpstarting our day. While many just opt to wait in line in a coffee shop, some people prefer a hands-on approach and make their own cup of joe. And among coffee lovers, espresso is truly one of the all-time favorites. Not only because it makes the coffee taste and feel good, but also because of health benefits.

So, in this article, we will be teaching you how to make that perfect espresso for your mornings. The following will be tips and tricks that you should take note of.

1. Always use freshly roasted beans

In order to make an espresso with great quality, it all starts with a set of freshly roasted beans. Roasted beans are at their peak freshness and flavor at least 2 weeks after their roast date, and you should consider that when picking the beans you like.

Aside from that, since you can make an espresso using different types of beans, you should always choose the right beans that suit your taste.

There are a lot of options that coffee experts consider as the best ones, and heck, there are so many combinations of must-try drinks that coffee aficionados swear to, but at the end of the day, it still depends on your personal preference.

2. Thoroughly clean your portafilter

A portafilter is a tool that you will mainly use when making an espresso. This is why, before using it, it should be well-cleaned. Make sure that there are no leftover grounds as it will totally affect the taste and quality of the next batch of coffee. Aside from that, before refilling, make sure that it’s totally dry so your coffee grounds won’t be over-extracted.

3. Use a scale

You might be used to using a spoon when measuring your coffee, however, it may not produce the best tasting result and can even ruin it. On the other hand, using a scale enables you to have specific measurements for a better coffee yield. As a result, you’ll be able to enjoy a well-balanced and perfect cup of coffee. It does really make a big difference that will definitely improve your overall coffee experience.

4. Only use filtered water

Water is the second most important substance when making an espresso. It’s where the purity of the overall taste of espresso depends. So, when you use tap water, you should expect impurities as tap water contains minerals that will alter the taste and quality of your coffee. This is why opting for filtered water has always been recommended when you want to achieve a perfect shot of espresso.

Final Words

For most people, making a cup of coffee is considered a chore — another painstaking part of every morning routine or cycle. But for coffee enthusiasts, making a perfect tasting espresso is a work of art. It needs effort, love, and passion. They follow certain standards and specific processes to ensure quality. So, if you want to improve your espresso experience, start applying the tips mentioned above and taste the difference.

10 Trendy Ways To Make Your Kitchen Eco-friendly

0

We all are well aware of the situations regarding global warming and climate change. It is evident how scary it is to see our people suffering out of it and to even imagine what cost will be paid by the next generation for our doings. With all this information and awareness, if we cannot change our daily habits then there is very less chance to save the planet. We should start respecting nature by using resources very efficiently and in a proper manner. This initiative can be started by your own kitchen, a place where you spend most of your life.

It doesn’t even demand a huge change or rocket science to implement something as easy as using re-washable clothes instead of paper cloth, or using electricity very wisely, switching off the lights, oven, etc. when not needed. Here are 10 game-changing and trending tips that you can follow to make your kitchen eco-friendly:

Energy Efficient Lighting

Use natural light whenever possible to cut down your electricity bill. You can use LED light bulbs because they cut down electricity up to 50 percent and look very vintage in your kitchen. Also, they’re very affordable in price and easily available. Check Ecoy for amazing kitchen décor ideas.

Kitchen Garden

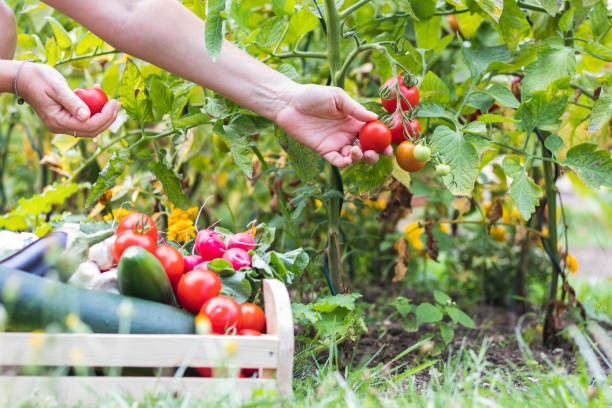
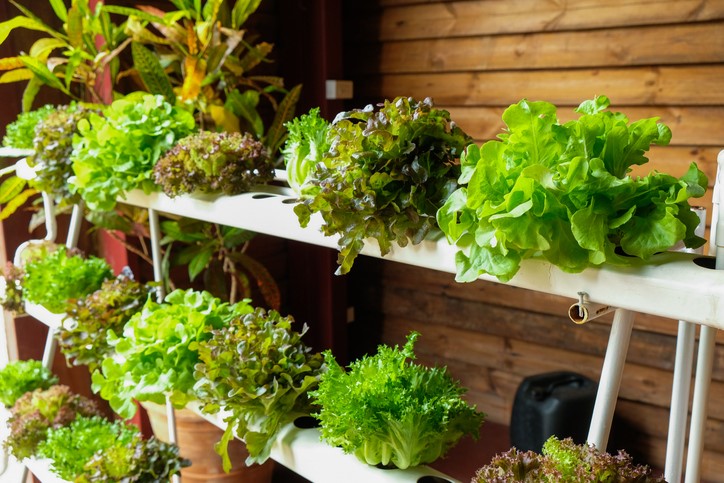
Kitchen gardens are so convenient and handy these days. It saves so much energy and the physical task of purchasing herbs and vegetables from the market. You can grow several types of vegetables really easily like carrots, tomatoes, cucumbers, bell peppers, aloe vera, beetroots, etc. Herbs like parsley, curry leaves, mint, sage, basil, bay leaves, etc. can be grown and conveniently taken care of.

Save Water

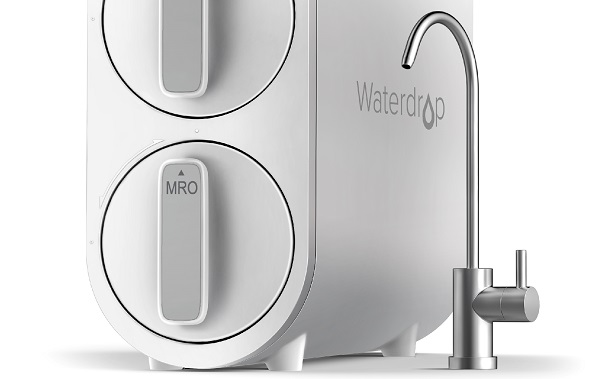
Another way to protect Mother Earth from our almost endless shedding of household waste is to use a tankless RO system. These systems not only help everyone in the household gain access to better water than what comes out of the tap, but it also prevents the secondary pollution that occurs when people have to eventually throw away the tank to their tank reverse osmosis system. Their filters also last longer, so that reduces waste even further.

Buy Second Hand

You don’t have to be less fortunate financially to opt for second-hand items. You can be super rich and still choose second-hand electronics and other products for the greater good of the environment. Blenders, coffee makers, and exhaust fans can be easily taken as second-hand appliances instead of brand new.

Sustainable Installments

If you are not comfortable going for second-hand items, then look for something that is energy efficient in nature. While you are purchasing a refrigerator or deep freezer, always look for electronics that consume low voltage of electricity. They are mostly identified as ‘Energy Star’ where usually electronics with 4 stars and 5 stars is the most energy-efficient.

Take Care of Hygiene

You should always take good care of disposing of all the waste and discard it in one proper area with multiple dustbins installed near your sink and washbasins. When you collect the waste to dump it, half your job is done in terms of keeping the kitchen hygienic. The rest depends on regular cleaning of the kitchen’s cupboards and shelves, drying your pots and lids before storing them, maintaining the freshness, and keeping the re-washable wiping cloths and dishcloths handy when needed.

Eco-friendly Utensils

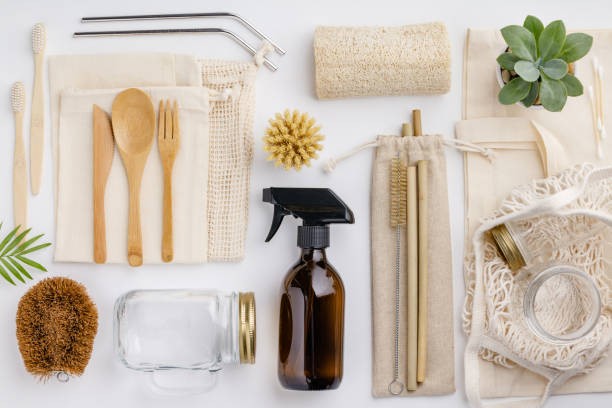
Very fine alternatives are available in the market that not only make your kitchen environmentally friendly but also add beauty to your kitchen. Ceramic crockeries, brass bottles, mason jars, borosil glass bowls, stainless steels, and silicon-based baking trays and molds. All of these are excellent examples of wise and better choices instead of opting for plastic products.

Prevent Food Waste

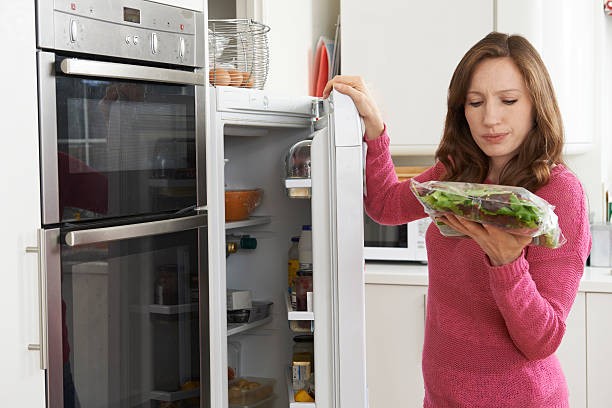
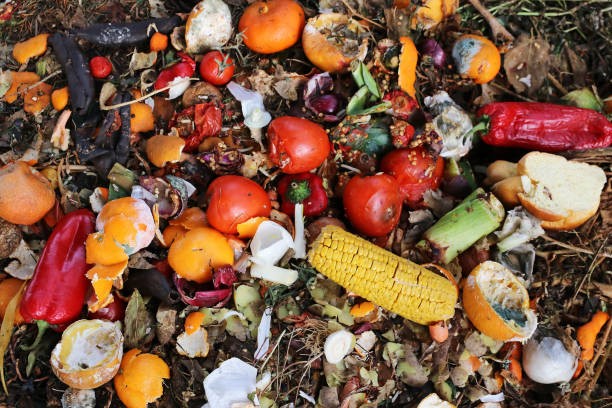
Food waste is the most common and most terrible thing to do. Not just in terms of being eco-friendly but also wasting the blessing when there are people who don’t get to eat a single meal for the day. ‘Food Hugger’ is the answer for your food waste, it can be added to your arsenal and the set comes with five silicone food savers where you can cover half slices of vegetables and fruits without them getting stale and wasted.

Reuse and Recycle

There are plenty of options where you can reuse and recycle kitchen products. You can maintain a different section in your kitchen where you can collect all the recycled goods. You can use reusable sponges for the sink and store your soap in a proper and dry way so that it lasts longer.

Avoid Plastic Bags

Use mason jars and reusable pouches instead of plastic boxes to store, refrigerate or pack the food. Whether you want to soak overnight oats for breakfast or keep candies and chocolates in it. You can also switch to bioplastic bags, silicone molds, and trending ‘seaweed’ plastic as an alternative to plastic bags.

Use of Natural Fabrics

Now the final best decision that you may make for your kitchen is using washable cotton towels and dishcloths. This will cut the usage of paper towels and is ideal to dry pots and pans. It is easily washed with very minimal use of soaps. Many latest studies have proven that alternating ‘bamboo’ with wooden cutting boards is quite a wise choice that people are making. Bamboo is also used for backsplashes and flooring.

Takeaway

It is entirely up to us to bring small changes into the process. We must be able to think like responsible citizens who understand the value of resources and the damage it may cause if any sincere measures will not be taken.

Proper Use of Pressure Cookers and Basic Device Care

0

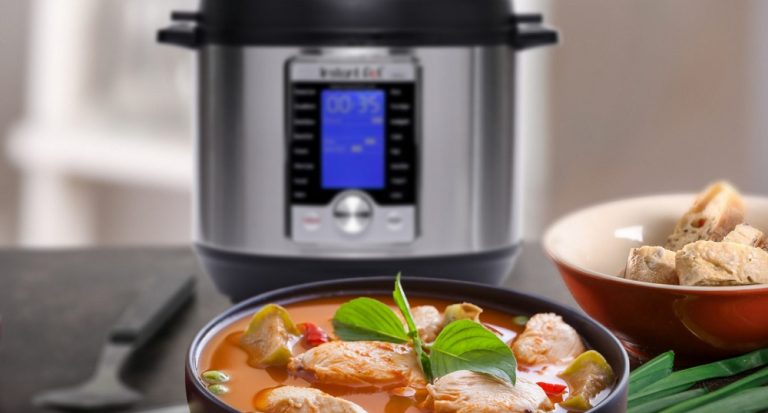
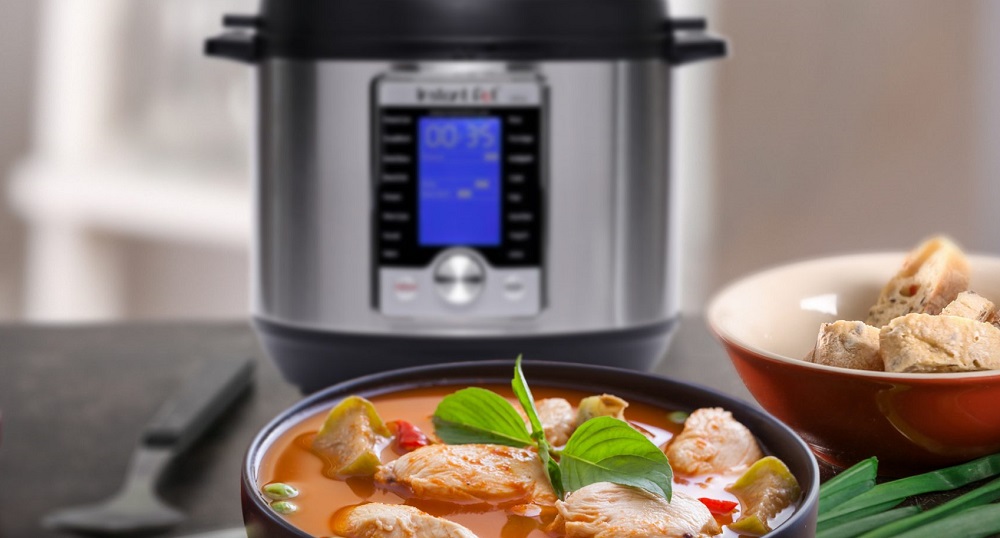
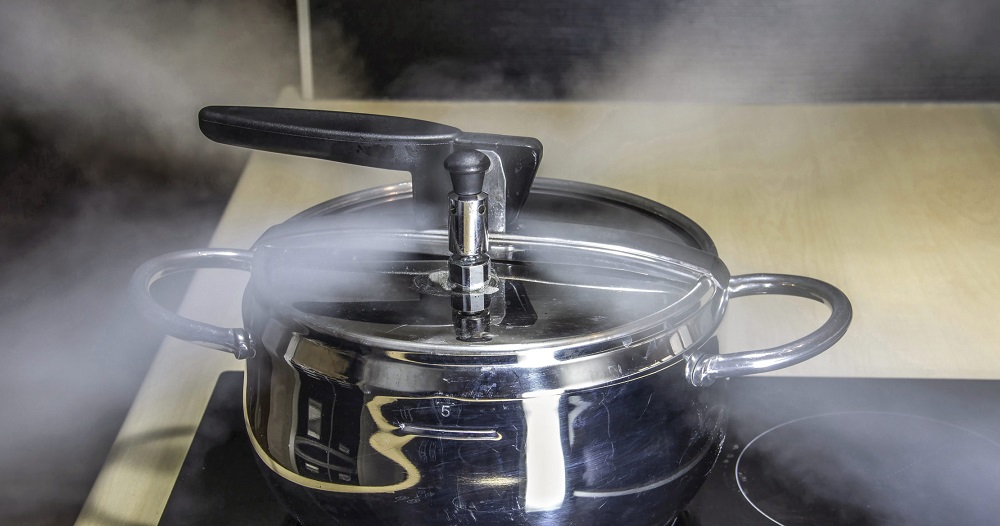
Every single day, pressure cookers make people’s lives easier. Long hours of cooking are no longer necessary because pressure cookers can reduce cooking time by up to 50%. This is because the pressure cooker is designed to trap all steam and prevent evaporation. This causes the pressure inside the chamber to build up and this increases the internal temperature of the contents, making it easier and faster to be cooked.

Using the relationship between pressure and temperature, the method of pressure cooking was invented and is now common knowledge amongst cooks. Furthermore, this method of cooking can keep the nutrients in the food it cooks. It’s no surprise that so many people are addicted to this device.

The designs of the top pressure cooker brands have been proven to last years, with proper handling and care. Their innovations and features that ease the process of cooking are the reason why pressure cookers are really favored amongst household cooks and professional chefs.

Pressure cooker dangers

Some pressure cooker brands, on the other hand, have been reported to overheat and explode. In fact, victims of these brands have been reported to have suffered severe burn injuries. The explosions are sometimes accompanied by broken debris of metal from the pressure cooker and these can cause serious harm by piercing the skin of nearby people.

As a result, many law firms have deemed a number of pressure cooker lawsuits necessary. This action serves to weed out all of the defective and harmful pressure cookers in the market before they spread out and be purchased by unwary consumers. To know more about these lawsuits regarding defective pressure cookers, go to this page.

As with any device, pressure cookers need proper handling to avoid malfunctions and accidents. Using it without proper knowledge will only cause harm to the user.  To avoid this, we’ve prepared some tips on how to properly use a pressure cooker:

Read the instruction manual

When buying new cooking equipment, it is always important to read the instruction manual that usually comes with the product. Even if you have prior knowledge of operating similar cookers, some products may have different configurations, depending on the brand. The instruction manual covers all the necessary precautions and instructions on operating the cooker. This will also include the things you must avoid doing while using the cooker so make sure to read manuals thoroughly.

Check your pressure cooker and cooking equipment

When you have finished going over the instructions manual, it is time to check the equipment. First, examine the pressure cooker for cracks, dents, or any deformities. Make sure that the cover also closes securely and does not detach easily when locked in. Any defects like these can cause accidents while pressure cooking.

Add an appropriate amount of liquid when pressure cooking

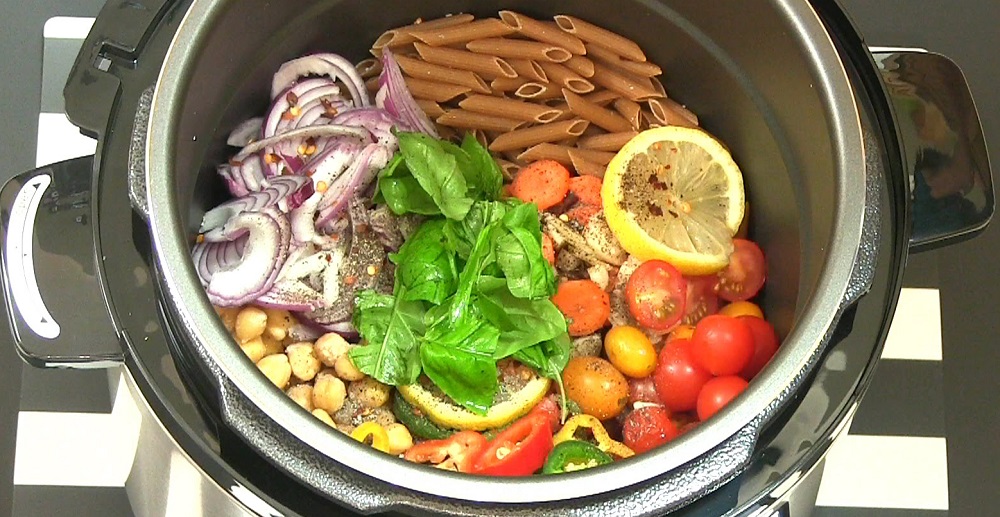
The amount of liquid used in pressure cooking is essential because it can make or break your recipe. Too much liquid will cause the cooker to overflow and too little will not cook the food throughout. The liquid is also responsible for producing the steam that will ensure that the pressure and temperature inside the cooker rises. Fill the pressure cooker up to two-thirds of its height, including the solid food inside.

Do not overfill the pot

Most people make the mistake of overfilling the cooking pot and this causes the cooker to overflow. The result is that sometimes the pressure exceeds the force of the lid and causes the top of the lid to blow off. Sometimes, froth appears on the edges if the food inside overflows and causes leaks around the pot, which makes the pot surface dirty and the cooking surface as well. Make sure not to go beyond the indicated levels in the recipes when pressure cooking.

Use the appropriate heating method

Pressure cookers can be used in different types of cooking ranges, whether induction, electric, or gas. Different types of cooking ranges have their own advantages when pressure cooking. Using gas ranges is the most common and easiest method since controlling the heat is easy using analog controls. Induction and electric stovetops, on the other hand, require mastery since the heat goes up and down in an instant and it may cause overcooking if not controlled correctly.

Learn how to release the pressure correctly

Another method of controlling the internal temperature of the pressure cooker is releasing some of the steam trapped inside the pot. By releasing the steam inside the pot, the pressure inside goes down, thus also lowering the internal temperature. Also known as the “quick-release” method, this method needs to be done using pot holders as the steam coming out of the pot is very hot.

Cooking with a pressure cooker is a fun and easy way to make meal prep times a lot shorter and it gets more flavor out of the ingredients this way. Still, this requires constant practice to master, as with any technique in cooking. With these in mind, here are some of the best tips for improving your cooking expertise. So keep these tips in mind the next time you use a pressure cooker.

3 Valentines Day Dinner Recipes and a Gift Idea

Valentine’s Day, that important day of the year is coming! A day when people recommit themselves to one another and express how much they really care for their significant other. So, it’s only natural to want to do something special. Like cooking your beloved a delicious meal of a full dinner. With that in mind, I’ve rounded up 3 Valentine’s Day recipes you can prepare on this special day.

French Onion Soup

No matter what you serve, French Onion Soup is always a good starter that’s bubbly and delicious.

Ingredients:

  • 4 tablespoons of butter
  • 3 large white onions sliced into crescents
  • 2 tablespoons all-purpose white flour
  • Freshly ground black pepper
  • Kosher or sea salt
  • ½ cup of white wine
  • 4 cups of beef stock
  • 2 cups of chicken stock
  • 8 sprigs of fresh thyme
  • 8 slices of baguette
  • 1 cup of grated Gruyère cheese

Directions:

Step One: Melt butter over medium-high heat and then add onions. Cook until golden brown, all while stirring the onions occasionally. Once the onions are browned, add flour and cook an additional 60-seconds. Sprinkle the onion mixture with salt and pepper before adding the white wine. Allow the mixture to simmer until the white wine has evaporated. Add the beef and chicken stocks, the thyme, and bring the mixture to a boil. Once it’s reached a boil, reduce the heat to medium and gently simmer for approximately 15-minutes. Season to taste with salt and pepper and remove the thyme sprigs.

Step Two: Put your oven’s broiler on high. Place baguettes slices on a baking sheet and top each with two tablespoons of cheese. Place them under the broiler until the cheese is melted. Remove from broiler.

Step Three: Add soup to large mugs or bowls. When that’s done, add a baguette slice on top of it. Now it’s ready to be served.

Lemon Garlic Shrimp

Lemon Garlic Shrimp is a great second course for Valentine’s Day.

Ingredients:

  • 1/3-cup of butter, divided into two parts
  • 4-cloves of minced garlic or 1 tablespoon of granulated garlic
  • 1.75 pounds of shrimp, peeled and de-veined. Tails are left intact.
  • Freshly ground black pepper and Kosher salt
  • Juice from half a lemon
  • 2-tablespoons water
  • Chopped parsley for garnish.

Instructions:

Step One: Melt 2 tablespoons of butter over medium-high heat in a large skillet. Add in the garlic and cook for about 60-seconds or until fragrant. Do not burn the garlic!

Step Two: Fry the shrimp in the butter mixture and add salt and pepper to taste. Cook for approximately 2-minutes on the first side while stirring occasionally. Flip the shrimp and then cook for 2-minutes on the other side. When the shrimp is barely pink, then it’s time to move to step three.

Step Three: Add in the butter, water, and lemon juice. Cook the mixture, all while stirring occasionally until the butter has completely melted and the shrimp is cooked. Do not overcook the shrimp. Add salt and pepper as needed before serving.

Beef Tenderloin With A Mushroom Gravy

Beef Tenderloin served with a sherry mushroom gravy is also a great Valentine’s Day dish.

Ingredients:

  • 2-pound beef tenderloin
  • 2 tablespoons butter
  • 2 chopped shallots
  • 1 pound of sliced mushrooms
  • ½-cup of dry sherry
  • 2 cloves of garlic, minced
  • 1 teaspoon of Kosher or sea salt
  • ½ teaspoon of ground black pepper
  • 2-cups of beef broth
  • 1 tablespoon of all-purpose white flour
  • 1/2-cup of heavy cream
  • Aluminum foil

Instructions:

Step One: Heat your oven to 375-degrees Fahrenheit. While the oven is heating, begin melting 1 tablespoon of butter in a dutch oven over medium heat. Season with ½ teaspoon of salt and ¼ teaspoon of black pepper. Cook the fresh mushrooms in the butter for 4-minutes, stirring occasionally. Now add the shallots and 1/4-cup of sherry. Cook for an additional 4-minutes or until the liquid has been absorbed and the mushrooms are slightly browned.

Step Two: Remove the mixture from the dutch oven into a separate glass bowl and then clean out the dutch oven. In a separate bowl, combine the remainder of the butter, pepper, and salt. Add in the garlic and thyme. Evenly spread this butter mixture over the meat.

Step Three: Heat the dutch oven over high heat. Once it’s hot add the beef tenderloin. Cook each side of the beef, as well as the ends of the beef, for about 2-minutes on each side. When the tenderloin is browned, add in 1-1/2 cups of beef broth, and return the mushrooms and shallots to the dutch oven.

Step Four: Insert a digital in-oven thermometer into the meat, place a lid on the dutch oven, and then place it into the oven. Cook for 30-minutes. For rare beef tenderloin, cook until it reaches 110-degrees. For medium-rare, cook until 120-degrees, and for medium, cook it to 130-degrees. Once done, remove the tenderloin and wrap it in aluminum foil. Set it aside.

Step Five: Heat the pan drippings in the dutch oven over medium heat. Whisk some flour and cream together and then place it into the pan drippings. Add the remaining sherry. Bring the mixture to a steady simmer and reduce for approximately 4-minutes. Salt and pepper to taste.

Step Six: Unwrap the tenderloin, slice it into thick slices and then serve it with the mushroom gravy. Garnish it with any thyme that may be remaining.

And the finale…

Don’t forget to give your significant other something nice to go along with their meal. I came across a gift idea that I thought was pretty neat. That idea is DedicatedStars.com. A place where you can name an actual star after a loved one, have that registered, and a certificate issued so that you can hand it over after that delicious dinner.

Grocery Shopping Bags Can Be Used to Stop Global Warming

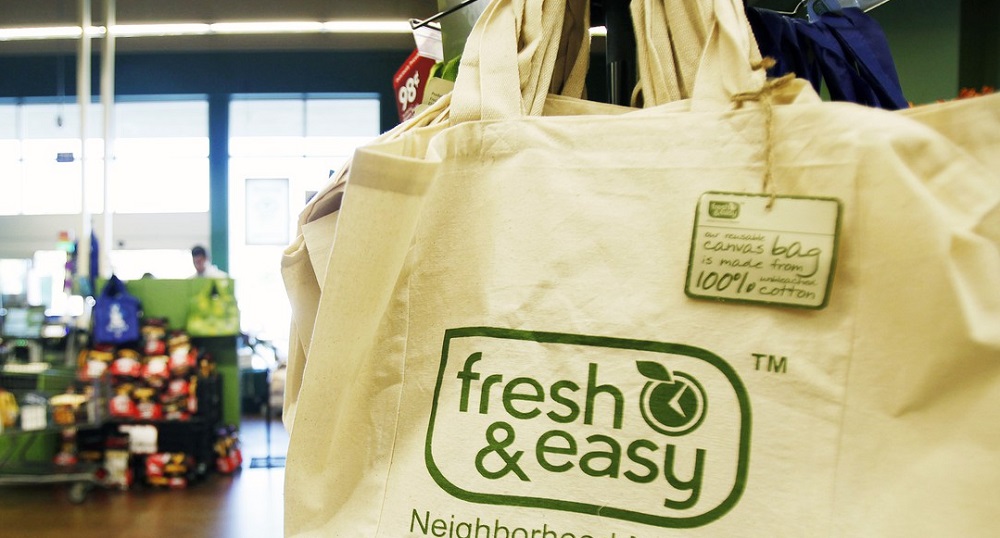
It’s common knowledge that reusable bags which you can use many times over are great for the environment. That’s because they replace single us plastic bags and cut down on the amount you’re using each time you shop. Some examples include ‘bags for life’, printed cotton bags, and robust materials.

The Problem of Single-Use Plastic Bags

There are many global and local problems associated with the use of single-use plastic bags. These include environmental damage, climate change, and pollution caused by manufacturers. Discarded bags and plastic fragments from those degrading also cause damage to wildlife and habitats. Plus, there’s damage to human health caused by the ingestion of chemical compounds found in plastic bags.

There are many reasons why we shouldn’t be using single-use plastic bags given the many ways reusable bags help the environment.

8 Ways Reusable Shopping Bags Help the Environment

It’s very clear that reusable and less damaging shopping bags are the way forward to improve our individual impact on the environment. To reaffirm this, here are the main ways in which reusable shopping bags help the environment.

Protect wildlife

This is obvious since every single-use plastic bag (disposables) which ends up in the ocean or countryside is a danger to wildlife species of those habitats. According to statistics, using reusable bags instead could save the lives of more than a million seabirds and 100,000 marine animals every year.

Cleanliness

Single-use plastic bags are extremely lightweight, so the wind can easily blow them out of bins, landfills, and refuse trucks. Replacing them with reusable bags means we will use less, and our surroundings will gradually become cleaner and far safer for wildlife.

Reduce Our Individual Contributions to Climate Change

Supply and demand are key. The fewer single-use plastic bags that we use (demand), the less companies will supply them. The cut down on manufacturing will in turn cut carbon dioxide emissions. Sometimes it feels like we are unable to do anything to fix such a huge global problem, but every little helps. Small ripples make big waves as they say.

Improve Recycling Rates

Most single-use plastics are not recyclable, unfortunately. In comparison, many reusable bags can be turned into something useful at the end of their lifespan instead of going to landfills.

Save Taxes

Cleaning up plastic litter and sending waste to a landfill is costly. If we use fewer single-use plastic, we can free up funds to be used on other more socially useful initiatives such as healthcare or education.

Less Oil Use

Did you know that plastic bags are made from oil? Choosing not to use them means finite fossil fuels can be left in the ground. Consequently, this reduces carbon emissions but means the valuable, non-renewable resource will last longer.

Better Drainage

Plastic bag litter has clogged drains, leading to major floods. Using fewer single-use plastic bags in the environment means less flooding, less water-borne disease, and better sustainability for vulnerable communities.

Support sustainable jobs and economic growth

Buying reusable bags made from sustainable materials such as cotton, bamboo, or jute can help farmers and textile workers to support themselves and their families. In low developed countries, demand for reusable bags can offer a valuable new revenue stream.

Hydroponic Gardening – Yes, You Can!

0

For most of us, outdoor gardening is just a fond memory until spring. Many of us envy those lucky folks for whom “winter” is the same as a cool, rainy summer’s day. Just because summer’s over doesn’t mean your green thumb has to hibernate, no matter where you live. That said, hydroponics doesn’t have to be just a winter project either. These systems are becoming a way to grow more and better food in less space all year long. To keep growing all year round—think hydroponics!

What Is Hydroponic Gardening?

Simply put, hydroponic gardening is a method of growing plants without soil. It’s an efficient, fast, and proven way to grow big, beautiful plants without the problems soil can bring.

How Does Hydroponics Work?
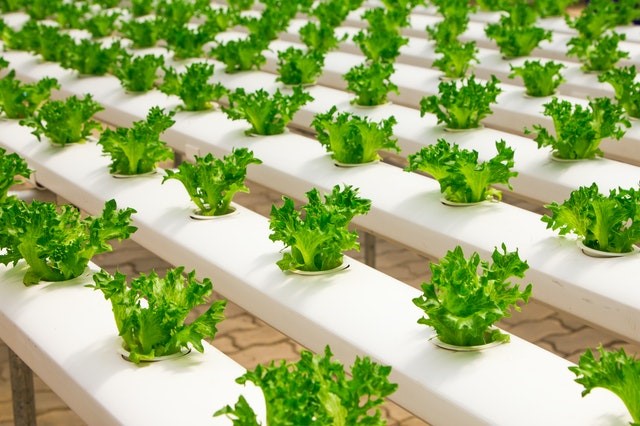
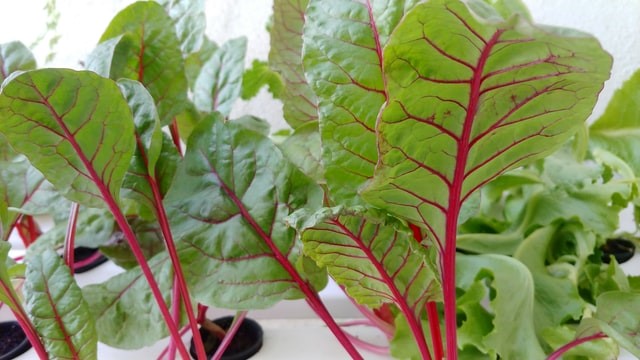
Plants have four basic needs: water, sunlight, nutrients, and carbon dioxide. Normally, nutrients come through soil and fertilizer, making a plant work to get food. In a hydroponic garden, nutrients are dissolved in the water, allowing a plant to absorb more food faster. Light can be provided by a simple “grow light” bulb if you don’t have a convenient, light-filled window. Lastly, soil often contains pests and diseases, ergo—no soil, no bad critters. Mostly.

Hydroponic systems can be as small as a single pot or as large as commercial greenhouses strung in a row. When hydroponics are combined with vertical planting techniques, they can use up to 99% less space. One reason for this is that in a hydroponic system, plant roots don’t have to spread out to find food. It surrounds them in the water they grow in, allowing more plants to grow in a smaller space.

Cost-Saving Benefits

Although you might not think so, a hydroponic system uses far less water than conventional gardening. A plant typically uses about 0.1% of the water its roots take in, and the rest is released back into the air. In a hydroponic system, water released by a plant is recirculated and used again, resulting in substantial water savings.

Because there are no soil pests or diseases, far fewer chemicals are needed. Healthy plants grow faster and produce bigger yields with the plant’s food delivered through the water directly to the root systems. Not only do you get more food, but it’s better tasting and higher in nutrients. Why? Because usually, produce is picked before it’s ripe then treated with ethylene gas as it gets closer to market to artificially ripen it before it hits the store shelves. When you grow your own fruits or vegetables, they ripen on the plant, making for better taste and quality. You know the difference between a vine-ripened strawberry and one from the store – no comparison!

Components of a Hydroponic System
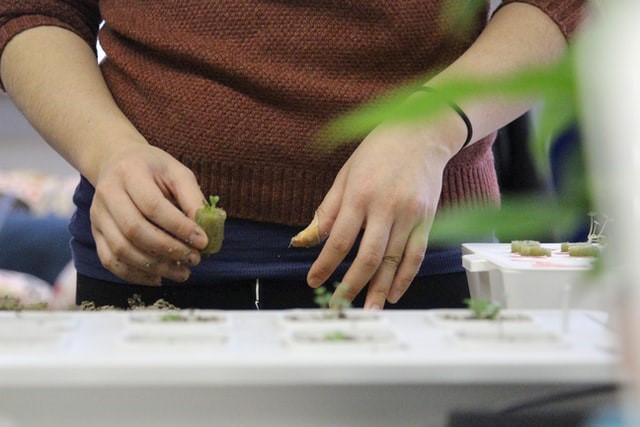
Basically, a hydroponic system needs very few things. A container to hold your plant, food, light, water, and an aquarium air pump if you’re growing directly in water. Containers for use by home gardeners on a countertop can range from a pot to grow a single plant to one large enough to produce a few tomato plants. You can always spread out more by multiplying containers or going vertical—the choice is yours.

An additional word on containers… While you can use clay or plastic pots arranged in a tub to form your system, something called a “net pot” will probably be a better choice. These are really just plastic pots with no bottom and open slats in the sides to allow a plant better access to food and water. They also allow roots to grow freely, making for a happier plant, and we all know what that means… Successfully getting better tasting and healthier fruits and vegetables.

Some systems also use an inert growing media such as coir, vermiculite, or peat moss to support the plant’s weight and anchor the root systems. There are many kinds of inert media to choose from depending on the plants you want to grow and the PH that needs to be maintained. Advice from a garden or hydroponic store will help you make the right choice.

Lighting

And lastly but very much not the least, you’ll need to consider your lighting. Most hydroponic systems will require between 12 to 18 hours of light a day for optimal plant growth. Whether you’re lucky enough to have the most of this in natural light will depend on where you are geographically or if you’re growing in the summer or the winter (or maybe even in your basement). Whatever the case, light is essential, and even if you have good natural light, you might want to consider a backup grow light or two for those cloudy, rainy, or snowy days that come to everyone’s life now and again.

Grow lights are different from regular bulbs only in the spectrum of light they produce. Plants need more of some colors than others, so grow lights often have a pink-y tone. From a simple bulb to put in your lamp to systems in and of themselves, they are readily available and generally easy to install and operate. Timers also help keep things on track to ensure your plants get the light they need, even if you sleep in occasionally or get home late after working a little overtime.

Types of Hydroponic Systems

There are quite a few different kinds of hydroponic systems available to buy or, in some cases, make yourself. Depending on your circumstances, one may work better for you than another, but in the end, they can all provide the same high-quality growing success. Here are the six basic systems, but don’t get fooled into thinking you have to choose one or another. As with anything hydroponic, they can be adjusted, combined, or adapted to your particular needs and circumstances.

Wick systems

Plants are placed in growing media in a tray that sits on top of a reservoir tray containing water and a plant nutrient solution. Wicks (think, rope, string or felt) connect the growing tray to the reservoir tray, and water flows up the wicks to water your plants.

  • Pros: Simple, reliable, non-mechanical
  • Cons: Slow working, can encourage fungus and rot

Nutrient film technique (NFT) systems

This system suspends plants in “channels” over water, and a pump allows that water and food to flow continuously over the bottom of the roots. This provides constant nourishment to the plant while at the same time allowing the upper root to breathe lots of oxygenated air.

  • Pros: cost-effective in reusing water and food
  • Cons: pump or power failure equals dead plants

Ebb and flow systems

These systems work by pumping water and nutrients into your “grow tray” then allowing it to drain back into a reservoir. When wet, plants drink water and food, and when dry, they breathe. Alternating between wet and dry periods promotes rapid, healthy growth.

  • Pros: versatile, suitable for many types of plants
  • Cons: pump failure, mold, rot, root diseases

Drip systems

Drip systems pump aerated water and nutrients through tubing to individual pots where the regulated drip feeds and waters your plants. These systems can be either a “recovery system” (which re-pumps drained off water and food) or “non-recovery systems” (which pumps the drained water to a waste container).

  • Pros: Versatile, supports larger plants
  • Cons: maintenance and system complexity

Aeroponic systems

There is no growing medium and running water – just a fine mist of water and food pumped to plants suspended in towers. The mist drains down the sides of the tower into a reservoir, which then can be re-pumped back onto the plants again. Constant exposure to air, food, and water allow the plant to thrive quickly.

  • Pros: surplus oxygen, high performing, and mobile
  • Cons: expensive, high maintenance

Fresh water or Deep Water Culture (DWC) systems

Maybe the purest form of hydroponics, plants are suspended in net pots over a reservoir of water and food. They absorb nutrients through their submerged roots. A pump oxygenates the water allowing plants to breathe and “eat” constantly.

  • Pros: low maintenance, easy at home set up
  • Cons: limited plant types, temperature control

Easy Hydro Plants for Beginners
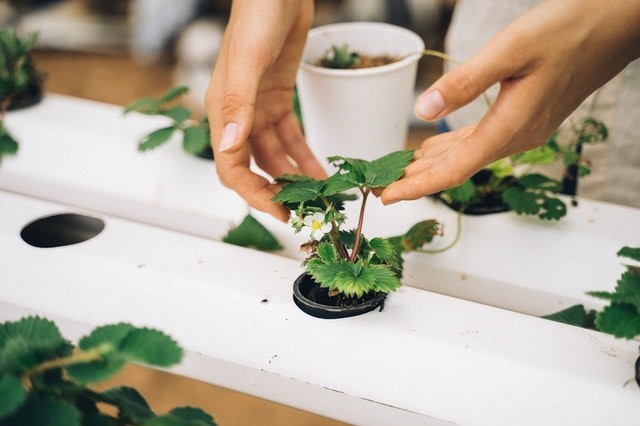
Want to be successful off the hop? Try your first foray into hydroponics by growing lettuce, spinach, strawberries, bell peppers, or herbs. Experienced growers have found these plants thrive in a hydroponic environment. Durable, fast-growing, and easy to start makes them the perfect candidates for your inaugural hydroponic experiment. Tomatoes and cucumbers can also be very successful with the right system but might require a little more attention.

Hydroponic Growing Tips

The key to success is pairing the right system for you with the right plants. It’s tempting to go all out and try for an amazing array of everything but… Starting small and controlled sets you up for success. This, in turn, leads to pride in your new garden and eventually amazing your dinner guests with the freshest food. Probably since their own summer gardens were just a fond memory…

Be realistic—about everything. How much maintenance you want to do is a key factor in the type of system you choose. Remember, you’re not stuck with the system you start with. You can add, adapt, or upgrade as your experience and your demand for the best food both expand.

Stagger your plantings for a constant supply. Some plants start from seed, while some are better started as mini-plants (like strawberries). Monitor and provide 12 to 18 hours of light a day, requiring a grow light in most places. Depending on the plant, you may need to pinch and prune to keep the growth low and send energy to the fruit. Peppers, tomatoes, and cucumbers would benefit from this kind of TLC.

How to Build a Hydroponic System
Anybody with a bit of DIY moxie (or the willingness to learn and try) can build a hydroponic garden. Whether or not you’re a new gardener or an experienced green thumb, the building principles are the same. Research the kind of system you want and plan your growing space. Figure out what you want to grow, where and how you can provide enough light, and determine how and where you’re going to house your system.

After all this thinking, make a list of the materials you’ll need, subtract what you already have, which will equal what you’ll need to buy—don’t forget the plants or seeds! Go slowly and make sure everything is contained, accessible, and to hand. Nothing would be worse than to have plant water leak from your system and ruin something, so choose your containment wisely.

There are so many systems and variations. Your best bet will be the internet, library, or your local garden or hydroponics store to get the specific information you need to get started. The last two are troves of personal information from experienced growers, but if you’d rather wing it, take out a book or find a tutorial online. There may also be a commercial hydroponics operation near you, and these sometimes do tours or have online videos to show off their systems. Whichever option you choose, have fun with it.

Conclusion

Is your mind racing to figure out what kind of system might work for you, how big you could manage and how much better food you could have for cheap, cheap? All those things are not only possible but, in fact, likely if you make an honest assessment of your lifestyle, space, and dedication to learning and experimentation. You may not get perfect results your first time or two, but with a bit of adaptation and willingness to learn, meals at your house will be outstanding!

Originally posted on Porch.com

What Mixes Well With Remy Martin?

0

If you like drinking brandies and cognacs, Remy Martin is a brand that’s definitely not foreign to you. Rémy Martin has become a household name thanks to the brand’s devoted following and soaring sales. The 1724 Remy Martin corporation established the well-known VSOP Cognac, which had its full share of corporatization in the early 1900s. The brandy-like taste of the beverage is easily identifiable. Sweet, spicy, fruity, and bitter flavors mingle in this mouth-watering concoction, making the experience much more worthwhile.

Instead of sipping on the usual gin and tonics or caipirinhas, go beyond booze made from rum, whisky, and gin. Despite its reputation as a high-class drink, bartenders are rediscovering cognac’s versatility as a cocktail foundation. Regardless of your budget, you will surely find Remy Martin prices that fit your wallet. Moreover, they have various cognacs to pick among, so you won’t have to worry about splurging.

Here are a few bartenders’ top Remy Martin Mixes to get you started in the cognac game.

Get the front seat experience with the infamous Sidecar

The Sidecar has a stronger claim to fame than other brandy mixes for drink aficionados because of its delicate sweetness and sharpness. The Sidecar, a twist on a traditional sour cocktail, is a blend of cognac, lime juice, and orange-flavored liqueur. While contemporary mixers may have their ideas about the ideal proportions, the original recipe probably called for an equivalent pour of each of the three components. Relying on Rémy Martin 1738 Cognac elevates the Sidecar to an even higher standard, making it one of the bartenders’ favorite cognac mixes.
French 75 will give you the French “feels”

What’s fascinating about this cognac mix is that experiences still vary on whether the French 75 was originally a cognac or a gin-based cocktail. Different experts have different opinions about this drink since this famous drink has lime juice, sugar syrup, and champagne. Christopher Longoria, the drink manager of San Francisco’s Che Fico, believes in the superiority of the French 75. Despite its unclear history, it is something that will remain iconic and will always be considered an elegant French mix because of its rich and full flavor.

Make it bolder with the Stinger

The Stinger is an excellent choice for an after-dinner cocktail. The Stinger is for you if you want a more robust dessert beverage. It’s prepared only with Rémy Martin VSOP Cognac and a minty white liquor.

According to drink experts, The Stinger is an underappreciated classic to which every drinker should give more attention. With the addition of mint, it’s possible to enjoy the oaky, caramel, vanilla, and fruitcake flavors of cognac with the addition of this cocktail. It’s an underappreciated gem when they work together. Liquor experts believe that the best way to have another drink after this mix is with another Stinger. Since the minty taste in the Stinger is so strong, you’ll be looking for more.

Although Remy Martin cognac can be added to traditional alcoholic drinks, you can also experiment and pour it into other mixed drinks to add new flavors to your old favorites. Considering cognac pairs well with a wide range of tastes, you should not be afraid to try it with various mixers and drinks to discover which ones you fancy the most!

Tips On Packaging Cooked Food

0

When meal prepping for the week, store your food safely so it can be enjoyed at a later date. In addition to making your life easier down the line, pre-prepared food is a much more cost-effective approach.

Whatever the scale of your cooked food that needs storing, get prepared by having some eco-friendly takeaway packaging handy. Once you have suitable containers ready, you can make food preparation easier than ever. Simply grab a box and either heat it up right away or take it on the go for lunch. To help ensure you store your food effectively and hygienically, here is a simple guide to make the process as easy as possible.

Choose Your Containers Wisely

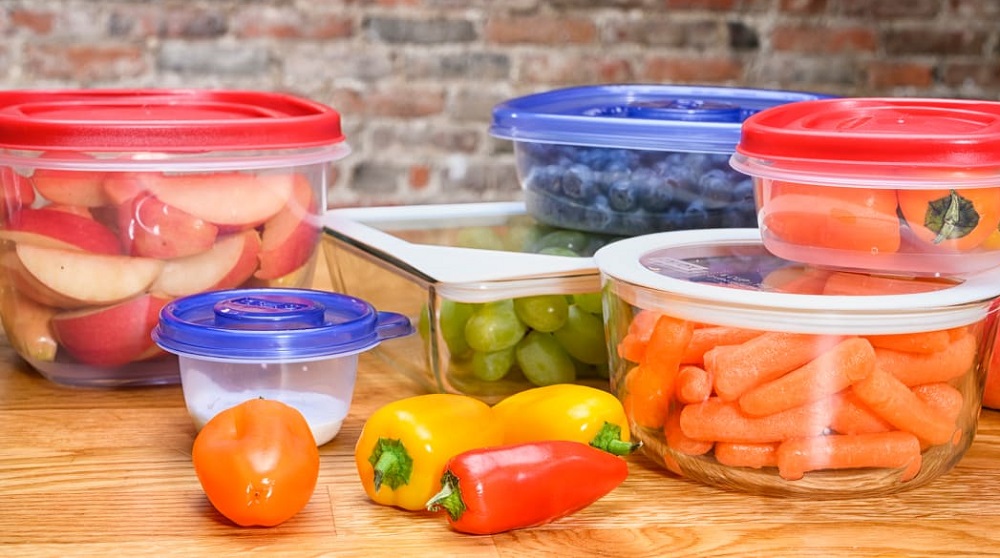
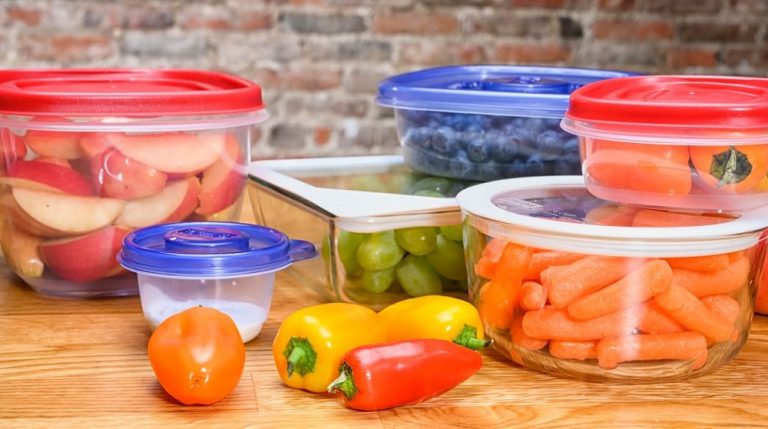
Depending on what type of food you are storing, ensure you pick the right containers for the job. For food that you can heat from frozen, opt for microwavable or oven-proof containers. This saves you from having to transfer the contents over or ruining your packaging.

Let it Cool

Once you’ve finished cooking, wait for the food to cool down to room temperature before you put it into storage. Putting hot goods straight into the fridge or freezer risks spoiling the food. On the other hand, do not leave it standing for over two hours as this runs the risk of bacteria forming.

Serve it Up

It is always worth separating your batch into individual serving sizes before you put it in the freezer. Have each portion stored in an individual container so you can take what you need.

Label Your Food

As you put your food into the fridge or freezer, write a label to go with it. Make it clear what is inside the packaging and note down the date that it was cooked so you can ensure that you do not keep food for longer than you should. Whether you use a professional label printer or stick on some tape, having a written reference will help you maintain an organized and safe set of food.

Vacuum Packing

For those who are producing a high volume of food, switching to vacuum sealing can be a worthwhile decision. Food can be stored in specially designed bags that are sealed to remove any air from the contents and keep the packaging as small as possible. As well as freeing up a lot of additional space, it will keep the quality of food better against a build-up of ice.