It doesn’t matter what type of knife you need to sharpen – a quality sharpening stone is convenient and can be used on just about any blade. The uses don’t stop there so it can be an important tool to have around. The better products are so convenient they can be taken on a camping trip without weighing you down.
However, some are just made to be a bit higher in quality than others which is why it is difficult to know what the best sharpening stones should look like. To help clear a few things up, and make this purchase a simple one, we have created our list of the best available products. Any of these will help you take your blades from dull to as good as new.
List of the Best Sharpening Stones
- Editor’s Choice: Sharp Pebble Premium Whetstone Knife Sharpening Stone (Amazon) – Review
- Best Affordable: Lansky Puck – Dual Grit Multi-Purpose Sharpener (Amazon) – Review
- Best For Versatility: DMT W6EFC Three 6-Inch Diamond Whetstone Models (Amazon) – Review
- Best For Convenience: Dan’s Whetstone Company (Ultra Fine) Pocket Knife Sharpening Stone (Amazon) – Review
- Best With Pouch: Fallkniven CC4 Ceramic Whetstone Sharpener W/Leather Pouch (Amazon) – Review
- Best Tri-Hone: Smith’s TRI-6 Arkansas TRI-HONE Sharpening Stones System (Amazon) – Review
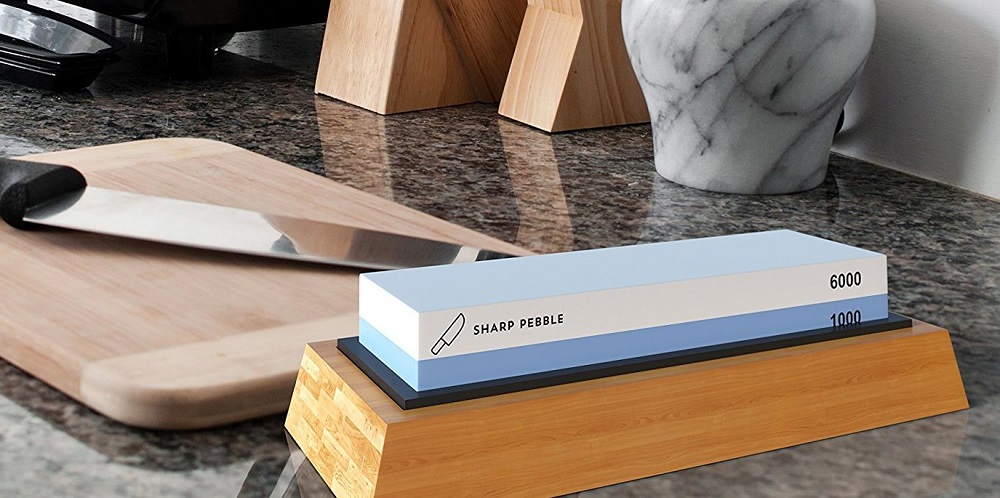
Editor’s Choice: Sharp Pebble Premium Whetstone Knife Sharpening Stone
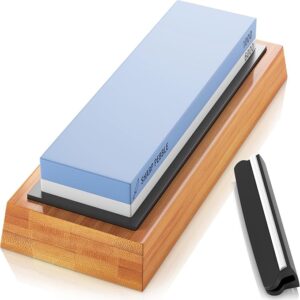
This is not only one of the best sharpening stones available, but it seems to be one of the most popular products around. It is hard to find anyone who has anything bad to say about it which is a testament to the build quality and materials. Not only does it come with a dual-sided whetstone that has different grit ratings of 1,000 and 6,000 to help you to sharpen then polish the blade, but it also has a bamboo base.
This is what helps to keep it in place thanks to the non-slip material. With an angle guide included, it is durable and known for lasting a long time so use it on your hunting knife, pocket knife, cleaver knife, sushi knife, steak knife, and just about any other type of blade.
Best Affordable: Lansky Puck – Dual Grit Multi-Purpose Sharpener
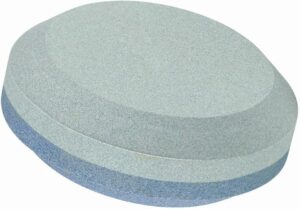
The contoured shape of this puck design sharpening stone makes it easy to get a dull knife back to a former glory and is a favorite of many. It can be used on a variety of blades, even ax’s despite being small in size. This is actually one of the major benefits of using this sharpening stone – it fits into your pocket nicely and is easy to grip in your palm so you can stay safe when using it.
The design is great because it offers both a coarse grit of 120 for sharpening tools and blades, then a medium grot of 280 to polish so you’ll only need this one neat sharpening stone for all your needs. If you had to pick a downside then it would be that it doesn’t come with a base but there is little else to fault here.
Best For Versatility: DMT W6EFC Three 6-Inch Diamond Whetstone Models
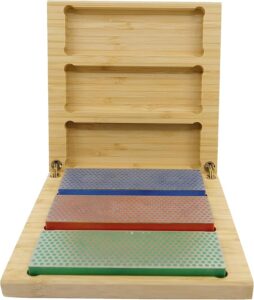
In a way, this neatly packaged product looks so good it would make a great gift but if you need a quality sharpening stone for yourself, then it is worth looking at. There are three different stones included which have their own uses so you can move between the coarse whetstone to restore a dull blade and make it sharper, a fine whetstone to keep the blade extra sharp or the extra-fine whetstone that will help to polish the blade.
The quality is in the mono-crystalline diamond surfaces making them durable so you know they will last a long time. You don’t have to use water to get the benefits and never need to keep oil around and make a mess.
Best For Convenience: Dan’s Whetstone Company (Ultra Fine) Pocket Knife Sharpening Stone
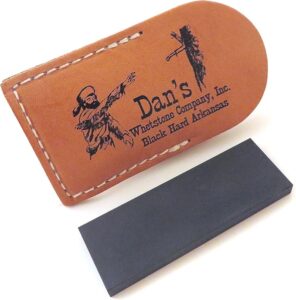
Being able to take your sharpening stone anywhere is a big plus so when you see the quality as well as the convenient size of this ultra-fine product, it’s hard to not be impressed. It is the go-to sharpening stone of many professionals including chefs and woodworkers because of its quality and are quarried in central Arkansas, in the Ouachita Mountains.
With an incredibly hard surface and a grit range of 5,000 – 8,000, it comes with an eye-catching leather pouch that makes it easy to keep in your pocket and prevents any mess. The best way to use them is alongside a honing oil to prevent clogging only using light pressure.
Best With Pouch: Fallkniven CC4 Ceramic Whetstone Sharpener W/Leather Pouch
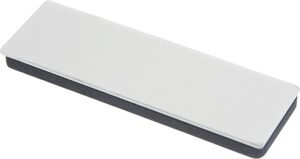
The slick design of this whetstone sharpener is what first catches the eye and the leather pouch only adds to the appeal. Anyone looking for an easy to use sharpening stone will appreciate the fact that you do not need to apply lubrication before using this product.
Made from synthetic materials it has a dual-sided sharpening surface that includes one white side of 2,000 grit ceramic stone that is super fine for a smooth finish after you have sharpened on the darker 1,000 grit side made of synthetic sapphires. Although you don’t need to use oil or water to use this stone sharpener, it is never a bad idea to give them a clean now and then after using this neat whetstone.
Best Tri-Hone: Smith’s TRI-6 Arkansas TRI-HONE Sharpening Stones System
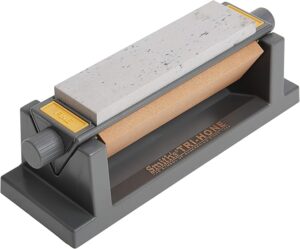
When you need to sharpen different blades you need a variety of stone options and this is exactly what you get with this product. You can choose from any of the rotating sides that range from 400, 600, 1,000 & 1,200 grit and because it comes with a mini bench it is one of the most convenient ways of sharpening a blade.
The non-slip base makes it safe by keeping it sturdy and it is easy to switch between the stones because of the different colors. There is a sharpening angle guide to make sure you get the exact angle you need as well as an oil trough that is built into the device to make sure clean up is as easy as sharpening.
Sharpening Stone Guide
No matter what type of blade you own, there will come a point where you can no longer work with it until you have a sharpening stone. They are simple so you would imagine that it is easy to find a quality product right? Well, this isn’t always the case which is why it is important to make sure you know what to expect from a sharpening stone.
The better products tick certain boxes and to help you make a sensible decision, we have created the following buyer’s guide to keep your mind and your blades sharp.
What To Look For In Sharpening Stones
Natural Materials
These are better wearing and of a higher quality but do come at a price. Most people tend to think it is worth the investment as they allow you to create a sharper edge in your blades. One of the most common and popular natural stones is Arkansas stone. Otherwise known as novaculite it is one of the toughest stones and well suited to particularly dull blades.
Dual Grits
If you don’t buy a sharpening stone with dual grits you might need to buy more than one. This is because the dual sides often come with a low grit level and a high one. These are used to sharpen then polish the blade so having everything you need in one stone is preferrable.
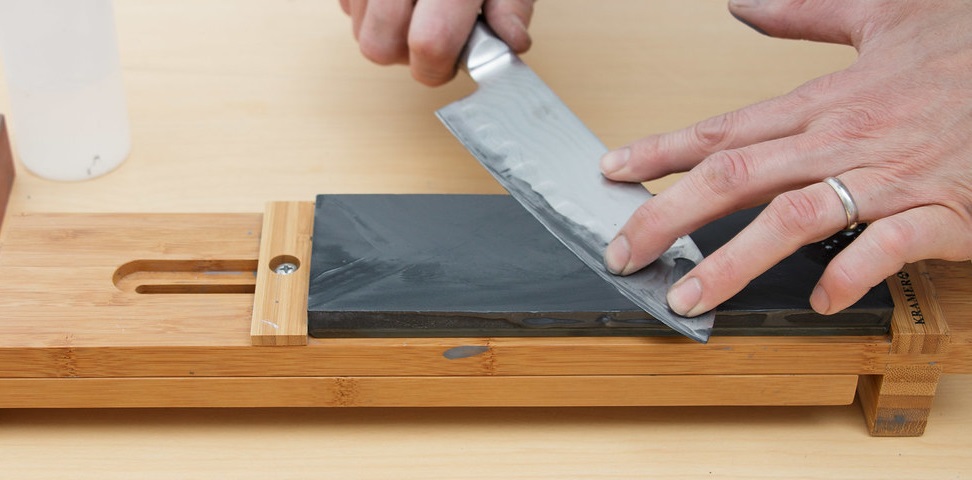
Sturdy Base
Not all sharpening stones come with a sturdy base but it can make sharpening safe and easier for some people. The alternative is to hold the stone in your hand whilst sharpening and although an experienced might use this method, it is not for everyone. A sharpening stone that fits into a non-slip base will help to make the process easier.
Multiple Uses
Because a lot of people want to sharpen multiple knives, the sharpening stone needs to be versatile. There is no point in buying a compact product that can’t be used on your kitchen knives or other blades after you’ve used it to sharpen your pocket knife.
Size
When it comes to a sharpening stone, size matters. You need it to be wide enough to accommodate your blade with ample room. Check the size of the blade you are looking to sharpen or consider the other tools you might want to use it for before purchasing. After you have the right one, use long, slow motions to pass the blade over and let the stone do all the hard work.
Value
The best thing about a sharpening stone is that because they are simple devices, it doesn’t cost a lot of money to get a quality product. However, a sharpening stone is only worth buying if it has the quality to sharpen a blade in just a few strokes, and lasts a long time.
What Grit Is Best For A Sharpening Stone?
This depends on the stage you are at as those who want to sharpen a blunt or dull blade will need to use a coarser stone which means a lower grit. When it comes to polishing, the higher grit levels help you to create the perfect finish. Use a grit level of around 300 – 400 to sharpen and 1,000 and above to polish.
Oil Vs Water
To stop particles from building up on the blade and getting in the way of where the stone needs to sharpen, a lot of people use a lubricant. Various oils are popular and some people even use household items such as baby oil to keep the area clear from debris.
Water is also commonly used and some stones make it a requirement. This means soaking the stone for a while (usually no more than 10 minutes) before using but this variety of sharpening stones tends to wear a lot faster. Still, they will often be cheaper than other types and when looking for a sharpening stone you can use in the field, it is a lot easier to get your hands on some water than oil.
Ceramic Sharpening Stones
These are becoming more and more common in kitchens and other professional places because they are convenient to use. Because they do not require water they are good for those who need to sharpen on the go so a chef can get back to their meal prep with a razor sharp knife.
You’ll find them in a variety of grits and made with aluminum oxide.
Bench Stone Vs Pocket Stone
As you might expect, a bench stone has a larger surface and is better suited to bigger blades. They’re not as convenient as a pocket stone but because of the added weight, they tend to be sturdier.
The benefit of using a pocket stone is that it is easily portable so is great for taking into the field but it is hard to maintain a constant angle compared to a bench stone.
What Is The Best Sharpening Stone For A Beginner?
When it comes to handling knives, a beginner should use a sharpening stone that keeps things simple. This means you will want a stone that is easy to handle and doesn’t require lubrication.
If you have to constantly stay on top of flattening or soaking the stone you might lose patience with it and use it less often than you should. When you know what you are doing, it can be a good time to change to a more advanced stone that requires some maintenance, but it isn’t necessary.
What Is A Whetstone?
Whetstone or water stone is just another name for a sharpening stone. They can sharpen a variety of blades and tools so anything from a pair of scissors to razors can benefit from a whetstone.
Whatever you want to call it, if you have tools and blades that you use often, you can preserve their lifespan by keeping them sharp. With an effective whetstone or sharpening stone, you can keep them in great condition for some time.
If you’re looking for a pocket knife sharpener then check out my reviews and tips on this article.