Millions of people all over the world use a French press to make their coffee. Why do these coffee aficionados do that when there are faster or simpler ways to brew a cup of coffee? It’s because using a French press is one of the best ways to ensure that the maximum amount of richness and flavor is extracted from the coffee grounds. There’s simply no other coffee brewing method that can compete with it. Let’s find out how to find the best coffee for French press and how to prepare that coffee properly to create a great cup of Joe.
List of the Best Coffee for French Press
- Best Overall: French Press Specialty Medium-Roast Coffee (Amazon) – Review
- Best Organic: Cafe Don Pablo Whole Bean Medium-Dark Coffee (Amazon) – Review
- Best Dark Roast: Wild JO Dark French Roast Organic Coffee (Amazon) – Review
- Best Affordable: Chock Full O’ Nuts New York Roast Ground Coffee (Amazon) – Review
Best Overall: French Press Specialty Medium-Roast Coffee
When it comes to coffee for French press brewing, experience matters. Coffee should be the product of years of research and experience so that when the consumer picks up a bag, they know it’s going to be the best coffee available. Fortunately, Primos is a coffee company with that kind of experience.
They’ve been growing and processing high-quality coffee beans since the late 1920s. It’s a medium-roasted product that’s coarsely ground and isn’t bitter like some other types of coffee.
This medium-roasted coffee has a subtle flavor that’s always smooth and has sweet citrus notes in it. It has this flavor profile because it’s grown in the mountains of Nicaragua where it thrives underneath shade trees. At just the right time, the beans are then harvested by hand and are naturally dried and prepared.
It’s then ground to a nice coarse grind. Although we do like our coffees to be a little coarser than what Primo provides, we’re still extremely happy with the end result and feel that this coffee is the best one available for French press brewing methods. This is a 100% Arabica blend of coffee that’s sure to delight anyone who drinks it.
Best Organic: Café Don Pablo Whole Bean Medium-Dark Coffee
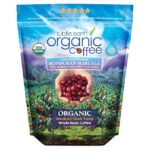
It isn’t always the easiest thing to find organic coffee beans that don’t cost a fortune but still taste great. Some people spend a considerable amount of time trying to find beans that have a low acid level, contain chocolaty notes, and are not only GMO-free but are certified organic by the CCOF as well.
Fortunately, these coffee beans are such a product. They are made using only the best growing practices and these 100% Arabica beans are sourced from the Marcala region on Honduras. And they’re grown and processed without any chemical inputs being used. Only natural fertilizer and vermiculture are used to nourish the product.
Another thing that makes this organic coffee exceptional is that the growers don’t use any insecticide at any time on the coffee plants or their beans. They don’t need to because they’re grown at an elevation where there are very few insects, and the insects that are present can be easily repelled by the farmers planting peppers as a repellant. The result is a coffee that just about everyone will feel good about drinking.
And since it has a nutty dark roast flavor that has notes of honey, cocoa, and caramel, they’ll want to come back and drink it again and again. It has a flavor depth that few other products can compete with and it’s never sour on the stomach.
Best Dark Roast: Wild JO Dark French Roast Organic Coffee
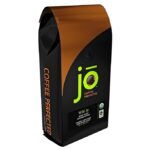
When we first discovered Wild Jo coffee, we weren’t exactly sure what to expect from this product. We expected a strong, intense and flavorful coffee, but we didn’t know how strong or how flavorful it would be until we actually tried it. Once we tried it, it was a pleasant surprise, to say the least.
Although this coffee wasn’t nearly as strong as we thought it would be, it still had a full-body that reminded us with every sip that it was a premium coffee. It’s also a product that was reasonably priced and didn’t cost a fortune. That made it the perfect candidate for any brewing method imaginable, from brewing in a drip coffee maker to using a French press brewing method.
This coffee is made with USDA certified organic coffee beans that are Fair Trade Certified and Kosher Certified as well. It’s a product that sourced from many small coffee growers around the planet and is made with only the best Arabica beans. What’s the flavor of this coffee. It’s a coffee that’s bold and a bit smokey but has just a hint of chocolate in its flavor profile.
This coffee also has touches of brown sugar in it, and it’s a product that’s never acidic and is nice and smooth. Anyone who has been searching for a dark artisan coffee roast might want to think about trying this product in their French Press.
Best Affordable: Chock Full O’ Nuts New York Roast Ground Coffee
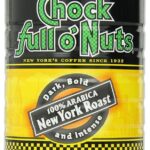
Chock Full O’ Nuts New York Roast is a ground coffee that people either love or hate, but it’s certainly a decent budget coffee. When we reviewed this product, we found it to be a smooth dark roast coffee that had a very low acidity level and was easy on the stomach. This product was also packaged in a steel can instead of a plastic one.
Although this coffee’s flavor is supposed to be bold, we instead found it to be a bit bland. When we say bland, we don’t mean tasteless. We just mean that we thought it could be a bit bolder in its flavor profile. Fortunately, its timid flavor profile also means that it’s not going to disagree with coffee drinkers who might have sensitive stomachs.
However, there is something that we like about this product and that’s the fact that it brews up quite nicely in a French press. We also felt that this product stayed fresh for quite a long time in its can, which was quite surprising considering that pre-ground coffee usually goes stale fairly quickly.
This coffee might not be mistaken for a premium dark roast coffee, but it’s certainly a coffee that will work in a pinch. It’s also a good product for consumers who are looking for a coffee that delivers a good caffeine payload without costing too much.
A Guide To Coffees For French Press Brewing
If we haven’t bored our readers to death with our selections for the best coffees for French roast brewing, we thought that we’d take a few extra moments and do an in-depth dive on the entire subject – choosing the best coffee, making a French press, the shelf life of coffee beans and so on. For anyone wondering what they should look for in their coffee grounds or beans, and anyone who wants to know how to make French press coffee, then this is the guide for them.
How To Choose The Best Coffee For French Press Brewing
First, let’s discuss the beans (or grounds) that make for the best French press coffees. Although many articles like to state that there’s only one type of coffee that’s suitable for use in a French press, we’ve found that there are actually several different types of coffee that can be brewed in this way. Let’s take a quick look at our two favorites and see what qualities these coffees offer to the consumer.
Our first choice for French press brewing is a nice dark roast coffee. One that’s made from Arabica beans sourced from South America. These coffees have a smokey, chocolate, amber flavor to them that’s really satisfying. The second type of coffee that we like are the fruity coffees sourced from Africa. This is especially good when they’re medium-roasted and we feel they translate well during the French press brewing process.
Regardless of which type of coffee is chosen, it’s important to realize that the grind is the most important aspect of any French press coffee. It’s important to choose a coarse ground coffee because that type of coffee will extract the best. While it’s best to always grind your own beans, the next best thing is to choose a coarse-ground coffee.
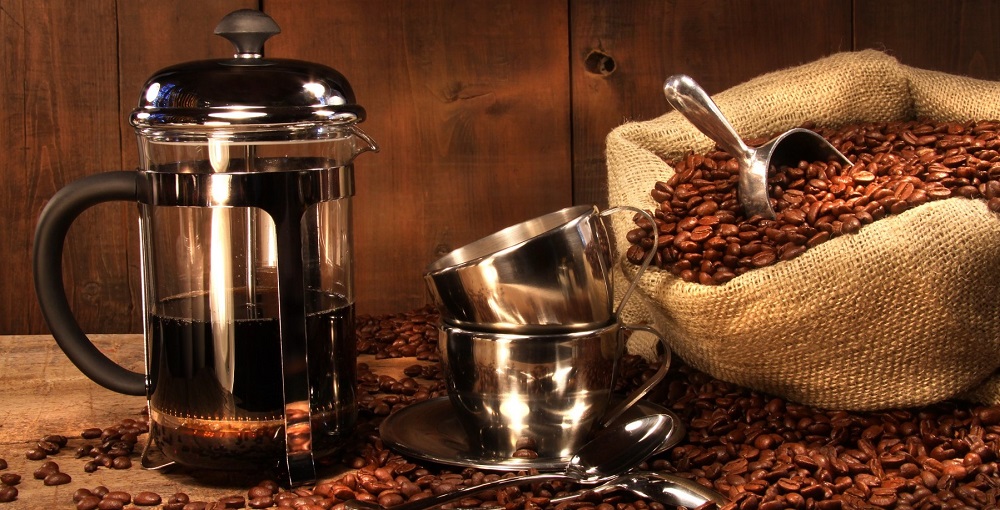
How To Make French Press Coffee
Once the perfect beans (or grounds) are purchased, and all of the necessary French press equipment is collected, it’s time to make that perfect cup of coffee. Few brewing methods are as easy as using a French press, so this section isn’t going to be too extensive. However, you should follow each step carefully to ensure you get the proper extraction for your cup of coffee. This section is also going to assume that you are using coffee beans and not grounds, but the process is pretty much the same so it shouldn’t make too much of a difference.
Equipment Needed:
- 1/2-Cup Of Coffee Beans
- French Press
- 4-Cups Of Filtered Water
- Tea Kettle
- Long Spoon
Grind Your Coffee Beans
Using your favorite burr grinder, grind the beans on the coarsest setting possible. Once the grounds have been coarsely ground, which should only take a few moments, it’s time to move the ground beans to the French press.
Boil The Water
Bring the 4-cups of filtered water to a boil in your favorite tea kettle. Once the water has begun to boil, turn off the kettle or remove it from heat and wait 1 minute. This will ensure that the necessary temperature of 190 to 195 degrees Fahrenheit is reached but no hotter.
Add The Water to the Press
Add the hot water to the French press and stir it with the long spoon. When that’s been done, allow the coffee ground to steep for approximately 4 to 5-minutes. After this steeping period, plunge the press by slowly moving the plunger to the bottom of it. Be sure to serve the coffee immediately for the best results. Moving the coffee to a cup as soon as possible is the best way to ensure that it is fresh and doesn’t get skunky. If the coffee is left too long in the press, then it will overexpress and that’s not good for the body or the flavor of the coffee.
Let’s Sum It All Up
And that’s all there is to buying and brewing the best coffees for French press brewing. If a person has never tried to brew coffee in this way, we think that they’ll be quite surprised at how well it turns out. A properly brewed French press coffee has a subtle flavor that can’t be obtained by any other brewing method. In our opinion, this method of brewing is one of the best ways of brewing coffee and should be tried at least once by anyone who enjoys their morning cup of coffee.