Home Blog Page 92

Dua Gia- Pickled Bean Sprouts

I fell in love with pickled bean sprouts back when I was cooking Korean food- it was these seasoned soybean sprouts that started the love affair.  If you’ve only ever eaten bean sprouts as a crunchy add-in to Asian noodle dishes like Pad Thai, I’d definitely encourage you to try them out in a recipe where they’re front and center.

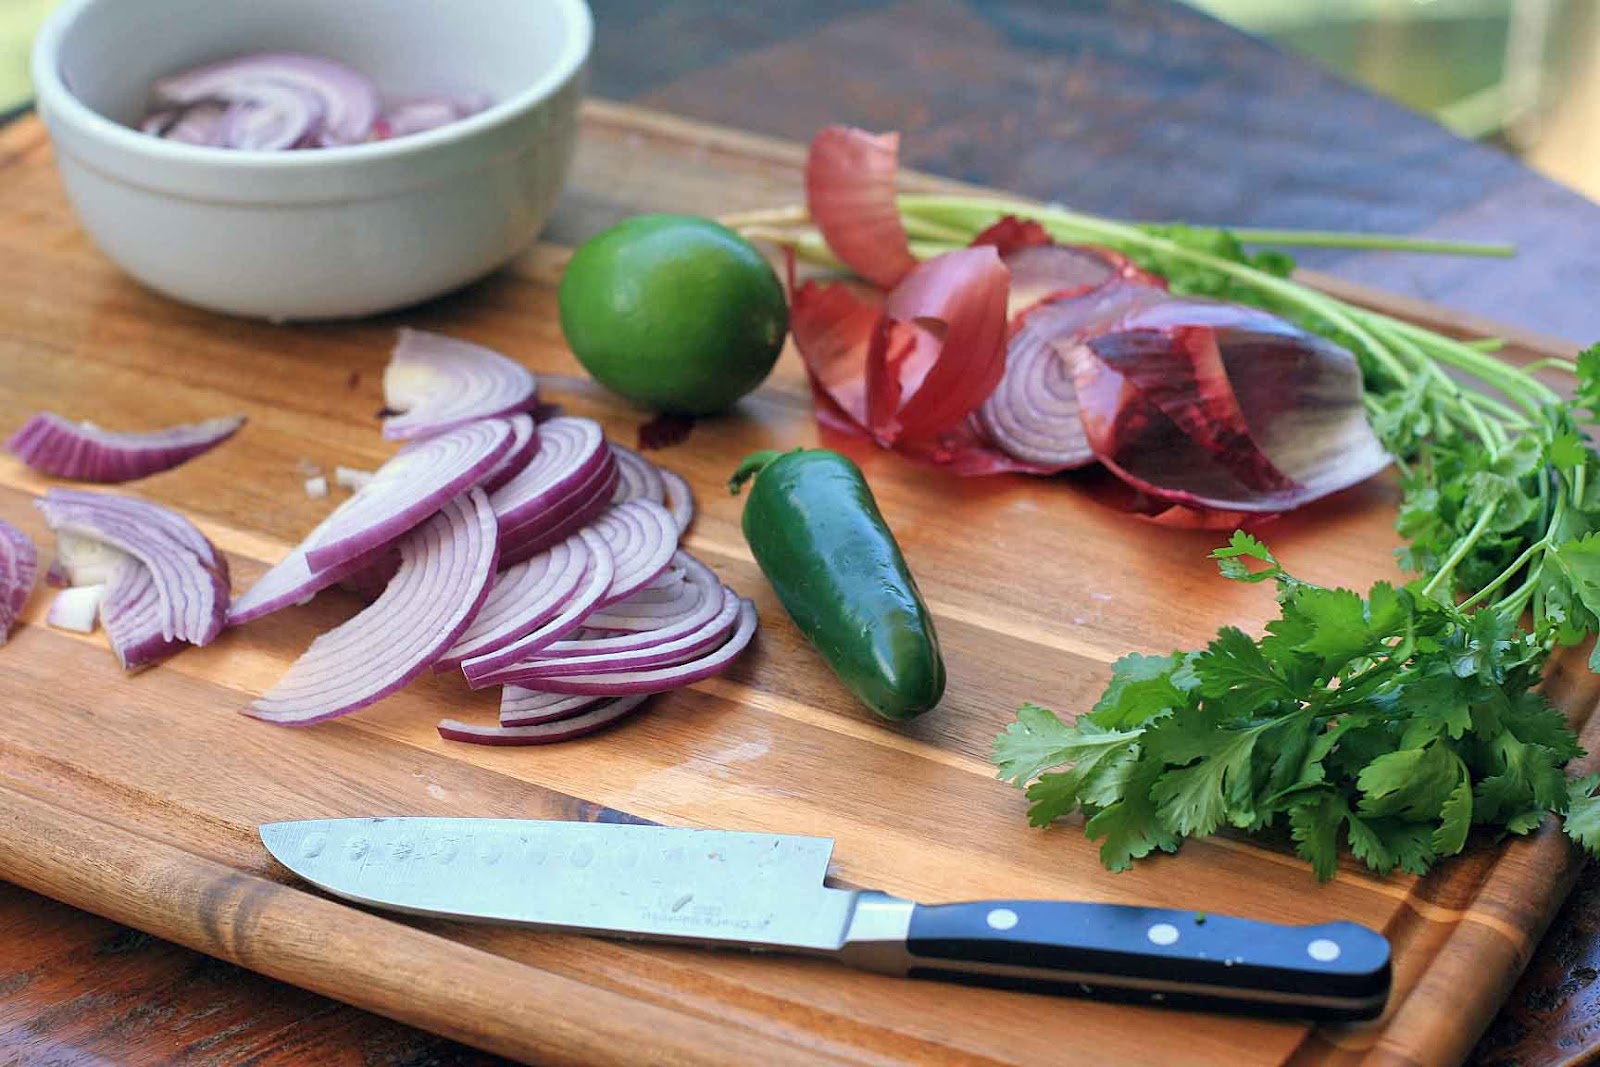
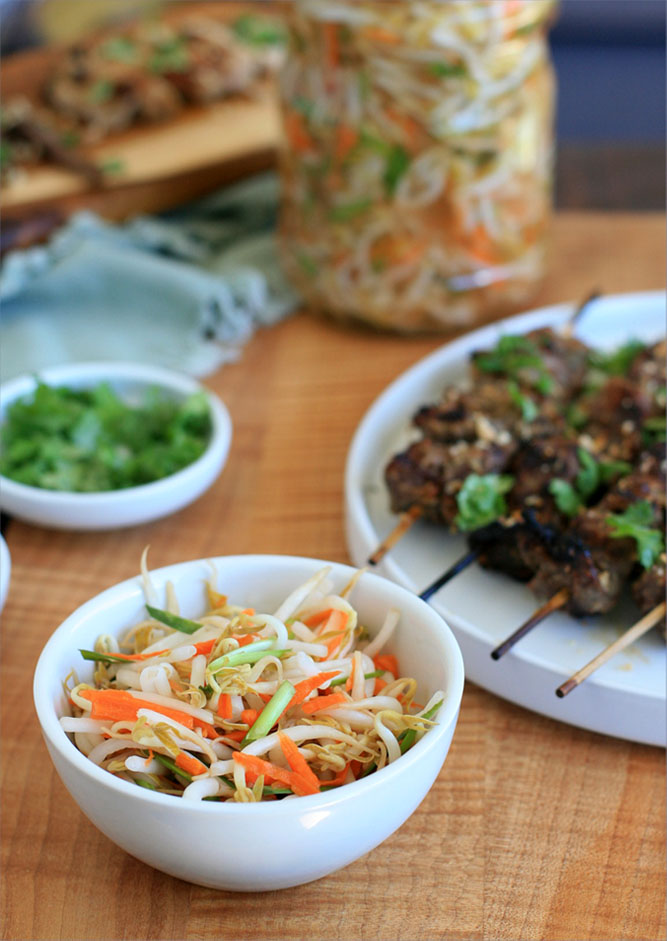
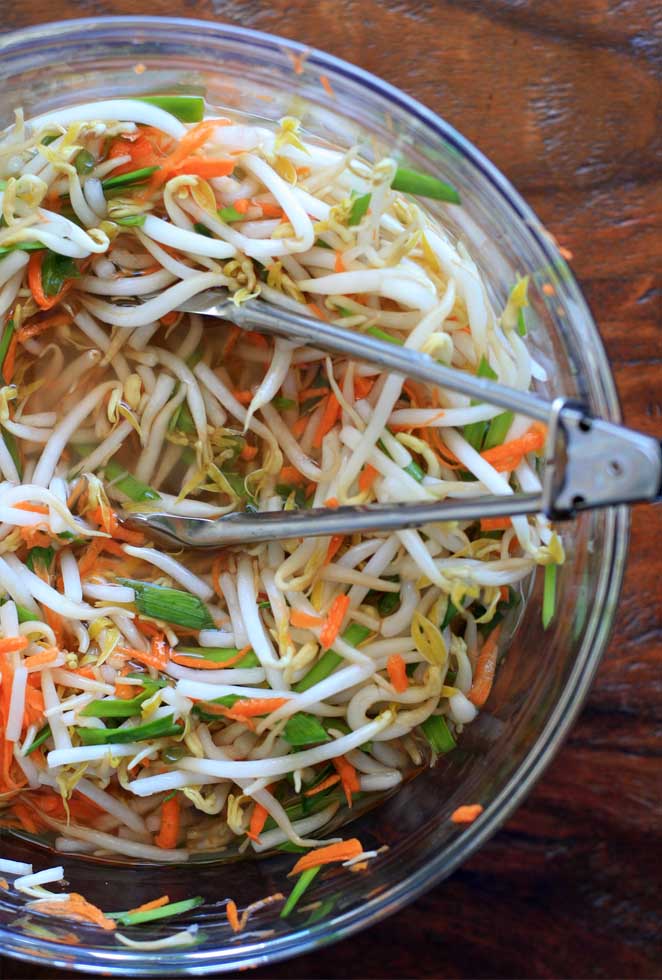
I’m happy to announce that I’ve got another winner for you.  In this Southern Vietnamese dish, bean sprouts (I used mung bean sprouts), carrots and chives are pickled in a sweet and salty brine.  You can eat the sprouts in large quantities like a salad, enjoy them as a side to cut the richness of caramelized meat dishes (like this one and this one), or even toss some into your favorite lettuce wraps or Vietnamese noodles.

Dua Gia- Pickled Mung Bean Sprouts

Yield: 6-8 servings

Prep Time: 15

Cook Time: 5

Total Time: 2 hours

Ingredients:

1/2 cup sugar
1-1/2 teaspoons salt
1 cup white vinegar
1 cup water
1-1/4 pounds bean sprouts, rinsed under cool water
1 carrot, peeled and shredded
small bunch chives or green onions, cut on the diagonal into small pieces

Directions:

Combine the sugar, salt, vinegar and water in a small saucepan over medium heat. Stir to dissolve the salt and sugar. Set aside and let cool completely.

Combine the bean sprouts, carrot and chives or green onion in a large bowl. Pour the brine over the vegetables. Toss and let sit for at least one hour, tossing occasionally. The vegetables will shrink in volume, allowing the brine to cover all of the vegetables.

Serve immediately or cover and refrigerate. To serve use tongs or a slotted spoon to scoop up the bean sprouts from the brine. Enjoy your pickled bean sprouts!

*Will keep for several days in the refrigerator.

Shrimp and Egg Pancakes

If I’m lucky, the cooking I do for Girl Cooks World carries me though most of the week and there’s little or no need to do extra cooking on weeknights.

But there are those inevitable evenings when I come home late from work, shopping or working out and I want something quick but substantial.  A quick egg scramble often comes to the rescue.

But now I have another quick weeknight meal option that’s infinitely more fancy pants: Shrimp and Egg Pancakes from Andrea Nguyen’s Vietnamese cookbook Into the Vietnamese Kitchen.

In this dish, shrimp, eggs and green onions combine to create little pancakes.  The difference between these and your standard fried eggs?  A liberal amount of cooking oil changes the texture, creating crispy, browned edges.

This dish works just as well for dinner as it does for brunch.  I loved them dipped into fish sauce, but those of you who are less enamored with the funky, stinky sauce than I am could use soy sauce, sweet chili sauce or even ketchup spiked with Sriracha.

Shrimp and Egg Pancakes

Yield: 2 as a main dish, 4 as an appetizer

Prep Time: 10

Cook Time: 10

Total Time: 20 minutes

Ingredients:

* 1 pound large shrimp, peeled and deveined
* 1-2 Tablespoons salt
* 4 eggs, beaten
* 3-4 green onions, cut on the diagonal into 1-2 inch pieces
* canola or vegetable oil for frying
* fish sauce, gluten-free soy sauce, sweet chili sauce or Sriracha-spiked ketchup for dipping.

Directions:

Place the shrimp in a colander and toss with salt. Rinse under cold water and let drain. In a large bowl combine the shrimp, eggs, and green onion.

In a large skillet or frying pan heat a thin layer of oil over medium-high heat. Heat until the batter immediately sizzles when dropped into the oil.

Ladle about 2-3 Tablespoons of batter for each pancake, taking care to make sure that each pancake has at least two or three shrimp and some green onion. Do not crowd the pan or the pancakes will overflow into one another.

Fry for about 2 minutes, or until the bottom has browned and the pancakes have set. Carefully flip the pancakes and fry until the second side has browned. Transfer to a plate and repeat with the remaining batter, adding additional oil if necessary.

Serve on a plate with a small bowl of your desired dipping sauce(s).

Pollo con Salsa De Quinua a la Huancina- Peruvian Chicken with Quinoa, Cashew and Goat Cheese Sauce

0

 If there’s one thing I’ve learned from my first week cooking in Peru, it’s that those Peruvians really kill it with their rich and flavorful sauces.  In this dish, sauteed onion, garlic, and yellow pepper paste combine with evaporated milk, crumbled goat cheese, cooked quinoa and roasted cashews to create a creamy, luscious sauce for baked chicken.

It’s another variation of the sauce I used last week for the Ocopa Arequipena.  The lesson here?  I’ll once again quote one of my favorite sayings, “use what you have to make what you want.”  Sub out the cashews and/or goat cheese for whatever nut or fresh, crumbly cheese you’ve already got in your pantry and fridge.  I have a feeling this is one of those instances where it’d be hard to mess things up.

And I’d be remiss not to mention the chicken; it gets a nice bath in a lime, salt and pepper marinade and then baked until just cooked through (and safe!  It’s recommended chicken gets to an internal temperature of 165 degrees).  I’d happily eat this plain or as a filling for tacos.  I find that most people over-bake chicken, which is the reason they end up with chicken breasts that are sad and dried out.

The sauce adds a rich, creaminess and the Salsa Criolla Peruana sprinkled on top adds some spicy heat and acidity.

Pollo con Salsa De Quinua a la Huancina- Peruvian Chicken with Quinoa, Cashew and Goat Cheese Sauce

Yield: 6 servings

Ingredients:

Chicken:
6 small boneless chicken breasts
juice of two limes (about 6 Tablespoons)
1-2 Tablespoons olive oil
salt and pepper

Sauce:
2 Tablespoons olive oil
1 onion, chopped
2 cloves garlic, minced
2-3 Tablespoons mirasol hot yellow pepper paste
15 ounce can evaporated milk
1/2 cup cooked quinoa
1/4 cup dry roasted cashews
2-3 ounces goat cheese (or substitute feta cheese or queso fresco)
salt and pepper

Salsa Criolla Peruana:
1 red onion, cut into thin half-moons
1-2 Jalapeno chile peppers, seeded and minced
1 clove garlic, minced
2 Tablespoons fresh cilantro leaves, chopped
3 Tablespoons fresh lime juice
salt and pepper

Directions:

Place the chicken breasts in a large bowl. Add the lime and olive oil and sprinkle with salt and pepper. Stir to coat. Cover and place in the refrigerator; let marinate for a couple of hours.

Preheat oven to 400 degrees. Line a rimmed baking sheet with parchment paper and place the chicken on the prepared sheet. Cook for approximately 20 minutes, or until no longer pink.

In a medium saucepan heat the olive oil over medium heat. Add the onion and garlic and cook, stirring, until the onion has softened. Next, add the yellow pepper paste and stir to coat the onion mixture. Add the evaporated milk and reduce heat. Simmer for about ten minutes. Remove from heat and let cool slightly.

Pour the onion mixture in the base of a blender. Add the quinoa, cashews and cheese and process until smooth. You can add some extra milk or olive oil to thin out the sauce, if necessary. Add salt and pepper to taste.

Place the chicken on a serving platter and pour some of the sauce over the top. Serve with Salsa Criolla Peruana.

To make the salsa, combine all of the ingredients in a medium sized bowl and toss to combine.

Hello Detox- Part Deux

0

Yep, it’s that time of year again… time for me to get my semi-annual (more or less) cleanse/detox.  I just did some major closet and fridge spring cleaning and now it’s time to focus inward for a couple weeks.  And just like last time, I’ll be posting some detox-friendly recipes rather than taking a vacation from the blog.  Cleanse or not, a girl’s gotta eat… or at least drink.

Over the next couple weeks you’ll find some of my favorite healthy juices, smoothies, soups, meals, salads and, yes, even desserts.  To get you started, here’s some of my cleanse/detox-friendly recipes from the archives.

Cleanse/Detox:

Chocolate and Coconut Sherbet

0

I never intended to buy an ice cream maker.  Living in Honolulu, apartments and kitchens tend to be spatially challenged and I do my best to avoid purchasing small appliances.  And I couldn’t say I had any complaints with the products that Haagen-Dazs and Ben and Jerry’s were pumping out, although there are a couple flavors in the Ben & Jerry’s graveyard that I wouldn’t mind seeing make a comeback.  White Russian much?  I’m sure The Dude and I weren’t the only ones sad to see that one go…

But soon after I found out I had Celiac I decided to find out whether I had other food allergies/sensitivities/intolerances as well.  An allergy skin test came back with a panic-inducing laundry list of possible suspects.  I scheduled a blood test and an elimination diet, but not before convincing myself that I’d never be able to have real ice cream again.

Later, I discovered that I don’t actually have any problems with dairy (or about 98% of the foods on that original list), but not before an ice cream maker had already found its way into my pantry.  I needed it, I rationalized, because the rice and coconut ice creams are so overpriced at the health food stores.

Had I been forced into a dairy-free existence, making this chocolate and coconut sherbet would probably be a weekly occurrence. Even now it’s a favorite.  It’s easier to make than custard-style ice creams and is surprisingly creamy, considering the lack of egg yolks.  Just don’t omit the alcohol, which keeps the sherbet from freezing into a hard, solid block.

Oh, and one final thing?  I don’t care how it’s spelled… I will pronounce it as “sherbert” until the day I die.

Chocolate and Coconut Sherbet

Yield: 6-8 servings

Ingredients:

 1 cup water
1 cup bittersweet chocolate chips
13.5 ounce can coconut milk
1 Tablespoon coconut rum
1 cup sugar
Chocolate shavings and unsweetened coconut for garnish (optional)

Directions:

In a medium saucepan combine the water and sugar over medium heat; cook until the sugar has dissolved. Add the chocolate chips and stir until the chocolate has melted. Remove from heat and add the coconut milk and coconut rum.

Let cool to room temperature and then chill in the refrigerator at least four hours. Freeze in an ice cream maker. Scoop into individual serving bowls and top with the shaved chocolate and unsweetened coconut.

Royal Tahiti Cocktail

0

When I said that I might throw in some tropical drinks to take me away Calgon-style, this is exactly what I envisioned.  It looks like a lava flow, but it’s made with bananas, cream of coconut, lime juice and rum.  A little bit of strawberry puree gives it some color and sweetness.  It was adapted from a recipe served at the Hilton Moorea Lagoon Resort & Spa, pictured below.

Images via GoTahiti and Ocean Home

Wow.  I’d sure wouldn’t mind lounging by the water with one of these frosty drinks after a nice little dip or kayak session (a girl can dream, can’t she?), but until that day comes, I’ll just have to blend one of these babies up from time to time and use my imagination.

Royal Tahiti Cocktail

Yield: 1-2 servings

Ingredients:

* 1-1/2 ounces rum
* 1/2 banana (or one small apple Banana)
* 1/4 cup cream of coconut
* 1 Tablespoon lime juice
* 2 cups ice
* 4 strawberries, pureed

Directions:

Combine the rum, banana, cream of coconut, lime juice and ice in a blender and process until smooth. Pour into one or two glasses and then top with strawberry puree. Use a straw to swirl the strawberry puree through the drink. Serve immediately.

Peppered Pear and Goat Cheese Scones

I’ve been waiting patiently all week to post these…  I loved them so much that I wanted them to get three full days on top of the Girl Cooks World main page.  These peppered pear and goat cheese scones are the perfect marriage of savory and sweet.

Punctuated with small chunks of tender pear and tangy goat cheese, these light and moist scones are perfect for breakfast or brunch. (I happily ate one just about every morning for a two week period). They’d also make a fun gluten-free bread option for a festive dinner.

Although I love love loved the pear and goat cheese combo, feel free to play around with other combinations like apple and cheddar.  Hope you guys like these as much as I did.

Peppered Pear and Goat Cheese Scones

Yield: 8-12 scones

Ingredients:

* 1 cup plus 3 Tablespoons superfine rice flour
* 1/2 cup potato starch
* 1/2 cup tapioca starch
* 2 Tablespoons sugar
* 1 Tablespoon baking powder
* 1 teaspoon xanthan gum
* 1 teaspoon salt
* 1-1/4 teaspoons freshly ground black pepper
* 8 Tablespoons cold butter, cut into small pieces
* 1 pear, peeled, cored and diced
* 4 ounces goat cheese, roughly crumbled
* 1/2 cup plain yogurt, preferably whole milk
* 2 Tablespoons milk, plus extra for brushing

Directions:

Preheat oven to 375 degrees and line a baking sheet with parchment paper or a nonstick baking mat.

Place the rice flour, potato starch, tapioca starch, sugar, baking powder, xanthan gum, salt and pepper in a large bowl and mix to combine. Add the butter and use your fingers to break it up into small pieces and incorporate into the dry ingredients, but do not overwork it and melt the butter.

Add the pear and goat cheese and carefully mix. In a small bowl whisk together the yogurt and 2 Tablespoons of the milk. Pour into the flour mixture and gently fold to combine. Use your hands to divide the dough into roughly 8-12 scones, depending on how large you’d like them to be. Arrange on the prepared baking sheet, leaving about an inch of space between the scones. Gently flatten the top slightly and then brush with milk. Sprinkle with a little extra ground black pepper, if desired.

Place in the preheated oven and bake 22-25 minutes, or until the tops are lightly golden. Remove from oven and transfer to a cooling rack.

Dark and Rich Gluten-Free Chocolate Cupcakes

0

Among the things that one must absolutely have in life: a go-to chocolate cake/cupcake recipe.  And not just any chocolate cake, but a rich, moist chocolate cake that can work for children’s cupcakes as easily as the base for a death-by-chocolate cake.

I’d heard great things about Elizabeth Barbone’s gluten-free recipes over at Serious Eats (she posts on Tuesday, so go check her column today!), and decided to give one of her chocolate cakes a whirl.  Never one to leave well enough alone, or actually try a recipe as stated without making adaptions, I changed things up to use one of my preferred gluten-free flour and starch combinations.

Wow.  It’s rich, moist and virtually indistinguishable from the Hershey “Perfectly Chocolate” cake that served as the inspiration.  And she gets major bonus points for making this a one-bowl affair.  I’m looking forward to reading through her Gluten-Free Tuesday archives to see what other goodies she has posted.  I’ll be sure to report back with any special finds.

Dark and Rich Gluten-Free Chocolate Cupcakes

Yield: 12-14 cupcakes

Ingredients:

* 1 cup sugar
* 1/2 cup rice flour
* 1/4 cup potato starch
* 2 Tablespoons tapioca flour
* 1/2 cup cocoa
* 3/4 teaspoon baking powder
* 3/4 teaspoon baking soda
* 1/2 teaspoon salt
* 1/2 teaspoon xanthan gum
* 1 egg
* 1/2 cup milk
* 1/2 cup vegetable or canola oil
* 1 teaspoon vanilla extract
* 1/2 cup warm water or coffee

Directions:

Preheat oven to 350 degrees and line a 12-well muffin tin with paper liners.

In a large bowl combine the sugar, rice flour, potato starch, tapioca starch, cocoa, baking powder, baking soda, salt and xanthan gum. Mix well.

Add the egg, milk, oil, vanilla extract and water (or coffee). Mix until smooth. Divide evenly among the prepared muffin wells.

Bake for 18-20 minutes, or until a toothpick inserted in the center comes out clean. Cool completely and top with your favorite frosting.

Note: recipe can be doubled. Click to see the original recipe (which uses rice flour, cornstarch and sweet rice flour) and baking times for two 8-inch round cakes or one large 9×13 pan.

Buttermilk Pound Cake with Meyer Lemon Glaze

0

Remember when I sung the praises of Elizabeth Barbone’s gluten-free column at Serious Eats and told you I’d report back with other special finds?  As it turns out, I’d already pinned her buttermilk cake recipe on my kitchen inspiration board over on Pinterest.  I took that as a sign that this was the recipe to try next.

Once again, I couldn’t leave well enough alone and adapted it to use Meyer lemons for the glaze and one of my preferred flour and starch combinations.  Much like those gluten-free chocolate cupcakes, this bread turned out really well.  Dense and moist, with a hint of pucker from the Meyer lemon glaze, this is a perfect cake for spring.  Have it in the afternoon with a cup of tea or first thing in the morning (I won’t judge).

I might have to pull a Cate and Elizabeth (à la Julie and Julia) and bake my way through her column.  I also need to put her blog, Gluten-Free Baking on my blogroll stat.

Buttermilk Pound Cake with Meyer Lemon Glaze

Yield: 1 loaf

Ingredients:

* 1-1/4 cups superfine rice flour, plus extra for dusting pan
* 1/2 cup potato starch
* 1/3 cup tapioca starch
* 1-1/2 teaspoons baking powder
* 1/2 teaspoon salt
* 1/2 teaspoon xanthan gum
* 3/4 cups (1-1/2 sticks) butter, at room temperature
* 1 cup sugar
* 2 eggs, at room temperature
* 1 cup buttermilk
* 1 teaspoon vanilla extract

Meyer Lemon Glaze:
* 3 Tablespoons Meyer lemon juice
* 1 cup powdered sugar

Directions:

Preheat oven to 350 degrees and grease a loaf pan and dust generously with rice flour.

In a medium bowl, combine the rice flour, potato starch, tapioca starch, baking powder, salt and xanthan gum. Mix to combine and set aside.

In a large bowl cream the butter and sugar for 2 minutes. Add the eggs, one at a time. Alternate adding the flour mixture with the buttermilk, mixing well to combine after each addition. Stir in the vanilla extract.

Pour the batter into the prepared pan and bake for about 45 minutes, or until a knife inserted in the center comes out clean. Remove and let cool on a wire rack for 5 minutes. Turn out the loaf from the pan onto the wire rack and let cool completely.

Prepare the glaze by whisking together the Meyer lemon juice and the powdered sugar. Place the loaf on a piece of wax paper and drizzle or brush the glaze over the top, allowing the glaze to drip down the sides.

Cut into slices and serve.