Home Blog Page 105

Detox Tea with Burdock Root

0

Sorry for the radio silence guys. I unexpectedly took a couple weeks off from blogging to relax and enjoy the holidays.  I read a couple great books (like this one and this one), watched a ton of DVDs (my favorites being thisthis and this), and did crazy stuff like going to bed at 9:30. Total bliss.

I was raring and ready to go with a couple recipes, but it just seems so wrong to post maple bourbon ice cream with candied bacon right now, when everybody is in total health mode (even if it was totally awesome).

Instead I’m going to start things off with a nice detox tea, for those of you who may have overdone with with the spiked eggnog and champagne over the holidays.   You’ll find burdock root, also called gobo, in just about every detox tea on the market because it’s known to support and detoxify the liver.  And because burdock is a key ingredient in this popular Japanese New Year’s dish, it should be easy to find at just about any Asian market during December and January.

Made from the burdock root, ginger, and lemongrass, this tea is like a big, warm hug for your liver.   You can also make it more chai-like by adding a cinnamon stick and some cardamom pods if you’d like.

Detox Tea with Burdock Root

Yield: 10 servings

Prep Time: 10 minutes

Cook Time: 20 minutes

Total Time: 30 minutes

Ingredients:

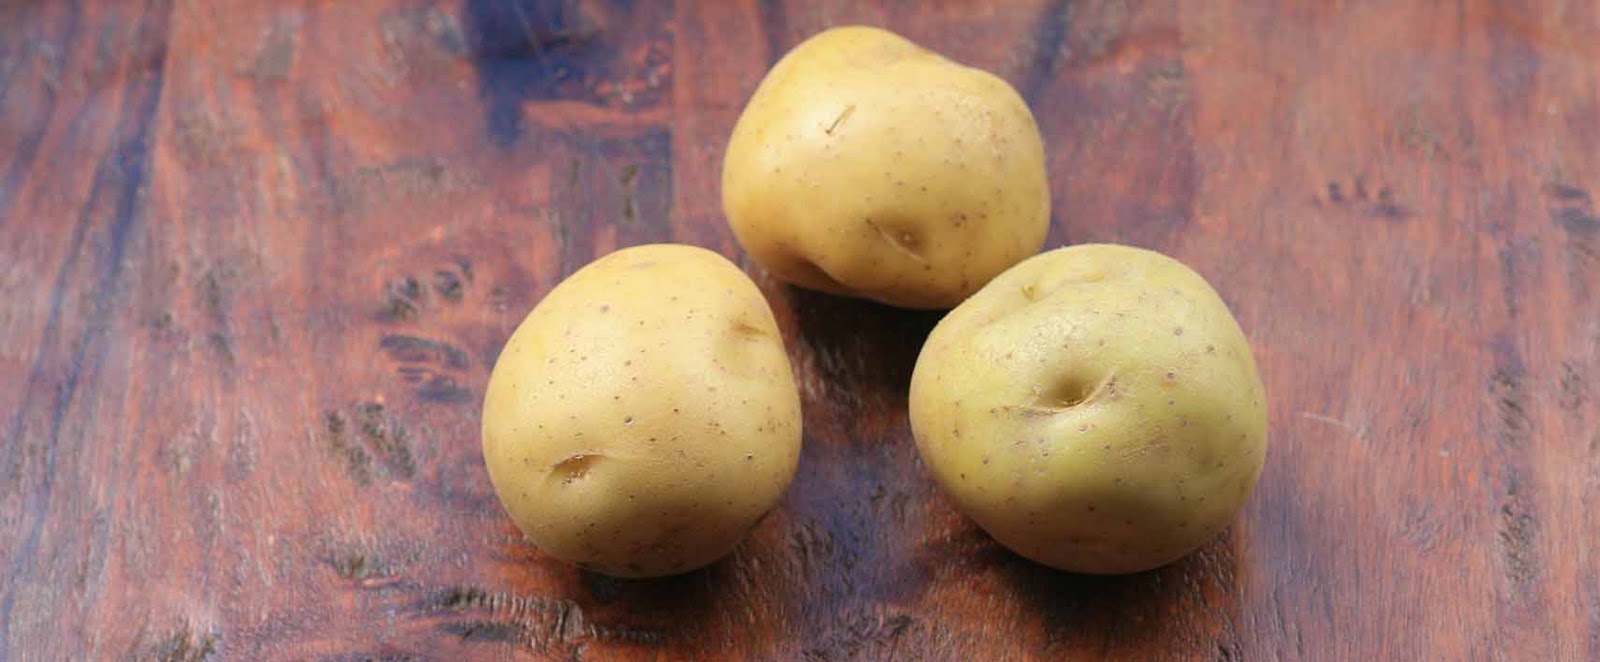
* 2 burdock roots, peeled and roughly chopped
* 2 stalks lemongrass, woody ends trimmed and thinly sliced
* 3-inch piece fresh ginger, peeled and thinly sliced
* 12 cups water
* honey or stevia to sweeten (optional)

Directions:

Combine the burdock, lemongrass, ginger and water in a large stock pot. Bring mixture to a boil and then reduce heat and simmer, partially covered (lay the lid slightly askew) for at least 20 minutes. Strain mixture ans sweeten with honey or stevia, if desired.

Nuoc Cham – Everyday Vietnamese Dipping Sauce

0

Before delving into Vietnam’s savory dishes, I need to cover the nation’s ubiquitous dipping sauce: nuoc cham.  It’s served alongside just about everything from grilled meatballs to noodles to hand rolls.  If you’ve ever eaten at a Vietnamese restaurant, you’ve likely already tasted this liquid gold.  Made with fish sauce, lime juice, chile peppers and a touch of sugar, it’s hot, sour, salty and sweet done right.

There’s little that can’t be enhanced with a quick dunk into a bowl of nuoc cham.  I love it so much that I’ve been known to break tradition by just dumping the whole bowl of nuoc cham into my bowl of bun (one of my favorite noodle dishes), likely embarrassing my dining companions in the process.

I think you’ll love it too.

Nuoc Cham- Everyday Vietnamese Dipping Sauce

Ingredients:

1/4 cup fresh lime juice
1 Tablespoon rice wine vinegar
3 Tablespoons sugar
2/3 cup water
1/3 cup fish sauce (most are gluten-free, but check to label to make certain)
1-2 Thai chiles or Serrano chile peppers, sliced into thin rings
2 cloves garlic, smashed with the blunt side of your knife, then minced

Directions:

Combine all ingredients in a medium bowl and stir to dissolve the sugar.  Taste and adjust amounts, if necessary, to get your desired balance of hot, sour, salty and sweet.  I like mine sweet and tangy with a bit of heat that lingers briefly on the lips.

Note: You can also grind the chiles, sugar and garlic using a mortar and pestle, if desired.

Frozen Hot Chocolate

As I mentioned earlier this week, I’ve got ice cream and other frozen treats on the brain.  The temperatures have been rising around here and since I’m fundamentally anti-air conditioning, I have to resort to other methods to stay cool.

And when I can’t get to the beach or pool, frozen desserts are my favorite way to beat the heat.  I was perusing this Ice Cream and Frozen Desserts cookbook last week and the Frozen Hot Chocolate recipe caught my eye.

Unfortunately, the recipe relied on an ice cream maker.  I have one, but I preferred a recipe that everybody with a blender would be able to quickly whip up.  I decided to see whether the legendary New York institution, Serendipity, which is famous for their frozen hot chocolate, ever released their recipe.  One quick Google search later, I found my answer: yes!

I’ve started tweaking the recipe to avoid the use of pre-packaged hot chocolate mixes, but then made a bunch of other ratio changes as well.  I’ve never had the Serendipity drink before (although their recipe surprisingly gets very mixed reviews), but this version sure hit the spot.

And like homemade blended coffee drinks, this has a tendency to separate a bit.  It doesn’t bother me (plus I drank it quickly enough to mostly avoid the problem!), but you can always use Starbuck’s secret trick of adding a pinch of xanthan or guar gum to keep things nice and stabilized.  If calories are no object, adding a scoop of store-bought ice cream, which will likely have some xanthan and/or guar gum already in it, will also up the creaminess factor.

Frozen Hot Chocolate

Yield: 4-6 servings

Ingredients:

1 cup good quality dark or bittersweet chocolate chips
1-1/2 cups half-and-half
1/2 cup unsweetened cocoa powder
3/4 cup sugar
pinch salt
1-1/2 cups milk
6 cups ice
pinch xanthan gum (optional)
whipped cream
chocolate shavings

Directions:

Place the chocolate chips in a large, microwave-safe bowl. Microwave the chocolate for one minute at 50% power. Stir. If necessary, continue heating in 30-second increments until chocolate is nearly melted (residual heat will melt any remaining chocolate solids).

Slowly whisk in the half-and-half until smooth. Add the cocoa powder, sugar and pinch of salt and stir until smooth. Slowly whisk in the milk.

Pour the chocolate mixture into the base of a blender. Add the ice and a pinch of xanthan gum, if using. Process until smooth. Pour into four to six individual glasses and top with whipped cream and chocolate shavings.

Note: I used my Vita-mix, which has a very large base/container. If you have a blender with a somewhat small base/blender container you may have to process the frozen hot chocolate in two batches.

Colorful Quinoa, Black Bean and Corn Salad

0

High in protein and easy to digest, it’s no wonder that quinoa’s popularity has surged in recent years.  Although I use it often as a replacement for rice with stews or stir fries, I like it even better as the base for a filling, grain-based salad.

Quinoa pairs beautifully with other Peruvian staples like corn, black beans and peppers.  Unlike many beige and bland grain salads, this quinoa salad is as pretty as it is delicious.  This rainbow-hued dish reminds me of all of the colorful photos I’ve seen of Cusco (aka Cuzco), one of South America’s most photogenic cities.

Clockwise from Top Right: Dennis Kirkland, Skyscraper City, Pinterest

Trolleys, embroidered clothing, cobblestone streets, adorable alpacas and architecture with just the right pop of color.  Anybody else just about ready to book a flight to South America?

Clockwise from Top: Skyscraper City via Pinterest, Joan Wharton via Pinterest, Griet via LN Knits via Pinterest

Until my Peruvian travel dreams become a reality, I guess I’ll have to just stick with eating Peru’s favorite grain.  And one final note: this salad is an excellent keeper and would be great as a picnic or potluck item.

Colorful Quinoa, Black Bean and Corn Salad

Yield: 8 servings

Ingredients:

1 cup quinoa, thoroughly washed in a fine sieve (unless pre-rinsed)
1-3/4 cups water
15-ounce can black beans, thoroughly rinsed
1 cup frozen corn
1/2 red bell pepper, seeded and finely chopped
1 Jalapeno chile pepper, seeded and minced
1/2 red onion, finely chopped
1/4 cup cilantro leaves, roughly chopped
1/3 cup olive oil
1/4 cup balsamic vinegar
salt and pepper

Directions:

Combine the quinoa and water in a rice cooker and cook according to the manufacturer’s instructions. Alternatively, combine the quinoa and water in a medium saucepan, bring to a boil, reduce heat, cover and simmer (not removing the lid!), until all of the water has been absorbed.

Remove from heat and let stand for five minutes. Fluff with a fork and let cool slightly.

In a large bowl combine the quinoa, black beans, corn, red bell pepper, Jalapeno pepper, onion, and cilantro and mix well. In a small bowl whisk together the olive oil and balsamic and the pour over the quinoa; toss to coat. Season with salt and pepper.

Lohikeitto- Finnish Salmon Soup

Although I’m a huge fan of seafood, I make it much less often than I’d like.  I’d dog-eared this recipe but wasn’t sure I’d have time to go to my favorite fish market to buy the salmon.  The market’s not particularly close to where I live and there’s never parking available…. like EVER.

But I found myself running errands around that part of town on Saturday and saw that there was not one, but two parking spaces out front.  Even better?  When I got inside, I saw they were running a special on salmon filet.  It’s like the universe aligned for me… for about five minutes anyways.

This isn’t a flashy recipe, just a good, basic salmon soup with a cream base.  Or, you could consider it a potato and leek soup with a salmon upgrade.  Just be sure to add enough salt to make the flavors pop and top it with plenty of fresh herbs.  I tried both parsley and dill.  My recommendation?  You can never go wrong with the salmon and dill combination.

PrintLohikeitto- Finnish Salmon Soup

Yield: 4 servings

Ingredients:

* 3 Tablespoons olive oil
* 1 leek, chopped (white and light green part only)
* 3 cups plus 1 Tablespoon water, divided
* 1 bay leaf
* 3/4 pound potatoes, cubed and peeled
* 3/4 pound salmon filet, skinned, de-boned and cut into small chunks
* 3/4 cup cream (I used half and half)
* 1 Tablespoons cornstarch (up to 1 1/2 Tablespoons if you’d like the broth thick)
* 1 Tablespoon butter
* salt and pepper
* fresh parsley or dill for topping
* lemon wedge (optional)

Directions:

Heat the olive in a large saucepan and sauté the leek until softened. Add 3 cups of the water and the bay leaf and bring to a boil. Reduce heat and carefully add the potatoes. Cover and simmer until the potatoes are tender.

Add the salmon and and simmer for five minutes. Add the cream and stir to mix. Make a cornstarch slurry with the cornstarch and 1 Tablespoon of water, stirring to dissolve the cornstarch. Add to the soup and simmer until the soup has thickened.

Add the butter and remove from heat. Season with salt and pepper to taste. Top with plenty of fresh parsley or dill. Serve with a squeeze of lemon, if desired.

Lanttulaatikko- Finnish Rutabaga Bake

0

Never heard of a rutabaga before?  Perhaps you know it by one its other names: Swedish turnip, swede, or yellow turnip?   But considering the fact that the guy at the supermarket checkout line had to ask me three times what it was, I’m guessing that it’s not really that big of a seller.

That’s a shame because it’s actually one tasty root vegetable.  As it turns out, it originated from a cross between turnip and cabbage.  Not a crossbreed I would ever have thought of, but I guess that’s why I’m not a botanist.

I’m a couple weeks too late, but this rutabaga bake, made with mashed rutabaga, cream, bread crumbs and seasoned with a hint of nutmeg, is an old, traditional Finnish Christmas dish.  The rutabaga is inherently sweet, but if you’d like to dial it up a bit (a la the Sweet Potato Casserole), feel free to add a teaspoon or so of sugar.

Lanttulaatikko- Finnish Rutabaga Bake

Yield: 6 side servings

Ingredients:

* 2 medium rutabagas, peeled and diced (about 6 cups)
* 3 Tablespoons butter, divided, plus extra for greasing
* 3/4 cup cream (I used half-and-half)
* 3/4 cup gluten-free breadcrumbs
* 1 teaspoon salt
* 1/2 teaspoon nutmeg
* 2 eggs, slightly beaten

Directions:

Place the diced rutabaga in a large saucepan and cover with water. Bring to a boil and then reduce heat and simmer until tender, about 20 minutes. Drain and mash. Set aside to cool slightly.

Preheat the oven to 350 degrees. Grease an ovenproof dish with butter.

Add 2 Tablespoons of the butter, the cream, breadcrumbs, salt, nutmeg and eggs to the rutabaga and stir to mix. Pour into the prepared dish and dot the surface with pats of the remaining butter. Bake for 45 minutes or until the top has lightly browned.

Carrot Miso Salad Dressing and my Everyday Detox Salad

Want to know the trick to eating salads twice a day for a month?  Lots and lots of interesting dressings.

In terms of dressings, so far there’s been lemon tahini, creamy Asian, cilantro vinaigrette, cranberry-walnut, and then this here carrot miso.  I first heard about it from Deb, who’d been inspired by Gwyneth, who got the recipe from Cleanse specialist Dr. Alejandro Junger.  Was that convoluted enough for you?

The combination of carrot and ginger can do no wrong (for evidence see here and here), and this was no exception.  For those of you who are looking for a more substantial salad, avocado would make a lovely addition.

Carrot Miso Dressing

Yield: Dressing: About 1 1/2 cups, enough dressing for about 6-8 salads

Ingredients:

Carrot Miso Dressing:

1 cup chopped carrots
1 shallot, chopped
1-inch piece fresh ginger, grated or chopped
3 Tablespoons white miso paste
2 Tablespoons rice vinegar
1 teaspoon sesame oil
1/4 cup oil
up to 1/4 cup water

Everyday Detox Salad with Carrot Miso Dressing:

spinach
thinly sliced red onion
chopped cherry tomatoes
chopped cucumbers
carrot miso dressing
chopped cilantro
salt and pepper

Directions:

For the dressing, blend the carrots, shallot, ginger, miso, rice vinegar and sesame oil until smooth. Slowly add the oil. Add one Tablespoon of water at a time until the dressing has reached your desired consistency.

To make the salad, combine the spinach, red onion, tomatoes and cucumbers in a large bowl. Drizzle with carrot miso dressing and top with chopped cilantro. Add freshly ground salt and pepper to taste.

Spicy Jalapeno Creamed Corn Soup with Roasted Corn Salsa

I’m all about little details that can transform a perfectly good dish into something extra special.  You know, like candied walnuts on a salad or burnt onions atop an Indian dal.  The roasted corn salsa here is a perfect example.  The jalapeno creamed corn soup by itself is really quite good.  But add some roasted corn salsa on top and it becomes one of those knock-your-socks off dishes.  At first taste my mind started spinning, imagining everything I could top with the slightly crisp roasted corn niblets… corn and clam chowder, shepherd’s pie, southwestern chili, the list goes on and on.

I’d originally planned to make this with fresh corn but by the time I got to the market, only the very sad looking ears were left.  The good news is that frozen corn worked great, meaning this soup can be made year round.  And since the ingredient list is short and simple, this is one soup that would definitely benefit from a good, flavorful broth.  If you’d like to add another texture and flavor (as well as some good, healthy fat), feel free to add some avocado to the roasted corn salsa.

Spicy Jalapeno Creamed Corn Soup with Roasted Corn Topping

Yield: 4-6 servings

Ingredients:

Soup:

* 1/4 cup olive oil
* 4 cloves garlic, minced
* 1 onion, chopped
* 2 jalapeno peppers, stemmed and chopped
* 6 cups frozen corn, defrosted
* 3 cups chicken or vegetable broth
* salt and pepper
* roasted corn salsa

Roasted Corn Salsa:

* 2 1/2 cups frozen corn, defrosted
* 1 Tablespoons olive oil
* salt and pepper
* 1 Tablespoon finely chopped red onion
* 2 Tablespoons cilantro leaves, finely chopped
* 1 jalapeno pepper, stemmed, seeded and finely chopped
* 1/2 avocado, pitted and chopped (optional)
* salt and pepper

Directions:

To make the soup, heat the oil in a large saucepan over medium heat. Add the garlic, onion and jalapeno and sauté until they have softened, about 4-5 minutes. Remove from heat.

Place the defrosted corn in a blender and then add the sautéed garlic, onion and jalapeno. Puree until smooth. You may need to pulse the blender to get things smooth. Alternatively, add up to 1/2 cup of the broth to get things moving.

Pour the corn puree into the saucepan and heat over medium heat. Slowly stir in the broth. Bring to a boil, and then reduce heat, cover, and simmer, approximately 15-20 minutes. (While the soup is simmering, you can prepare the roasted corn salsa). Season with salt and pepper to taste.

Ladle into individual soup bowls and top with the roasted corn salsa.

Note: if you’d like the soup a little less thick, feel free to add some extra broth or water.

To make the salsa, preheat the oven to 450 degrees. Prepare a baking sheet by lining it with aluminum foil. Spread the defrosted corn evenly on the prepared baking sheet and drizzle with the olive oil and then lightly season with salt and pepper. Roast for about 20-25 minutes, or until the corn has turned a golden brown (some kernels may turn almost blackish and crispy- don’t worry- they’ll taste really great). Remove from oven.

Combine the roasted corn, red onion, cilantro leaves, jalapeno pepper in a bowl and mix to combine. Gently stir in the avocado, if using. Add salt and pepper, if needed.

Anzac Biscuits (Cookies)

Have you ever thought you’d made some great new discovery only to find out that the discovery had actually been made years before and that, furthermore, you were late to the party?  Well, that was the case with these Anzac cookies, or biscuits as they’re called in Australia.

My expectations for these cookies was quite low; their name is from the acronym for the Australia New Zealand Army Corps.  During World War I, women sent a variation of these cookies to soldiers abroad because the ingredients didn’t spoil and the cookies traveled well.

Well, these eggless wonders really took me by surprise.  Far from the tasteless bricks I was anticipating, they were soft, chewy, with a definite caramel flavor.  After I made them I realized that Heidi already wrote about them years ago, claiming they were her favorite cookie AND that David had included a recipe for an adaption in his latest book Ready for Dessert: My Best Recipes.

Well, I might not have made any new discoveries, but I’m happy to have found these cookies nonetheless.  They were easy to convert to gluten-free and tasted amazing. An added bonus is there’s no worry about eating the raw dough because no eggs are involved.  I hope you give them a shot.

Anzac Biscuits (Cookies)

Yield: Approximately 30 cookies

Ingredients:

1 cup gluten-free oats
3/4 cup dried, unsweetened coconut
1/3 cup brown rice flour
One third cup oat flour (I ground my gluten-free oats in a coffee grinder)
1/3 cup potato starch
3/4 cup sugar
1/4 cup brown sugar
1 teaspoon baking soda
1 teaspoon xanthan gum
1/2 cup butter
1 Tablespoon honey (or Golden Syrup)
2 Tablespoons boiling water

Directions:

Preheat the oven to 350 degrees and grease a baking sheet or line with a Silpat baking mat.

Mix together the oats, coconut, brown rice flour, oat flour, potato starch, sugar, brown sugar, baking soda and xantham gum in a large bowl and stir to combine.

In a small saucepan, melt the butter and honey together. Add the boiling water and stir to combine. Pour into the oat mixture and mix well.

Lastly, drop by teaspoon onto prepared baking sheet and bake for approximately 12 minutes, or until lightly browned. Remove from oven and allow the cookies to cool for one to two minutes on the baking sheet. Remove cookies to a cooling rack.