 I’m all about little details that can transform a perfectly good dish into something extra special. You know, like candied walnuts on a salad or burnt onions atop an Indian dal. The roasted corn salsa here is a perfect example. The jalapeno creamed corn soup by itself is really quite good. But add some roasted corn salsa on top and it becomes one of those knock-your-socks off dishes. At first taste my mind started spinning, imagining everything I could top with the slightly crisp roasted corn niblets… corn and clam chowder, shepherd’s pie, southwestern chili, the list goes on and on.
I’d originally planned to make this with fresh corn but by the time I got to the market, only the very sad looking ears were left. The good news is that frozen corn worked great, meaning this soup can be made year round. And since the ingredient list is short and simple, this is one soup that would definitely benefit from a good, flavorful broth. If you’d like to add another texture and flavor (as well as some good, healthy fat), feel free to add some avocado to the roasted corn salsa.
Spicy Jalapeno Creamed Corn Soup with Roasted Corn Topping
Yield: 4-6 servings
Ingredients:
Soup:
* 1/4 cup olive oil
* 4 cloves garlic, minced
* 1 onion, chopped
* 2 jalapeno peppers, stemmed and chopped
* 6 cups frozen corn, defrosted
* 3 cups chicken or vegetable broth
* salt and pepper
* roasted corn salsa
Roasted Corn Salsa:
* 2 1/2 cups frozen corn, defrosted
* 1 Tablespoons olive oil
* salt and pepper
* 1 Tablespoon finely chopped red onion
* 2 Tablespoons cilantro leaves, finely chopped
* 1 jalapeno pepper, stemmed, seeded and finely chopped
* 1/2 avocado, pitted and chopped (optional)
* salt and pepper
Directions:
To make the soup, heat the oil in a large saucepan over medium heat. Add the garlic, onion and jalapeno and sauté until they have softened, about 4-5 minutes. Remove from heat.
Place the defrosted corn in a blender and then add the sautéed garlic, onion and jalapeno. Puree until smooth. You may need to pulse the blender to get things smooth. Alternatively, add up to 1/2 cup of the broth to get things moving.
Pour the corn puree into the saucepan and heat over medium heat. Slowly stir in the broth. Bring to a boil, and then reduce heat, cover, and simmer, approximately 15-20 minutes. (While the soup is simmering, you can prepare the roasted corn salsa). Season with salt and pepper to taste.
Ladle into individual soup bowls and top with the roasted corn salsa.
Note: if you’d like the soup a little less thick, feel free to add some extra broth or water.
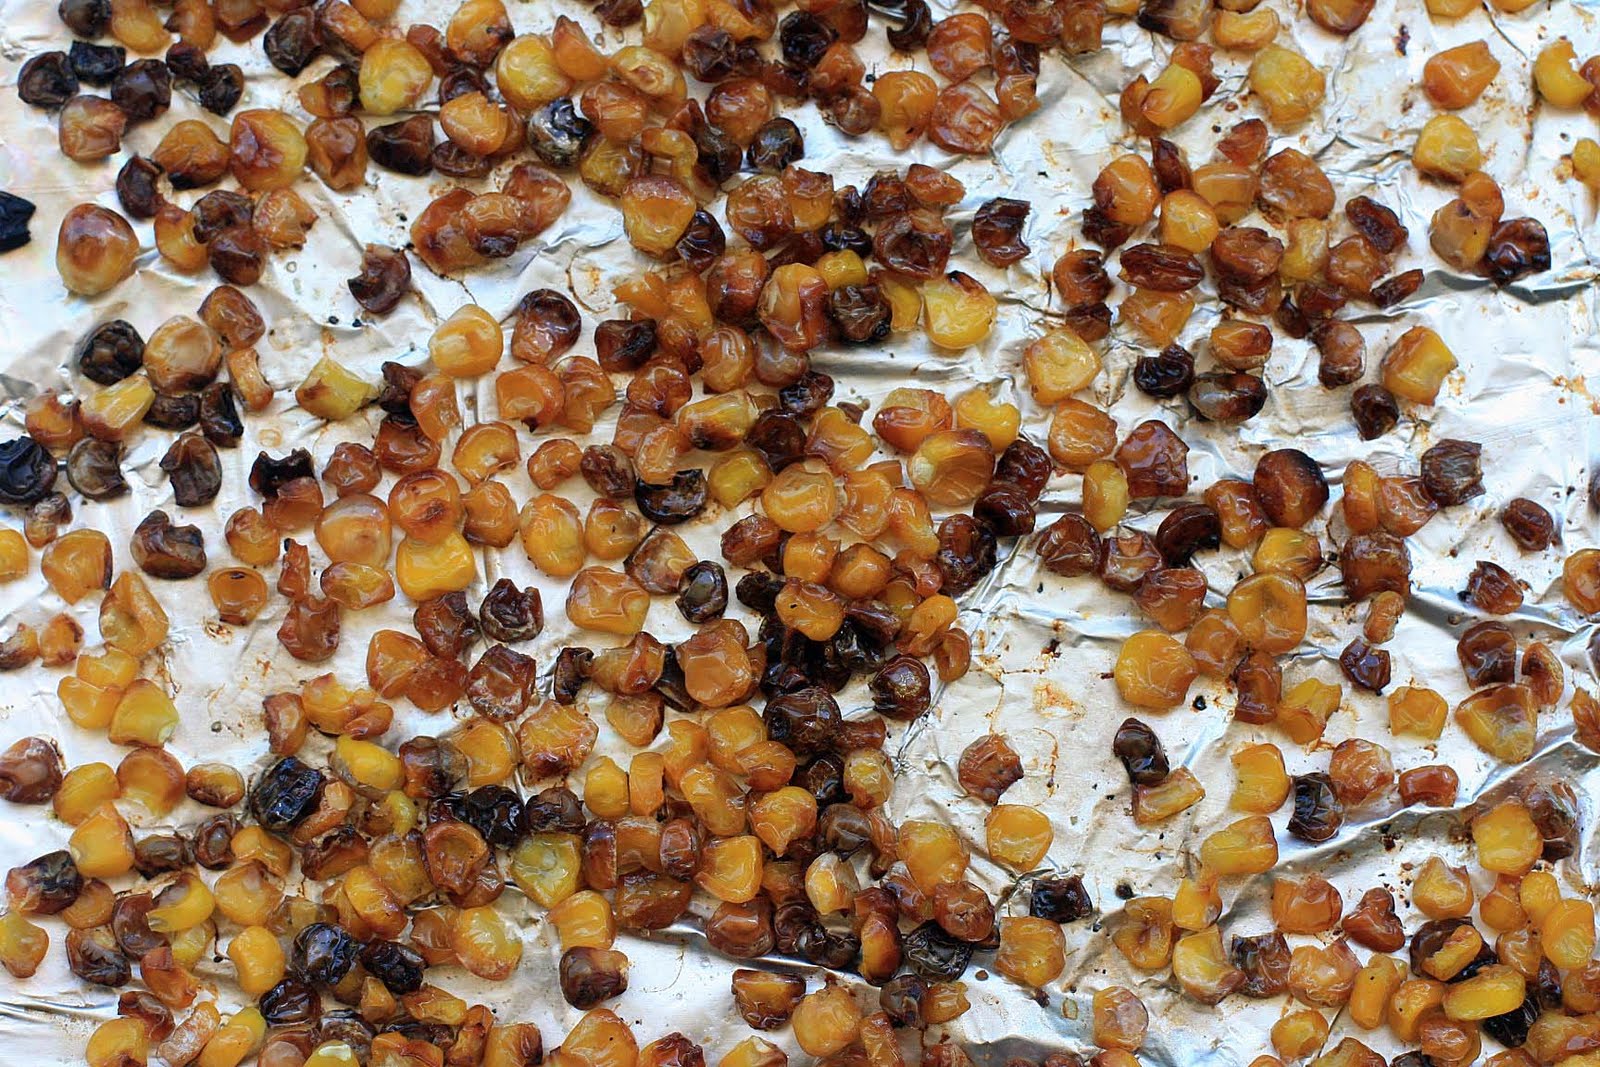
To make the salsa, preheat the oven to 450 degrees. Prepare a baking sheet by lining it with aluminum foil. Spread the defrosted corn evenly on the prepared baking sheet and drizzle with the olive oil and then lightly season with salt and pepper. Roast for about 20-25 minutes, or until the corn has turned a golden brown (some kernels may turn almost blackish and crispy- don’t worry- they’ll taste really great). Remove from oven.
Combine the roasted corn, red onion, cilantro leaves, jalapeno pepper in a bowl and mix to combine. Gently stir in the avocado, if using. Add salt and pepper, if needed.
")