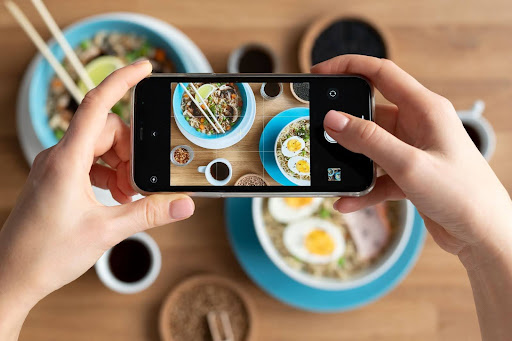
Good photos make your cooking content easier to follow. When you document recipes with clear images, people understand your process better. You don’t need a fancy camera — most smartphones work great if you know a few basic tricks.
Setting Up Your Kitchen Photography Space
Your phone probably has manual settings you’ve never touched. Look for exposure, focus lock, and HDR in your camera app. These three settings will improve your photos immediately.
Shoot near a window during the day. Natural light makes food look appetizing and real. Never use your phone’s flash — it creates weird shadows and makes everything look yellowish. A $15 desk lamp from Target works fine for evening shots if you buy daylight bulbs.
Documenting Recipe Development and Cooking Techniques
Culinary students need quality photos for class projects and portfolios. Your photos prove you know proper knife skills, can execute techniques correctly, and understand plating. Professors want to see the process, not just the final dish.
Take photos at consistent angles to show progression clearly. If you’re making a soufflé, shoot from the same spot to show how it rises. This works for any recipe tutorial or cooking demonstration. Students often compile these photos into presentations for their cooking classes. An EduBirdie PowerPoint presentation writing service can help organize your recipe photos with proper analysis and formatting, which saves hours when finals week hits.
Show the full story. Raw chicken breast, seasoned chicken breast, seared chicken breast, plated chicken breast. Each stage matters. Your cooking instructor can see if you browned the meat properly or if your sauce has the right consistency.
Essential Kitchen Props for Food Photography
Your phone camera is enough. Anything above 8 megapixels works. The iPhone 11 and newer Samsung models all qualify. Just wipe the lens with your shirt before shooting — seriously, this fixes half of blurry photo problems.
Props should be simple:
- White plates from IKEA cost $2 each and make colors pop
- A wooden cutting board adds texture without stealing attention
- Kitchen towels cover messy countertops quickly
- Your actual cooking spoons and forks look more real than fancy silverware
- Scatter a few loose ingredients like herbs or spices around the main dish
Clear your counter before shooting. Move the dish soap, the mail, and your coffee mug out of frame. A clean background takes five seconds and makes you look like you know what you’re doing.
Lighting Your Cooking Station for Better Photos
Set up perpendicular to your window, not facing it. This creates soft shadows that make food look three-dimensional. Direct window light washes everything out.
Buy white foam board from the dollar store. Hold it opposite your window to bounce light onto dark spots. This costs $1 and works as well as a $50 photography reflector. You can also use white cardboard from a cereal box.
Editing Food Photos Simply
Edit on your phone right after shooting. Increase brightness by 10-20%. Bump contrasts up slightly. Straighten crooked angles. Crop out distractions. That’s it.
Don’t use Instagram filters on cooking photos. Valencia makes everything yellow. Sierra turns soup gray. Your goal is showing what you actually cooked. Heavy filters scream “I’m hiding something” to anyone evaluating your work.
Capturing Different Cooking Stages Effectively
The rule of thirds is simple. Imagine a tic-tac-toe grid on your screen. Put your main subject where the lines cross, not in the center. Food styling and composition, as research says, directly affect how people perceive the finished dish. Your photos instantly look more professional.
Different foods need different angles. Pizza looks best from directly above. A burger needs a straight-on shot to show all the layers. Most plated dinners work at 45 degrees. Take three shots from different angles — you can pick the best one later.
Give your food room to breathe. Don’t zoom in so close that the dish fills every pixel. Empty space makes viewers focus on what matters. You’ll also thank yourself later when you need to add recipe titles or crop the photo.
Building a Recipe Photography Workflow
Photograph multiple dishes on the same day when possible. Your lighting stays consistent, which matters more than you’d think. Set up once, shoot three recipes, save an hour.
Follow this order every time: ingredients laid out, key cooking steps, final plate from three angles. This checklist stops you from forgetting shots while your pasta gets cold. Check photos immediately — reshoot anything blurry while your stove is still hot.
Create folders like “2025-10-Carbonara” and “2025-10-Risotto” on your phone. When you’re building your portfolio six months from now, you’ll find everything fast. Back up to Google Photos weekly. Losing a semester of cooking photos because you dropped your phone is not a situation you want.
Common Food Photography Mistakes in the Kitchen
Shoot food fresh. Ice cream melts in three minutes under lights. Lettuce wilts in five. Pasta dries out and looks sticky after ten minutes. Plate your dish, style it fast, shoot immediately, then eat.
Clean your plates. A smear of sauce on the rim ruins an otherwise perfect photo. Wipe edges with a damp towel before shooting. Remove that one piece of parsley that fell where it shouldn’t. These details matter on a 27-inch computer screen.
Stop using auto mode for everything. Auto exposure makes dark chocolate cake look gray. Auto focus picks the fork instead of the food. Tap your screen to focus manually. Adjust that brightness slider. You’ll get better results in weird lighting situations.
Your photos improve with practice. Start with good window light and clean plates. The fancy techniques come later. Every dish you photograph teaches you something new about angles, timing, or composition.