For most of us, outdoor gardening is just a fond memory until spring. Many of us envy those lucky folks for whom “winter” is the same as a cool, rainy summer’s day. Just because summer’s over doesn’t mean your green thumb has to hibernate, no matter where you live. That said, hydroponics doesn’t have to be just a winter project either. These systems are becoming a way to grow more and better food in less space all year long. To keep growing all year round—think hydroponics!
What Is Hydroponic Gardening?
Simply put, hydroponic gardening is a method of growing plants without soil. It’s an efficient, fast, and proven way to grow big, beautiful plants without the problems soil can bring.
How Does Hydroponics Work?
Plants have four basic needs: water, sunlight, nutrients, and carbon dioxide. Normally, nutrients come through soil and fertilizer, making a plant work to get food. In a hydroponic garden, nutrients are dissolved in the water, allowing a plant to absorb more food faster. Light can be provided by a simple “grow light” bulb if you don’t have a convenient, light-filled window. Lastly, soil often contains pests and diseases, ergo—no soil, no bad critters. Mostly.
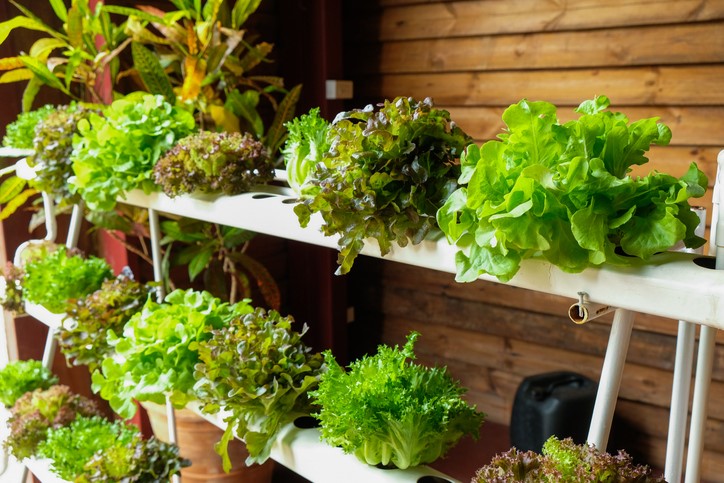
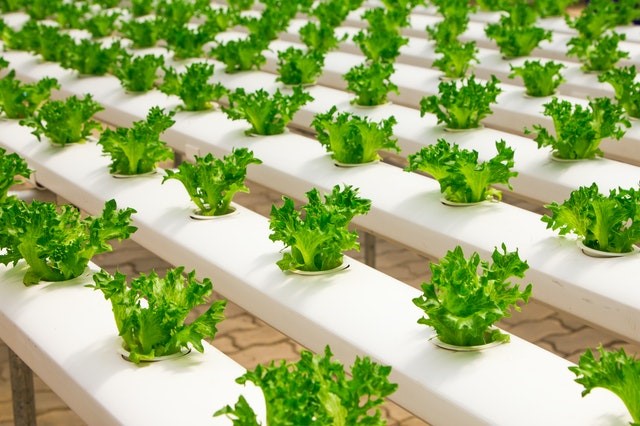
Hydroponic systems can be as small as a single pot or as large as commercial greenhouses strung in a row. When hydroponics are combined with vertical planting techniques, they can use up to 99% less space. One reason for this is that in a hydroponic system, plant roots don’t have to spread out to find food. It surrounds them in the water they grow in, allowing more plants to grow in a smaller space.
Cost-Saving Benefits
Although you might not think so, a hydroponic system uses far less water than conventional gardening. A plant typically uses about 0.1% of the water its roots take in, and the rest is released back into the air. In a hydroponic system, water released by a plant is recirculated and used again, resulting in substantial water savings.
Because there are no soil pests or diseases, far fewer chemicals are needed. Healthy plants grow faster and produce bigger yields with the plant’s food delivered through the water directly to the root systems. Not only do you get more food, but it’s better tasting and higher in nutrients. Why? Because usually, produce is picked before it’s ripe then treated with ethylene gas as it gets closer to market to artificially ripen it before it hits the store shelves. When you grow your own fruits or vegetables, they ripen on the plant, making for better taste and quality. You know the difference between a vine-ripened strawberry and one from the store – no comparison!
Components of a Hydroponic System
Basically, a hydroponic system needs very few things. A container to hold your plant, food, light, water, and an aquarium air pump if you’re growing directly in water. Containers for use by home gardeners on a countertop can range from a pot to grow a single plant to one large enough to produce a few tomato plants. You can always spread out more by multiplying containers or going vertical—the choice is yours.
An additional word on containers… While you can use clay or plastic pots arranged in a tub to form your system, something called a “net pot” will probably be a better choice. These are really just plastic pots with no bottom and open slats in the sides to allow a plant better access to food and water. They also allow roots to grow freely, making for a happier plant, and we all know what that means… Successfully getting better tasting and healthier fruits and vegetables.
Some systems also use an inert growing media such as coir, vermiculite, or peat moss to support the plant’s weight and anchor the root systems. There are many kinds of inert media to choose from depending on the plants you want to grow and the PH that needs to be maintained. Advice from a garden or hydroponic store will help you make the right choice.
Lighting
And lastly but very much not the least, you’ll need to consider your lighting. Most hydroponic systems will require between 12 to 18 hours of light a day for optimal plant growth. Whether you’re lucky enough to have the most of this in natural light will depend on where you are geographically or if you’re growing in the summer or the winter (or maybe even in your basement). Whatever the case, light is essential, and even if you have good natural light, you might want to consider a backup grow light or two for those cloudy, rainy, or snowy days that come to everyone’s life now and again.
Grow lights are different from regular bulbs only in the spectrum of light they produce. Plants need more of some colors than others, so grow lights often have a pink-y tone. From a simple bulb to put in your lamp to systems in and of themselves, they are readily available and generally easy to install and operate. Timers also help keep things on track to ensure your plants get the light they need, even if you sleep in occasionally or get home late after working a little overtime.
Types of Hydroponic Systems
There are quite a few different kinds of hydroponic systems available to buy or, in some cases, make yourself. Depending on your circumstances, one may work better for you than another, but in the end, they can all provide the same high-quality growing success. Here are the six basic systems, but don’t get fooled into thinking you have to choose one or another. As with anything hydroponic, they can be adjusted, combined, or adapted to your particular needs and circumstances.
Wick systems
Plants are placed in growing media in a tray that sits on top of a reservoir tray containing water and a plant nutrient solution. Wicks (think, rope, string or felt) connect the growing tray to the reservoir tray, and water flows up the wicks to water your plants.
- Pros: Simple, reliable, non-mechanical
- Cons: Slow working, can encourage fungus and rot
Nutrient film technique (NFT) systems
This system suspends plants in “channels” over water, and a pump allows that water and food to flow continuously over the bottom of the roots. This provides constant nourishment to the plant while at the same time allowing the upper root to breathe lots of oxygenated air.
- Pros: cost-effective in reusing water and food
- Cons: pump or power failure equals dead plants
Ebb and flow systems
These systems work by pumping water and nutrients into your “grow tray” then allowing it to drain back into a reservoir. When wet, plants drink water and food, and when dry, they breathe. Alternating between wet and dry periods promotes rapid, healthy growth.
- Pros: versatile, suitable for many types of plants
- Cons: pump failure, mold, rot, root diseases
Drip systems
Drip systems pump aerated water and nutrients through tubing to individual pots where the regulated drip feeds and waters your plants. These systems can be either a “recovery system” (which re-pumps drained off water and food) or “non-recovery systems” (which pumps the drained water to a waste container).
- Pros: Versatile, supports larger plants
- Cons: maintenance and system complexity
Aeroponic systems
There is no growing medium and running water – just a fine mist of water and food pumped to plants suspended in towers. The mist drains down the sides of the tower into a reservoir, which then can be re-pumped back onto the plants again. Constant exposure to air, food, and water allow the plant to thrive quickly.
- Pros: surplus oxygen, high performing, and mobile
- Cons: expensive, high maintenance
Fresh water or Deep Water Culture (DWC) systems
Maybe the purest form of hydroponics, plants are suspended in net pots over a reservoir of water and food. They absorb nutrients through their submerged roots. A pump oxygenates the water allowing plants to breathe and “eat” constantly.
- Pros: low maintenance, easy at home set up
- Cons: limited plant types, temperature control
Easy Hydro Plants for Beginners
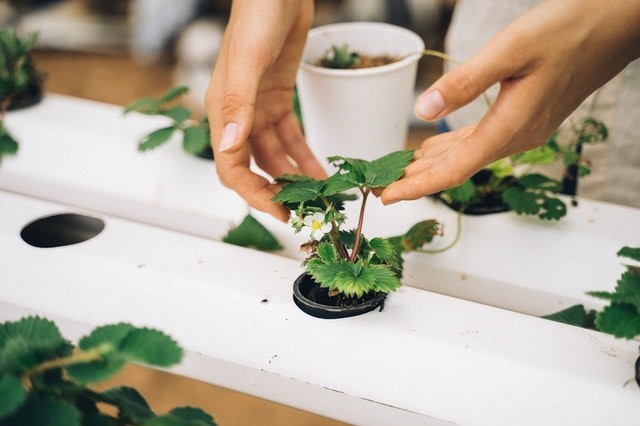
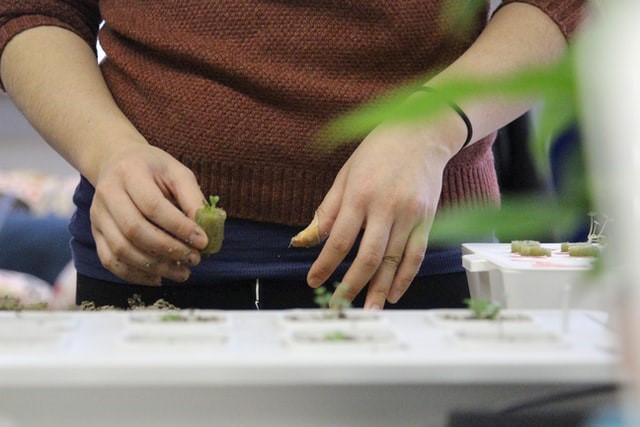
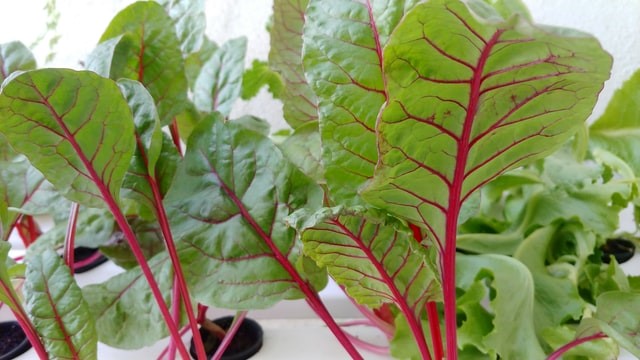
Want to be successful off the hop? Try your first foray into hydroponics by growing lettuce, spinach, strawberries, bell peppers, or herbs. Experienced growers have found these plants thrive in a hydroponic environment. Durable, fast-growing, and easy to start makes them the perfect candidates for your inaugural hydroponic experiment. Tomatoes and cucumbers can also be very successful with the right system but might require a little more attention.
Hydroponic Growing Tips
The key to success is pairing the right system for you with the right plants. It’s tempting to go all out and try for an amazing array of everything but… Starting small and controlled sets you up for success. This, in turn, leads to pride in your new garden and eventually amazing your dinner guests with the freshest food. Probably since their own summer gardens were just a fond memory…
Be realistic—about everything. How much maintenance you want to do is a key factor in the type of system you choose. Remember, you’re not stuck with the system you start with. You can add, adapt, or upgrade as your experience and your demand for the best food both expand.
Stagger your plantings for a constant supply. Some plants start from seed, while some are better started as mini-plants (like strawberries). Monitor and provide 12 to 18 hours of light a day, requiring a grow light in most places. Depending on the plant, you may need to pinch and prune to keep the growth low and send energy to the fruit. Peppers, tomatoes, and cucumbers would benefit from this kind of TLC.
How to Build a Hydroponic System
Anybody with a bit of DIY moxie (or the willingness to learn and try) can build a hydroponic garden. Whether or not you’re a new gardener or an experienced green thumb, the building principles are the same. Research the kind of system you want and plan your growing space. Figure out what you want to grow, where and how you can provide enough light, and determine how and where you’re going to house your system.
After all this thinking, make a list of the materials you’ll need, subtract what you already have, which will equal what you’ll need to buy—don’t forget the plants or seeds! Go slowly and make sure everything is contained, accessible, and to hand. Nothing would be worse than to have plant water leak from your system and ruin something, so choose your containment wisely.
There are so many systems and variations. Your best bet will be the internet, library, or your local garden or hydroponics store to get the specific information you need to get started. The last two are troves of personal information from experienced growers, but if you’d rather wing it, take out a book or find a tutorial online. There may also be a commercial hydroponics operation near you, and these sometimes do tours or have online videos to show off their systems. Whichever option you choose, have fun with it.
Conclusion
Is your mind racing to figure out what kind of system might work for you, how big you could manage and how much better food you could have for cheap, cheap? All those things are not only possible but, in fact, likely if you make an honest assessment of your lifestyle, space, and dedication to learning and experimentation. You may not get perfect results your first time or two, but with a bit of adaptation and willingness to learn, meals at your house will be outstanding!
Originally posted on Porch.com