Today I want to talk about what post-traumatic stress disorder (PTSD) is and how I’m treating my PTSD and panic attacks. I am a victim of childhood abuse and PTSD has been a part of my life ever since. Thanks to my therapist’s help, the attacks have gotten much less frequent but I still sometimes suffer from sudden onsets of PTSD like panic attacks.

If you read my other posts, then you know how much I prefer to treat different common ailments (like headaches, dermatitis, etc.) with natural household remedies. I do not denounce modern medicine completely but I do prefer to avoid it if I can. I figure that if something worked well enough for our ancestors then there is no reason it shouldn’t work for us too.
However, when I am in the middle of a panic attack, I don’t really have the luxury of time to try out different remedies, hoping one of them will work. I need something effective. In those times, I am not afraid to reach for my prescription drug that I know will bring me relief. That said, there are times when natural remedies work just as well on my PTSD as modern medicine. These are tried by me and while I cannot guarantee that they will work for you as well, do give them a try if you want to.
But first, let’s talk about PTSD itself.
What is Post-Traumatic Stress Disorder?
The Mayo Clinic defines PTSD in the following way:
Post-traumatic stress disorder (PTSD) is a mental health condition that’s triggered by a terrifying event — either experiencing it or witnessing it. Symptoms may include flashbacks, nightmares and severe anxiety, as well as uncontrollable thoughts about the event.
Many people who go through traumatic events have difficulty adjusting and coping for a while, but they don’t have PTSD — with time and good self-care, they usually get better. But if the symptoms get worse or last for months or even years and interfere with your functioning, you may have PTSD. (source)
So how do you know if you have PTSD? Take a look at this list of symptoms and try to see if any of them relate to your situation (source):
- Re-experiencing: intrusive memories, sleep disturbance, dissociation, intense anger or anxiety at memory
- Avoidance: avoidance, detachment, estrangement, numbing, “shutting down”
- Hyperarousal: nightmares, irritability, sleep disturbance, anger, aggression, impulsivity, panic attacks, exaggerated startle response
Ok, now that we’ve got explained, let’s talk about treatment.
Conventional Methods for Treating PTSD and Panic Attacks
Conventional methods of treating PTSD can be divided into two groups: psychotherapy and medicine.
I could not be happier with my therapist. She has been a wonderful guide that made me think of my experience in a different light. I strongly advocate for anyone to try therapy, even if they haven’t specifically experienced abuse. Getting in touch with your inner self is much easier if you have someone to talk to, someone who often understands you better than you do yourself. If you want to help someone with PTSD and don’t want to do the worst thing to do to someone with PTSD then read and be prepared to support them.
GAP
I am more conflicted about the medicine. I don’t want to rely solely on conventional drugs mostly because I am heavily aware of what I put in my body and because many of those drugs have unwanted side effects. So what if I can manage my panic attacks better if I am just sleepy all the time? I need to also be able to take care of my family.
I occasionally use some of my prescription drugs but in general, I try to avoid them. After carefully reading all the leaflets that come with the drugs and based on the potential side effects, I decide whether to use them or not. Only then I am making the best decision for me and my family.
Natural Methods for Treating PTSD and Panic Attacks
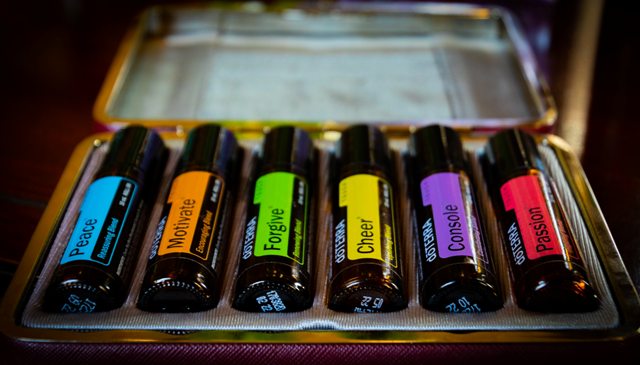
The way I most often manage my PTSD symptoms is with essential oils. I am very drawn to them because of their natural properties that well, are just pure nature. Also, I love utilizing whatever gifts nature gives us, be it organic food or essential oils. They contain no strange artificial fragrances, no chemical substances, they are just a concentrated essence of nature.
GAP
So I prepared a list of essential oils (single or blends) that I found to be the most effective at treating my PTSD symptoms. I underlined the ones that are available in the Premium Starter Kit.
- Peace and Calming: a strong relaxant that uplifts mood and promotes a sense of inner peace, great for improving your emotional state. Can be used in a diffuser, added to bath water, or applied to the body directly (wrists, feet, temples).
- Stress Away: relieves daily stress, loosens the tension in your muscles, promotes inner peace and emotional stability.
- Deep Relief: relieves muscle tension caused by prolonged stress, soothes inflammation of muscles, joints, and ligaments, has pain relieving properties. Can be applied directly in the affected place every 15 minutes up to 5 times a day.
- Lavender: a calming relaxant with anti-inflammatory properties. Can be used in a diffused, added to bath water, or applied to the body directly.
- SARA: aids in recovery from trauma by focusing on the source of the stress. Can be applied over your body’s energy centers or places where it was abused.
- Trauma Life: reduces stress caused by traumatic experiences and helps in managing symptoms like insomnia, restlessness, hopelessness, and anger.
gap
- Valor: gives a feeling of empowerment, inner strength, and courage, used to treat low self-esteem. Can be applied to wrists, feet, and nape.
- PanAway: helps manage pain and inflammation, speeds up the healing process. Can be used in a diffuser, added to bath water, or applied to the body directly (temples, forehead, nape).
- Tranquil: combats restlessness and reduces anxiety, has a calming and relaxing effect on both mind and body. Can be applied to nape, temples, and wrists.
- Release: releases anger and opens the subconscious mind to aid in recovery. Can be used in a diffuser, added to bath water, or applied to the body directly (wrists, feet, nape).
- RutaVaLa: relieves anxiety and helps to achieve quality sleep. Can be applied to wrists, feet, nape, temples, and forehead.
- Present Time: gives a feeling of empowerment and helps focus on the present rather than the past. Can be applied to chest, nape, forehead, and temples.
- Joy: helps overcome spells of sadness and depression by producing positive energy. Can be used in a diffuser, added to bath water, or applied to the body directly (chest, nape, forehead, temples, wrists, and feet).
So Many Different Essential Oil Blends
I know there are a lot of these blends out there. You don’t need to use or buy all of them. I believe that our bodies know best which ones are the most effective. I don’t know about you but I feel a certain pull towards some essential oils, some more than others. That’s because my body is telling me which ones are the most helpful at treating my PTSD and panic attacks.
GAP
I feel like being in tune with your own body is the first step to better wellbeing. Of course, that doesn’t mean that you should give in to any craving. Craving for a cigarette, for example, is not going to do you any good if you give in. It takes skill to distinguish between the bad and good cravings but it definitely can be learnt!
When it comes to essential oils, I most often choose those blends that have citrus in them. They are refreshing in a way that other blends can’t compete and they are great when I need something to lift my spirit. They also give me that much needed boost of energy if I had a rough night and couldn’t get much sleep.
The ones I have been using the most lately are Peace and Calming and Stress Away. Together with single lavender essential oil, they are the most heavily utilized natural remedies in my arsenal.
GAP
Other Natural Methods for Treating PTSD and Panic Attacks
Essential oils are not for everyone, I get it. Some don’t like the oily texture, some find the fragrances to be too strong, and some plainly don’t believe they work. That’s ok. You don’t need to force yourself to use something you don’t trust. There are some other methods.
It will sound like a cliché but I observed a strong correlation between PTSD and my sleep patterns. Whenever I have trouble sleeping, I am tired the next day (which is obvious, I know). I also get stressed because I know how important sleep is and am upset with myself for not being able to sleep. That makes me more prone to suffering from PTSD symptoms. I am still working on it but I believe that learning how to sleep well is the key to living a stress-free life.
GAP
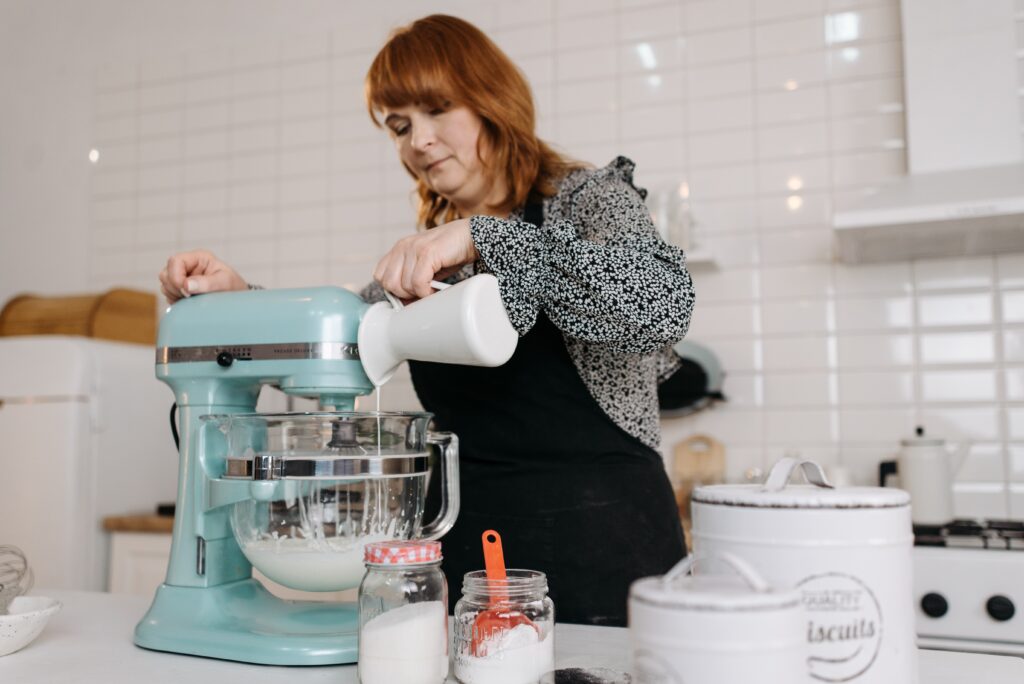
And in the end, I just want to introduce you to this one neat trick I learned from reading Eat For Heat that has helped me greatly in the past. I make a mixture of one spoonful of sugar and one spoonful of salt. I then place that mixture under my tongue. This triggers a relaxation response that is powerful enough to stop most panic attacks!
That’s it for now, thank you for sticking with me until the end. And remember that you can choose not to follow what I have written here. Listen to your body and doctor, then decide what is best for you.


")

")