Home Blog Page 99

Healthy Mint Chocolate Ice Cream

0

I wasn’t kidding around when I said that I intended to eat well on this cleanse.  I mean, mint chocolate ice cream.  Really?  I suppose the most important part about doing a cleanse is finding one that works for you.  I got my start with cleanses when my naturopath and my allergist both recommended I do an elimination diet to see whether I was allergic or sensitive to anything besides gluten.  I ended up doing a hybrid of the elimination diet from the good folks over at Whole Life Nutrition and Dr. Junger’s Clean program, which gets high marks from Gwenyth as well as a bunch of folks on Amazon.

This time I’m loosely following Natalia Rose’s Detox for Women (Kimberly Synder’s The Beauty Detox Solution is similar).  Natalia stresses lots of vegetables but gives the green light on limited amounts of raw goat cheese (yum!) and dark chocolate (double yum!).  That’s a cleanse I can get behind.

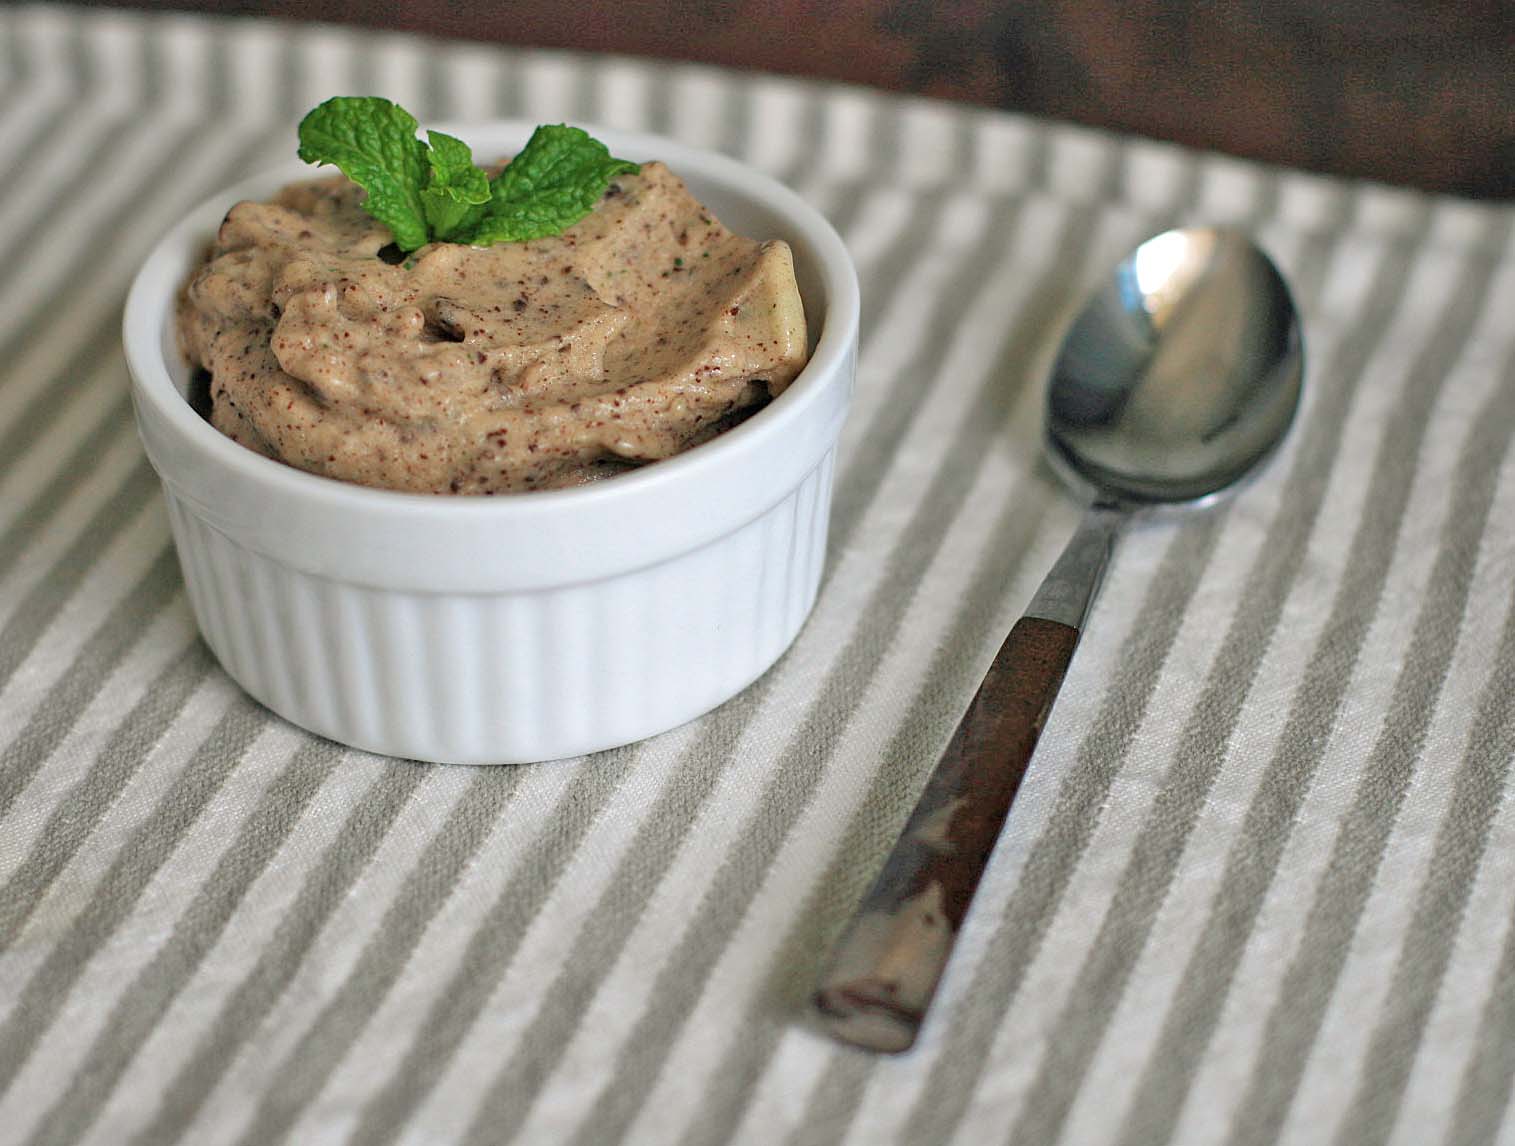
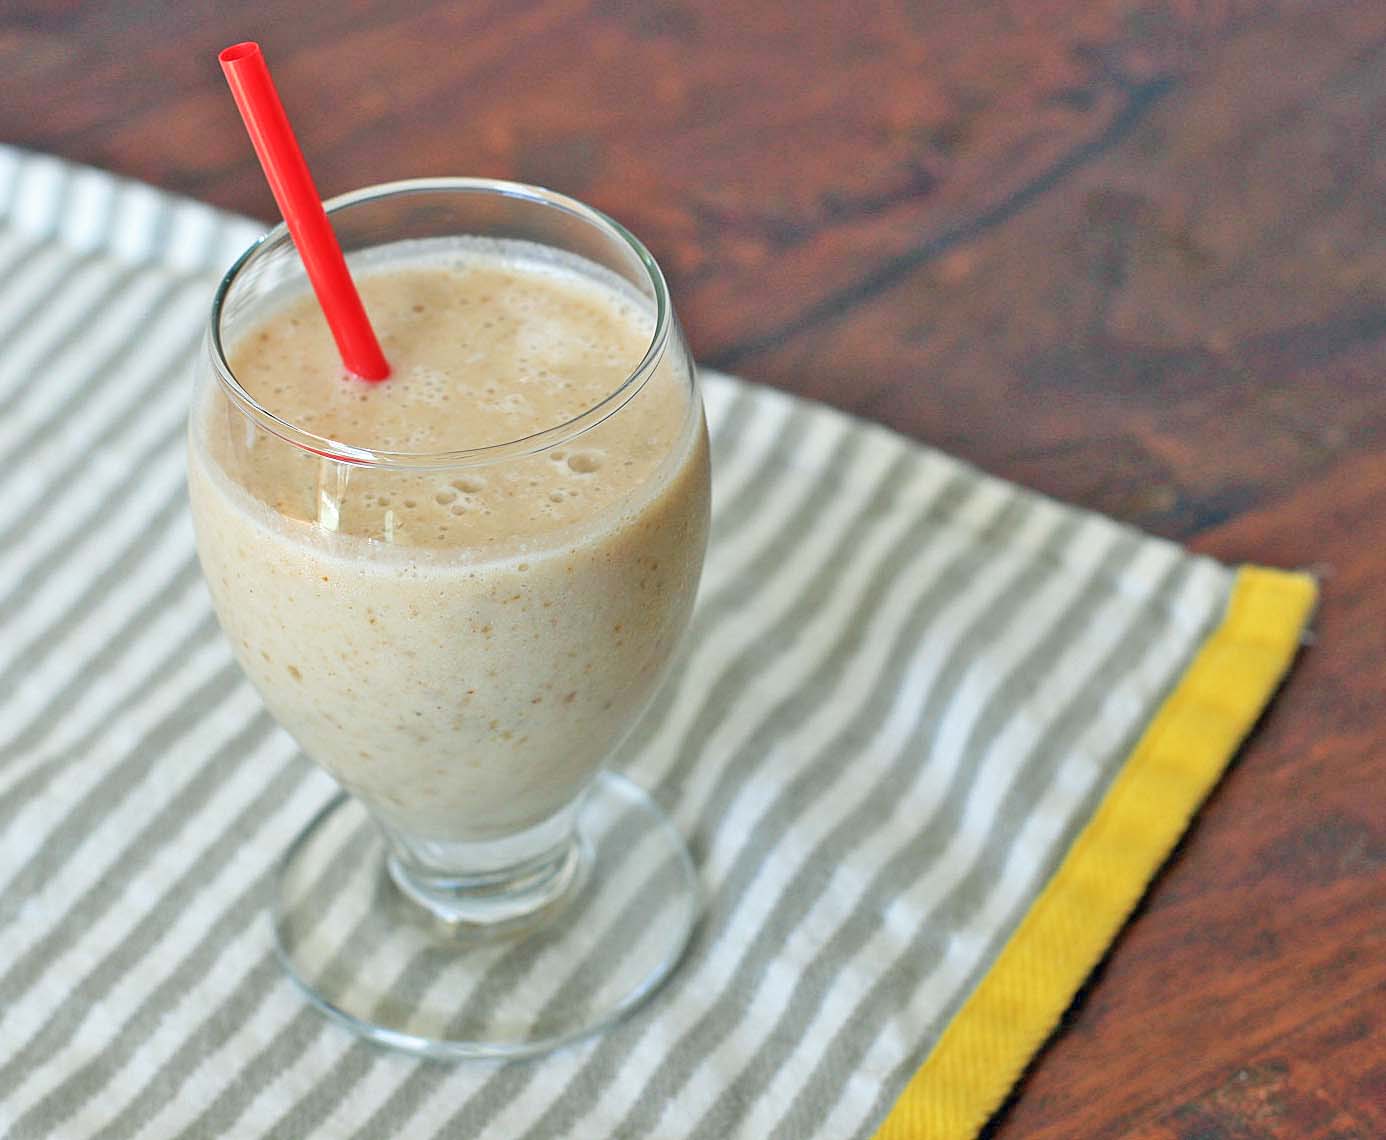
You’ve may have seen one-ingredient banana ice cream in the blogosphere before.  OK, but a little on the boring side in my opinion.  In one of Natalia’s earlier books, she has a recipe for “banana mint,” which is like a soft serve mint ice cream.  I lightened it up with a bit of ice and processed some chocolate in there with it.  It’s pretty amazing what you can get when you combine a bunch of mint leaves, a small amount of chocolate chips, and some frozen bananas.  I have a feeling that I’ll be whipping up variations of this long after this cleanse is done.

Healthy Mint Chocolate Ice Cream

Yield: 2-3 servings

Ingredients:

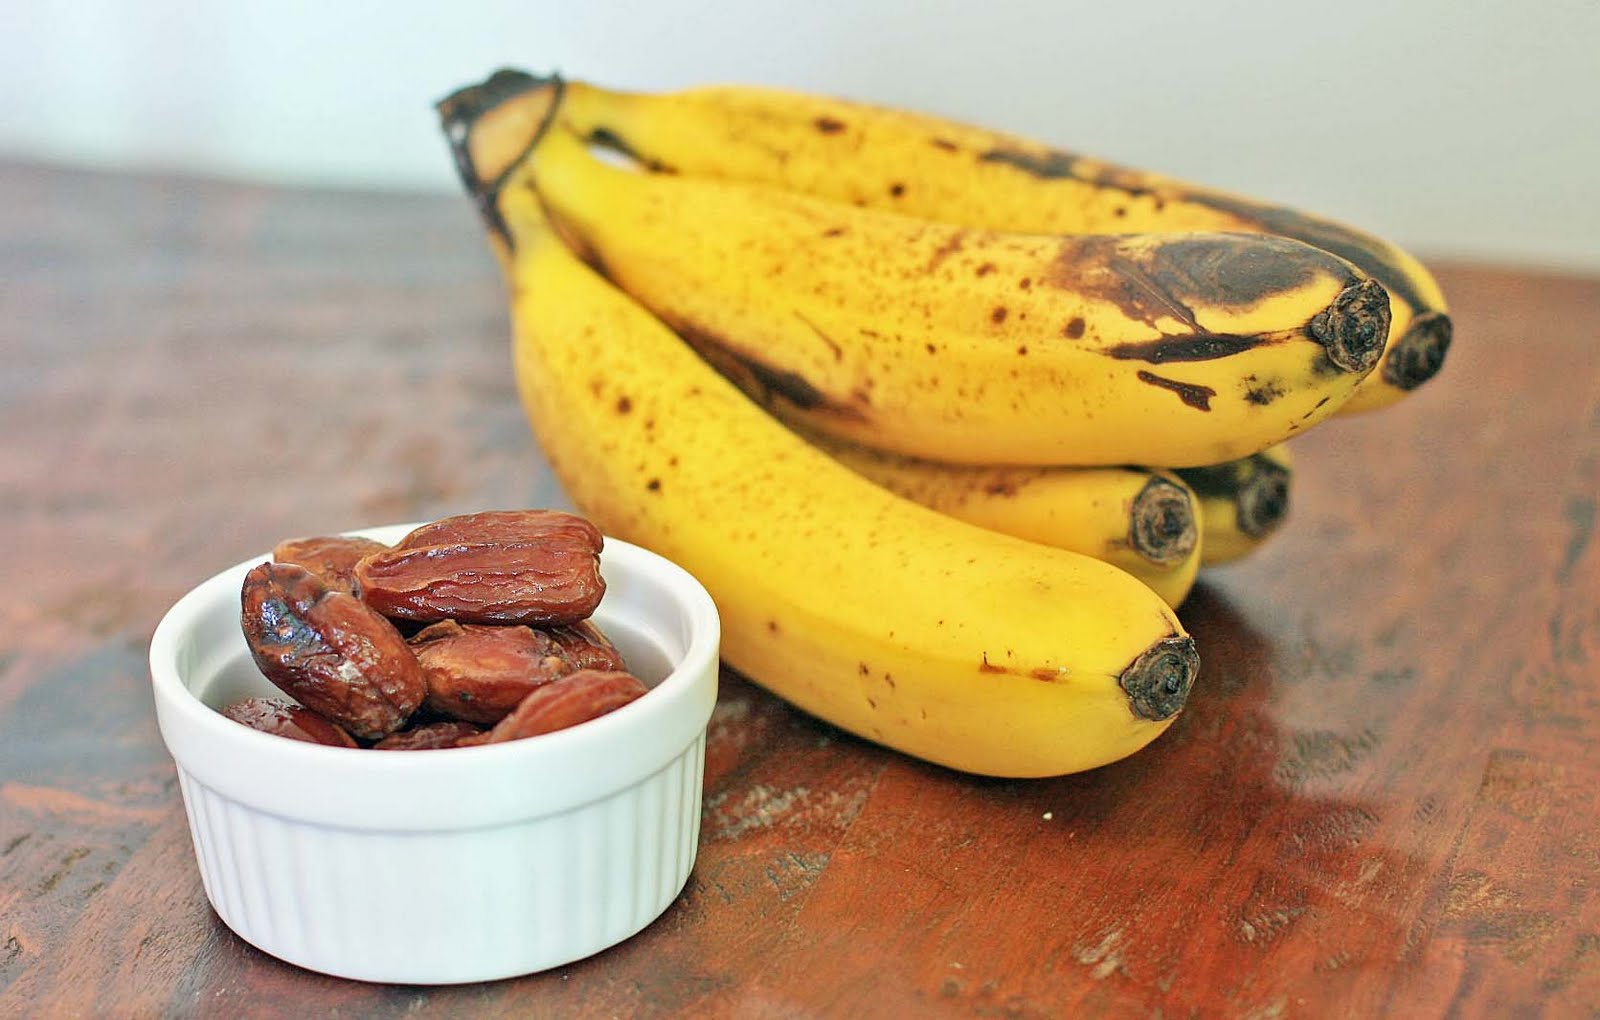
 3 very ripe bananas, peeled, cut into chunks and frozen
about 15 fresh mint leaves
1 1/2 cups ice (optional)
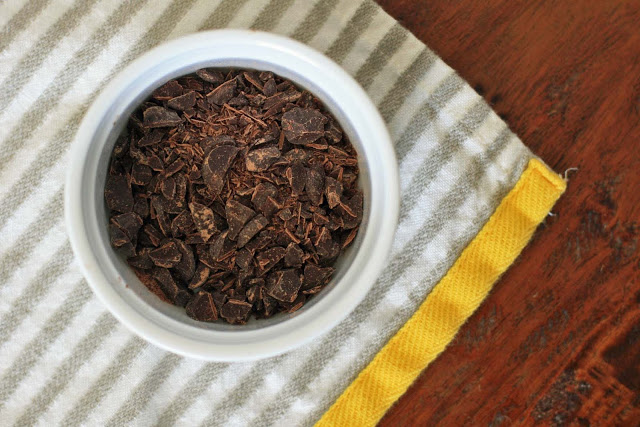
1/4 cup bittersweet or dark chocolate chips

Directions:

If using a high speed blender such as a Vita-mix or Blendtec: Place the bananas, mint leaves and ice, if using, into the blender container. Turn on the machine and quickly increase speed to high. Use the tamper to press the ingredients into the blades while processing. Once everything is slightly combined, stop the machine and add the chocolate chips. Turn the machine back on and again increase the speed to high. In about 10-30 seconds, the sound of the motor will change and mounds should appear in the mixture. Stop machine immediately or melting can occur.

If using a food processor: In a food processor combine the bananas and mint leaves. Process until almost smooth. Add the chocolate chips and process until well combined.

Serve immediately.

Note: You can also freeze the mixture to get a harder ice cream, but you’ll have to let it sit out and thaw for a couple minutes before you’ll be able to scoop it.

Date with Fate Smoothie

The inspiration for this one comes from the Garden Isle.  I’m not sure how the topic of smoothies came up, but a friend from the north shore of Kauai mentioned that Moloa’a Sunrise Fruit Stand made a mean date smoothie.  The very next day I threw some dates into a simple banana nut smoothie and swooned.  Now, I’m all about throwing dates into milk-based (dairy or non-dairy) smoothies for sweetness.  And now that I’m off sugar for a couple weeks, I’m all for a little sweetness in my life.

As it turns out, this smoothie is nothing like Moloa’a’s (which I later found out has papaya, mango, banana, coconut, dates, macadamia nuts and rice milk- yum), but it’s great in its own right- it makes for one killer breakfast or dessert smoothie.

Date with Fate Smoothie

Yield: 1 serving

Ingredients:

 1 banana, broken into several pieces
1 cup almond milk
6-8 dates, depending on your desired level of sweetness (reduce to 3-4 if you have the   larger Medjool variety)
1 cup ice

Directions:

Combine ingredients in a blender and process until smooth.

Moroccan Spiced Lentil, Chickpea and Fava Bean Soup

0

Why am I posting this hearty, filling, and chunky soup right when many of you are finally beginning to experience summer weather and probably longing for something light and refreshing?  Well, I’m trying to not forget all of my friends in the Southern Hemisphere who are just starting their long haul through winter. This one is for you guys.  Plus, isn’t anytime the right time for a healthy, vegan bean soup?

This soup combines lentils, chickpeas and fava beans in a tomato broth spiced with ginger, turmeric and cinnamon- some of the best warming spices out there.  This soup has been passed down and refined from the original gruel that the Berbers used to warm themselves during the cold winters in Morocco’s Atlas mountain range.  If you’re short on time, feel free to used canned chickpeas or frozen fava beans.

Spiced Lentil, Chickpea and Fava Bean Soup

Yield: 6 servings

Ingredients:

3 Tablespoons olive oil
2 onions, sliced
4 cloves garlic, thinly sliced
1/2 teaspoon ground ginger
1/2 teaspoon ground turmeric
1 teaspoon cinnamon
4 cups canned diced tomatoes, in their juice
1/2 teaspoon sugar
3/4 cup lentils, rinsed and drained
6 cups vegetable or chicken broth or stock
1 cup dried chickpeas, soaked overnight, boiled until tender, and drained (or substitute a 15 oz can of chickpeas)
1 cup dried fava beans, soaked overnight, boiled until tender, and drained
1/2 cup chopped cilantro
salt and pepper to taste

Directions:

Heat the oil in a stockpot or very large saucepan over medium heat. Add the onions and garlic and cook until the onion has softened. Add the ginger, turmeric, cinnamon and stir to mix. Stir in the diced tomatoes, sugar and lentil and pour in the broth or stock. Bring the mixture to a boil, then reduce heat and simmer, covered, until the lentils have softened, about 25 minutes.

Add the chickpeas and fava beans and simmer another 10 minutes. Allow the flavors to meld and the soup to heat through.

Add the cilantro and add salt and pepper to taste.

Vegetarian Dubu Jeon- Pan Fried Tofu with Mushrooms

When I was in high school, my parents shipped me away to one of those awful college prep summer programs.  I’m sort of a dork so I didn’t really mind the classes but the cafeteria food was another thing altogether.  Plain tofu was one of the only edible things besides jello and granola.  I began to wonder whether I’d been shipped to a weight loss camp in disguise.

So after a month or so of daily, unseasoned tofu I was pretty much ready to write it off for life.  While I’m a huge fan of many vegan foods, I’m much more likely to use beans as the protein source.  I sure didn’t expect to be posting any tofu recipes around here.

But then I found a store that carried packages of these cute-as-a-button enoki mushrooms for only 79 cents.  And then I feel in love with this soy sesame dipping sauce.  And finally, I saw a quick vegan recipe that combined the two.  I figured the only things I had to lose were a 99 cent package of tofu and about five minutes of my time.

Well, I think it’s safe to say that I’ve moved past my self-imposed tofu moratorium.  Quick pan fried pieces of tofu are smothered, and I mean that in the best possible way, with enoki and shiitake mushrooms and then drenched with that killer soy sesame sauce.  This recipe might be just the thing to covert your tofu hating friends.

Pan Fried Tofu with Mushrooms

Adapted from The Korean Table: From Barbecue to Bibimbap 100 Easy-To-Prepare Recipes

* 1 pound firm tofu
* 2 Tablespoons vegetable oil
* 3 fresh shiitake mushrooms, thinly sliced
* 1 bunch enoki mushrooms, approximately 4 oz., rinsed and ends trimmed
* Soy sesame dipping sauce

Place the tofu in a microwave safe bowl and microwave for one minute.  Drain the liquid.  Cut the tofu in half so that the two pieces of tofu are half as thick as the initial block.  Cut in half again, this time lengthwise.

Heat 1 Tablespoon oil in a medium skillet over medium-high heat.  Fry the tofu for about 2-3 minutes on each side, until lightly browned.  Remove to two plates.

Heat the remaining oil and add the mushrooms.  Stir fry for approximately 2 minutes until the mushrooms have softened.  Spoon mushroom mixture over the tofu and drizzle the soy sesame dipping sauce over each piece.

Serves two.

Haemul Pa Jeon – Seafood and Green Onion Pancake

0

I’m really digging the fact that so many Korean dishes come together so quickly. Traditional Korean pancakes use wheat and rice flours, but this version with rice flour and cornstarch (bound together with the help of an egg) worked just fine and was both crispy around the edges with a bit of chew.

I really wanted the focus here on the seafood rather than the pancake itself, so this recipe almost straddles the line between pancake and fritter.This can also be an extremely inexpensive appetizer or meal.  Since the seafood gets chopped up, feel free to purchase broken scallops and smaller, and cheaper, shrimp.  I’m also happy to report that, according to a friend, this easily won the taste test between my gluten-free version and the local Korean market’s.

Seafood and Green Onion Pancake

Yield: 4 servings as an appetizer

Ingredients:

* 1 cup rice flour
* 1/4 cup cornstarch
* 1 egg
* 1 teaspoon salt
* 1/2 cup water
* 3/4 pound any combination of squid, shrimp or scallops, cut into small chunks
* 5 green onions, cut into 1-2-inch pieces
* vegetable oil, for frying
* Korean red pepper threads, for garnish (optional)

Directions:

In a large mixing bowl, combine the rice flour, cornstarch and salt. Add the water and mix until smooth. The batter should be relatively thick. Stir in the seafood and green onions.

In a medium or large skillet, heat one tablespoon of oil over medium high heat. Spoon some batter onto the skillet, making pancakes of your desired size. Fry on each side for about 3-4 minutes, until crispy and the pancakes begins to turn golden.

Repeat with remaining batter, adding more oil when necessary.

Garnish with red pepper threads, if desired, and serve with Soy Sesame Dipping Sauce.

Note: for those of you who eat gluten, here’s the general flour ratio from several cookbooks (they all suggest using some rice flour). Use 1 cup wheat flour, 1/3 cup rice flour and one cup water for the dough. This will likely make a much thinner pancake than the gluten-free version I made (again, I was almost going for a seafood fritter), or you can adjust the water amount down for a thicker pancake.

Chocolate Brigadeiros, Adapted- Salted Chocolate Caramels

I feel as though I should first apologize for bastardizing the formula for what is more or less the national candy of Brazil.  If you’re looking to get a very traditional recipe, it’s probably best that you look elsewhere.  However, if you’re a big fan of salted chocolate caramels, you might want to give this a try.  It reminds me of a certain recipe from the dearly departed Domino magazine (whimper, whimper), but better.  And you don’t even need a candy thermometer.

Chocolate Brigadeiros, Adapted- Salted Chocolate Caramels

Ingredients:

* 2 (14–ounce) cans sweetened condensed milk (or make your own)
* 4 Tablespoons butter
* 4 Tablespoons heavy cream
* 1/4 cup (or 3 oz.) bittersweet chocolate chips (I use Ghirardelli 60% Cacao Bittersweet chocolate chips)
* 1 Tablespoons unsweetened cocoa powder
* sea salt (or substitute with cocoa powder or chocolate sprinkles)

Directions:

Combine the condensed milk, butter, and heavy cream in a heavy bottomed saucepan. Bring to a boil over medium heat. When the mixture starts to bubble, whisk in the chocolate and cocoa powder.

Reduce the heat to low, and cook, stirring constantly, until mixture easily pulls away from the bottom and sides of the pan. There are several tests you can use to ensure it is done. Swirl the pan around; if the whole mixture slides as one piece, it’s done. To put it another way, when you can draw the wooden spoon across the bottom of the saucepan and you are able to see the bottom of the saucepan for a second or two before the mixture combines back together, it’s done.

Slide the mixture into a bowl and let cool. Once it’s at room temperature, chill in the refrigerator for 4 or more hours.

Scoop the mixture out and use your hands to roll each into a little ball about the size of a chocolate truffle.

At this point you have several options. My favorite way to finish the candies was simply to top each with a couple flecks of sea salt. You can also roll them in unsweetened cocoa powder or chocolate sprinkles (the traditional route). I also saw some pictures online of brigadeiros rolled in colored sprinkles….. super cute for a kid’s party.

Store covered, in the fridge.

Burmese Spiced Yogurt Chicken

In January I’ve heard a whole lot of rumblings around the blogosphere about people having a hard time getting back in the swing of things after the holidays.   Even though we’re well into February, I’d still have to agree with that sentiment. It’s certainly not due to a lack of inspiration.   During my two weeks pause from blogging I felt like a high school student without any homework.

chicken cooked in yogurt and spices

But rather than spending all of my time on Facebook or at the mall (or whatever it is that high school kids do these days), there were post-work Pilates sessions, late nights with good books, early morning weekend hikes and subsequent mid-afternoon naps.

It was pretty great.

chicken Reluctant to let go of all of these little luxuries that can only exist with a little free time, I’ve been slacking a little bit around here.   I’ve been forgetting to come up with recipe game plans and grocery lists and just sort of winging it as best I can come the weekend.

Last Saturday I did a quick scan of a Burmese cookbook. I was trying to figure out what I could make with whatever ingredients were in the freezer, fridge, and pantry. I had some sad, forgotten chicken thighs in the freezer and a small tub of Greek yogurt in the fridge. Additionally, I had all of the requisite spices in my admittedly overstocked spice rack. So, this chicken cooked in yogurt and spices shot up to the top of the very short list of possibilities. Chicken is marinated overnight with pretty basic spices and yogurt. Bake it until bubbly and the chicken is cooked through. Finally, top it with some crispy shallots and fresh cilantro, and it pretty much tastes like heaven.

Who knew slacking off could be as delicious as chicken cooked in yogurt and spices?

Burmese Spiced Yogurt Chicken

Although this recipe worked very well using the baking method, I imagine grilling the marinated chicken would be even better…

Yield: 4 servings

Prep Time: 15 minutes

Cook Time: 30 minutes

Ingredients:

4 pieces chicken breast or chicken thighs, chilled
1/2 cup plain Greek yogurt
2 cloves garlic, minced
1 teaspoon minced fresh ginger
1-1/2 teaspoons salt
1/2 teaspoon ground turmeric
2 teaspoons ground cumin
1 teaspoon paprika
1 teaspoon ground cardamom
2 Tablespoons oil
fried shallots, for topping
fresh, chopped cilantro leaves, for topping

Fried Shallots:
At least one cup thinly sliced shallots
oil

Directions:

Place the chicken in a large bowl. Add the yogurt, garlic, ginger, salt, turmeric, cumin, paprika and cardamom. Stir to mix. Cover with a lid or plastic wrap and refrigerate for 8 hours or overnight to fully infuse the chicken cooked in yogurt and spices.

When ready to bake, preheat oven to 350 degrees. Arrange the chicken pieces in a baking dish (I used one slightly smaller than a 9×13″) and pour any of the additional marinade over the chicken. Bake for 30 minutes or until the chicken is completely cooked through. This method enhances the chicken cooked with yogurt and spices.

While the chicken is baking, prepare the crispy shallots. Heat 1/4 cup oil in a skillet over high heat. Add the sliced shallots and stir until well-coated in oil. Spread into an even layer. Stop stirring and let the shallots cook until the shallots on the periphery begin to brown. Stir well and again spread the shallots out into an even layer. Repeat until all of the shallots are a dark brown, adding more oil if necessary. Drain on a paper towel.

Top chicken with crispy shallots and chopped cilantro.

Mushrooms en Papillote- Mushrooms Baked in Parchment Paper

0

I find myself in the unusual position of being relatively stress-free this December.   For once I’m not doing any traveling during the holiday season, I don’t have to worry about cooking or eating in kitchens with counters that  seem perpetually covered in glutenous bagel and/or bread crumbs, and I really don’t even have to worry about doing any gift shopping (with the exception of the little ones, family and friends have pretty much adopted a no gifts policy and focus on presence instead of presents… although family will have to wait for my presence for another month or so).  In fact, my friends and I have discussed scrapping a traditional Christmas meal altogether and just getting together for either some gluten-free mac and cheese or pizza.  Elaborate meals happen all the time around here, so just lounging around, watching movies and having a cheesy carb fest sounds pretty amazing.

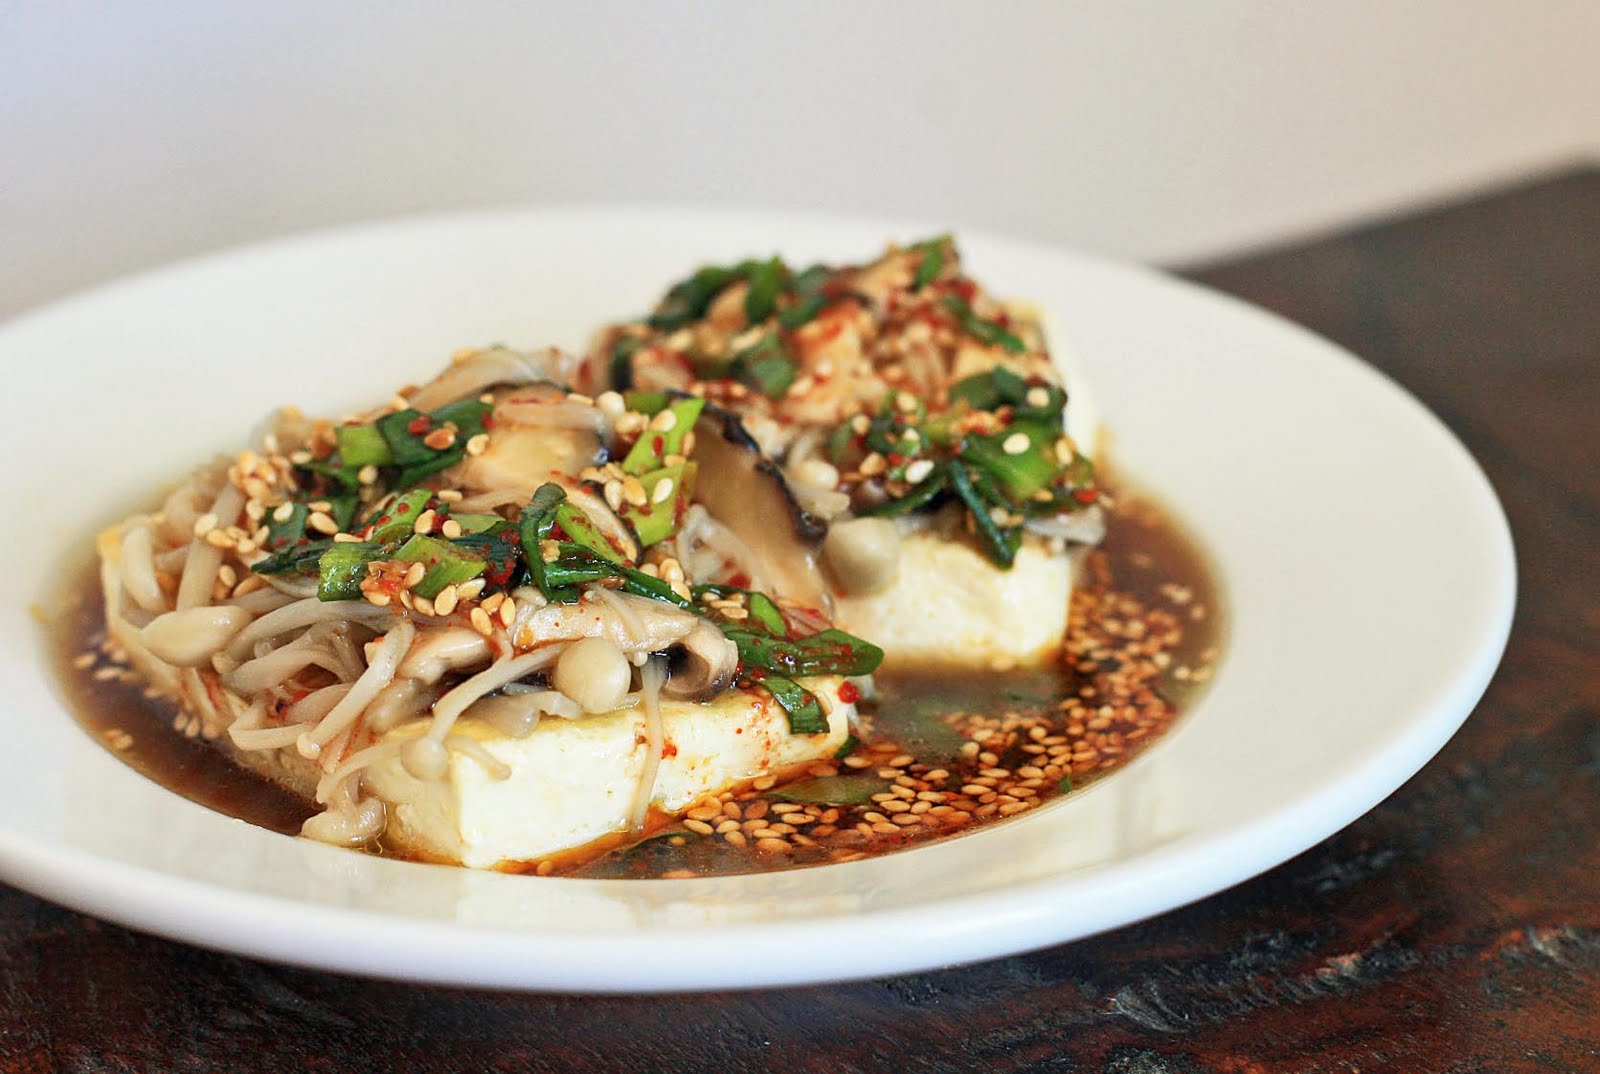
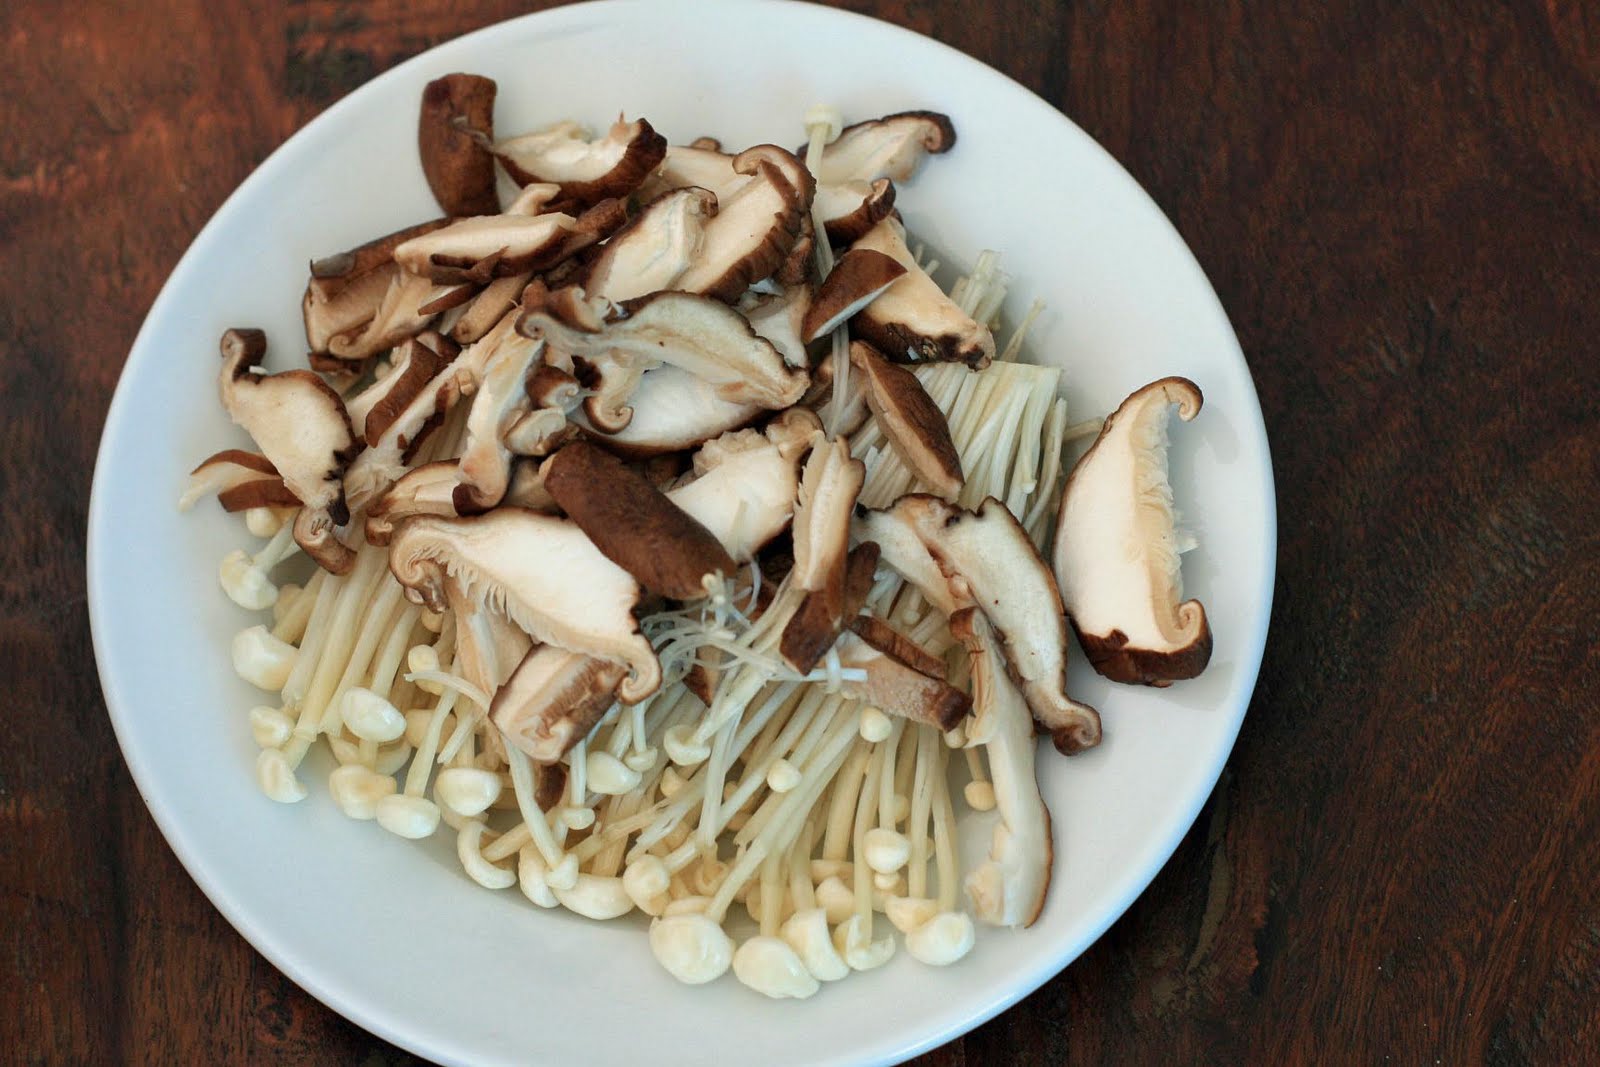
Of course there will still be a couple dinner parties this month (you know, the whole presence thing), and this mushroom dish is sure to be on the menu at least once or twice.  Since I tend to go overboard with the number of dishes and courses, I always try to keep a couple of them on the simple side to prevent myself from getting overwhelmed.

And these mushrooms en papillote couldn’t be much easier.  Toss some mushrooms with some butter, lemon juice, white wine, parsley, salt and pepper and bake everything in a calzone shaped parchment packet.   I used a mixture of button mushrooms and some local Hamakua Alii and Pioppini for a little variety.   Although they’re intended to be a side, I can easily imagine eating these mushrooms with some mashed potatoes for one-bowl meal.

Mushrooms en Papillote- Mushrooms Baked in Parchment Paper

Yield: 4 side servings

Prep Time: 10 minutes

Cook Time: 20 minutes

Total Time: 30 minutes

Ingredients:

* 2 Tablespoons butter, divided
* 1 pound mushrooms, such as button, chanterelle, shiitake, or a mixture, brushed clean
* 1/2 teaspoon salt
* 1/4 teaspoon black pepper
* 1 teaspoon lemon juice
* 2 teaspoons white wine
* 2 Tablespoons freshly chopped parsley

Directions:

Preheat oven to 375 degrees and cut parchment paper into an approximate 18 by 11-inch rectangle. Fold the rectangle in half crosswise. Open the parchment and coat with a small pat of butter. Place the rectangle, buttered side up, on a baking sheet. Cut the remaining butter into small pieces.

Cut or slice any large mushrooms into bite-size pieces and place in a bowl. Add the salt, pepper, remaining butter, lemon juice, wine and parsley and toss well. Spread the mushrooms over one half of the prepared parchment paper and fold the other half of the parchment rectangle over the mushrooms. Take the vertical edges (opposite the folded edge) and fold over twice. Continue folding towards each exposed end, until you reach each side, creating a calzone or dumpling shaped packet. Twist each side to seal the packet shut.

Place the packet on a rimmed baking sheet and bake until puffed and the mushrooms are cooked through, about 15-18 minutes. Carefully transfer the parchment packet to a platter, carefully open the packet and serve immediately.

Lait de Poule- Spiked Eggnog

0

I feel like the holiday season doesn’t officially begin until I have my first sip of eggnog.   And although I’ve done my best to ignore the ingredient list  in my beloved Hood Golden eggnog (high fructose corn syrup, artificial flavors and RED 40, YELLOW 5 & 6) for the past several years, I decided that it was high time to make my own… with no questionable ingredients.

Rich and creamy, this eggnog is spiced with real vanilla bean, cinnamon, cloves and nutmeg.  And because I’d like everybody to enjoy a Salmonella-free holiday season, I decided to go with a cooked egg version.

In past years I’ve skipped the booze because the idea of milk/cream coupled with hard alcohol didn’t seem all that tempting.  Man did I miss the boat on this one.  After all, both Irish Crème and White Russians are prime examples of just how great the cream and hard alcohol combination can be.

If you’re making this eggnog for children, you’ll want to skip the bourbon and rum.  But if you’d like to gussy it up a bit, I saw a great tip from Laura Calder to add a bit of orange flower water to taste.  And while the eggnog can be garnished simply with a sprinkle of cinnamon or nutmeg, a small cap of whipped cream and a cinnamon stick garnish make the drinks extra festive.

Lait de Poule- Spiked Eggnog

Yield: 6 servings

Prep Time: 10 minutes

Cook Time: 20 minutes

Total Time: 1 hour 30 minutes

Ingredients:

 4 cups whole milk
1 vanilla bean, Split lengthwise
1 stick cinnamon, plus extra for garnish
2 cloves
6 egg yolks
1/2 cup sugar
1 cup heavy cream
1/4 teaspoon nutmeg (can add more to taste)
1/4 cup bourbon
2 Tablespoons rum
whipped cream

Directions:

Place the milk into a large, heavy-bottomed saucepan and scrape in the seeds from the vanilla pod. Add the vanilla pod, one cinnamon stick, and the cloves. Heat the mixture to the boiling point. Remove from the heat, cover, and let sit 20 minutes to infuse.

Beat the egg yolks, sugar, and heavy cream, and nutmeg together in a large bowl. Very slowly add the infused milk mixture, whisking constantly. Return everything to the saucepan, place the pan on medium-ow heat and cook, whisking constantly, until the mixture has thickened slightly, about 3 to 5 minutes. Do not allow the mixture to boil (the mixture will likely curdle if it comes to a boil). Stir in the bourbon and rum. Taste the mixture and add more nutmeg, if desired. Strain the mixture into a jug, cool, and, chill.

When ready to serve, pour the eggnog into glasses, top with whipped cream and a sprinkle of nutmeg or cinnamon. Garnish with a cinnamon stick, if desired.