 Here’s the post I am going to refer you back to again and again. These are the basic steps in hot water bath canning which means boiling the filled jars until they are hermetically sealed. This vacuum packed seal, along with the acidic contents keeps the food safe from bacteria and in particular clostridium botulinum.
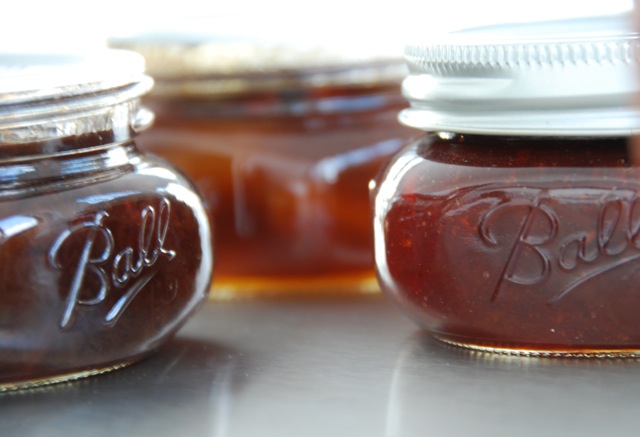
Whenever we ‘can’ or preserve jams and pickles in this way they can be stored in a cool, dark place for a year or more, and do not have to be put in the fridge until they are opened. The hot water bath canning method only works safely with high-acid foods, i.e. fruit preserves & pickles. So please for safety reasons, follow the recipes and these directions completely and accurately, or, you can put your preserves directly in the fridge and skip this part. But, this is the fun part; in fact
you’ll most likely have a ball!
Steps in Hot Water Bath Canning
1. Clean jars with hot soapy water or in dishwasher.
2. Pre-heat jars by placing open, empty jars on rack in canning pot and lower down. If you do not have a rack, you can place some screw tops down first to keep the jars from touching the bottom of the pan. Fill canning pot with hot water until the jars are full. Place lid on canning pot and heat on cooktop until hot but not boiling.
 Note
Note

Note: if the recipe states to boil the filled jars for 10 minutes or longer then the jars do not have to be sterilized at this step. If the recipe states to boil the filled jars less then 10 minutes then you will want to sterilize them here. Just boil the empty jars for 10 minutes at a full rolling boil.
3. Prepare recipe while jars are heating, keeping jars hot until ready to be filled.
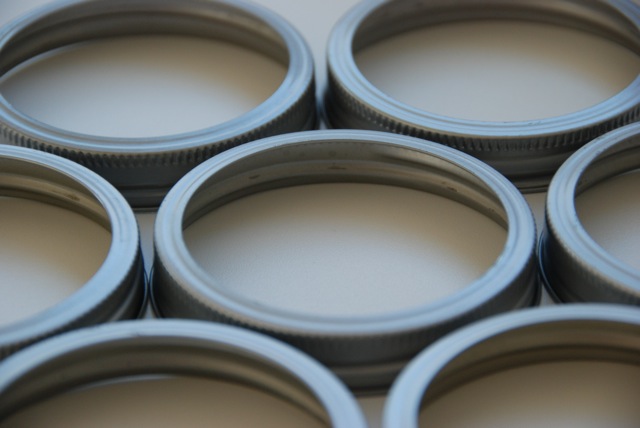
4. Heat jar tops 5 minutes before jars are to be filled. Place flat lids of mason jars, or the rubber gaskets for weck jars in a bowl with hot water (this water should not be boiling). Do not place metal screw caps in heated water, but you should place the weck glass tops in the heated water also if using.
5. Remove each jar as needed when food is ready to be processed. My rack hangs on the side of pot so I lift the entire thing up for easy access to the jars. This is where either a jar lifter or a silicone glove comes in handy. Place a folded kitchen towel on counter and place hot jar on towel (a hot jar placed directly on a cold counter top could break). No need to dry jar before filling. I turn it upside down and give it a couple of pats on the towel to shake out any excess water.
6. Fill jars one by one and food can either be ladled or sometimes poured into jar. Here is where I use my trusty funnel. Headspace is very important. Too much space between food and top of jar and it may not seal correctly. Too little and the food my be forced out of jar during boiling. As a general rule 1/2 inch headspace is perfect. Unless otherwise stated in the recipe food should always be processed immediately following the cooking stage, i.e. still hot.
note
7. Remove air pockets by running a small rubber spatula or chopstick around the side of the jar. For most jams you will not have to do this, but if there are large pieces of fruit, or with most pickles you will notice air pockets and will want to get rid of them to ensure a proper seal.
8. Place lids on jars after wiping rim with a damp paper towel to remove any misplaced food. Place the flat lid on if using mason jars, or the rubber gasket and glass lid if using weck jars. For the masons put the screwcaps on and tighten with fingertips. this means that you want the screw cap secure but not overly tight. For the wecks once you have the rubber gasket encircled around the inside of the glass top and placed on top of jar, put two metal clips on, directly across from each other.
note
 9. Adjust water to cover by 1 inch once jars are full and lowered back down into pot. if you have different size jars in the canner, cover the tallest one by 1 inch. Note that jar size should not vary too much within a recipe.
10. Process jars according to individual recipe as processing times vary and are based on size of jars, density and composition of food. Processing is the amount of time the jars must be immersed in a full rolling boil. Do not start timing until the boiling becomes steady & vigorous. The water must remain at a full rolling boil throughout. A kitchen timer is helpful here for accuracy. For safety reasons and to ensure that the food does not overcook, do not alter the processing time.
note
Note on high altitude canning: the higher your elevation, the lower the temperature at which water boils. If you are over 1000ft adjust as follows:
1001-3000 ft: increase processing time by 5 minutes
3001-6000 ft: increase processing time by 10 minutes
6001-8000 ft: increase processing time by 15 minutes
8001-10,000 ft: increase processing time by 20 minutes
11. Leave jars in pot for 5 minutes at end of processing time. Once heat is off and lid is lifted, a few minutes here will allow for adjustment to temperature change. I lift the rack up and hang it over the sides so that the jars are not in water, but they can be left down below also.
12. Lift jars out of canning pot with either a jar lifter, or using a silicone glove and place on kitchen towels. Try not to tilt jars excessively. Do not adjust the screw caps or metal clips, do not worry about any water gathered on top of jars. Let jars rest for 12 to 24 hours to cool completely. You may hear popping noises from the masons, this is the sound of the jar sealing.
note
 13. Check the seals after the 12 to 24 hour cooling period. For the masons push down in the center of lid. You should not hear a metal popping noise, and it should concave slightly. For the wecks the tab on the rubber gasket should be pointing down. Take off the screw caps or the metal clips and here is the real test: use your fingertips to pick up the jars by the lid only. If it is properly sealed you will be able to do this. If it isn’t the lid will come off and the contents of the jar will spill everywhere. So do it slowly and with your other hand under the jar.
Note: If any jars failed to seal, you can wipe the rim and try again using a new flat top or rubber gasket. If it is only one or two jars the easiest solution might be to put them directly in the fridge and enjoy immediately, as in some cases reprocessing overcooks the food and affects quality.
note
14. Store the jars in a cool, dark place without the screw caps or metal clips. This means out of direct light and in a temperature range of 55 to 78 for best keeping quality. Labeling the jars with date and contents is important because no matter how much you think you will remember what is what, you won’t. Trust me.
15. Examine each jar before opening by checking for bulging or leakage, and rechecking the seal as described above. If seal has come undone or you notice anything funny, do not eat contents, discard food and sterilize jar. Screw caps or metal clips should be refastened after opening for fridge storage.
If you follow these steps and the recipes accurately, you will have many jars of good and safe eats! for a list of canning equipment go here. Time to get cannin’ peeps!
But safety first…so read up, cause I’m not doing this for my health ya know …oh wait, and yours too!