Home Blog Page 115

Can Jam October Round Up: Chile Peppers

Oooh, this month was on fire! Chileheads, my peeps, this one is for you…

Pickles, Salsas & Chutneys

apple hatch pepper chutney – the cosmic cowgirl cowgirl, you have got it going on IMO. I bet this is flying off those market shelves, right?

ancho chile barbecue sauce – married …with dinner, don’t you just love when you get one over on Heinz?

charred chile barbacue sauce – local kitchen, this looks hot! (By that I mean good, you know that, right?) and omg the apple jalapeño preserves for pouring over ice cream? Genius!

chili & vegetable tid-bits – knit & knosh, these are beayootiful! And I love that you paid careful attention to safety while simultaneously utilizing a mixture of veggies that was just right for you and yours!

corn relish – mother’s kitchen, isn’t canning great for stretching the season of our favorite veggies? Your family might just be wishing for some corn in January and guess what then? Super mom to the rescue!

gap

honeyed garlic jaleneños – grow & resist, hey, this is like what I did! (Except mine are cayenne). Did the oil get all up in your canner?

marinated peppers – what Julia ate, why I love the can jam reason #kazillion: I pour over Linda’s book & still I skipped right over this. I agree the oil feels uncanny, but I trust her and omg antipasti in a jar. Next year I’m growing a bunch of sweets for this!

pa sportsman’s club sweet-hot wax peppers – put a lid on it, I’m a sucker for nostalgia in a jar…Does your mom give it an A+?

peter piper’s pickled pepper relish – mock paper scissors, a solid pickled pepper recipe right here, makin’ me wish I had a grilled cheese to put it on right now!

pickled carrots with habanero – wine book girl, this is a basic and very good pickled carrot recipe. And the addition of habanero is very appropriate, I like it!

gap

pickled peppers – thinking out loud, that dog wants those peppers… Make sure he has gloves on before you give him some. 🙂 And make some more o’ these next time, ’cause I know you’re gonna need them past November!

pickled peppers – putting by, a basic pepper pickling recipe right here! (And a lesson in how giving gives back, especially if it’s to a farmer at the end of the season I might add!)

pickled roasted peppers – bigger than a breadbox, I bet you Peter didn’t roast his peck of pickles – but Mimi sure did – her fifth of a peck that is!

salsa verde – backyard farms, and red hot chili jelly! …And oh no, about the pectin problem. Jeeesh!

spicy bread & butter zucchini pickles – locally preserved, did you taste them yet? Was the chipotle just what the doctor ordered for these picklz? (Oh, and please do tell about the spicy quince pickles!)

spicy red peppers & red onion chutney – market life, this looks tasty! Bring on the chutney!

sweet chile sauce – the artisanry of acorn cottage, of course and then there’s salsa verde, and jalapeño jelly too! Jalalooya!

Onions Limone Chutney

Let me tell ya the story about onions limone. Ya see, onions was a big talker. Until one day, the boss told me to give onions the silent treatment. Know what I’m sayin? I did a real clean job.

‘Cause that’s what I do. I’m not sayin’ a couple-a-few innocents didn’t get caught in the mix. These things happen.

Regardless, I get the job done.

Onions Limone Chutney

Adapted from Jellies, Jams & Chutneys by Thane Prince
1/2 pound red onions (about 1 medium-large), diced
1/2 pound lemons (about 3 medium)
4 & 1/2 ounces dried apricots, chopped
4 garlic cloves
1 1/2 inch slice of ginger
3 dried red chiles
7 ounces demerara sugar – or raw
1 tablespoon black mustard seeds
1 tablespoon salt
1 cup white wine vinegar
1/2 pint canning jars or smaller
yield: 1 & 1/2 pints approximately


Directions:

1. Squeeze the lemons and set juice aside.

2. Scrape the flesh from the lemon peels and discard. Slice and then dice the cleaned lemon shells.

3. Peel the garlic and ginger and process to a paste with the dried chilis. You can use a mini processor, a wet/dry spice grinder or a good old fashioned mortar and pestle.

4. Put everything into a preserving pot including the reserved lemon juice. Heat on medium low until the sugar melts and then turn up the heat to medium high and bring to a boil. Simmer until mixture thickens – about 20-30 minutes.

You know when it reaches sufficient thickness when you slide your stirring spoon across the bottom of the pot and the chutney wavers on either side for a second or two before it melts back over itself.

gap

5. This chutney is quite thick and like me, you may have a bit of trouble getting all of the air pockets out of the sides. Be sure to use a knife or back of spoon to run around the inside sides and give the jar a little bang and side to side shuffle on the counter-top when filling.

6. Hot water bath process for 10 minutes.

To allow the flavors to fully flourish, it is best to let this chutney rest for 2-3 weeks before indulging. This recipe can easily be doubled.

This little chutney packs a powerful punch, and definitely has an Eastern flair. I would say skip the ubiquitous chutney & sharp cheese pairing with this one and go right for the curries, stir-frys and one dish Indian and Southeast Asian inspired meals. Or simply use it stirred into a rice or grain as the flavoring agent.

(Ok, I couldn’t wait – we had it last night with rice and a quick Indian shrimp stir-fry and it really was the perfect pairing! I served it alongside one of our go to lemon pickles and it was so good we ended up stirring this onions limone right into our rice and forgoing the lemon pickle altogether! (Go figure!)

Quince & Cranberry Holiday Preserves

Remember that red stuff in a can that added sour-sweetness to the turkey, stuffing and mashed potatoes? Of course you do. This could most certainly be enjoyed with all of the above mentioned pairings. And though it has the traditional tart-sweet flavor, the quince and candied ginger add a toothsome chutney-esque zing. Plus I can’t stop eating it on top of chevre each morning ever since it’s inception. I can only imagine it slathered across one of those warmed holiday brie wheels. Or nestled comfortably inside the indent of a nut-and-buttery thumbprint cookie.

To top all of this off, it’s about the simplest preserve I’ve ever made. So if you’ve been thinking about learning how to jam, then I say this one is for you. Now just imagine arriving, on Thanksgiving day, or another some-such winter holiday feast, with a jar or two of this delight up your sleeve.

If word gets out you might just find yourself invited to a tad more of those little shindigs come next holiday season, and you certainly want that, don’t you? Of course you do.

Quince & Cranberry Holiday Preserves

2 & 1/2 pounds fresh cranberries
1 & 3/4 pounds quince, peeled and cut into 3/4 inch cubes
6 ounces candied ginger, sliced very thin
5 cups sugar
5 cups water
pint and half pint mason jars

Yield: approximately 6 pints

Directions:

1. Place 2 or 3 small plates in freezer to test set later on, prepare jars for hot water bath processing. No need to sterilize as processing time is 10 minutes.

2. Place sugar and water in a non-reactive (stainless steel, or enameled cast iron) pan and heat on low until sugar is dissolved. Turn up heat and bring to a boil.

3. Once boiled, add quince and bring to a boil again. Lower heat and simmer for a good hour until quince turn red and syrup begins to thicken.

4. Add candied ginger slices and whole cranberries, bring to a boil, continue boiling on medium-high until the cranberries pop and soften. Cook until set, approximately 20 minutes. Test set by placing a teaspoonful on a frozen plate. Put plate back in freezer for 30 seconds. Run finger through. If it wrinkles even slightly under your finger, it is set. Make sure to turn the stove off as you are testing as you don’t want to over set it as you are testing. If on the first try you find that it is not set, turn up the heat and try again in another minute or two.

5. Fill jars leaving 1/4 inch headspace and hot water bath process for 10 minutes.

You can easily cut this recipe in half, forgo the canning part, and slide it right into the fridge for use during the holiday season if you don’t feel like getting your hands wet just yet!

Whole Pickled Blueberries

Did you ever wish a blueberry was a tomato? Probably not. Perhaps if you’ve had to become as familiar with late season blight as we’ve had to here in the northeast, you might have. But never-you-mind because even if you have, thousands of tomatoes falling off your bushes and you’re eating juicy heirloom tomatoes out of hand at every meal and your bottling your year’s supply of sauce and your pickling the green ones and salsa-ing the red ones…

Even if you are doing all of that I say this: tomatoes ain’t got nothin’ on blueberries. I mean, tomatoes are peachy and all but… blueberries go better with champagne. But seriously folks. Ahem. All tomato envy aside (ok I said it!), this is the berry thing that I have been searching for!

It’s sweet and kind of jammy, but with a delicious pickled tang. The berries remain whole so the texture is divine, and the spices give it a hint of exotica that pairs as well with (dare I say) a meaty (free range, organic, grass-fed, happy life and all that jazz) main course or a scoop of frozen dessert.

Whole Pickled Blueberries

Adapted from The Joy of Pickling

2 quarts blueberries (firm but ripe)
14 cloves
12 allspice berries
1 teaspoon fennel seeds
1 teaspoon whole black peppercorns
2 cinnamon sticks (about 2 inches each)
1 1/2 cups champagne vinegar (or white wine vinegar)
2 cups sugar (I use raw)
3 pint or 6 1/2 pint canning jars

Yield: approximately 3 pints

Chewy Spicy (Dried Fruit) Chutney

I remember a more innocent time when I said I didn’t like garlic with fruit. And then another time when I confessed I wasn’t a chutney fan.

That was then. I think it was onionz limone that finally put me over the edge…those illicit little jars of toothsome lemony-spiced-pucker-in-your-mouth-deliciousness didn’t last long around here. So, this time I decided to unabashedly dive right in.

I’m talking fatto garlic cloves, a rotund and juicy onion, gobs of ginger, a lotta dried hot pepper and some big chewy bits of fruit. This is chutney on steroids, jersey shore chutney if you will. This chutney is damn proud to be a chutney and he’ll tell ya about it in every single bite.

If this chutney had hair, you wouldn’t dare run your hands through it. This chutney would hog the bathroom mirror. This chutney is a situation.

Chewy Spicy Chutney

3/4 lb. dried fruit – (I used raisins, sour cherries, figs and apricots. You can also use apples, peaches, pears, blueberries, mango, papaya, etc. Use any combo you like, with at least 4 different types of fruit)
1 & 1/2 lbs. apples (or pears, peaches, plums)
3/4 lb. light brown sugar
2 & 1/4 cups apple cider vinegar

1 large red onion, diced (or yellow, or 2 large shallots)
4 plump garlic cloves, chopped
2 tablespoons grated ginger
2 dried extra hot chiles (or to taste) – crushed
2 teaspoons salt
1/2 pint or smaller mason jars

yield: approximately 3 & 1/2 pints

Directions:

1. Prepare jars for hot water bath processing. No need to sterilize as filled jars will be processed for 10 minutes.

2. Leave dried berries and raisins whole, cut larger fruit into 1/2 inch pieces. Peel and core apples, chop into hefty 1 inch pieces.

3. Add everything to a non-reactive pan, stir to combine. Heat on low until sugar is fully dissolved.

4. Turn up the heat and bring to a boil. Once boiling, lower heat to simmer. Simmer until desired thickness. Mine took approximately 30 minutes.

5. Fill hot jars and hot water bath process for 10 minutes. You will need to run a plastic chopstick or knife around the inside rim of jar to release air bubbles before putting on lid.

This will thicken fairly quickly as far as chutneys go because of the bulky dried fruit. The apples will break down to form the base, but if you’ve cut the apples in large inch-sized pieces there should be some not-quite cooked down apple bits remaining. This will add to the chutney’s overall chunkiness.

This chutney will taste best if you let it hang out on the shelf for 3-6 weeks before opening.

I am a full-fledged chutney fan now – I really love this chutney! (I can’t wait to taste it after the 3 week mark!) and I am excited about the endless possibilities of dried & fresh fruit combos. While I went for texture and heat here, and did not add spices, I can see taking this basic recipe in many directions by adding spices the likes of mustard and fennel seeds, coriander, anise, etc. and of course all manner of spice powders.

Learning: while this is not a new concept around these parts, again and again I am reminded how DIY just renders everything better! Me thinks I was not previously enamored by bottled chutneys because even the best store-bought cannot compare to doing it yourself!

Taking & Making Stock

gap

Maybe it’s my utilitarian bent, but there’s something I find exhilarating about ‘cleaning up the garden’ right around the break of fall.

On a good year, mid-September is about the time I’ve finally had my fill of fresh tomatoes, cucumbers and melons. It’s when the tentative chill of evening and early morning reawakens a taste for warming meals: soups, risottos, braised vegetables…You know, comfort food.

Let’s face it, in September the veggies in the garden (or your local farmer’s market) are certainly no spring chickens anymore.

They may look a tad less precocious than they did in their youth but, they still got good flavor. And that’s exactly what I’m looking for in a good vegetable stock. You?

gap

And yes it’s true that the making of vegetable stock is a wonderful way to ‘clean up the garden’ or to take advantage of the dwindling farmer’s market prices, and of course to give meaning and purpose to those vegetables about to enter mid-life.

But I would make it regardless of those things because having delicious vegetable stock is essential in my kitchen (and will be in yours too if you give it a try) throughout the winter months. It adds depth and deftness when making all the things I want to eat when it’s cold outside.

So take stock of your garden or your farmer’s market this month and make stock!

Here are my two essentials, with these I can make just about any dish or soup – east or west. I freeze them in quart containers and ice cubes (which I place in freezer bags once frozen in trays for 24 hours). The quarts I use for soups, risottos and the like, and the cubes I use whenever I need a burst of flavor in braises, sauces, beans, stir-frys, etc. They will last well in the freezer for a good 6 months.

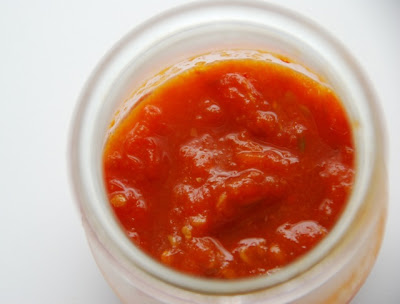
Sweet Tomato Ketchup

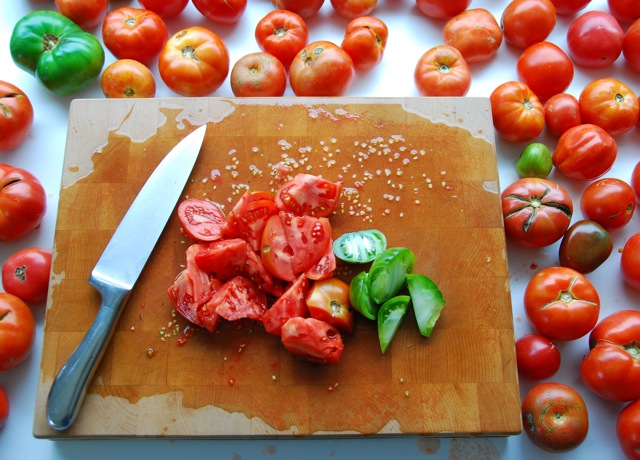
Remember this? After two long weeks in LIC I got back to my little plot of heaven up in the Berkshires only to find an onslaught of these:

The way I saw it, there were only two choices: me or them. It was brutal.


Sweet Tomato Ketchup (R.I.P)

4 pounds very ripe tomatoes, peeled & chopped
1 cup sugar (I use raw)
1 & 1/2 cups white wine vinegar
1 tablespoon sea salt
1 head garlic, peeled & chopped fine
2 & 1/2 tablespoons ginger, peeled & chopped fine
1-2 dried red chiles, pounded in mortar & pestle (or 1/4 to 1/2 teaspoon flakes)
1/2 teaspoon fennel seeds
1/2 teaspoon cumin seeds
1/2 teaspoon fenugreek seeds
juice & zest of one lime
1/2 pint or smaller mason jars

yield: approximately 2 pints

Directions:

1. If you have ever tried to peel a raw tomato before then you know what I’m saying when I tell you to boil a pot of water, and drop them in whole. Take them out after 30-60 seconds, just until their skins split and drop them in a waiting bowl of ice water. Peel. If this is the first you’ve ever heard of this, you’re welcome.

2. While you’re waiting for the water to boil, zest and juice the lime. Chop the garlic and ginger. If you have a wet/dry spice grinder or a small food processor with which to make a smooth garlic-ginger paste, use it here.

3. Prepare the whole dried chiles in the mortar & pestle if using. I like to bruise whole spices to bring out the flavor. Toss in the cumin, fennel and fenugreek seeds and pound lightly once or twice, do not crush.

4. Add the tomatoes, garlic-ginger paste, spices, vinegar, salt, and lime zest & juice to a non-reactive pot. Add the sugar and heat on low until the sugar dissolves. Once the sugar has dissolved, turn the heat up and bring to a boil.

5. Once the boiling point is reached, bring the heat down and simmer for approximately 1 and 1/2 hours, until desired ketchup-y thickness.

6. While the ketchup is simmering, prepare jars & lids for hot water bath processing. Process full jars for 10 minutes.

This ketchup is delicious and versatile. It’s a sweet ketchup but not cloyingly so. The spices ground the rich tomato flavor but don’t overpower. It’s lovely with potatoes all-ways: French fried, pan fried, or oven baked. Try it on a fried egg or grilled cheese sandwich – or in any other way you enjoy your ketchup!

White Radish Pickle

If you really are committed to eating locally, and/or growing your own food then I think you’ve caught on by now that in most of the country root veggies are coming into their own this time of year.

Yes I know pumpkins, winter squash, etc. – but like I said over here you can ‘put up’ winter squash pretty much anywhere for a good 4 months or more if you have a cool place in your house. At around 60 degrees, they’ll sit around quite comfortably getting sweeter by the day. So there is time a’ plenty for squash shenanigans.

Now roots on the other hand, they really need it a bit colder to keep for months. Most of us, city dwellers in apartments, or with modern cellars with furnaces don’t have the luxury of a proper root preserving cellar like many of our great-grandparents did.

I love the stories my dad tells me of my great-grandparent’s root cellar. He used to go down there as a kid and find much more than roots. He said there were barrels of pickled everything. Cukes, eggplants, peppers, eggs…and this is the best part: wine. Barrels of homemade wine in the cellar. (sigh)

I am not quite sure that my Neapolitan great-grandparents had any pickling experience with white radishes, aka daikon. It seems to be more of an eastern thing.

That, my friends, is one of the many reasons I love pickling and preserving so much: pickling is the way we can experience our heritages… because let’s face it, it is a rare one of us who doesn’t have pickling in their family history. That’s what everyone did back then! Preserve – and farm. At least to some extent. And that is what makes exploring preserving foodways so rich, because everyone did it, everywhere. It is a way to experience the flavors of the world.

White Radish Pickle

Adapted from World of the East Vegetarian Cooking by Madhur Jaffrey

2 lbs. daikon (2 vary large or 3 medium)
3/4 cup sugar
3 tablespoons salt
4 tablespoons rice vinegar
2 quart jars

Yield: about a quart and a half

Directions:

1. Wash daikon, take leaves and ends off and cut in half lengthwise. Slice in very thin slices about 1/16th of an inch. A Jjapanese benriner really helps. I have this one and trust me, it is way better than the more expensive ones. But if you gots mad knife skillz than forget I said anything…

2. Bring sugar, salt & vinegar to a boil, stirring to dissolve sugar. Once it reaches boiling, take off heat and pour over sliced daikon.

3. Let cool and pour into jar/s. Place closed jars in fridge and let sit for 3-4 days before eating.

This is a common condiment at many a Japanese restaurants. You may not recognize it because it is sans yellow food coloring here. It is sweet and pungent. And when you open the jar, it will smell like it just committed an inexcusable act. But that will dissipate quite quickly.

A little goes a long way. It goes perfectly, of course, on the side of any Japanese inspired meal, or a salted, grilled fish. For a quick lunch, it is the cherry on top of a bowl of brown rice with a chopped hard boiled farm-fresh egg and a splash of soy, with or without a bit of stir fried greens.

It is a quick pickle and not enough acid to seal in a hot water bath and store at room temperature. So you will need to keep it in the fridge where it will last for months and months. You can easily 1/2 the recipe on your first time out. Enjoy!

Walnut Sage Pesto

It has been a real treat tricking around the blogoshpere of late and seeing all my fellow foodies and homesteaders waxing poetic about this time of year. I mean, can you blame us? Look at these beauties:
I grew them! Out of all the things that I try and make appear in my garden, these never cease to amaze me, that they come out of the ground from a seed! I mean, where does all that matter come from?! And the beauty! Ugh!

Starting this blog and this blog this year has made me more aware of my waxing and waning [preserving] ways. Because I’ve actually started to (b)log what I do on this side of my kitchen, I realize that fall, rather than summer, is when I’m a preserving maniac. Probably due to a few things: a) I work like a %#!ch through the summer b) when it’s warm & gorgeous outside I want to be outside any chance I get, and c) I happened to have traveled a lot this summer and with any luck that will be a recurring theme.

And finally, I am a utilitarian at heart. So right about this time of year I scramble and not just eggs folks. I scramble to save anything I possibly can that has grown in my garden. And herbs this time of year, well let’s just say their days are numbered. In more ways than one.

Pestos are a great way to save the herb garden for a good 4 months – so that means delicious herb tastes into February! The reason I put that winter squash photo up there is not just to show off my gorgeous gourds, it’s because this pesto is so perfect a pairing with winter squash – which is just coming into it’s own – that you may just want to gobble it all up now!

But the truth of the matter is; winter squash can last for 4 months itself in a cellar or a cool part of a house or even an apartment at about 50-60 degrees.

Walnut Sage Pesto

Adapted from a Martha Stewart magazine

This will make 1 cup of pesto. I adjust according to how much parsley and sage I’ve just harvested from my herb garden. You should do the same, whether it’s from your garden, or one of the last lovely Saturdays of the season at your farmers market.

3/4 cup walnut halves or pieces
1/2 cup pine nuts
2 garlic cloves, peeled
salt to taste*
1/2 cup chopped flat leafed parsley
4 tablespoons coarsely chopped fresh sage
1/2 cup extra virgin olive oil
1/2 cup grated parmigiano*

You’ll need a food processor or a good blender. Some small jars or freezer containers.

1. Heat a dry skillet on medium heat. Toss in walnuts and toast for approximately 4 minutes, stirring occasionally. They should color slightly and you should smell a delicious nutty smell. Place them in a bowl.

2. Toss pine nuts into skillet and do the same as above. They will take about 2 minutes. do not let them burn; they burn easily, so be watchful. They should get a very light brown on either side. When they are done, place them in bowl with walnuts.

3. Place garlic cloves in processor (or blender) with just a pinch of salt – pulse to chop.

4. Add parsley and sage – process until smooth.

5. Add nuts and pulse until finely chopped.

6. Keep processor running on low and drizzle in olive oil.

gap

*Cheese and salt do not freeze well. If you are planning to freeze (for up to 4 months) add the parmigiano and additional salt when you are ready to eat. This also stores nicely in the fridge for 4 weeks! Cheese and salt will be fine in the fridge but I store it either way without. I prefer to add the cheese fresh, and also in the fridge it is better if a layer of oil sits on top, which it will do easily without the cheese added.

7. I freeze or fridge in small containers, 1/2 cup each. Because I find that is good for a meal for eating suggestions are endless: any which way with winter squash for sure – as simple as roasting halves of acorn squash and placing a dollop of pesto inside, roasting smaller pieces of any kind of winter squash and tossing it with pesto and stirring all that into a bit of pasta, or eating as is. From that same Martha Stewart magazine was a recipe for winter squash gnocchi which I make every year but that is a whole other ball of dough.

Here’s a good one: if you make a simple winter squash soup that is basically a base of some onions, peeled & chopped squash, a simple veggie broth and stir in some cream or crème fresh at the end, well then you could put a dollop in each bowl without the parmigiano…like a pistou.

And of course it is a pesto after all, so if you want to forgo the squash and go straight for the pasta, do it!

And when you do, this is the trick to perfect pesto’d pasta: when the pasta is done (al dente!) save a little of the pasta water to the side. When you toss the pesto in the pasta add a couple-few splashes of the water to give it the right consistency. Now get outta heeaaa!